CLASSIC ITALIAN BRUSCHETTA RECIPE

italian brushcetta recipe_-3.jpg

A classic Italian Bruschetta Recipe with Cheese

Italian cuisine has always been one of my favorites. When I was little my mom took my brother and I to Italy for the summer and we stayed in this villa outside the small medieval town of Montalcino, smack in the middle of Tuscan wine country. The villa was owned by a winemaker and farmer and was situated on the edge of his vast property. I remember running through the rows of grapevines, chasing sheep, and stomping buckets of grapes for fun. A child's dream playground and also the place I was first introduced to Italian cuisine (at least as far back as I can actually recall) and believe me it was love at first taste!

Bruschetta is a typical antipasto that comes before your meal and opens up your stomach for the usual large plant of pasta to follow. I am a huge fan of a classic tomato bruschetta and making it at home quite often. Not only is a classic bruschetta actually quite easy and straightforward to make but it also takes no time at all. If you are looking for an easy authentic Italian bruschetta recipe to make for your next meal, check out my bruschetta recipe below!

INGREDIENTS:

Serves 3-4 as an appetizer

1/4 Cup of Extra Virgin Olive Oil
2-3 Cloves of Garlic (if you like garlic put more... obviously) - minced
3 Tomatoes (I use vine tomatoes) - remove seeds and chop into pinkie nail size bits
1/3 Cup of Chopped Fresh Basil Leaves
Salt and Pepper to taste
French Baguette - Cut into pieces
Parmasan Cheese - optional garnish


CRAVING ITALIAN FOOD? CHECK OUT THESE OTHER DELICIOUS ITALIAN RECIPES!


HOW TO MAKE AN AUTHENTIC ITALIAN BRUSCHETTA!

In a small skillet, heat up extra virgin olive oil on medium - low heat. When ready, add in the garlic and allow to cook until aromatic and translucent (about 2-3 minutes). Remove from heat.

In a bowl, add your garlic and olive oil, chopped tomatoes, and basil. Sprinkle with salt and pepper to taste. Mix thoroughly and set aside.

italian brushcetta recipe_-4.jpg

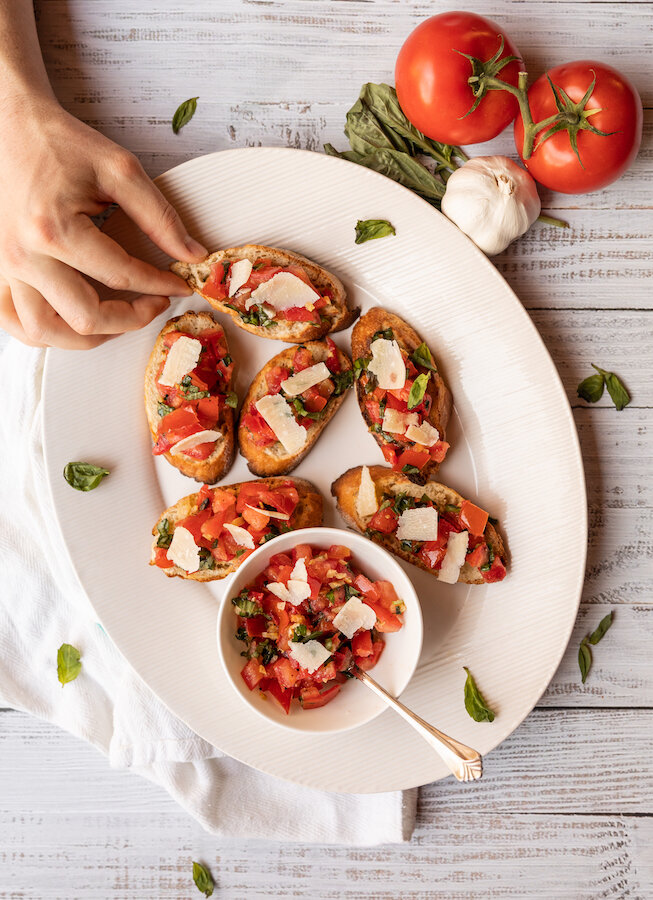
An authentic Italian bruschetta with cheese

Cut the baguette into 1/2 inch slices and brush with olive oil on one side. Place them on a baking sheet, olive oil side up, and broil them in the oven until they start to brown (like toast). Once out of the oven dress the baguette with the bruschetta ingredients in the bowl.

Garnish with some more chopped fresh basil or parmesan cheese if you like and it is ready to serve!

italian brushcetta recipe_-2.jpg

An authentic Italian bruschetta with cheese

CHECK OUT THIS VIDEO ON HOW TO MAKE BRUSCHETTA


FOLLOW ME ON INSTAGRAM @ISTHATSOH


I hope you enjoyed this easy Italian bruschetta recipe. If you did please tell me about your experience in the comments below. If you want me to try something else I am always up for suggestions!!!!

PIN THIS POST

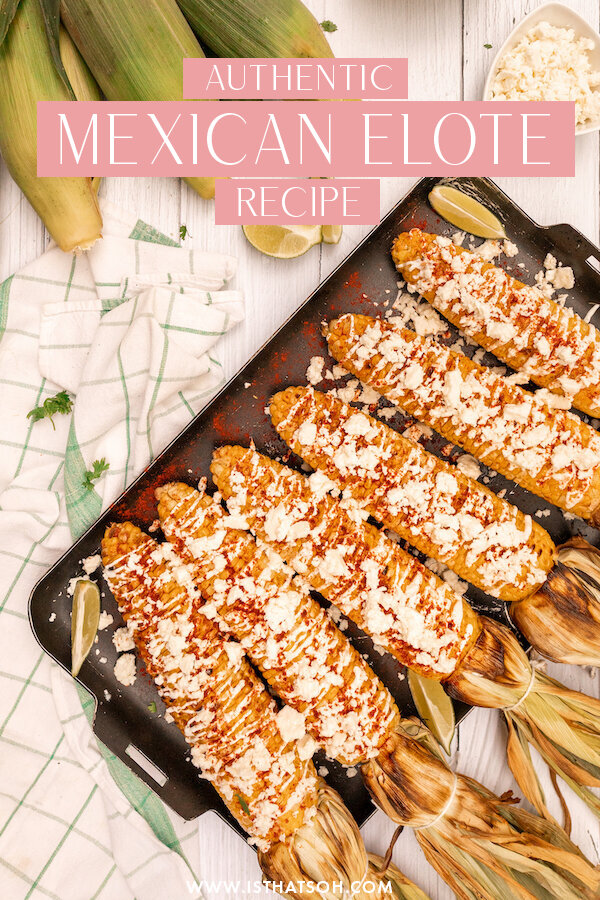
ELOTE - MEXICAN STREET CORN

Elote or Mexican street corn is one of my favorite appetizers!! Whenever I go out for tacos I always have to order the Mexican street corn otherwise the dining experience isn't complete! The thing you might not realize is that it is so simple to make and you can do it so easily right at home. I made mine on the bbq this past week which I think was even better than boiling it because when you boil it you dilute the sugars in the kernels whereas if you bbq it, they get sealed in and the corn tastes extra sweet! Give it a go, you’ll be surprised just how delicious and easy it is to make.

INGREDIENTS:

Sweet Corn - Two per person is my usual estimate
Butchers Twine
2 TBSP of Vegetable Oil
Cream Fresh
Chipotle Chilli Seasoning Spice
Feta Cheese, Cotija Cheese or Queso Fresco
Lime Wedges - optional

DIRECTIONS:

Peel back the husk of corn and tie back with a piece of butchers twine

Coat corn in a light layer of oil and place on the bbq, turning frequently so that it becomes only slightly charred

When the corn is ready, drizzle with creme fresh, sprinkle with chipotle seasoning and garnish with cheese.

Serve warm with a slice of lime.

Enjoy!


I hope you enjoyed this recipe as much as I do. If you have any comments please leave them below and I'll be happy to answer them as soon as I can! Happy cooking!!!


PIN THIS POST

CAULIFLOWER EGG FRIED RICE (LOW CARB & KETO)

Always on the lookout for a low carb option to make with my next meal, this cauliflower egg fried rice is my new favorite recipe. It’s so easy to make, is great for batch meal planning, and only takes a few minutes to prepare. If you are looking for a tasty low carb, keto, gluten-free recipe that is packed full of flavor and taste just like the traditional egg fried rice, you got to try this recipe!

Enjoy!

INGREDIENTS:

- Makes 4 Servings -

2 TBSP of Vegetable Oil
3 Scallions - Chopped
4 Garlic Cloves - Minced
1'“ of Fresh Ginger - Minced
1 CUP of Frozen Peas
1 500 gram Pack of Frozen Cauliflower Rice
4 TBSP Low Sodium Soya Sauce
2 TBSP Sesame Oil
3 Eggs - lightly beaten
Salt and Pepper to Taste

DIRECTIONS:

Heat up vegetable oil in a large skillet on high. When hot, throw in your chopped scallions and minced garlic and ginger. Allow to cook for 3-4 minutes before adding in your frozen peas.

When peas begin to turn bright green (about 4-5 minutes) add in your frozen cauliflower rice and mi thoroughly until well incorporated and there are no big chunks. Allow water to evaporate by continuing to cook for 5-7 minutes.

Next, add in your soya sauce and sesame oil, Mix until all the rice is coated before pushing the rice to one side fo the skillet.

On the empty side oft he skillet, add in your egg. Salt and pepper to taste. Fry it up, scrambling as it goes. Once cooked mix in with the rice and remove from heat.

Enjoy!


If you like this recipe or have any comments/questions, feel free to leave them in the comment section below!


PIN THIS POST

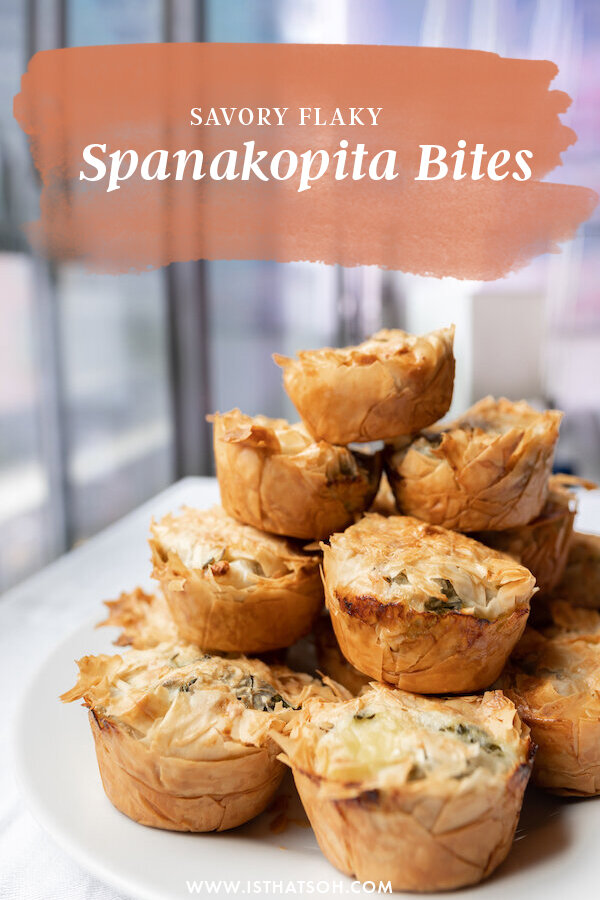
SAVOURY FLAKY SPANAKOPITA BITES

Spanakopita-6 2.jpg

I was craving some flaky spanakopita the other day and decided to test my hand at baking it myself at home. Adam’s Baba (grandmother) makes an amazing Macedonian version called Zelnik so naturally, she was the first person I called. These little spinach pies ended up turning out amazing even though I sort of freestyled some of the measurements and combined Baba’s recipe with a couple of others I found. I mean, you can never have too much cheese, right!?

INGREDIENTS:

Serving: 24 Spanakopita Bites

-Spanakopita Filling-
Olive oil
1 Medium Sweet Onion chopped finely
6 CUPS of Fresh Spinach chopped roughly
3 Springs of Green Onions, sliced into thin pieces
2 CUPS of Italian flat parsley chopped finely
2 Cups of Goat and Sheep Feta
1 CUP of freshly Grated Halloumi Cheese
2 Eggs beaten lightly
Salt and Pepper

-Phyllo Cups-
1 (454 Grams) Packet of Phyllo Sheets*
3/4 CUPS of Melted Unsalted Butter
1 Egg beaten lightly

*Phyllo Sheets - Make sure that the phyllo dough is completely thawed.  It is super fragile so if it is not well thawed out it will break easily.  In general, be extra gentle when handling each layer of phyllo because it is so thin it will tear easily. You have to work a little fast because the dough drys out quickly. I first cut the phyllo layers into rough 4” squares using a scissor and stacked them to keep the air off them as I worked. You can also keep them under a slightly damp dishtowel. Work with one muffin pan at a time.

DIRECTIONS:

Spanakopita.jpg

Butter your muffin trays making sure to coat the bottom of each cup and the sides

In a pan add in olive oil and finely chopped onion and saute until translucent.

In a large bowl add the sauteed onion with finely chopped parsley, spinach, green onion, eggs, crumbled feta, and Halloumi. Add a pinch of salt and pepper and combine thoroughly till well mixed. Set aside.

Preheat oven to 375 degrees and pull out your muffin trays. It’s time to create your pastry cups.

Add one 4” phyllo square to each buttered muffin cup mould on your tray pressing each sheet into the moulds and allowing the corners to point up. Little tears may occur -don’t worry to much about this! Just make sure on the next layer to cover the tear with some phyllo. Using a pastry brush, brush each phyllo sheet with butter before adding another 4” phyllo square on top. Do this until you have cups that are 5-6 layers thick.

Spanakopita-2.jpg

Once complete, fill each cup with spinach mixture and fold over phyllo corners back towards the middle to create a cover. If they have died out, try brushing them with butter to help moisten them. There will be some flaking, don’t worry so much about it.

Spanakopita-3.jpg

Mix the last beaten egg with remaining butter and brush the top of each muffin mould with the mixture to help keep the phyllo sheet corners together before placing muffin tins in the oven and baking for 35 to 40 minutes or until the top is golden

Once ready, allow muffin trays to cool for 10 minutes before trying to transfer cups onto a serving plate or cooling rack.

Enjoy!


If you like this recipe or have any comments/questions, feel free to leave them in the comment section below!


PIN THIS POST

NUTELLA CHOCOLATE WONTON POPPERS

Oh my I think this is one of my favorite recipes yet! These wonton poppers are super quick and easy to make and are a great dessert option. The varieties of what you can add as filling is endless - all you need is a little imagination. Think icing, caramel, marshmallow, or even jam. Any fruit combination works well too - just have fun with it!

VIDEO POSTED BELOW

INGREDIENTS:

Wonton Wrappers (I recommend 3 per person)
1 Bar of Chocolate (I used Lindt Milk Chocolate)
Jar of Nutella
Fruit (I used banana slices 1/4 inch thick and strawberries)
1 Egg (whipped)
2 Cups of Vegetable Oil
Icing Sugar (garnish)

DIRECTIONS:

Cover a baking sheet in wax paper and lay out your wonton wrappers.

Add your chocolate/Nutella and fruit fillings.

Brush whisked egg along the edges of each wonton wrapper to help seal it shut.

Fold wonton wrappers over and press down the corners with a fork to seal the edges.

Place vegetable oil in a deep pan on the stove and allow to heat up for 4 minutes on medium.

Once ready drop poppers into the frying pan and let to cook for 2 minutes before flipping them over.

Once nicely golden remove from oil and place on a plate covered in paper towel.

When poppers have cooled slightly, plate and sprinkle with icing sugar before serving.

ENJOY!!!!

I hope you enjoyed this recipe as much as I do. If you have any comments please leave them below and I'll be happy to answer them as soon as I can! Bon Appetite!!!