KOREAN KIMCHI PANCAKES (KIMCHIJEON) WITH DIPPING SAUCE - A YUMMY KOREAN STREET FOOD RECIPE

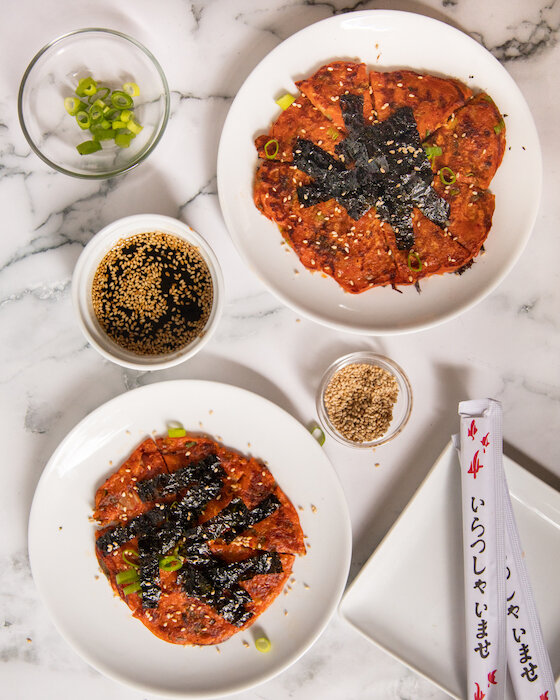
Korean kimchi pancakes (often referred to as kimchijeon in Korea) are a delicious street food dish often enjoyed as a snack or after a night out, that is so easy to make at home! To tell you the truth, it’s just like making traditional pancakes where you add everything together in a bowl and fry it up except Korean Kimchi Pancakes are way more savory than your traditional North American pancake thanks to the addition of green onions and some spicy kimchi! If you enjoy Korean food and want to learn how to make delicious kimchi pancakes at home, check out this foolproof recipe with dipping sauce below!

IS KIMCHI VEGAN?

It all depends on the brand you buy! Traditional kimchi does contain fish sauce but depending on the brand you buy you can also find it without, so make sure to check the ingredient list. Additionally, Kimchi is not difficult to make, so if you want to try making it at home you can just leave out any animal products to make it vegan.

In my opinion, the best kimchi brand is Myungga Mat Kimchi however, I did recently do a Whole 30 cleanse and found a plant-based kimchi brand called LIVE at Ambrosia that I very much enjoy. It doesn’t have any added fish sauce and uses apple for sweetness instead of sugar. *NOTE: This recipe is not whole 30!

WHAT ARE SOME KIMCHI BENEFITS?

Kimchi is so good for your gut! It aids with digestion and is packed full of great probiotics. It is also said to help with inflammation, aid with weight loss, strengthen your immune system and support heart health!

DOES KIMCHI GO BAD

Yes! I recently had to throw out the remnants of a jar of kimchi that was a month or so old. You could tell by the way it smelled that it had ‘over fermented’. It smelled like a bottle of wine that has been sitting out for a few days. If you open your jar and it smells kind of sour with a pungent alcohol smell - it’s most likely gone bad.

* Please Note - Some links in this post may be affiliate links *

INGREDIENTS FOR KIMCHI PANCAKES:

Makes 2-3 Pancakes

3-4 Green Onions (chopped diagonally) - set a little aside for garnish
1/2 a CUP of Kimchi (chopped) *Use a plant-based Kimchi if you want this recipe to be vegan!
1/2 a CUP of Korean Pancake Mix
2-3 TBSP of Kimchi Juice and/or Korean Chili Paste
About 1 Cup of Water (to be added a 1/4 CUP at a time)
1-2 TBSP of Vegetable Oil

- Garnish -
1 TBSP of Seasame Seeds (roasted)
Dried Seaweed (cut into 2-inch strips)

- Dipping Sauce -

2 TBSP of Soya Sauce
1 TBSP of Water
2 TSP of Rice Vinegar
1 TSP of Sugar
2 TSP of Sesame Oil
1 TSP of Sesame Seeds


CHECK OUT THESE OTHER ASIAN INSPIRED RECIPES


HOW TO MAKE KIMCHI PANCAKES:

In a small bowl, add all your dipping sauce ingredients, and using a fork mix it together before setting it aside.

In a bowl add in your green onions (making sure to put some to the side for a garnish later), Korean pancake mix, kimchi, and kimchi juice/ Korean chili paste in a bowl. Stir in a 1/4 cup of water at a time until a batter starts to form. You want it to be the same consistency as a regular pancake mix so keep adding water until you achieve this desired consistency.

Heat up 1-2 TBSP of vegetable oil in a pan and pour in your Kimchi pancake batter when hot. Allow the Kimchi pancake to cook on one side for 2-3 minutes before flipping - same as you would a regular pancake.

When ready, remove from heat, garnish with sesame seeds, more green onion, and dried seaweed strips.

Serve with dipping sauce.


FOLLOW ME ON INSTAGRAM @ISTHATSOH


I hope you enjoyed this easy vegan kimchi pancake recipe with dipping sauce as much as I do. If you have any comments about how to make kimchi pancakes, please leave them below and I'll be happy to answer them as soon as I can! Happy cooking!!!

PIN THIS POST

PAD GRA PROW - EASY THAI STREET FOOD RECIPE!

Since I am always and forever dreaming of travel, I thought I’d share a new recipe and popular street food dish today from a country on my bucket list, Thailand. Pad Gra Prow (sometimes also seen spelled Pad Gra Pow or Pad Kra Prow) is a flavourful, ground pork dish that is served on top of a bed of steamed Jasmin rice and topped with a sunny-side-up egg. Not only is it super simple to make but it will have you asking for second helpings! Don’t like pork? That’s okay! Tofu makes a great vegetarian substitute for pork or even ground chicken. Alternatively, if you are looking for a low-carb option you can also substitute the rice for a lettuce wrap which adds an extra refreshing element to this already delicious dish. No matter what your preference, this recipe will have you daydreaming of traveling to Thailand one day soon too.

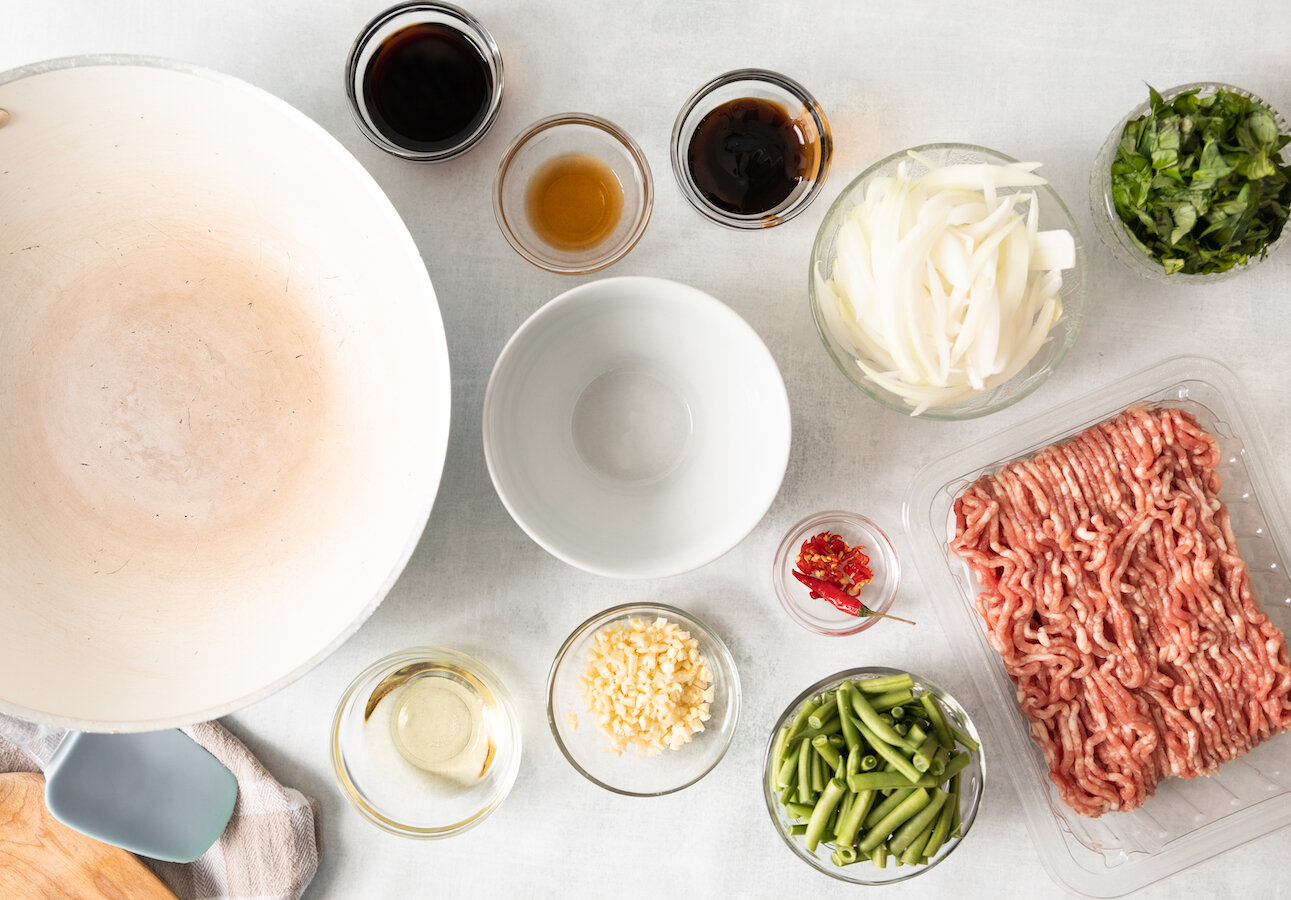
INGREDIENTS:

Yields 2-3 Servings

2 CUPS of Steamed Jasmin Rice
4 TBSP of Vegetable Oil divided - 1 TBSP and 3 TBSP
1 TBSP of Oyster Sauce
1 TBSP of Soy Sauce
1.5 TSP of Fish Sauce
2 TBSP Garlic - minced
1/2 TSP of Thai chili - minced
1 LB or 450g of Ground Pork - you can substitute for chicken or tofu but squeeze out all the water if you use tofu
1 Cup of French Beans - cut in 1” pieces
1/2 a White Onion - cut in 1/4 inch strips
2 Eggs
1 Cup of Thai Holy Basil - roughly chopped - if you can’t find Thai Holy Basil you can use regular Italian Basil instead
Salt and Pepper


MORE MOUTHWATERING ASIAN RECIPES


DIRECTIONS:

Cook rice and set aside.

While rice is cooking, add the oyster sauce, soy sauce and, fish sauce to a bowl and mix thoroughly, set aside

Next, in a wok heat up your vegetable oil and add in your garlic and chili. Cook until fragrant.

Once fragrant, add in your ground pork (or substitute with chicken or crumbled tofu) and allow to cook completely. Salt and pepper as desired.

Next, add in veggies (onion and beans) and continue to cook for about 2 minutes.

During this time/, fry eggs sunny side up in a skillet with a little bit of vegetable oil until whites are cooked but yolk is still runny, set aside.

Once pork/veggies are done, add the sauce mixture you made earlier to the wok and stir until well incorporated.

Next, stir in basil until wilted

Lastly, plate the pad gra prow on top of a bed of rice adding the fried egg on top and garnish with a piece of fresh basil.

Additionally, you can add a lime wedge on the side as well as a few extra small pieces of chili in a tablespoon of fish sauce when serving.

Enjoy!


FOLLOW ME ON INSTAGRAM @ISTHATSOH


I hope you enjoyed this recipe as much as I do. If you have any comments please leave them below and I'll be happy to answer them as soon as I can! Happy cooking!!!


PIN THIS POST

SHAMROCK MATCHA FUDGE

With spring now on the horizon I am looking forward to good weather and celebrating Easter and St. Patrick’s Day in March. To help me get in the festive spirit I decided to whip up some white chocolate fudge with a matcha dessert twist to help it not only turn green but become a perfect St. Patrick’s Day dessert. Although they are as delicious and can easily be cut into matcha squares, I decided to take the theme a little further using my little shamrock cookie cutter to achieve these adorable shamrock match fudge morsels. If you are a matcha lover or looking for new ways to use Matcha powder, you are going to love this St. Patrick’s Day Recipe. But don’t take my word for it, try for yourself. Enjoy!

* Please Note - Some links in this post may be affiliate links *

INGREDIENTS:

Apx 16 Shamrocks

3/4 CUP of Condensed Milk
1.5-2 TBSP of Powdered Matcha - depending on how strong you want the matcha flavour
14 oz White Chocolate
1/2 TSP of Salt
1 TSP of Vanilla Extract
1 TBSP of Matcha for decorative dusting at the end

You will also need:
1.5 Inch Shamrock Cookie Cutter
8x8 Baking Pan
Parchment Paper
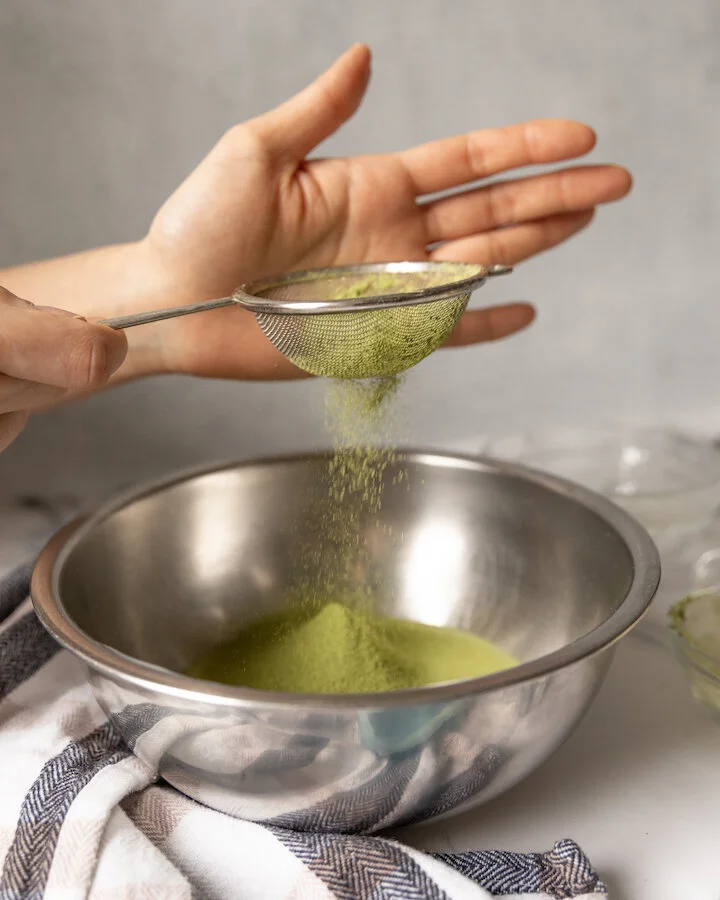
A Fine Sifter
Spatula


OTHER NOTEWORTHY DESSERT RECIPES


DIRECTIONS:

Pour condensed milk into a bowl and sift in your matcha.

Using a double boiling method, stir the matcha into the condensed milk until it is well incorporated on a medium low heat.

Next, add in the white chocolate and continue to double boil until it has melted completely and is well mixed.

Next, add in your salt and vanilla, stir.

Pour mixture into lined baking pan and store at room temperature for 15 minutes before moving to the fridge for an additional 3 hours.

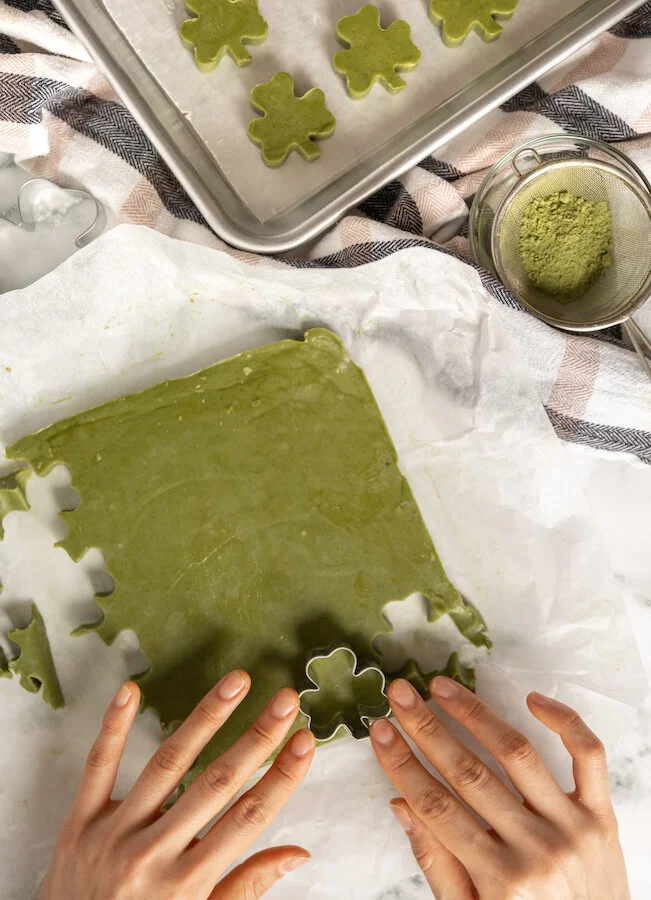
When fully cooled, cut out shamrock shapes using your cookie cutter and place on a non stick surface.

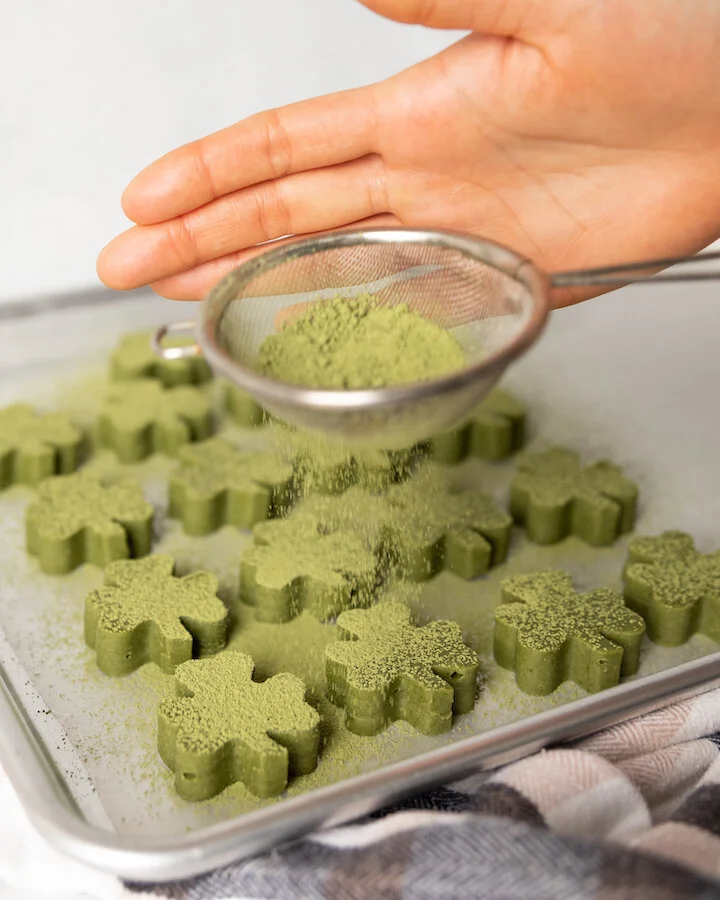
Sprinkle with more sifted matcha.

Store in fridge until you are ready to eat.

Enjoy!

These can be packaged and left in the freezer for a month.


FOLLOW ME ON INSTAGRAM @ISTHATSOH


I hope you enjoyed this recipe as much as I do. If you have any comments please leave them below and I'll be happy to answer them as soon as I can! Happy cooking!!!


PIN THIS POST

HOMEMADE FORTUNE COOKIES

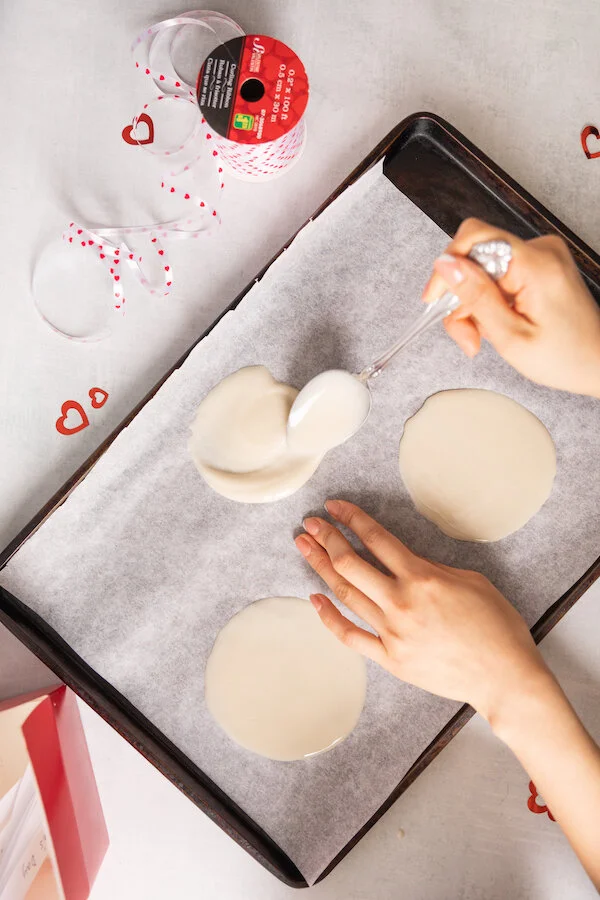
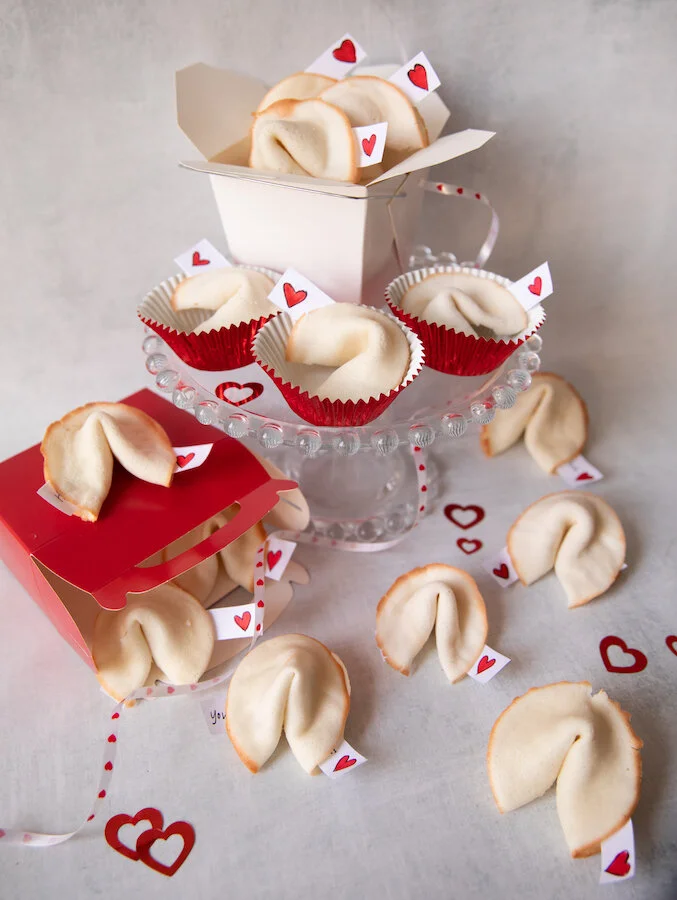
Thinking of making a customizable treat for someone in your life? Perhaps Valentine’s Day is coming up, maybe you want to cheer a friend up or you need the perfect gift for your anniversary. Look no further than this easy to personalize fortune cookies recipe! Not only can you leave super cute handwritten notes for someone inside or notes of encouragement but the cookies themselves are pretty addictive! When creating my fortune cookies I noticed that it is important to work quick which is why I recommend making your notes or messages ahead of time and having them already prepared. Additionally, when creating customized fortune cookies, you want to make sure you don’t make the batter too thick so that they dont turn into mini pancakes. Instead, spoon out as much as you need and spread it out in a circular motion so you can almost see the parchment paper underneath. Lastly, I would also recommend creating only making two fortune cookies at a time as you need to work fast and it can get harder the more you make at one time. Enjoy!

* Please Note - Some links in this post may be affiliate links *

INGREDIENTS:

Makes about 20 Fortune Cookies


4 Egg Whites
1 Cup of Flour
1 Cup of Sugar
4 TBSP of Water
2TSP of Almond Extract

You will also need:
Hand Mixer
Whisk
Medium Size Bowl
Baking Tray
Parchment Paper
Muffin Tray


CHECK OUT THESE OTHER GREAT RECIPE GIFT IDEAS!


DIRECTIONS:

Write out your ‘fortunes’ on strips of paper 4.5-5 inches in length.

Preheat oven to 400 degrees.

In a medium size bowl, beat egg whites with a hand mixer until stiff peaks form .

Add in your flour, sugar and almond extract, and mix with a whisk until it turns into a paste.

Add in your water and continue to combine with a whisk.

Line a baking tray with parchment paper and make circles with the mixture about 4.5 inches in diameter. You don’t want to do more than three at a time (I found my sweet spot to be 2) and don’t make them too thick or else they will come out like pancakes. So make sure they are thin!

Bake for 4 minutes or until edges brown slightly.

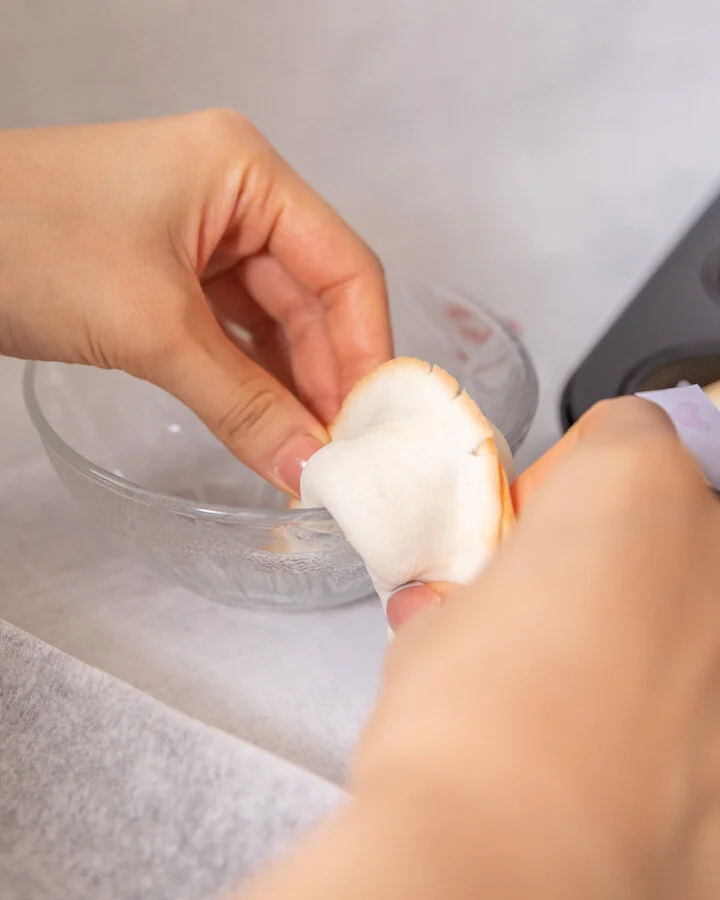
Remove from oven allowing to cool for 5 seconds before quickly but carefully pealing the pancake off the parchment and folding it in half with one of the notes inside. Pinch the sides together before folding it in half again using a cup or a lip of a bowl (see below photo for demo).

Place in muffin tray to cool and harden.

Flip parchment paper over and repeat. NOTE: You don’t want to use a piece of parchment paper more than twice otherwise the cookies start to stick to the paper.


FOLLOW ME ON INSTAGRAM @ISTHATSOH


I hope you enjoyed this homemade fortune cookies recipe as much as I do. If you have any comments please leave them below and I'll be happy to answer them as soon as I can! Happy baking!!!


PIN THIS POST

KOREAN PICKLED RADISH RECIPE

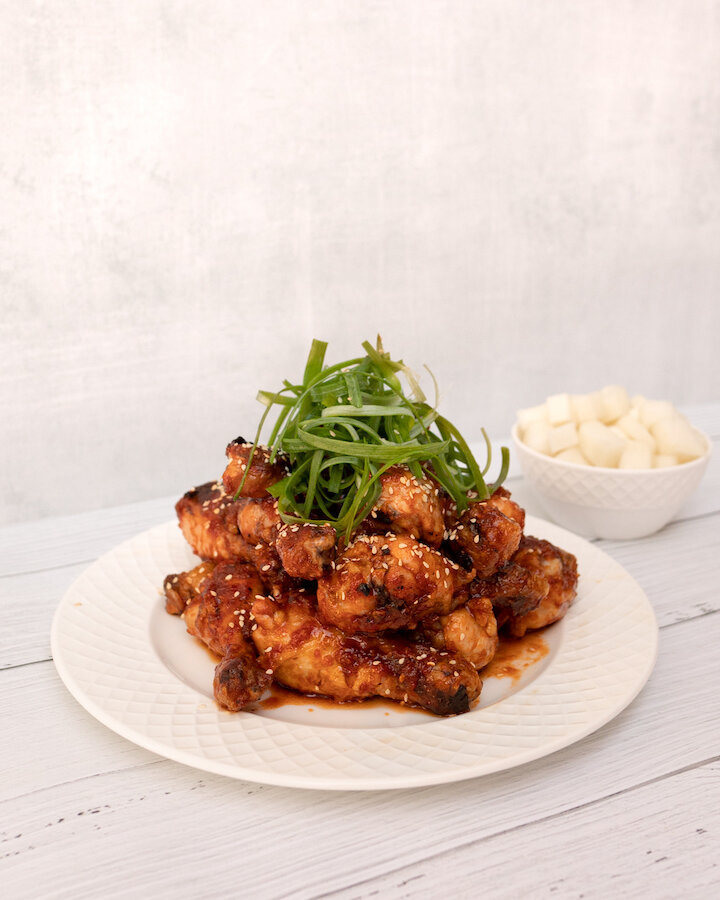
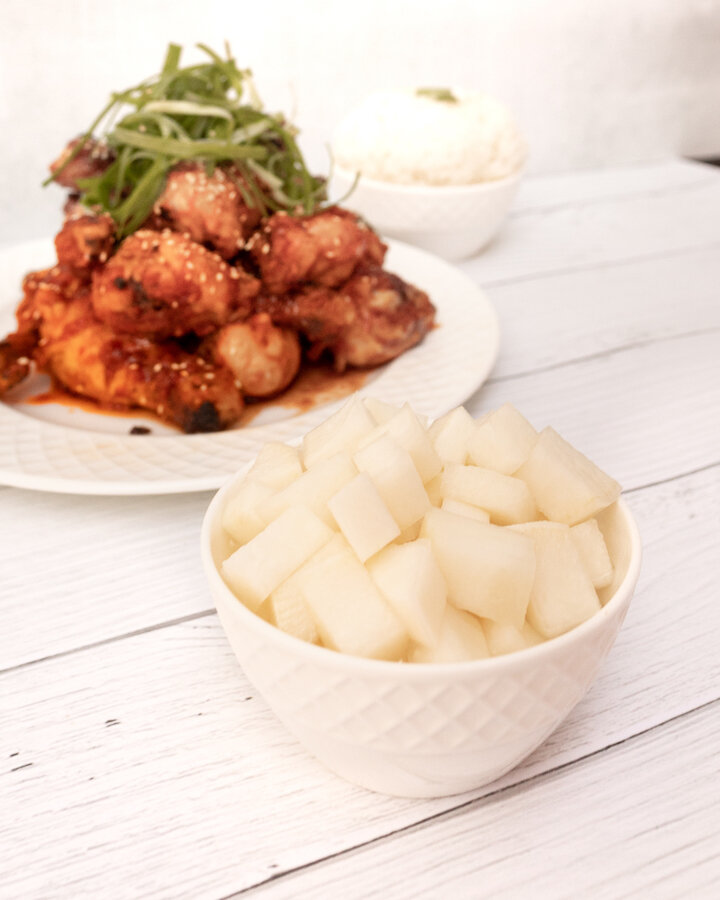
I am sure by now you can tell that I have recently developed a slight obsession with Korean food. Now having been introduced to Yangnyeom chicken by my boyfriend’s brother’s Korean girlfriend and already having a previous love for Bibimbap, I now wanted to start sharing recipes for some little side dishes that you often see being served with Korean food like this one, a simple Korean pickled radish dish. Unlike regular radish, Korean radish is massive in size and white on the outside as well as the inside. Usually served pickled along with other small side dishes, I find Korean pickled radish to be refreshing, almost like a palette cleanser that goes well with spicy dishes. Pickled korean radish can also be stored easily in the fridge for up to two weeks and made in batches which makes it easy to pull out during mealtime. We recently made Korean pickled radish to go with our Yangnyeom chicken dinner the other week and it was the best compliment for the dish! I think you will feel the same way also! Hope you like it!


INGREDIENTS:

- Pickled Korean Radish -

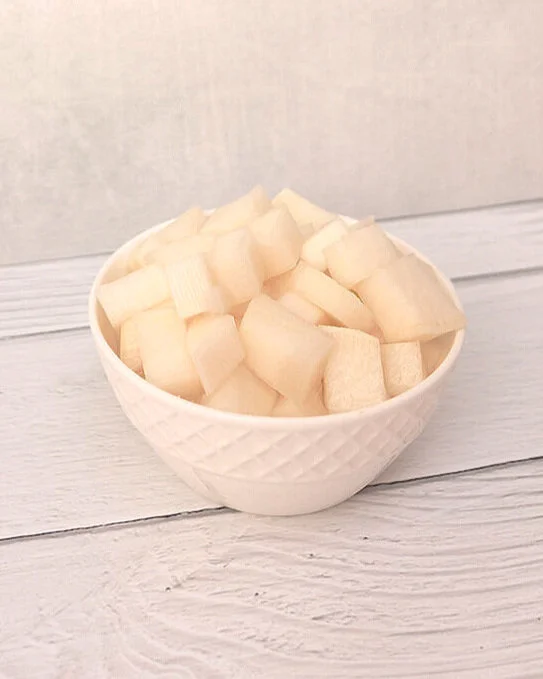
1 lbs of Korean Radish, peeled and cubbed
1/3 CUP of Sugar
1/3 CUP & 1 TBSP of White Vinegar
3/4 CUP of Water
1 TSP of Kosher Salt


CHECK OUT THESE OTHER ASIAN INSPIRED RECIPES!


DIRECTIONS:

Combine sugar, vinegar, salt, and water in a large glass pickling jar and give it a stir so that it can mix well.

Next, add in your cubed radish, seal with a lid, and place in the fridge.

Allow to ‘pickle’ for a minimum of 2 hours before serving.

Korean pickled radish can be stored in the fridge for up to two weeks.

P.S. This recipe is usually served and pairs really well with Korean Fried Chicken (pictured below).


FOLLOW ME ON INSTAGRAM @ISTHATSOH

Gallery Block
This is an example. To display your Instagram posts, double-click here to add an account or select an existing connected account. Learn more

I hope you enjoyed this pickled Korean radish recipe as much as I do. If you have any comments please leave them below and I'll be happy to answer them as soon as I can! Happy cooking!!!

PIN THIS POST