MOM'S OVEN ROASTED ROSEMARY GARLIC RACK OF LAMB

oven roasted rack of lamb!

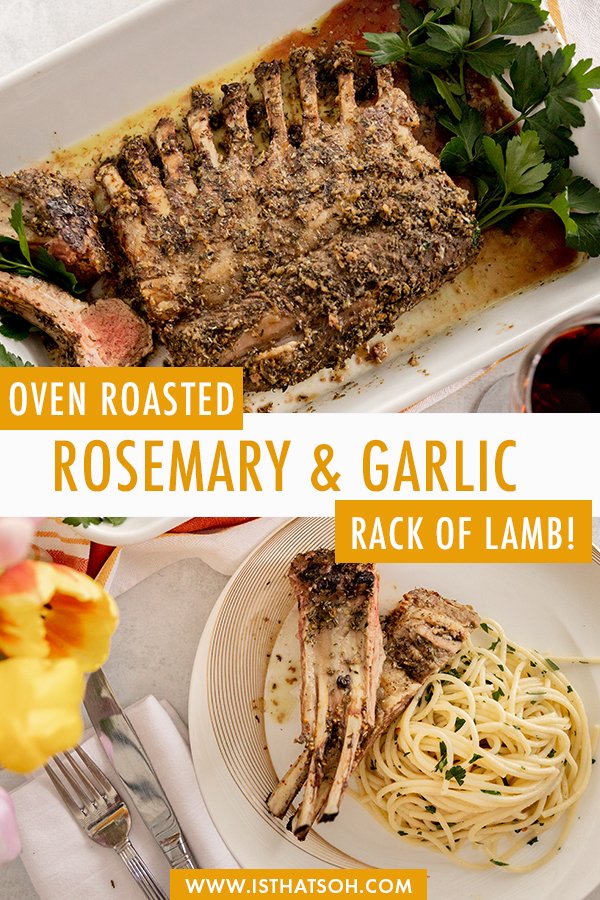
An oven roasted rack of lamb recipe!

One thing I love about coming home is eating my mom’s cooking! This week, my mom taught me some of her specialties including her coveted oven-roasted rosemary garlic rack of lamb! Best served alongside her Aglio e olio pasta, this dish is on repeat weekly in our household. If you are looking for a super easy recipe to make this weekend that you can prepare ahead of time, you have to try this oven roasted rack of lamb! It is soooo good and always a crowd pleaser!

* Please Note - Some links in this post may be affiliate links *

INGREDIENTS:

COOKING TIME: 25 Minutes

Serves 4

Rack of Lamb (8-9 ribs) - trimmed
1/4 CUP of Olive Oil
2 TBSP of Fresh Rosemary
2 TSP of Fresh Thyme Leaves
8 Garlic Cloves
Zest of 1 Lemon
Salt and Fresh Cracked Pepper


Kitchen Tools:
Food Processor
Baking Sheet
Meat Thermometer


CHECK OUT THESE OTHER AWESOME DINNER MAINS


HOW TO COOK RACK OF LAMB:

In a food processor, add in your olive oil, rosemary, thyme and lemons zest, pulse until finely chopped.

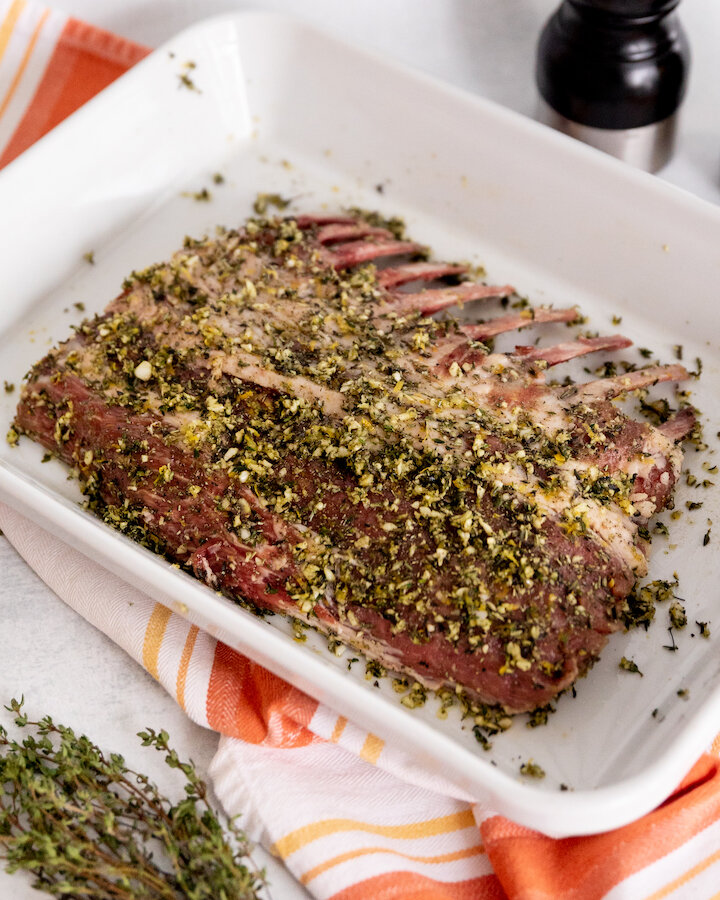
Salt and Pepper rack of lamb on both sides before covering in marinade and setting aside for 1 hour at room temperature on a baking sheet.

When ready, set oven to 450 and cook lamb for 15 minutes before rotating the baking sheet and continuing to cook for 10 minutes to ensure it cooks evenly and to medium rare. If you have a meat thermometer, for medium rare lamb the internal temperature should be at 130-140 degrees.

When meat is ready, remove from oven and let rest for 10 minutes before chopping it up into individual portions. This will allow the juice to redistribute.

Plate and serve.

Enjoy!

oven roasted rack of lamb

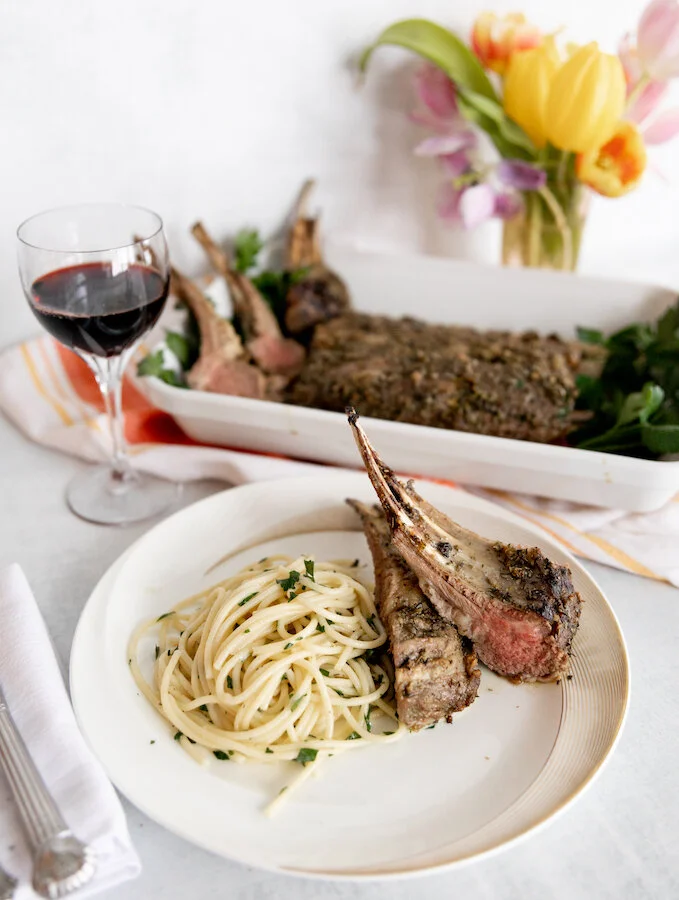
Oven roasted rack of lamb with rosemary and garlic


I hope you enjoyed this oven roasted rack of lamb recipe as much as I do. If you have any comments please leave them below and I'll be happy to answer them as soon as I can! Happy cooking!!!


PIN THIS POST

HOMEMADE FORTUNE COOKIES

Thinking of making a customizable treat for someone in your life? Perhaps Valentine’s Day is coming up, maybe you want to cheer a friend up or you need the perfect gift for your anniversary. Look no further than this easy to personalize fortune cookies recipe! Not only can you leave super cute handwritten notes for someone inside or notes of encouragement but the cookies themselves are pretty addictive! When creating my fortune cookies I noticed that it is important to work quick which is why I recommend making your notes or messages ahead of time and having them already prepared. Additionally, when creating customized fortune cookies, you want to make sure you don’t make the batter too thick so that they dont turn into mini pancakes. Instead, spoon out as much as you need and spread it out in a circular motion so you can almost see the parchment paper underneath. Lastly, I would also recommend creating only making two fortune cookies at a time as you need to work fast and it can get harder the more you make at one time. Enjoy!

* Please Note - Some links in this post may be affiliate links *

INGREDIENTS:

Makes about 20 Fortune Cookies


4 Egg Whites
1 Cup of Flour
1 Cup of Sugar
4 TBSP of Water
2TSP of Almond Extract

You will also need:
Hand Mixer
Whisk
Medium Size Bowl
Baking Tray
Parchment Paper
Muffin Tray


CHECK OUT THESE OTHER GREAT RECIPE GIFT IDEAS!


DIRECTIONS:

Write out your ‘fortunes’ on strips of paper 4.5-5 inches in length.

Preheat oven to 400 degrees.

In a medium size bowl, beat egg whites with a hand mixer until stiff peaks form .

Add in your flour, sugar and almond extract, and mix with a whisk until it turns into a paste.

Add in your water and continue to combine with a whisk.

Line a baking tray with parchment paper and make circles with the mixture about 4.5 inches in diameter. You don’t want to do more than three at a time (I found my sweet spot to be 2) and don’t make them too thick or else they will come out like pancakes. So make sure they are thin!

Bake for 4 minutes or until edges brown slightly.

Remove from oven allowing to cool for 5 seconds before quickly but carefully pealing the pancake off the parchment and folding it in half with one of the notes inside. Pinch the sides together before folding it in half again using a cup or a lip of a bowl (see below photo for demo).

Place in muffin tray to cool and harden.

Flip parchment paper over and repeat. NOTE: You don’t want to use a piece of parchment paper more than twice otherwise the cookies start to stick to the paper.


FOLLOW ME ON INSTAGRAM @ISTHATSOH


I hope you enjoyed this homemade fortune cookies recipe as much as I do. If you have any comments please leave them below and I'll be happy to answer them as soon as I can! Happy baking!!!


PIN THIS POST

MOROCCAN BROCCOLI SALAD - GLUTEN FREE, KETO & VEGAN

Packed full of antioxidants, this delicious Moroccan raw broccoli salad is both beautiful to look at and packed full of nutrients. If you, like me, are looking for ways to eat healthier without compromising on taste, this gluten free, vegan, keto broccoli salad is perfect. Since it can be prepared a day in advance and keeps well in the fridge, it also is great for meal planning or a grab-and-go snack. Not to mention it takes only a few minutes to make!

Enjoy!

INGREDIENTS:

Serves 4

- Dressing -
6 TBSP of Grape Seed Oil
1 TSP of Ras-El-Hanout Spice
1 Garlic Clove (pressed or chopped finely)
2 TBSP of Fresh Lemon Juice
2 TBSP of Balsamic Vinegar
1 TBSP of Honey (can be substituted with Agave if you are vegan)
Salt and Pepper to taste

- Salad -
6 CUPS of Broccoli Florets
1 Shallot (chopped Finely)
1 Jalapeno (chopped finely)
1/3 CUP of Dates (pits removed and chopped finely) - reduce the amount or leave out if you want more of a keto broccoli salad)
1/4 Cup of Roasted Pistachios (chopped finely)
Salt and Pepper to taste

- Optional Garnish-
1/4 CUP of Pomegranate Seeds
5-6 Slices of Pickled Beets (use sugar-free pickled beets if you want more of a keto broccoli salad)


LOOKING FOR SOME HEALTHY RECIPES? CHECK THESE OUT TOO!


DIRECTIONS:

Remove sauce pan from heat and add in lemon juice, balsamic vinegar, and honey (or agave). Salt and pepper to taste and set aside to cool.

Next, add your broccoli, shallots, dates, jalapenos and pistachios to a large salad bowl. Dress with your ras-el-hanout dressing, toss and garnish with pomegranates and slices of picked beats. Salt and pepper once again to taste.

Cover and chill if prepared in advance otherwise enjoy!


FOLLOW ME ON INSTAGRAM @ISTHATSOH


I hope you enjoyed this gluten free, vegan, keto broccoli salad recipe as much as I do. If you have any comments please leave them below and I'll be happy to answer them as soon as I can! Happy cooking!!!


PIN THIS POST

KOREAN PICKLED RADISH RECIPE

I am sure by now you can tell that I have recently developed a slight obsession with Korean food. Now having been introduced to Yangnyeom chicken by my boyfriend’s brother’s Korean girlfriend and already having a previous love for Bibimbap, I now wanted to start sharing recipes for some little side dishes that you often see being served with Korean food like this one, a simple Korean pickled radish dish. Unlike regular radish, Korean radish is massive in size and white on the outside as well as the inside. Usually served pickled along with other small side dishes, I find Korean pickled radish to be refreshing, almost like a palette cleanser that goes well with spicy dishes. Pickled korean radish can also be stored easily in the fridge for up to two weeks and made in batches which makes it easy to pull out during mealtime. We recently made Korean pickled radish to go with our Yangnyeom chicken dinner the other week and it was the best compliment for the dish! I think you will feel the same way also! Hope you like it!


INGREDIENTS:

- Pickled Korean Radish -

1 lbs of Korean Radish, peeled and cubbed
1/3 CUP of Sugar
1/3 CUP & 1 TBSP of White Vinegar
3/4 CUP of Water
1 TSP of Kosher Salt


CHECK OUT THESE OTHER ASIAN INSPIRED RECIPES!


DIRECTIONS:

Combine sugar, vinegar, salt, and water in a large glass pickling jar and give it a stir so that it can mix well.

Next, add in your cubed radish, seal with a lid, and place in the fridge.

Allow to ‘pickle’ for a minimum of 2 hours before serving.

Korean pickled radish can be stored in the fridge for up to two weeks.

P.S. This recipe is usually served and pairs really well with Korean Fried Chicken (pictured below).


FOLLOW ME ON INSTAGRAM @ISTHATSOH

Gallery Block
This is an example. To display your Instagram posts, double-click here to add an account or select an existing connected account. Learn more

I hope you enjoyed this pickled Korean radish recipe as much as I do. If you have any comments please leave them below and I'll be happy to answer them as soon as I can! Happy cooking!!!


PIN THIS POST

HEALTHY-ISH SPICY KOREAN 'FRIED' CHICKEN (YANGNYEOM)

Yangnyeom (or Yum Yum chicken as we like to call it), is a fried Korean chicken recipe, usually served breaded, and coated in a red, spicy, Korean fried chicken sticky red sauce. My boyfriend’s brother’s Korean girlfriend recently made this fried Korean chicken for the family and we all loved the sweet-salty-spicy flavors. Since we are all health-conscious, slight changes were made to the typical traditional recipe (no flour, frying in oil, and less sugar) but the results were just as tasty. If you feel like making something unique and easy for dinner, I highly recommend giving this recipe a go. It pairs beautifully with Korean pickled radish, a bowl of sticky rice, and of course, a nice cold beer!

Enjoy!

INGREDIENTS:

- BBQ Chicken Marinade -
3 LBS of Drumsticks
Vegetable OIl (enough to coat chicken)

- Korean Sauce -
2 TBSP of Rice Vinegar
2 TSP Ginger (minced or grated)
3 TBSP of Ketchup
2 TBSP of Honey
2 TBSP of Brown Sugar
2 TBSP of Soya Sauce
2 TBSP of Garlic (minced or grated)
1 TBSP of Sesame Oil
2-2.5 TBSP of Hot Chilli Paste (Gochujang) *depending on how hot you want

- Garnish -
Roasted Sesame Seeds
Green Onions, finely shredded


CHECK OUT THESE OTHER ASIAN STYLE RECIPES


DIRECTIONS:

Coat the chicken in vegetable oil and bbq till they are cooked through.

In a deep saucepan or wok create your Korean Chicken Sauce and heat up over low to medium heat, stir well. Once it starts to bubble, reduce heat, add in your bbq chicken and toss until well coated in sauce.

Remove chicken from heat and garnish with roasted sesame seeds and green onion before serving.

Enjoy!

P.S. This recipe is usually served and pairs really well with Korean pickled radish (pictured below)!


FOLLOW ME ON INSTAGRAM @ISTHATSOH


I hope you enjoyed this spicy Korean chicken recipe as much as I do. If you have any comments please leave them below and I'll be happy to answer them as soon as I can! Happy cooking!!!


PIN THIS POST