HOMEMADE FORTUNE COOKIES

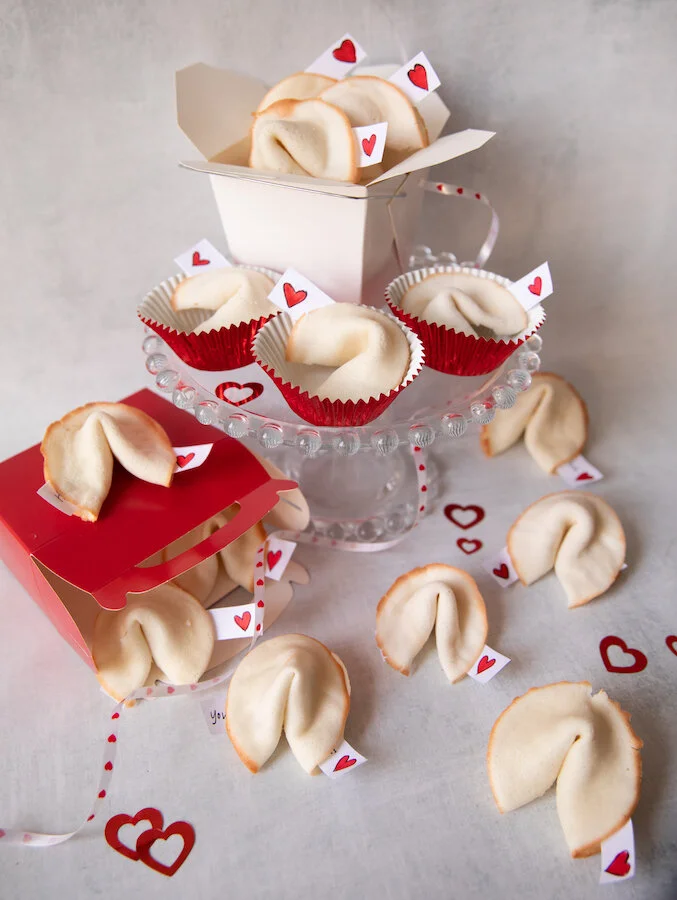
Thinking of making a customizable treat for someone in your life? Perhaps Valentine’s Day is coming up, maybe you want to cheer a friend up or you need the perfect gift for your anniversary. Look no further than this easy to personalize fortune cookies recipe! Not only can you leave super cute handwritten notes for someone inside or notes of encouragement but the cookies themselves are pretty addictive! When creating my fortune cookies I noticed that it is important to work quick which is why I recommend making your notes or messages ahead of time and having them already prepared. Additionally, when creating customized fortune cookies, you want to make sure you don’t make the batter too thick so that they dont turn into mini pancakes. Instead, spoon out as much as you need and spread it out in a circular motion so you can almost see the parchment paper underneath. Lastly, I would also recommend creating only making two fortune cookies at a time as you need to work fast and it can get harder the more you make at one time. Enjoy!

* Please Note - Some links in this post may be affiliate links *

INGREDIENTS:

Makes about 20 Fortune Cookies


4 Egg Whites
1 Cup of Flour
1 Cup of Sugar
4 TBSP of Water
2TSP of Almond Extract

You will also need:
Hand Mixer
Whisk
Medium Size Bowl
Baking Tray
Parchment Paper
Muffin Tray


CHECK OUT THESE OTHER GREAT RECIPE GIFT IDEAS!


DIRECTIONS:

Write out your ‘fortunes’ on strips of paper 4.5-5 inches in length.

Preheat oven to 400 degrees.

In a medium size bowl, beat egg whites with a hand mixer until stiff peaks form .

Add in your flour, sugar and almond extract, and mix with a whisk until it turns into a paste.

Add in your water and continue to combine with a whisk.

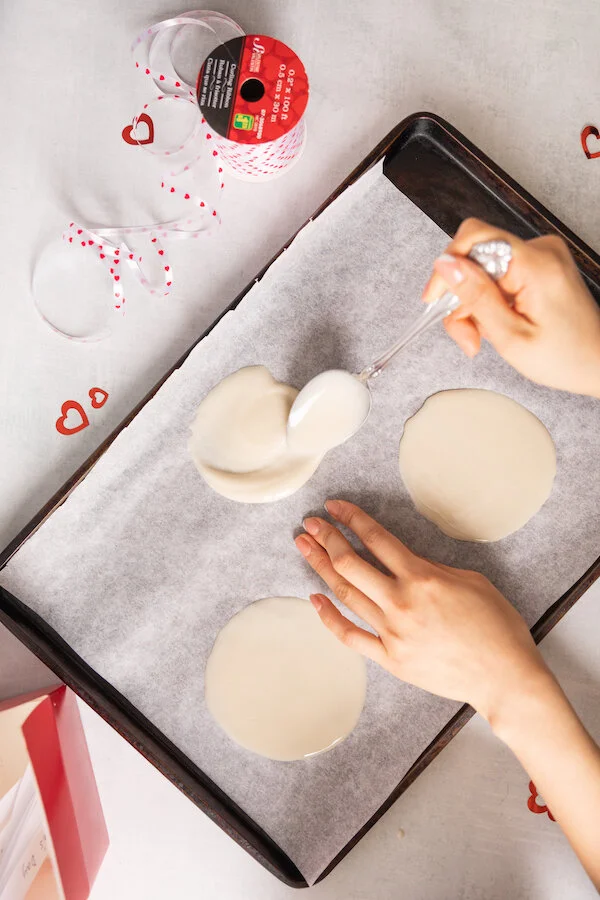
Line a baking tray with parchment paper and make circles with the mixture about 4.5 inches in diameter. You don’t want to do more than three at a time (I found my sweet spot to be 2) and don’t make them too thick or else they will come out like pancakes. So make sure they are thin!

Bake for 4 minutes or until edges brown slightly.

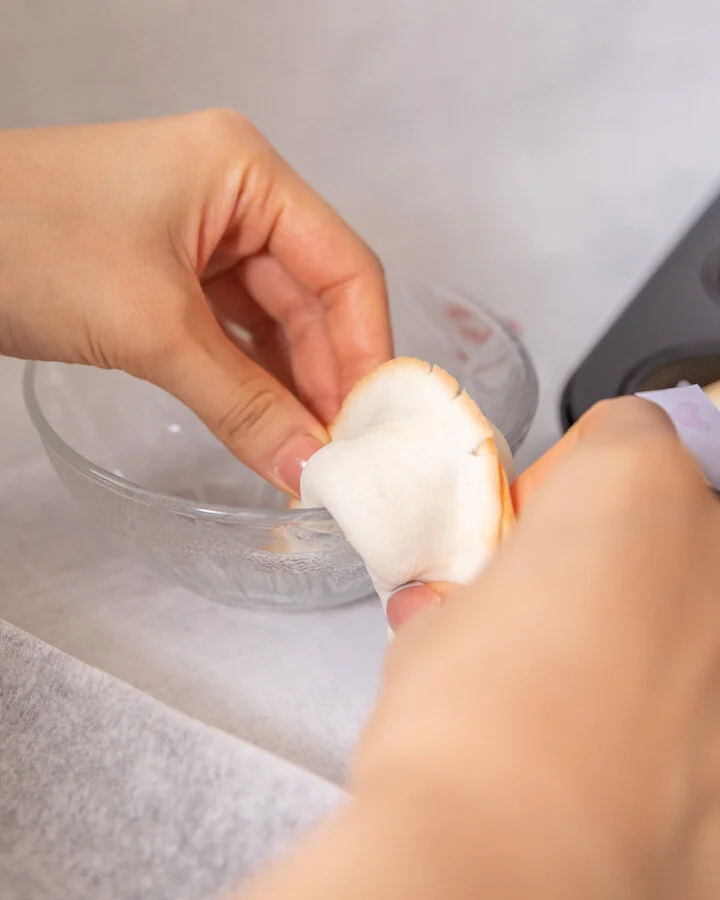
Remove from oven allowing to cool for 5 seconds before quickly but carefully pealing the pancake off the parchment and folding it in half with one of the notes inside. Pinch the sides together before folding it in half again using a cup or a lip of a bowl (see below photo for demo).

Place in muffin tray to cool and harden.

Flip parchment paper over and repeat. NOTE: You don’t want to use a piece of parchment paper more than twice otherwise the cookies start to stick to the paper.


FOLLOW ME ON INSTAGRAM @ISTHATSOH


I hope you enjoyed this homemade fortune cookies recipe as much as I do. If you have any comments please leave them below and I'll be happy to answer them as soon as I can! Happy baking!!!

PIN THIS POST

S'MORES COOKIES IN A JAR

Friendly reminder, you don’t need to spend a million dollars to show loved ones that you care about them this holiday season. Instead, give them a gift that is both homemade and personalized like that of some freshly baked sweets!

I for one love receiving homemade cookies or handmade gifts during the holiday season and one such gift I love to not only give but receive is ‘cookies in a jar’. This year, wow your friends with this festive s’more’s cookies recipe! No matter if you decide to bake them yourself or give a jar of cookie mix to someone as a gift, these cookies are sure to impress everyone on your list!


INGREDIENTS:


You will need 1L jars! Each jar yields approximately 9-10 cookies!

- FOR THE JAR -
1.75 CUPS of All-Purpose Flour
1 TSP of Cornstarch
1/2 TSP of Baking Soda
1/2 TSP of Salt
1/3 CUP of Brown Sugar
1/4 CUP of Granulated Sugar
1/4 CUP of Semi-Sweet Chocolate Chips
4-5 Graham Crackers
1 Cups of Mini Marshmallows
9 Hersey Pieces


- FOR BAKING -

1/2 CUP of Salted Butter
1 Egg
1/2 TSP of Vanilla


CHECK OUT THESE OTHER FESTIVE DESSERTS


DIRECTIONS:

When building the cookie mix jar, first make sure they are clean and dry inside.

Mix all-purpose flour, cornstarch, baking soda, and salt in a bowl, and then dump it into the jar using a paper funnel and packing it down.

Next dump in your Brown sugar, followed by your granulated sugar, and topped with the semi-sweet chocolate chip to create three additional layers.

Next, add a layer of cling wrap followed by your graham crackers, marshmallows, and Hershey bars. You want to do this so that they can be easily removed from the jar and separated from the mix when your recipient is ready to make the cookies.

Seal the jar and decorate as desired.

Make sure while decorating the jar to add a tag with the following instructions on how to bake the cookies:

- Preheat oven at 350
- Add 1/2 Cup of Salted Butter, 1 Eggs, and 1/2 TSP of Vanilla to a large bowl and beat until well combined.
- Open the jar and removed the top layer that is wrapped in cling wrap - set aside
- Dump the remainder of the jar in with butter and egg mixture and blend till cookie dough starts to form.
- Break graham crackers up and add 2/3 of broken crackers and 2/3 of mini marshmallows to the dough, folding it in. *You will want to save the remaining 1/3’s for garnish!
- Line a baking tray with parchment paper and create dough balls 2-3 TBSP in size and bake for 8 -10 minutes or until almost done, before removing the cookie trays from the oven, garnish with the remaining graham crackers, marshmallows, and pieces of the Hersey chocolate, and return to oven for an additional 2 minutes. (If desired, switch the oven to broil and toast the marshmallows on top. Just be sure to watch them because the small marshmallows burn quickly!)
- Cool for 2-3 minutes on a wire cooling rack before eating or storing in an airtight container.


FOLLOW ME ON INSTAGRAM @ISTHATSOH


I hope you enjoyed this recipe as much as I do. If you have any comments please leave them below and I'll be happy to answer them as soon as I can! Happy cooking!!!


PIN THIS POST

Smores.jpg

CHOCOLATE COVERED CHRISTMAS WAFER RODS

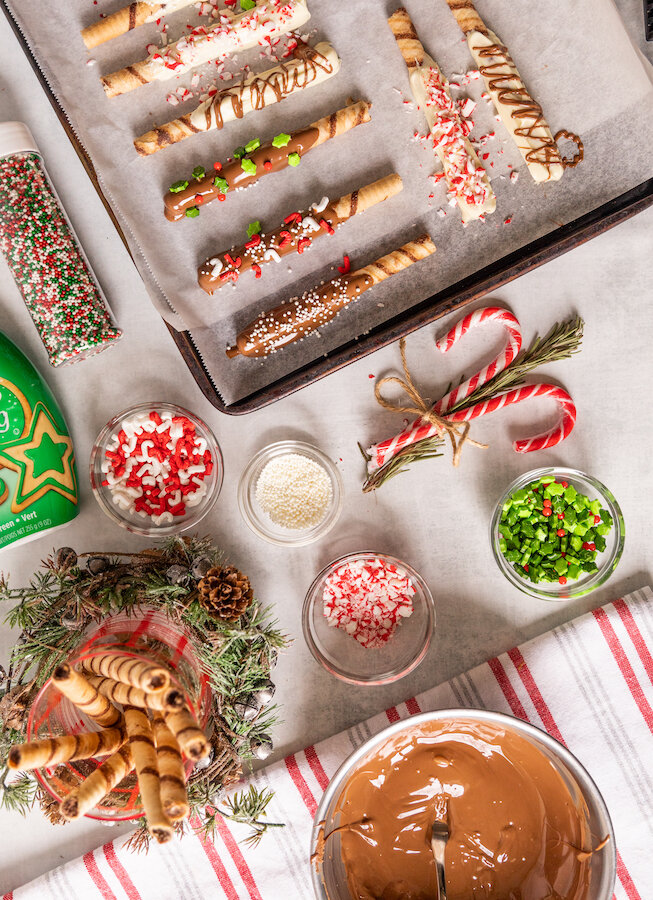
This chocolate covered Christmas wafer rod recipe is so easy to do and makes for a fun DIY you can get your nieces and nephews involved in. Plus, they are super festive and another great way to dress up the dessert table or package and added to your Christmas gifts as a personalized decoration!

Enjoy!

INGREDIENTS:


1 Can of Pirouline Wafer Rods
1 Bag of Pure White Chocolate Chips
1 Bag of Milk Chocolate Chips

- Toppings -
Sprinkles
Candy Cane - crushed
Cookie Icing

- Tools -

Wax Paper
2 Small Sauce Pans for Melting Chocolate
Piping Bag for Icing


CHECK OUT THESE OTHER FESTIVE RECIPES


DIRECTIONS:

Prepare a banking sheet by lining it with wax paper.

In a bowl, place one bag of chocolate chips and slowly melt using a double boiling method, stirring every once and a while until completely melted.

Dip wafers into chocolate or use a spoon to pour chocolate over 2/3rds of the wafer and gently shake off excess before placing on the wax paper to cool.

Immediately after, coat in sprinkles or crushed candy cane so they adhere to the chocolate-covered wafers.

If you are going to dress a few rods with cookie icing, first allow them to cool completely before adding icing and moving them to a new clean baking sheet with a new sheet of wax paper to dry.

Make sure all rods are dry before removing from the wax paper before packaging or displaying, or store in an airtight container at room temperature.


FOLLOW ME ON INSTAGRAM @ISTHATSOH


I hope you enjoyed this recipe as much as I do. If you have any comments please leave them below and I'll be happy to answer them as soon as I can! Happy cooking!!!


PIN THIS POST