SOH AT HOME - EP1- MASTER BEDROOM REFRESH

Toronto Home Renovations - Master Bedroom refresh - after photos reveal

Welcome to episode 1 of my new DIY and design series ‘Soh At Home”!

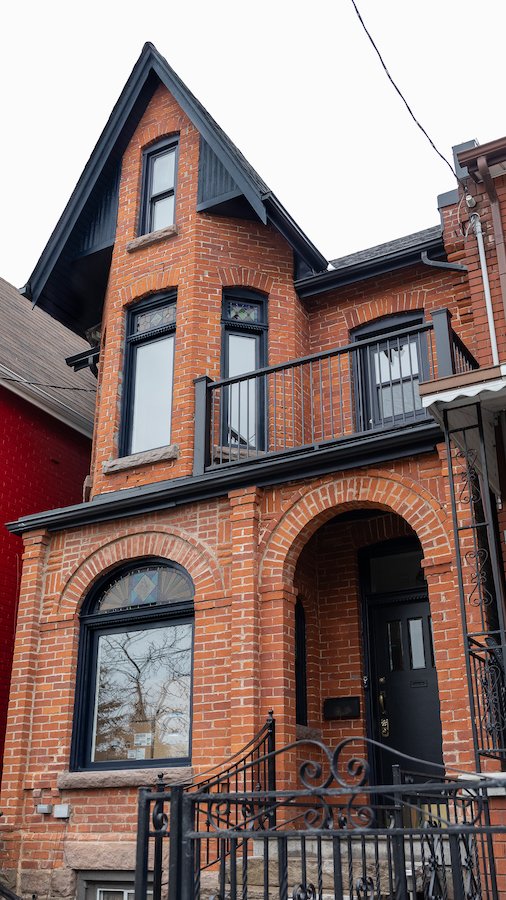
TORONTO VICTORIAN HOME - MASTER BEDROOM REFRESH!

I can’t believe it has taken me this long but now that our bigger Toronto home renovations are coming to an end I can finally do something about our master bedroom!

For the past four years, our primary bedroom has really taken a back seat. Adam and I have done nothing to it since we moved in and I’m ashamed to admit you can still see putty marks from where the previous owners had hung their pictures. Needless to say it was about time we did something and what a perfect project to kick off my new ‘Soh At Home’ series with!

In this new series we are going to be focused on quicker and smaller DIY’s and interior design projects aimed at turning this now nicely renovated traditional home into a house that reflects our taste and contemporary sensibility.

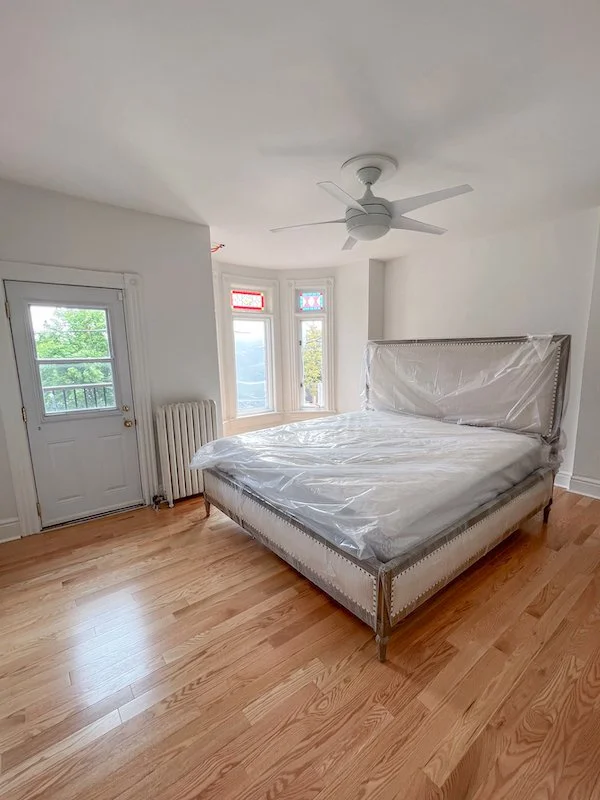
Previously, our master bedroom was a bit of a dumping ground. My ‘office’ took up the entire bay window area, there was clutter everywhere, a miss-mash of ‘furniture’ and window screens being stored in the corner. There was also an ungodly patch of wall behind our bedroom radiator, the ‘ceiling medallion’ was a small piece of round wood, and our ceiling fan was so old controlling it with the remote was always a hit and miss. In addition to my normal displeasures regarding the state of the primary bedroom, I have also been working on a separate linen closet project and had been storing all of the stuff from that in my master bedroom. Ugh.

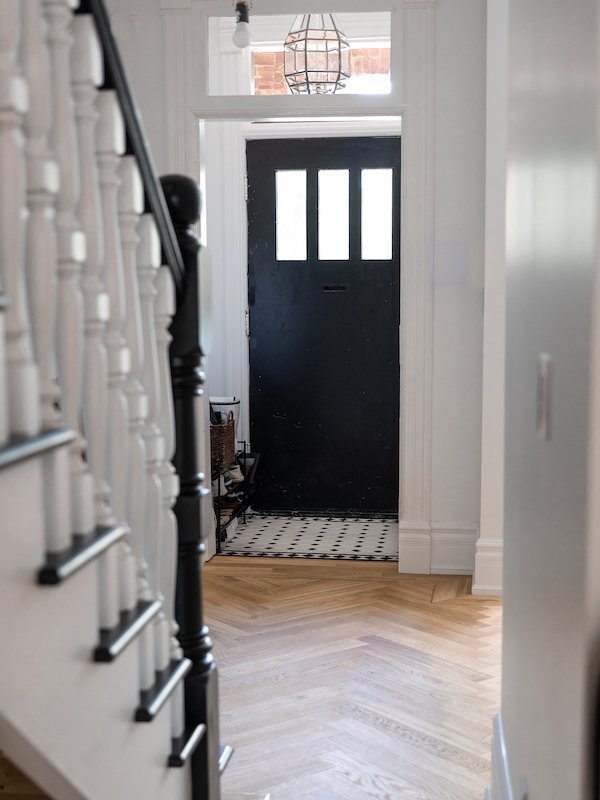
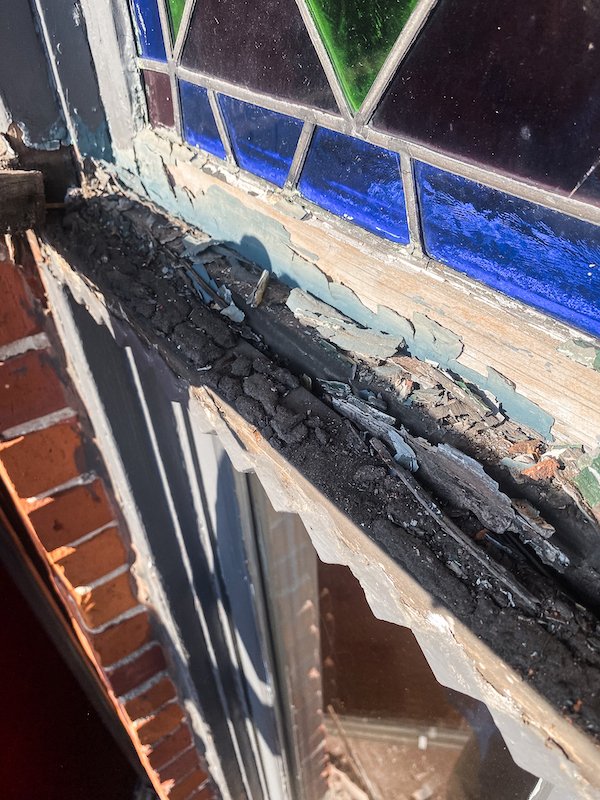
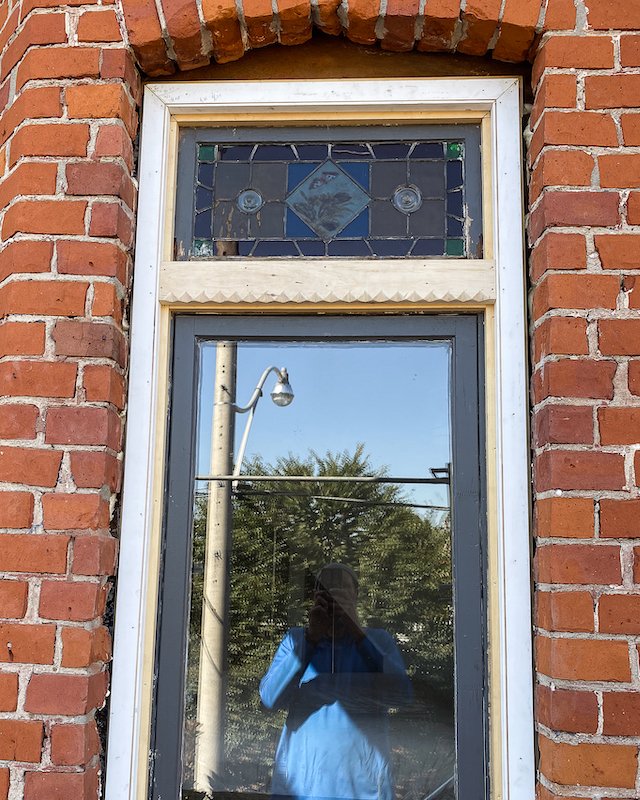
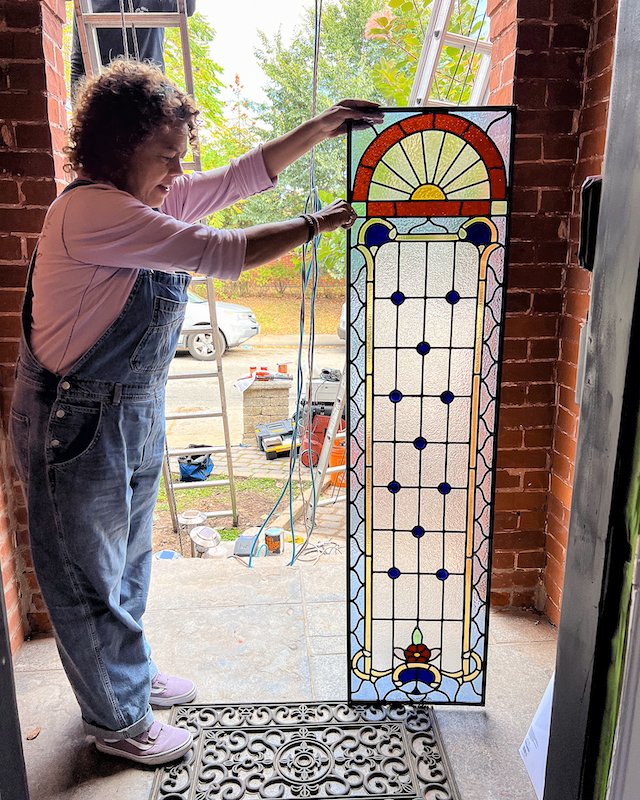
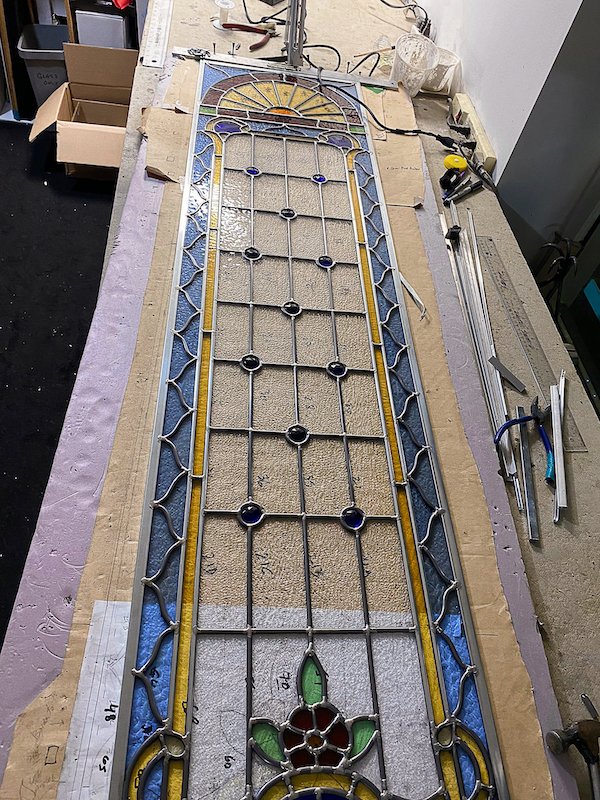
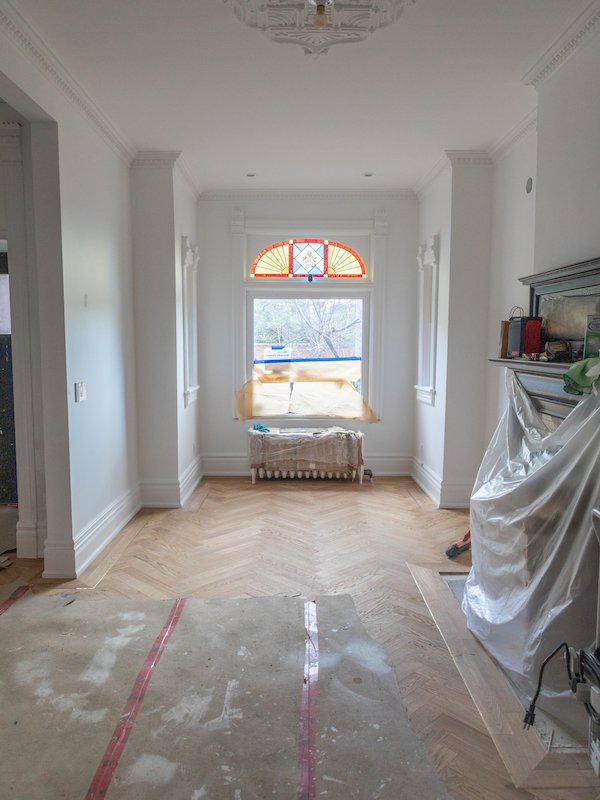
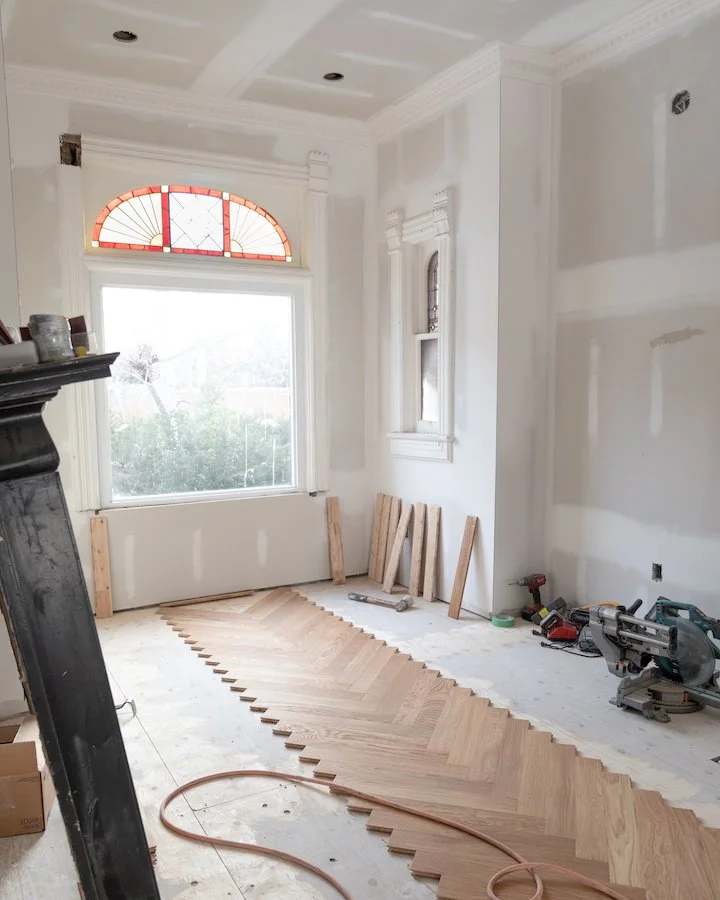
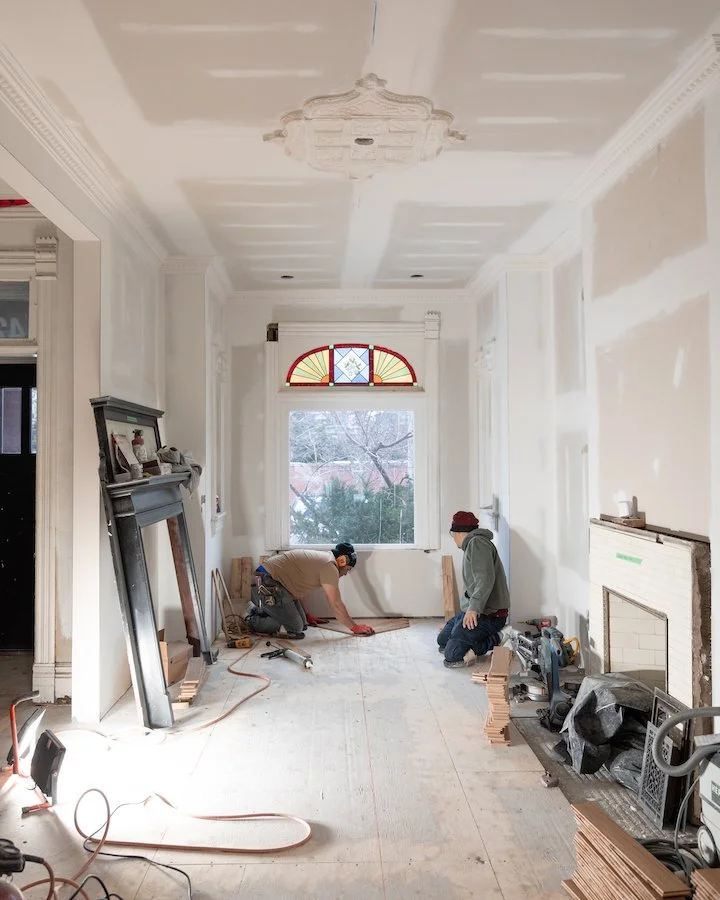
The primary bedroom had so much potential though! The stained glass bay window were what made me fall in love with this room and the king size bed I inherited after my mom got rid of her Florida condo had been an absolute godsend. Regardless, we needed to get to work!

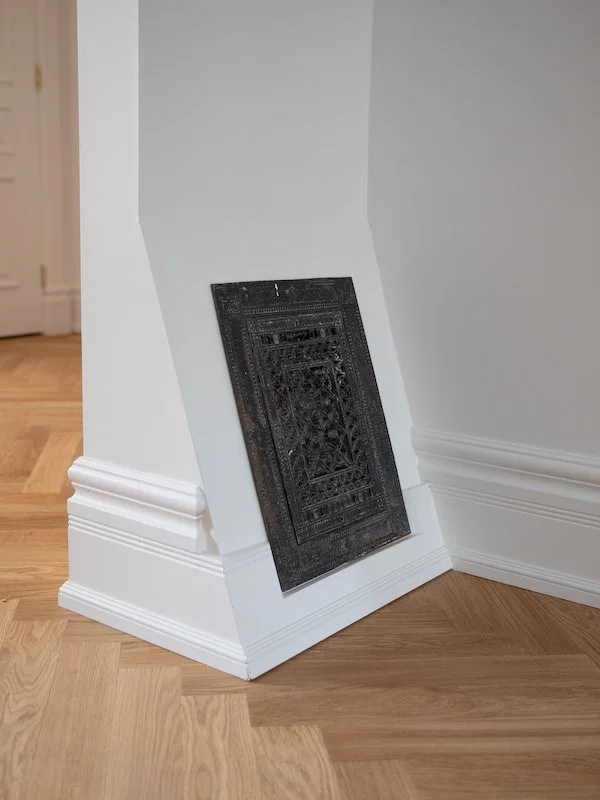
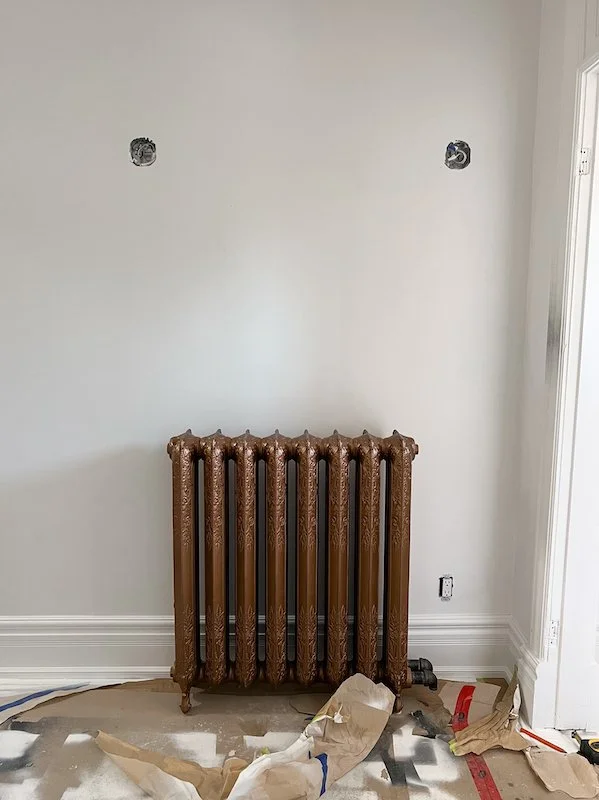
I roped in a few partners to help me with this project - so I didn’t have to do it alone - and I am really excited to share my design plans for this room which includes switching out our cast iron radiator for a newly refurbished ornate cast iron Victorian radiator from Ironworks Radiator Inc., removal and installation of a new plaster ceiling medallion from Parsiena Design, and installation of some much needed window treatments from Blinds To Go!


FOLLOW ME ON INSTAGRAM @ISTHATSOH


Toronto Home Renovations - Master Bedroom refresh - cleaned out and ready for demo

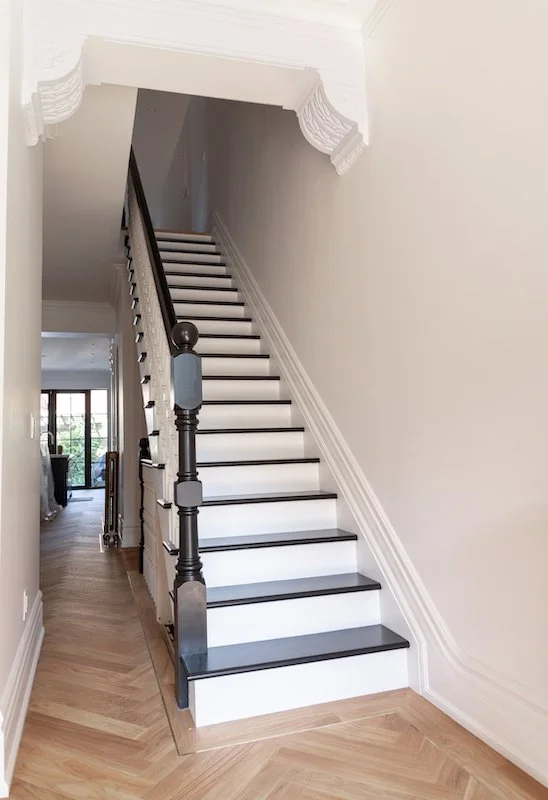
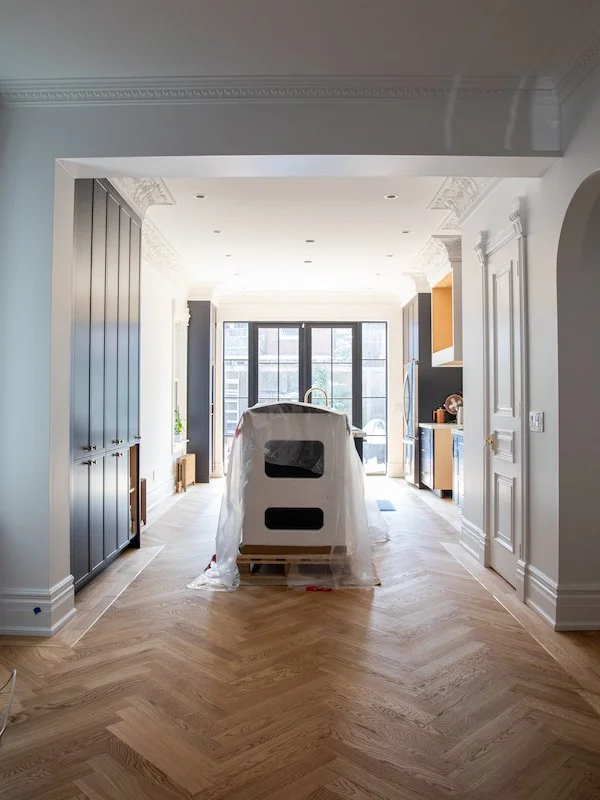
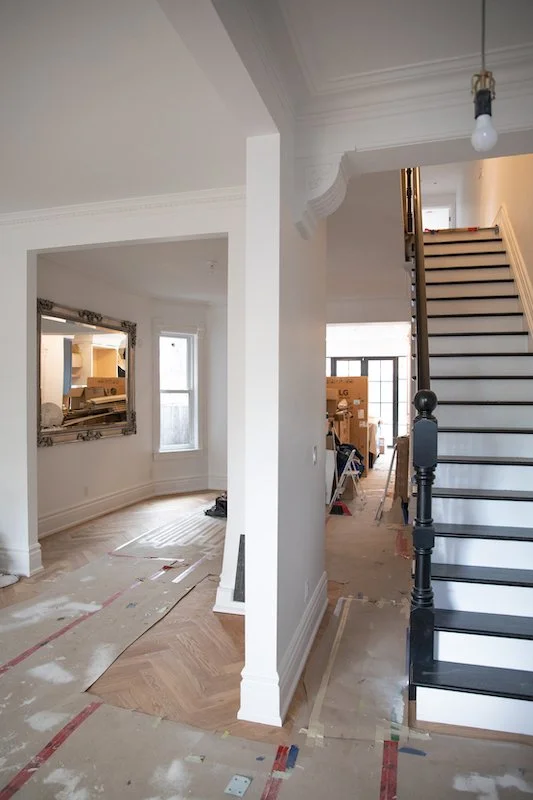
Our primary bedroom cleared out for a little demo before we begin painting!

A Green Master Bedroom

Green is a colour I have never really gravitated toward but after living in Adam's childhood bedroom for months during our Toronto home renovations, it totally grew on me. Green bedrooms are supposed to promote a sense of calm and comfort, reduce stress and foster a soothing sleep environment. The colour green also symbolizes growth, rejuvenation, and a connection to nature which all sounds pretty good to me. I mean, I get it! It’s also considered a ‘heritage paint’ colour so we are very much staying ‘on brand’ with this paint colour.

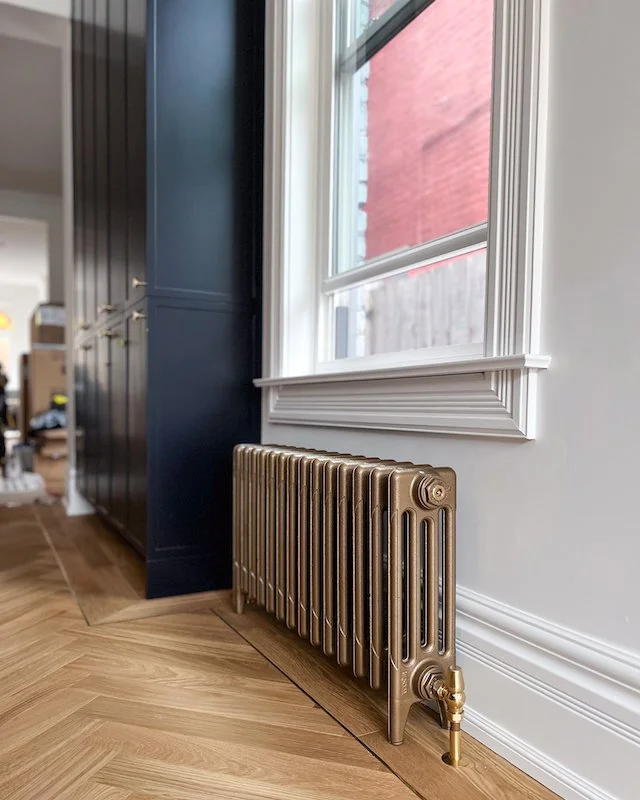
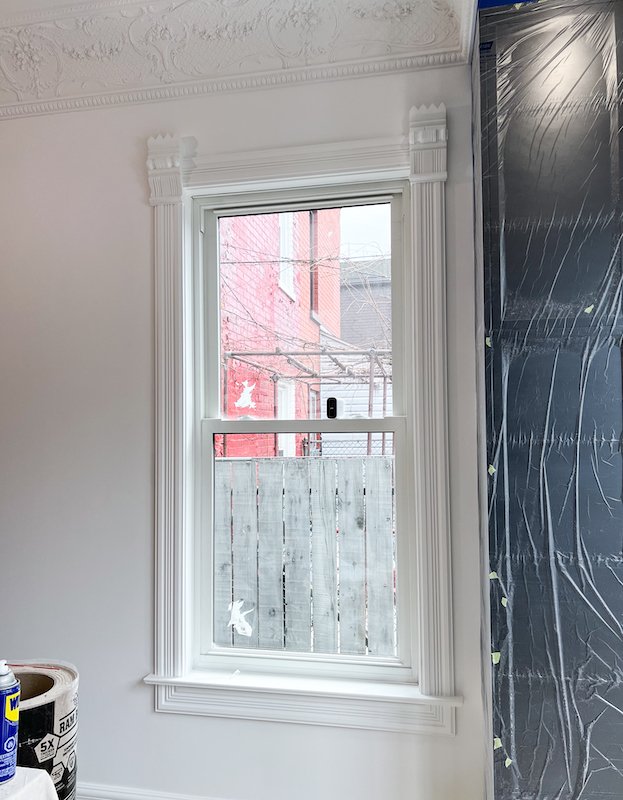
Before I could begin painting, I needed to get our cast iron radiator removed so I could tackle the ungodly patch hiding behind it. I actually had to psych myself up for this mini-demo because even though ‘Demo Soheila’ is a personality I like to get down with, you never know what you are going to find when you open a wall in an old house. Before I even started I knew this one was going to be messy as lath and plaster still make up the walls in part of this room. Thankfully, nothing remarkable was behind the patch and I was able to open and close it in an afternoon. After a few layers of mud the new patch of drywall flowed seamlessly with the existing lath and plaster wall and I was able to begin painting.

Toronto Home Renovations - Master Bedroom refresh - Parsiena Design ceiling medallion installation

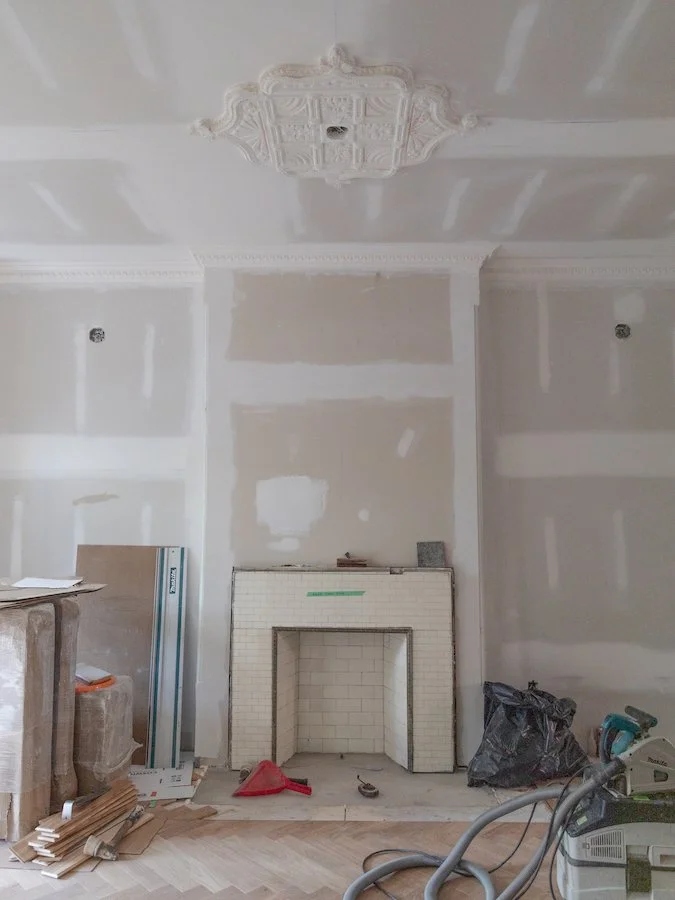
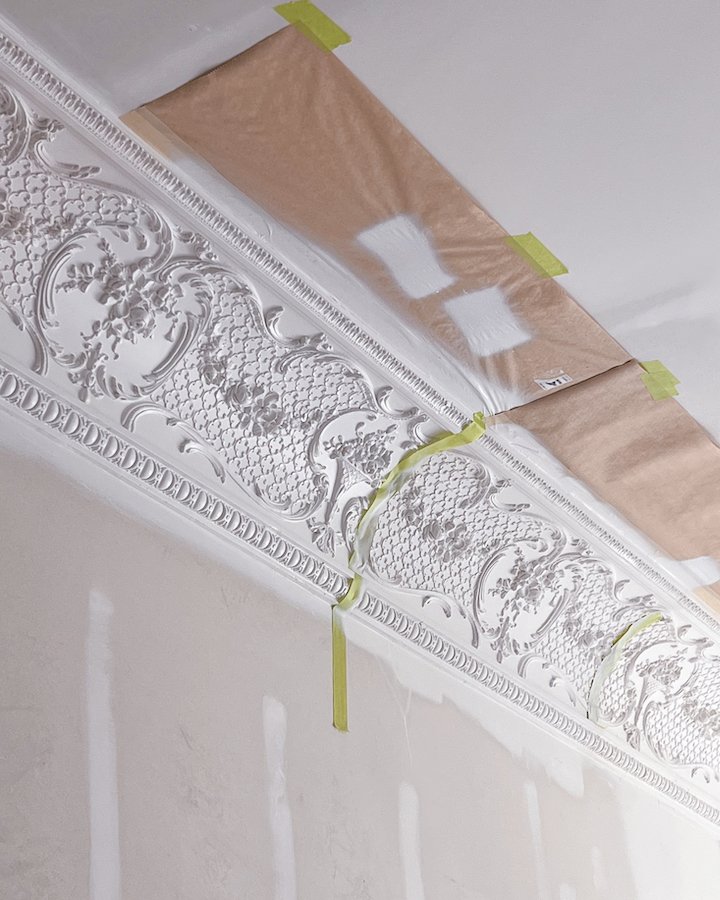
My new ceiling medallion from Parsiena Design!

Ceiling Medallion Incoming!

Since my excitement for this master bedroom refresh and inability to sit still always gets the best of me, I started painting the room even before Parsiena Design installed our new plaster ceiling medallion. If you are unfamiliar with Parsiena Design, they are a manufacturer of architectural and decorative elements like mantels, plaster mouldings, ceiling medallions, and so much more. It was them that I turned to for my beautiful main floor crown mouldings that I (and apparently many of you) am obsessed with. So when I decided to take on this master bedroom refresh, I knew I definitely wanted to work them them again. They have an extensive catalogue of products to browse on their website which is exactly how I found our new ceiling medallion. I think it’s elegant, classic, and fits well with the other traditional elements I have planned for the room.

Toronto Home Renovations - Master Bedroom refresh - Parsiena Design ceiling medallion installation

Installation of our new ceiling medallion from Parsiena Design


ENJOYING THIS CONTENT? CHECK OUT SOME OF MY OTHER EPISODES AND BLOG POSTS!


Victorian Cast Iron Radiators - Like Jewellery For Your House

Speaking of traditional elements, a month prior to starting this project I paid a little visit to my friends at Ironworks Radiations Inc. During phase 1 of our home renovation I had purchased two brand new Castrads cast iron radiators from them for our kitchen along with two newly refurbished ornate radiators for our front entrance and dining room.

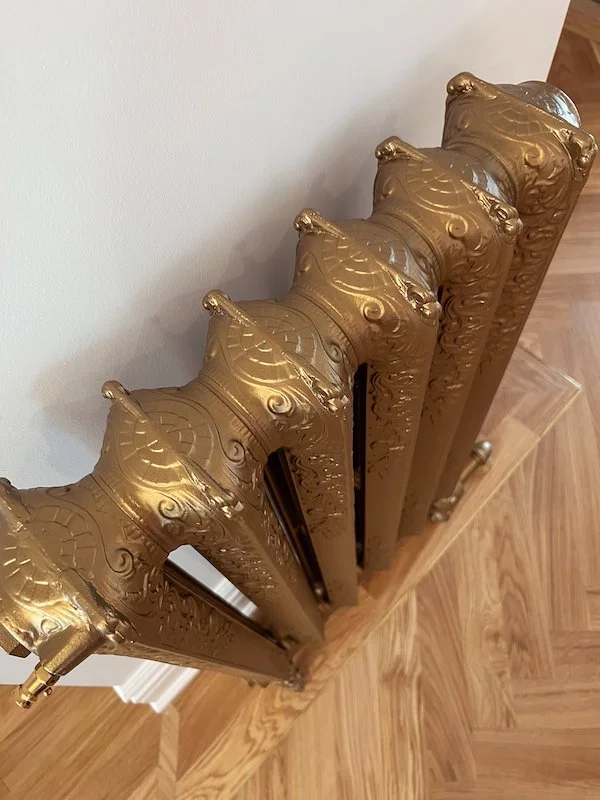
Not only do radiators give off amazing heat but I love the way Victorian cast iron radiators look after they have been freshly refurbished. Their freshly painted motifs add a design element to any room that I liken to jewellery and I was excited to add another piece of jewellery to mine.

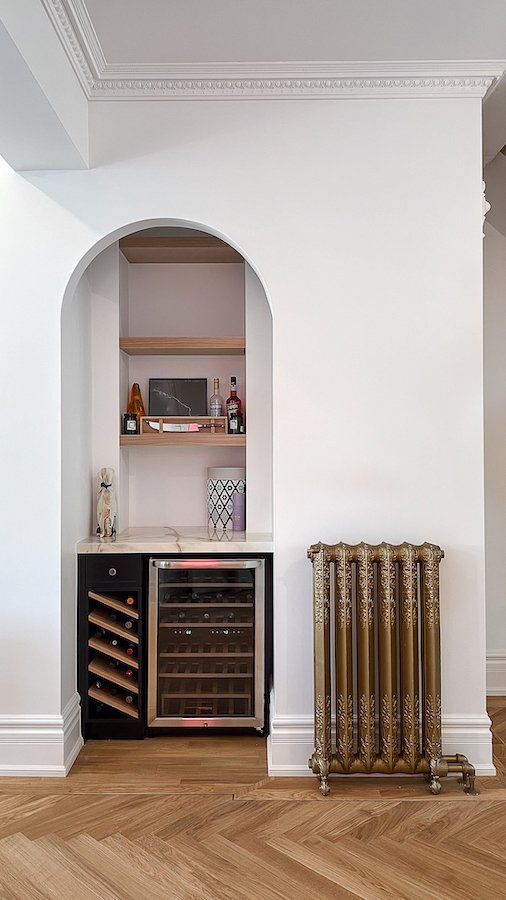
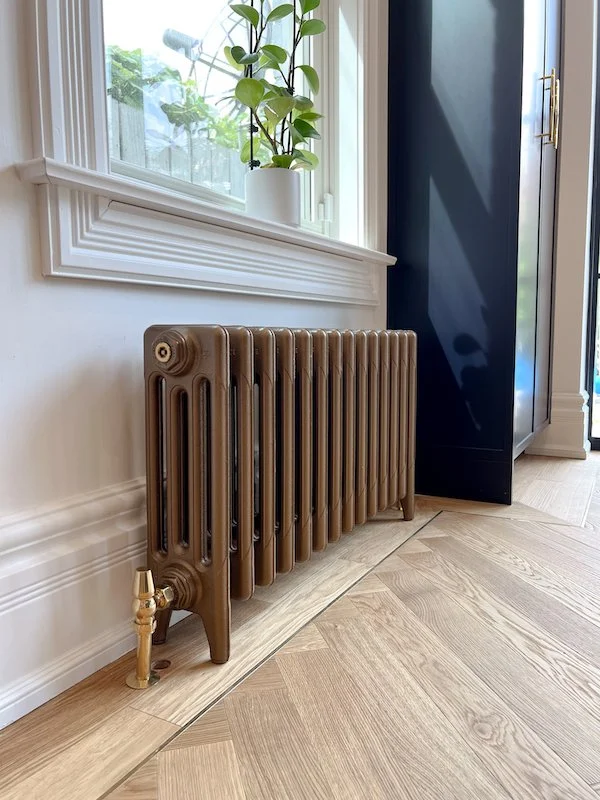
During our visit to the Ironworks stockyard, owner of Ironworks Jen personally walked me through options for our master bedroom and we settled on a beautiful 10 section, 2 column Gurney with a decorative scroll depicting a vine leaf motif. So fitting with the green, right!?

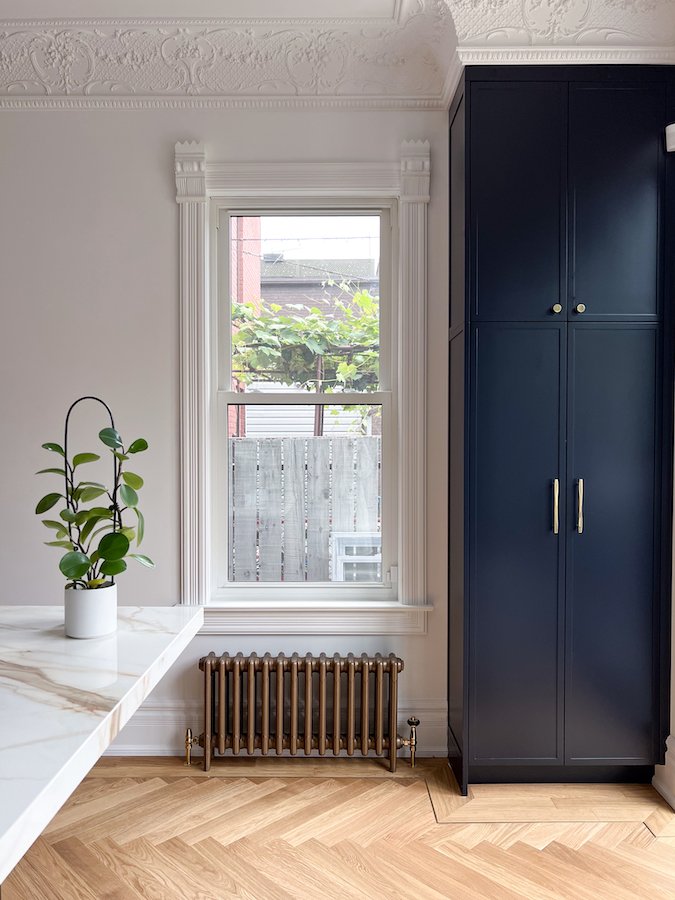
Ornate Victorian Radiators waiting to be refurbished in the Ironwork Radiators Inc. stockyard.

Except, remember I wanted the radiator to stand out, so I went with a ‘pale gold’ for my custom colour which I think compliments the green walls so well while also showing off those jewellery like details.

To really bring it all together and make it look extra pretty once installed, I chose a brass radiator valve, specifically the Windsor TRV valve from Castrads (which is only available at Ironworks), along with some new brass shrouds and base plates.

Like, what an upgrade!

Bedroom Drapes and Curtain Ideas

One thing I am kicking myself for not doing sooner is getting window treatments for our primary bedroom. Would you believe this whole time poor Adam has been sleeping with a stream of ambient light from a street lamp positioned 15 feet from our master bedroom bay window. Poor guy has been getting blinded at night affecting his ability to sleep. So when I told him we were heading into Blinds To Go’s new Castlefield showroom, he was rushing me out the door.

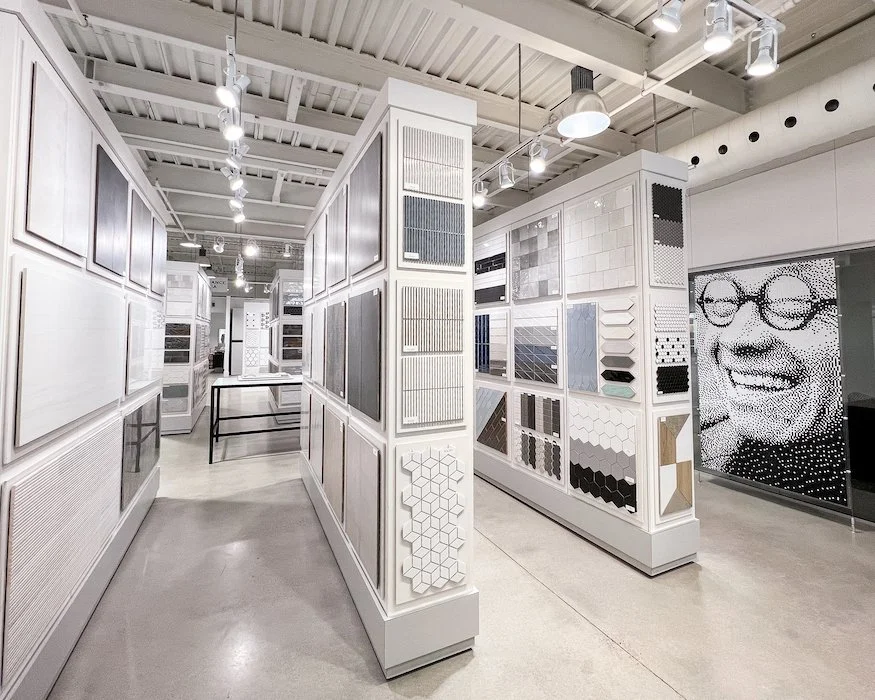
With window measurements in hand, we explained our needs and my design ideas with a Blinds To Go design consultant who was then able to walk us through all the little details of window treatments. From types of treatments, mounting styles, mechanisms and hardware we were able to figure out everything we wanted in one visit. Although I am no stranger to Blinds To Go (I used them for my previous apartment and for a rental property I managed a refresh for) their new showroom really left a lasting impression. The upper floor has the dreamiest atmosphere, full of fabric samples to browse and inspire. You can also experience the excitement of motorized shades in their ‘smart room’. But don’t blame me if this becomes the thing you didn’t know you needed in your life. Their team is also very knowledgeable and engaged in making sure you achieve your window treatment goals and aesthetic. Plus they have thousands of fabrics to choose from. Oh, and did I mention you can go online to their website and order free fabric samples before even stepping into their store? Literally no commitment, just to help you get inspired.

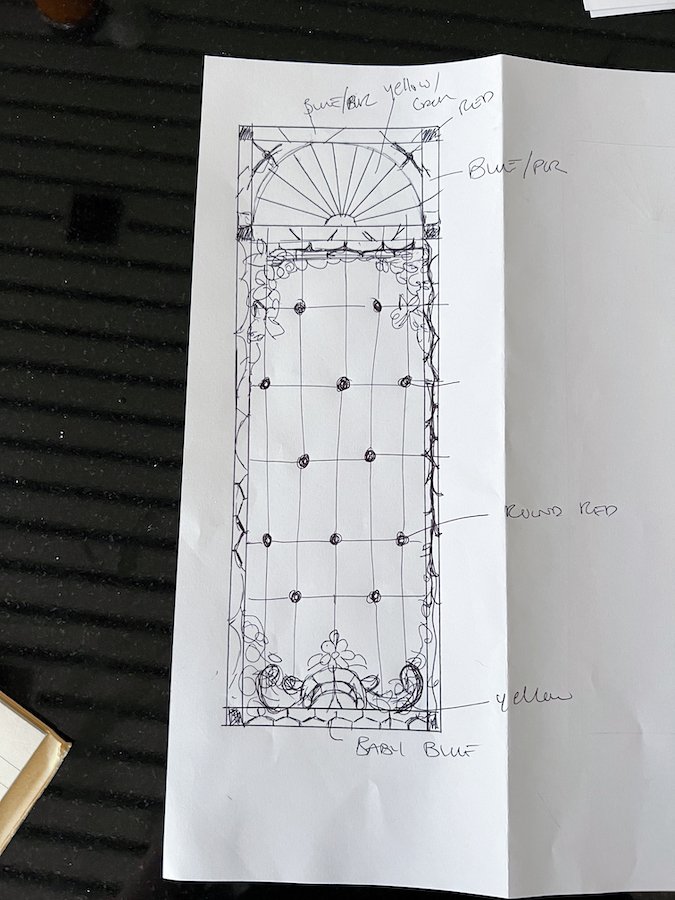
For the master bedroom we are doing Romans in Julia, Seafoam (left) and black out drapes in Linen Cotton Weave in Natural (right)

We ended up choosing a combination of roman shades and drapes for our master bedroom bay window, and another small roman for the balcony door. The drapes will have a white black out curtain liner while the roman shades will have a light filtering backer. In terms of fabric we went with ‘Linen Cotton Weave in Natural’ for the drapes and ‘Julia, Seafoam’ for the romans which has a beautiful embroidered floral motif.

In addition to our master bedroom we also ordered window treatments for the nursery and back bedroom! All romans shades, all in ‘Dow Cloud’ and all black out! I just know this is going to help Cyrus nap better during the day because his room also gets a lot of light, which is yet another reason I am kicking myself I haven’t done this sooner.

Toronto Home Renovations - Master Bedroom refresh - blinds to go at home measure visit

Following our showroom visit, a Blinds To Go team member came to our house to verify measurements.

Within a week of our visit to the showroom a member of the Blinds To Go team came to our house to verify measurements. They walked us through how things would look once installed and ensured we were all on the same page before processing the order, which I really appreciated. Once the order was officially placed all we had to do was wait. Production took about three weeks but the difference these window treatments make on not just the room but our ability to have a good nights rest is life changing.

Toronto Home Renovations - Master Bedroom refresh - master bedroom makeover idea

The final result! A beautiful, calming master bedroom we just love!

Overall, I am extremely happy with how this master bedroom refresh turned out. I love how soothing the green walls are and now with the newly refurbished radiator we got from Ironworks Radiators Inc., the elegant ceiling medallion from Parsiena Design and the life changing window treatments from Blinds To Go, our master bedroom has finally been elevated to a level it deserves! Adam and I even switched out the ceiling fan for a new, more modern ceiling fan with a remote that actually works, so things are very much on the up. I do want to spend more time decorating this room, adding furniture, and maybe some built-ins, but those are projects for another episode!

Thank you so much for joining me for my master bedroom refresh. As always, if you have any questions feel free to leave them below and don’t forget to subscribe to my Instagram and YouTube channel. Special thanks as well to all my partners who teamed up with me for this project, I would not have been able to achieve this transformation without your help and I appreciate the faith you have in me that makes you want to partner with me, again and again.

Until next time,

- Soheila

*as always, all opinions remain my own


PIN THIS POST

Toronto Home Renovations - Master Bedroom refresh - pinterest

EPISODE 10: IT'S FINALLY HAPPENING - RENOVATING MY VICTORIAN HOME

Toronto home renovation - victorian style house - winckelman tiles - victorian mosaic tiles with Border design - bathroom renovations in Toronto - powder room ideas

We finally installed the Victorian mosaic tiles I ordered from Winckelmans in the powder room!

RENOVATING MY TORONTO VICTORIAN HOME - EPISODE 10!

I know it’s been a few months since I last released an episode of my home renovation series but that is not because Adam and I have been relaxing and enjoying the summer, quite the contrary! Since moving back into the house and getting ourselves settled in, we have had to put our bigger renovation plans on the back burner and switch gears to concentrate on planning our wedding and getting married in Italy!

If you missed our big news, this past September Adam and I got married in Tuscany at the beautiful San Galgano Abbey. We kicked off our trip with a whirlwind weekend in Florence with friends before heading to Tuscany to check into our wedding villa where we would be hosting the majority of our wedding event. On the first night we hosted a large welcome dinner under the stars for all our guests before getting married the following day in front of all our family and friends. It was such a beautiful wedding and reception - a total dream come true! After one week in Italy, Adam and I headed to Croatia for our honeymoon where we spent a few days at a luxury boutique hotel in Hvar before sailing around to a few Croatian islands and finishing up in Dubrovnik for the last couple nights.

modern victorian house - home renovations toronto - foyer tiles - winckelman tiles black and white victorian tiles with boarder design

My dreams of having Victorian Tiles in my house have finally come true!

Installation of My Victorian Mosaic Tiles From Winckelmans Tiles

Before leaving for our wedding, we were able to get a few things off our to-do list including the installation of our new Victorian mosaic tiles from Winckelmans Tiles that we had previously picked up from their distributor in Toronto, Deco Tile.

It felt so good to finally have my tiles from Winckelmans installed! Adam’s dad ended up helping me with the foyer install (making sure to add in some Schluter Ditra lining for extra waterproofing protection) while Duran from DuWolf tackled the powder room to ensure we could get both spaces done before we left. Although the sheeted tile format (which my Winckelmans Tiles came in) does make the installation process easier, it still takes a lot of thoughtful planning to make sure everything lines up properly and is measured and cut perfectly, so the install is no easy feat! In the end, both spaces turned out even better then I or Adam could have imagined and the black and white Victorian tiles with a matching boarder design turned out super sophisticated/elegant. I love how when you walk into the house the foyer plays off the black and white staircase in the background too which makes the whole entrance way feel cohesive and inviting.

There is still a lot of work we have to do to the powder room following the tile install on one of the walls and floor but I can already tell it’s going to look great once it’s done and the custom Victorian stained glass window I’m having made is installed. Stay tuned for the final look in the next episode!

Toronto home renoation - arched wine cabinet with fridge - compact wine fridge - at home bar cabinet with coffee nook - victorian cast iron radiator and herringbone floors with brass inlay

Our arched bar with wine storage is looking better than ever!

Installation of Our Wine Cabinet With Fridge for Our
Home Bar & Coffee Nook

Another job we were able to check off our to-do list before heading to Italy was the installation of our little arched bar/coffee nook!

Do you remember back in episode 6 when we started drywall and framed out an interior archway for a future little bar area with wine cabinet and wine fridge? Well the custom cabinetry we had ordered was finally ready for install! I went for a super simple design that played off the kitchen’s navy blue palette by having a small cubby with slanted shelves (perfect for storing wine bottles) made with a small drawer on top to hold bottle openers etc. We used the left over Calacatta Gold porcelain from the kitchen for a counter top and duplicated the natural oak shelves to add additional storage for liquor bottles and bar paraphernalia. All we had to do once the navy blue bar cabinet and shelves were installed was plug in our new dual zone wine fridge and Nespresso machine, and decorate! Adam and I saved a whole case of wine from our wedding that we are planning to stash away and open on future anniversaries so I’m really happy to have a nice space to store them. Not to mention a little area separate from the kitchen to mix cocktails for guests while hosting over the holiday season!

DID YOU KNOW the perfect wine fridge temperature ranges between 50 °F (11°C) and 65 °F (18°C) for red wine and 45 °F (7°C) and 50 °F (11°C) for white wine. Neither did I, I had to look it up. Also, needing to rotate your wine bottles every few months is a total myth. As long as they are stored on their side you’re fine! Learn something new every day! Haha!

Victorian homes - toronto home renoations - restoration of victorian windows - house restoration

The plastic sheet draped over the front 2nd floor windows was becoming a huge eye sore!

Restoration of Our Original Victorian Windows

If you’re new to my channel or blog you might have been wondering why there is a big plastic bag draped across the front second floor window of our house. Well, do I have a nightmare story for you!

The evening before Adam and I were set to start drywall there was a massive rainstorm that called our attention to the badly deteriorated and rotted state of our 2nd floor windows. The water from the rainstorm was just pouring into our main floor front room and with drywall starting the next morning, we had no choice but to temporary fix it by draping a large plastic sheet of vapour barrier over the 2nd floor window as a way to keep water off of it as much as possible. This temporary solution worked very well. Amazing actually! The leaking instantly stopped but living with a large plastic sheet on the front of our house was a huge eye sore I was getting sick of looking at. So when Adam and I got back from our wedding and honeymoon, I called our carpenter and asked him to come work his magic.

Restoration of our front windows took a couple days but our carpenter quickly identify the obvious culprit. He started with removing all the rotten wood before replacing it with new wood and sealing any remaining gaps around the edges with spray foam. He did a great job replicating the original Victorian trim work and mimicking the original style just as I asked, and even primed the window with some primer paint to seal it in preparation for painting and a fresh outline of caulking.

It felts so good to not only get that plastic sheet off the front of our house but checking this off our to-do list gave me the reassurance I needed to feel confident that this window will no longer be a problem moving into the winter months.


FOLLOW ME ON INSTAGRAM @ISTHATSOH


Toronto home renovations - victorian homes - exterior house painting and restoration - victorian house gable restoration - exterior window trim painting

Giving the front of our house a little refresh!

Exterior Painting of Windows, Gable and Trim

After our carpenter wrapped up his work, Ariel and his painting crew came in to sand down and paint the front windows, gable, balcony and trim before sealing the windows off with some fresh caulking. Originally the gable, windows and trim was this dull grey colour and our front door and balcony spindles were black but none of it did anything to bring out the beautiful orange hue of the brick. I wanted something complimentary, that helped the house stand out and appear vibrant and glorious in its old age, and what better choice for that than orange’s most complimentary colour, blue! It’s my favourite colour after all!

So off I went to the paint store, with one small kitchen cabinet door tucked under my arm to find the perfect matching colour! Imagine my shock then to find out there is no Benjamin Moore colour that matches! The gentleman at the store ended up mixing the paint colour by eye and after a few small tweaks, we landed on the perfect formula! Thank god for paint snobs!

Now that the windows are restored and everything received a fresh coat of paint, the house is looking really sharp! I love how the navy blue paint accentuates the rich orange hue of the brick and how it changes colours (it sometimes almost looks black) depending on what time of day it is. To help underscore the navy blue trim we kept the front door, cast iron railing, 2nd floor balcony and eves/drain spouts black as a way to emphasize the difference in colour despite the navy appearing black at a quick glance.

Toronto home renovations - victorian homes - custom victorian stained glass window for powder room

Louis stopped by to drop off the completed stained glass window I had her custom make for my powder room!

My Custom Victorian Stained Glass Window Was Delivered!

Prior to leaving for the wedding, Louis had invited me to her studio in Etobicoke to finalize the design of the custom stained glass window she was making for the powder room. It was so cool to visit her studio and learn more about the stained glass classes she offers. The pieces she was working on for me looked incredible and exactly like the mock up design I had drawn for her months earlier. During my visit she showed me some final jewel options and glass colours she had selected, and asked me to choose what I liked the best before she began the welding phase of the production.

A few weeks later, while Ariel was still painting the house, Louis stopped by to drop off the finished stained glass window! IT LOOKED SO GOOD and I was so happy to see it installed and in all its glory in the powder room!


ENJOYING THIS CONTENT? CHECK OUT SOME OF MY OTHER EPISODES AND BLOG POSTS!


Home renovations Toronto - victorian homes - la cornue ranges - kitchen renovations toronto - herringbone floors with brass inlay - navy blue kitchen cabinets

Our La Cornue Cornufé range was finally installed!

Installation of Our La Cornue Range

It finally happened! After months of waiting for our new vent to arrive, two weeks ago we were able to get not only get it installed but we got our new La Cornue range installed too!

Originally, Adam and I had planned to have our stove installed in May when we moved in but the inspector saw the hole for the vent exhaust and said it was too big and not to code. Pivoting as best we could, we ordered a new vent that required a smaller exhaust hole but the kicker was we had to wait 16 weeks for it to arrive. In the meantime our new La Cornue stove lived in its crate in our dining room while Adam and I cooked all our meals on the BBQ.

After months of waiting our new vent arrived and we had our kitchen cabinetry maker from Domani Design Group come in to retrofit our range hood cabinet (because of course the new vent had to be a different size than our old vent) before having a professional appliance installer come in to finish the rest of the install.

By the way, if anyone is doing a kitchen renovations and needs a vent, we still have our old, unopened, Elica vent available for purchase! Model number is EAR140S4 if you want to check out the specs!

Now that our La Cornue stove is installed, Adam and I have been cooking up a storm. We love the duel electric ovens and powerful gas range. We also later learned that they discontinued making the La Cornue Cornufé range in the navy blue colour so it’s not even available for purchase anymore which makes me love it even more. I’m so excited to continue to play around with it over the holidays and feel way more confident about hosting family and friends for dinner now that we are not limited to just the BBQ. It’s going to make things so much easier and more enjoyable not to mention it looks like a piece of jewellery!

Overall, I am ECSTATIC about all the progress we’ve made on the house since moving back in. I even bought some lights on Black Friday which I can’t wait to arrive so I can install them! Christmas is also around the corner and I’m looking forward to getting our first Christmas tree and starting to host our friends and family for drinks and dinner.

Toronto home renovations - underpinning the basement - before

The current state of our basement - a sandbox!

2024 Plans: Tackling the Basement & Underpinning

In the new year Adam and I have plans to start tackling the basement which is currently a large sandbox. We want to do a big underpin in hopes of achieving an 8+ foot finished basement so it’s a bit more of a functional space and we can actually install our laundry machines (which is the last thing we need to install)! Until then they will continue taking up space in our living room. YAY! * eyeroll *

In preparation for the underpin (and before the ground froze) we had to cut away the bushes and smoke tree out front. Having to get rid of the smoke bush tree broke my heart, I loved that tree! Unfortunately it was so old, overgrown and wild that it produced less blooms each year and blocked all the light making it impossible to grow anything else. We have plans to re-landscape the front in the spring after the underpinning is done but for now we needed to prepare that front area for a demo bin.

Toronto home renovations - victorian homes - exterior window trim painting

The house after window restoration work and a fresh coat of black and navy blue paint!

Thank you so much for joining me today and for checking out my new Toronto home renovation series on Youtube. I am super excited to be modernizing a Victorian home while still keeping the charm of an old Victorian house. If you have any questions about my Victorian house renovations, what it’s like to live in Little Portugal, Toronto or recommendations for Toronto contractors, hit me up in the comments below!

Before I sign off, I’d also like to say a big thank you to Winckelmans Tiles and Deco Tile for partnering with me on this project. I’m so excited to be working with industry experts on our Toronto home renovations but want to reiterate that, like always, all opinions remain my own.

Until next time,

- Soheila

MORE BTS PHOTOS FROM THIS EPISODE


PIN THIS POST

Home renovations in Toronto - A Toronto Victorian Home - black and white victorian mosaic tiles from Winckelmans - powder room makeover

EPISODE 9: WE MOVED IN! - RENOVATING MY VICTORIAN HOME

IsThatSoh Kitchen - Victorian home with crown mouldings and castrad mercury cast iron radiator

After 14 months of renovations, we are finally ready to move back into our Toronto Victorian home!

RENOVATING MY TORONTO VICTORIAN HOME - EPISODE 9!

The moment we have all been waiting for! After 14 months of renovations, Adam and I have finally moved back into our Toronto Victorian home!

Shortly after returning from my wedding planning trip to Italy, our painter Ariel finished painting our house and packed up his stuff, which meant Adam and I could start focusing on cleaning the house and moving back in. In this episode we are going to be sharing the big reveal of our Toronto home renovation and everything we still have to do!

For those that are just tuning in, when Adam and I purchased this property as our first home, we knew it needed some work. The house had been divided into units with a ‘new-ish’ kitchen on the second floor and a very old, very small kitchen on the main floor.

Initially, Adam and I thought we would wait before doing any renovations; settle in, learn about the house, figure out its quirks, save a little money and then start the planning process. But soon after we moved in, we realized many of our appliances were broken and needed to be replaced. This ended up being the small nudge we needed to get the ball rolling. Seven months later (and just in time for Adam’s birthday), we received our building permit and were ready to get started!

P.s. If you are interested in seeing/revisiting what the house looked like prior to renovations, you can go check out my ‘pre-renovation house tour’!

moving day  - moving back into our victorian house

FOLLOW ME ON INSTAGRAM @ISTHATSOH


Before we could think about moving back into the house we first had to give it a deep clean. After 14 months of renovations, the whole house was covered in dust (especially all of the stuff we stored in the basement) so we spent the first week cleaning every nook and cranny before packing up the car with our personal stuff and finally moving back in.

HERRINGBONE FLOORING

Seeing the house sparkling clean for the first time was magical but pull up the protective ram board to reveal my new white oak herringbone flooring from Chestnut Flooring with the added brass inlay border, was a dream come true.

It had always been my fantasy to have herringbone floors so when Adam and I realized the house needed structural work to reverse the sagging on the main floor, I was ecstatic about the possibility of having to redo the floors.

Traditionally, herringbone flooring was made of hardwood oak but these days you can get them in engineered oak and they come in many different sizes and colours. Narrowing it down to the appropriate size was exceptionally hard given the size of the space. Too large and you don’t notice them, too small and it’s all you notice. In the end, Chestnut Flooring helped us find the perfect size plank and colour to add warmth back into the space. Seeing them now span all the way from the front entrance to the kitchen crittall door at the back, makes my heart skip a beat.

OUR REFURBISHED CAST IRON RADIATORS

I’ve said it once and I’ll say it a thousand more times, ornate cast iron radiators are like jewellery for you home. If you love Victorian style houses as much as I do, you would understand my desire to want to keep traditional elements like these beautiful cast iron radiators even when undergoing an extensive renovation. Not only do I think they add a pop of glam to the main floor but they work incredibly well at reducing moisture and expelling heat during colder winter months. Now, having moved back into our house I really get to enjoy the beauty of my cast iron radiators and I can’t wait to create focal points around them.

If you love Victorian homes or are just looking to refurbish your radiators, I highly recommend checking out Ironworks Radiator Inc in Etobicoke. They have an extensive stockyard of Victorian radiators located at the back of their shop and their inventory is always changing. They also work directly with Castrad Radiators in the UK to import brand new cast iron radiators in various styles including more modern, sleek silhouettes like the two we have installed under the twin windows in the kitchen.


ENJOYING THIS CONTENT? CHECK OUT SOME OF MY OTHER EPISODES AND BLOG POSTS!


home renovations in toronto - herringbone floors kitchen with brass inlay

KITCHEN RENOVATION PROGRESS & UPDATES

Progress on our kitchen renovation has unfortunately come to a halt. Right before we were set to have the stove installed (our final piece of the puzzle) the inspector looked at the vent hole and said it didn’t pass code. Little did we know before buying our hood vent that a 10 inch duct would not pass code given the parameters of our lot. The good news is, we found something that can be retrofitted to our cabinet hood but the bad news is, it could take up to 10 weeks to arrive. In the meantime, my stove lives in the dining room and Adam and I have to use the bbq to do all our cooking.

Other then that though the crown mouldings from Parsiana Design and the navy blue kitchen cabinetry from Domani Design Group look spectacular. Every time someone walks into our house they always comment on how beautiful the kitchen mouldings look against the slim shaker cabinets and how the brass inlay boarder sparkles against the the white oak herringbone flooring. I am thrilled with how the kitchen is turning out and I honestly can’t wait to see it complete once our La Cornue stove is installed.

STILL SO MUCH TO DO!

In addition to our kitchen not being completely finished, there are still so many things that need to be done around here. The bar cabinets have been measured and we are waiting delivery and install. The powered room needs to be tiled, same with the front foyer. We still need to figure out what we want to do with our fireplace. The hidden linen closet on the second floor needs to be completed. The bathroom pocket door isn’t finish being installed and trimmed out nor has the underbelly and side of our new custom staircase, but I know we will tackle these items in time so I’m not going to start sweating the small stuff.

Adam and I also have plans to start renovating the basement in the fall after our wedding, which will include some underpinning so there is definitely no shortage of work around here!

MASTER BATHROOM RENOVATION REVEAL

Inspired by the marble checkered pattern seen in the hallways of Palace of Versailles and incorporating my favourite colour blue, our master bathroom is currently our only functional bathroom. Although not honed marble like my inspiration, I just love how the blue and white checked floor tiles turned out and how well they compliment the veined porcelain slabs we chose for the shower walls. To help further pull the room together the large white oak wall mount vanity with a white quartz counter top matched our shower curb perfectly and the chrome faucets, tub filler and shower fixture turned out to be the perfect ‘polished’ detail to bring the room together.

When Adam and I first moved back into the house the shower glass wasn’t installed so we were taking a lot of baths! We also had ordered two new wall hung arched medicine cabinets for over the vanity but quickly realized they would protrude to much over the faucet to look and feel right. Thankfully I found these beautiful irregular shaped mirrors with a bevelled edge online that once installed, gave a modern twist to an otherwise traditional Victorian style bathroom.

Two weeks after we moved in, our shower glass also finally arrived. Installation took a good part of a day but I have to say it was worth the wait. The glass walls go floor to ceiling and the door swings both inward and out. We went with Chrome hardware so everything matches the newly painted cast iron tub we originally had in the basement and I really think it gives our master bathroom this feeling of grandness it was missing.

ARRIVAL OF MY MOSAIC VICTORIAN TILES!

Within the first few weeks of moving in I also received the best news! The Winckelman Tiles I had ordered had finally arrived and their local distributor here in Toronto, Deco Tile had called me to let me know I can pick them up!

The octagon mosaic Victorian tiles I had selected were even more beautiful in person! Once the car was loaded up we headed over to Deco Tile’s showroom on Tycos Drive to select the perfect grout to match. Honestly, this part was quiet challenging because so many colours would have worked well with these tiles but in the end I settled on a warm off white called Biscuit.

I can not wait to install these tiles in the powered room and front foyer and think they will really compliment the black and white custom staircase we just had installed.

Thank you so much for joining me today and for checking out my new Toronto home renovation series on YouTube. I am super excited to be modernizing a Victorian home while still keeping the charm of an old Victorian house. If you have any questions about my Victorian house renovations, what it’s like to live in Toronto or need recommendations for Toronto contractors, hit me up in the comments below!

Before I sign off, I’d also like to say a big thank you to Domani Design Group, Chestnut Flooring, Parsiena Design, Ironworks Radiator Inc and Winckelman Tiles for partnering with me on this project. I’m so excited to be working with such great companies on our Toronto home renovations but want to reiterate that, like always, all opinions remain my own.

Until next time,

- Soheila

MORE BTS PHOTOS FROM THIS EPISODE


PIN THIS POST

EPISODE 8: FINISHING TOUCHES - RENOVATING MY VICTORIAN HOME

Toronto Home renovations - victorian style home - custom staircase - spray gun painting staircase post and stair spindles

The stair balusters after being painted in a bedroom we turned into a giant spray paint booth!

RENOVATING MY TORONTO VICTORIAN HOME - EPISODE 8!

As the finishes come to a close, it’s hard not to look back on this year-long home renovation project and take stock of how far we have come. This past year, Adam and I faced a lot of ‘firsts’. First time demolishing a wall, first time doing any structural work, first time widening a staircase, framing out new bedrooms, doing insulation work - the list goes on. It’s true, ‘anything worth doing is going to be difficult’ and renovating our 125 year old Victorian home was no exception!

For those who have been following Adam and I’s home renovation journey, thank you so much for the support this past year. You have honestly made creating these videos and sharing our experience with you such a joy and I hope you feel inspired to step out of your comfort zone and challenge yourself in some way too.

For those that are just tuning in, when Adam and I purchased this property as our first home, we knew it needed some work. The house had been divided into units with a ‘new-ish’ kitchen on the second floor and a very old, very small kitchen on the main floor.

Initially, Adam and I thought we would wait before doing any renovations; settle in, learn about the house, figure out its quirks, save a little money and then start the planning process. But soon after we moved in, we realized many of our appliances were broken and needed to be replaced. This ended up being the small nudge needed to get the ball rolling and so the process of planning our Toronto home renovation begun. Seven months later (and just in time for Adam’s birthday), we received our building permit and were ready to get started!

P.s. If you are interested in seeing/revisiting what the house looked like prior to renovations, you can go check out my ‘pre-renovation house tour!

Toronto Home renovations - victorian style home - kitchen renoation - neoclassical kitchen design with slim shaker cabinets

My custom, slim shaker cabinet style kitchen made by Domani Design Group

INSTALLATION OF MY CUSTOM KITCHEN CABINETS

After over a year in the making, this past month our custom kitchen was finally installed!

Adam and I love to cook so when it came to designing our dream kitchen, we wanted to make it the perfect space to entertain. Adam’s only request was to have a large island where his friends could sit around and chat with him while he cooks. I, on the other hand, needed it to be super functional for content creation and full of natural light for photos. In the end, Adam got his large kitchen island and I got the neoclassical kitchen of my dreams. Of course we didn’t do it alone! In order to ensure the flawless execution of our dream kitchen, Adam and I turned to Domani Design Group here in Toronto.

Located in the Castlefield & Caledonia Design District, Domani Design Group is a family run business with over 40 years of experience in designing and building custom kitchens. In addition to being a distributor of luxury European brands like Pedini, Domani also specializes in custom cabinetry for both kitchens and bathrooms.

Having just splurged on a new stove, I wanted the cabinetry to compliment our dark navy blue La Cornue duel range. To achieve this I ended up going with a slim shaker cabinet profile in a matching navy blue. To me this felt both contemporary and classic, and I knew it would work well with the large ornate crown mouldings I was eyeing from Parsiena Design and the Crittall style back door Adam and I had designed for our newly enlarged back entrance. When it came to our counter tops and back splash, I choose a Calacatta Gold made of Porcelain as I knew it’s superior durability and resistance to stains would ensure it lasted a lifetime. To help bring out the caramel streaks in the veins we chose a complimenting House of Rohl faucet in a polished brass finish as well as elevated knobs and pulls.


FOLLOW ME ON INSTAGRAM @ISTHATSOH


Toronto Home renovations - victorian style home - bathroom renovations - waterproofing and tiling of checkerboard tile floors

Master bathroom renovations are underway and for the tiled floors I went with a checkered tile pattern in blue and white with a border to match!

MASTER BATHROOM RENOVATION UPDATE

With the completion of our white oak herringbone floors from Chestnut Flooring, we began the tile work for our master bathroom. Taking inspiration from the checkered pattern seen in the hallways of Palace of Versailles and incorporating my favourite colour blue, I was able to source a suitable match locally. The trick with this space however was that it was quite small. Since the majority of it would be covered by the tub, floating vanity and shower, using the right size tile was important. If the tile was too large, the pattern would not be as apparent and feel almost like an afterthought. Conversely, if the tile were too small, it would be distracting and all that you notice. In the end I found a suitable 8x8 tile that, although was not honed marble like my inspiration, was well proportioned for the space, offered the durability associated with porcelain, and complimented the white and blue ‘marble’ porcelain slabs we chose for the shower walls. To help further pull the room together I ended up choosing a large white oak wall mount vanity, also in a slim shaker profile, with a white quartz counter top to match our shower curb. For hardware, a chrome faucets, tub filler and shower fixture finished off the rooms colour palette with a ‘polished’ detail.

While tiling for the mater bathroom was underway, Adam and I turned our attention to the cast iron tub in the basement. When we first moved in, I would never take baths upstairs in our master bathroom. To me, there was something about the bathtub that never felt quite safe and I worried that if I filled it with water as well as my body weight, I would find myself falling through the floor. Instead I would take baths in the basement where I had a beautiful claw foot cast iron tub that would keep the water warm for what seemed like ages. It didn’t take long for the basement bathroom to become my little sanctuary and when renovations began, I had no intentions of getting rid of my beloved tub. Instead, I convince Adam that the best course of action was to move the cast iron tub upstairs! Once disconnected, Adam along with the help of his brother, began its great migration. In the process, however, we learned that only one side of the tub had been painted gold, and the other half was black! To remedy the situation, we had our painter Ariel from South Hill Property Care refinish the tub and paint the outside of it silver to match the chrome hardware. In addition to the tub, we also painted the bathroom’s small cast iron radiator in the same silver colour and I think they both turned out better than imagined. Once the paint was dry and the tiling of the master bathroom was complete, we were then able to resume moving the cast iron tub to the second floor and place it in it’s final position! I still can’t believe it!

Toronto Home renovations - victorian style home - custom staircase - spray gun painting staircase post and stair spindles

The posts of my custom staircase after they were finished being spray gun painted!

PAINTING AND TRIM WORK

Not only did Ariel refinish my cast iron tub, but he also worked diligently on all the fine carpentry. From baseboards to installation of my new doors, over the course of a month much of the trim work was completed.

Since Ariel was also in charge of painting the house, he was able to give the new stair spindles and posts a layer of paint prior to install by turning one of the second floor bedrooms into a paint spray booth. It was so cool watching him use a spray gun and seeing how quickly he can work with his machine. Almost makes me want to buy a spray gun myself.

I also spent some time restoring some original trim that I had saved from the original house prior to the demo. I used a heat gun to remove layers and layer of paint and restore them to their natural wood material. Once bare I then sanded them down, used a little wood filler to cover up any dents and imperfections before handing them back to Ariel for re installation. I love the way these look in the corners of the window trim and doors and actually had Parsiena Design reproduce them for me in plaster so that I could introduce them in the upstairs windows as well. Unfortunately, due to the nature of plaster, they don’t fair well in moisture rich places like bathrooms but this is exactly where the old wood ones would be the best option.

INSTALLATION OF OUR CUSTOM STAIRCASE

Once Ariel was finished painting the stair balusters and posts we were able to get our stair installer back in to wrap up the stairs. Adam and I are so happy with how our custom staircase turned out and love the Victorian detailing in the ornate design of the stair spindles.


ENJOYING THIS CONTENT? CHECK OUT SOME OF MY OTHER EPISODES AND BLOG POSTS!


BASEMENT RENOVATION UPDATES

Since the last episode, Adam and I have also made further headway on the basement. Once the main drain was installed we could begin concentrating on removing some of the disturbed soil from the basement and clearing out space. Adam and I plan to continue working on the basement this spring and will likely be doing some underpinning to the foundation on at least one side of basement while benching the other. More on this phase of our renovation project to come in future episodes so stay tuned!

Toronto Home renovations - victorian style home - refurbished cast iron radiators from Ironworks Radiators Inc

My refurbished ornate Victorian rads are finally ready for installation!

INSTALLATION OF OUR CAST IRON RADIATORS

As the weather started to warm up and spring was officially upon us, we were also able to get all our radiators from Ironworks Radiator Inc installed. I am so happy with how the refurbished vintage ornate cast iron radiators we got from them turned out and I love my chosen paint colours. Now installed, there is no denying the character and elegance they add to the main floor, and how well they play into the house’s Victorian heritage.

If you love Victorian style houses or are just looking to refurbish your rads at home, I highly recommend checking out Ironworks Radiator Inc in Etobicoke. They have an extensive stockyard of Victorian radiators located at the back of their shop and their inventory is always changing. They also work directly with Castrad Radiators in the UK to import brand new cast iron radiators in various styles including more modern sleek silhouettes.

Toronto Home renovations - victorian style home - custom staircase - spray gun painting

Painting of my custom staircase by South Hill Property Care

PAINTING THE HOUSE

Once Ariel was finished all the fine carpentry work, he was able to turn his attention to painting the rest of the house. We ended up going with Benjamin Moore’s ‘Chantilly Lace’ which truth be told caused him somewhat of a headache because it was so white that it took several coats to conceal inconsistencies in the walls. In total Ariel said he had to use about 4-5 coats on the walls and 3 coats on the trim to achieve a finish we were all happy with. Word to the wise, if you are thinking about painting your house Chantilly Lace prepare yourself for many coats!

Even though this is all I have to share today, there is still so much more work to be done at the house. All our appliances still need to be installed, Adam and I will be working on underpinning the basement in the spring, and our new tiles from Winckelman Tiles in collaboration with Deco Tile will be arriving soon! All this and more to come in future episodes!

Toronto Home renovations - victorian style home

My Toronto Victorian home currently undergoing a major renovation

Thank you so much for joining me today and for checking out my new Toronto home renovation series on Youtube. I am super excited to be modernizing a Victorian home while still keeping the charm of an old Victorian house. If you have any questions about my Victorian house renovations, what it’s like to live in Little Portugal, Toronto or recommendations for Toronto contractors, hit me up in the comments below!

Before I sign off, I’d also like to say a big thank you to Domani Design Group, Chestnut Flooring, Parsiena Design and Ironworks Radiator Inc for partnering with me on this project. I’m so excited to be working with local experts on our Toronto home renovations but want to reiterate that, like always, all opinions remain my own.

Until next time,

- Soheila

MORE BTS PHOTOS FROM THIS EPISODE


PIN THIS POST

EPISODE 7: A DATE WITH DESTINY - RENOVATING MY VICTORIAN HOME

home renovations in Toronto - install herringbone flooring with brass inlay from chestnut flooring

Installation in progress! My white oak herringbone dreams are about to come true!

RENOVATING MY TORONTO VICTORIAN HOME - EPISODE 7!

It’s been yet another busy month at the house as we power through more of the finishes. Following the delivery of our refurbished cast iron radiators from Ironworks Radiator Inc and the installation of our classical mouldings from Parsiena Design, Adam and I felt ready to take on the next stage of our Toronto Victorian home renovation, the flooring.

If you have been following my home renovation series for awhile, you may remember me spilling the tea on all my juicy home renovation plans. For those who are new, it has been a dream of mine to have herringbone floors! When Adam and I purchased this property as our first home together, one of the things that I was thrilled about was how old the floors were - odd I know but here me out. Down the line, I knew we would eventually do some renovations to our Victorian home, and when that time came, redoing the subfloor and installing new flooring would be a top priority. In the meantime, I made sure to plant the seed of herringbone floors in Adam’s mind by sharing interior inspiration with him on the regular. Little did I know my dreams were going to come true sooner than I had imagined!

It wasn’t long after Adam and I moved in that we noticed a few things were not as they seemed. Many of our appliances were not working and needed to be fixed, and since they were old to begin with, we debated whether that was even worth doing. In the end, the debate around fixing the appliances escalated into buying them which again escalated into widening the staircase (because 'how would we fit the washer and dryer upstairs otherwise’). All this turned out to be just the thing we needed to get the ball rolling and start planning our Toronto home renovation.

Having big dreams of what I wanted the floors to look like presented a few challenges for me. Victorian homes in Toronto tend to be long and narrow, and I wanted the pattern to be prominent and repeat several times across the width of the house. In order to achieve this look I required a smaller, skinnier plank size. Finding this very specific thing was not easy. Most suppliers I found carried a ‘standard size’ of 4-5 inch wide herringbone planks while I was looking for something slightly smaller in the 3-3.5 inch range. At one point I got so desperate, I called a restaurant with ‘skinny’ herringbone floors that had just opened to find out where they got theirs! It took me a few weeks and visits to numerous showrooms, not to mention ordering samples online from supplier in the US, to find the perfect product - but I found it!

home renovations in Toronto - install herringbone flooring with brass inlay from chestnut flooring - fireplace and ceiling medallion with egg and dart crown mouldings

The living room in my Toronto Victorian home is beginning to shape up really nicely!

CHESTNUT FLOORING #PARTNER

It was a sunny, fall Saturday when Adam and I drove out to Vaughan to visit Chestnut Flooring’s showroom. A long time Instagram follower of mine who also happened to be a flooring installer suggested I check out their showroom after seeing my stories and learning about my herringbone aspirations. Having installed many different brands of herringbone flooring in the Toronto area himself, he remarked at the quality of their engineered herringbone floors - and he was right. Chestnut Flooring not only had the size and colour we wanted, but it turned out that when compared to the other samples I had collected, their engineered herringbone floor product had a superior top wood layer/thickness. This meant if we ever wanted to refinish the floors down the line or needed to fade out a big scratch (knock on wood that never happens), we had the ability to sand them down and do just that! Perfect, right!?

We ended up having such a great experience working with Chestnut Flooring’s co-owner and showroom manager, Sherry, the first time around that as we progressed into our renovations and realized we would have to pull the second floor (phase 2) into the initial phase of our renovation they were the only showroom we needed to visit to source additional flooring. Not only do they offer a wide selection of products from both well-known domestic and international brands, including hardwood, engineered, laminate, carpet, vinyl and tile, but Sherry was able to find a match for our second floor that we just loved! A red oak, straight plank, solid hardwood that adds both warmth and durability to the second floor.


FOLLOW ME ON INSTAGRAM @ISTHATSOH


Part of my big herringbone design dream was to incorporate a boarder with brass inlay. Luckily, a week before installation I was able to find a supplier in the Toronto area but since it was going to take a few days to arrive, we ended up starting the installation on the second floor.

The flooring installation on the second floor went quick and took maybe two days. The red oak hardwood floors from Chestnut Flooring look so warm and inviting. You can really see the natural beauty of the grain when the afternoon sun shines into the room. Adam and I ended up getting enough material for both of the back bedrooms and the 2nd floor hallway. We do have big plans to tile our new bathroom but that will have to wait for another episode!

Just as we wrapped up the second floor installation the brass inlay arrived. I was so excited that my dream was becoming real right before my eyes that I stayed and watched the process. My flooring installer did such a great job incorporating the border inlay and really took his time polishing the brass before installation. He even kindly made two examples for me of how the corners could be done so I could feel confident with my choice. After a week, my date with destiny was upon me! The white oak herringbone floors were fully installed and looking even better then I could have imagined.

CABINETRY HARDWARE AND STAINED GLASS WINDOWS

While the flooring was being installed I was also able to finalize my kitchen cabinetry hardware and begin working on a design for a stained glass window in our main floor powder room. The window in the powder room is skinny but tall and although we love the natural light it provides, it really doesn’t provide any privacy. After commissioning a stained glass artist last fall to replicate one of the small panels in the front window that I noticed was missing, I thought I would work on a larger design with her for this space as well. My plan is to incorporate the same colours you can see in the front window and some of the same motifs, while also keeping the majority of it in the centre a clear, textured glass. Can you picture it?


ENJOYING THIS CONTENT? CHECK OUT SOME OF MY OTHER EPISODES AND BLOG POSTS!


Toronto Home Renovations - Victorian Style Home - mosaic tiles at Deco Tile showroom

Deco Tiles Showroom located at 142 Tycos Drive in Toronto

VICTORIAN MOSAIC TILE COLLABORATION WITH DECO TILE & WINCKELMANS TILES! #PARTNER

So, I have been keeping a secret from you. A few weeks ago I received an email from Winckelmans Tiles, a French tile manufacturer with factories in Northern France. Having been in business for almost 130 years, they are best known for their mosaic tiles that have been used in numerous hotel, commercial spaces and homes globally.

My first encounter with Winckelmans took place two years ago while designing the finishes for my Toronto home renovation. Their catalogue featured so many beautiful mosaic patterns but what caught my eye was their collection of Victorian tiles. Not only do they have the classic ‘Octagons and Dot’ pattern I was already completely charmed by but they also offer numerous classical Victorian border patterns as well. I was smitten and had to let them know!

Sometimes amazing things happen when you take a chance and put yourself out there, and I’m happy to finally be able to share that I am going to be collaborating with Winckelmans Tiles through their local distributor in Toronto, Deco Tile. Located on Tycos Drive in Toronto, I visited Deco Tiles showroom to place my order for the powder room and front entrance. I went with a classic super white and black Victorian ‘Octagon and Dot’ pattern with a border to match, and for the powder room I decided to extend the pattern and border up one of the walls. I can just picture it now, looking at your reflection in the mirror and seeing the Winckelmans’ pattern on the wall behind you, framing your silhouette. A dream I can’t wait for!

Home Renovations Toronto - victorian homes - Main Drain Replacement

Adam and I kicked off Phase 3 ‘Basement Renovations’ by replacing the main drain and installing a back water valve!

ADAM AND I KICKED OFF PHASE 3 - THE BASEMENT!

Once flooring was complete Adam and I decided it was finally time to kick off Phase 3 of our renovation. If herringbone floors were my dream, Adam’s was having an amazing entertainment space in the basement. Given all the structural work we had to do at the beginning of our renovation, our once finished basement was no more and it was time for us to pull the trigger on replacing and lowering the main drain as well as installing a back water value outside. This required us to not only demo the basement bathroom but begin breaking the concrete floor and digging a 3 foot trench. Of course with all our stuff stored in the basement, this was a big challenge but we were able to successfully knock off those first few tasks before we begin working towards finishing the basement in the spring. Now that the main drain has been replaced and the back water valve installed we can hook up the water, begin removing all the stuff being stored in the basement, and begin the cleaning process!

REFURBISHING OUR CAST IRON TUB

When Adam and I first moved into the house I would never take baths upstairs. For some reason I never felt the supports under the bathtub on the 2nd floor were strong and I was paranoid that I would fall through the ceiling if I filled it with the weight of water in addition to me. Instead I created a little candlelight sanctuary in the basement where we had this beautiful classic claw foot cast iron tub. I loved taking baths in the basement especially since the cast iron tub would keep the water so warm for so long. I knew even before we started the renovation that the tub wasn’t going anywhere and I was determined to have it installed in our new master bathroom on the second floor. Now that we were beginning to kick off phase 3 of our renovation, the tub needed to be disconnected and moved upstairs. During its ‘great migration’ we were not really surprised to learn that only half of the tub was painted gold! The previous owners had neglected to paint the back side of the tub and it was black! I did have plans to have it repainted and refurbished but having two different paints on it didn’t make that job any easier. In addition to the cast iron tub, I also had the small bathroom radiator painted in the same silver so as to match.

toronto home renovations - cast iron tub refinishing and painting

The great migration of my cast iron clawfoot tub begins but not until we have a chance to refinish and paint it!

The week following the completion of our herringbone floors we were able to prime the main floor and paint the crown mouldings. Once that was complete the kitchen cabinetry we had custom ordered from Domani Design Group was delivered and work began on the 2nd floor master bathroom. More on all of this to come in the next episode along with installation updates on our new custom staircase, phase 3 progress and so much more.

Thank you so much for joining me today and for checking out my new Toronto home renovation series on Youtube. I am super excited to be modernizing a Victorian home while still keeping the charm of an old Victorian house. If you have any questions about my Victorian home renovations, what it’s like to live in Little Portugal, Toronto or recommendations for Toronto contractors, hit me up in the comments below!

Before I sign off, I’d also like to say a big thank you to Ironworks Radiator Inc., Parsiena Design, Chestnut Flooring, Domani Design Group, Winckelmans Tiles & Deco Tile for partnering with me on this project. I’m so excited to be working with both local and international industry experts on our Toronto home renovations but want to reiterate that, like always, all opinions remain my own.

Until next time,

- Soheila

MORE ‘BEHIND THE SCENES’ PHOTOS FROM THIS EPISODE


PIN THIS POST