EPISODE 14: THE END OF AN ERA - RENOVATING MY VICTORIAN HOME

Toronto Victorian home - home renovations - basement renovation - finished basement - Toronto Blogger - TV room - Theatre room- recessed LED lighting - cove lighting

Our basement renovation is done! Can you believe it?

I always knew this day would come I just never realize how excited I would be for it. An entire home renovation summed up into 14 episodes. An era of learning new skills, building a home and designing something beautiful for my family. I know I will always look back on this chapter fondly but my heart is pulling me in a new direction. This basement renovation was definitely a challenging project (especially with a young child and a fraction of the bandwidth) but that only made the rewards so much sweeter. I stand ready for what’s next - A new design and DIY series called ‘Soh At Home’ where I can finally concentrate on turning this house into a home. Before I get into all of that though I have a lot to catch you up on.

Renovating My Toronto Victorian Home - Episode 14!

Introducing Eternal Love by Earth Aengel

Prior to microcement commencing, a beautiful contemporary art piece I had won in an art fundraiser was delivered and installed. It was such a pleasure to host the artist Earth Aengel over lunch and learn more about how the piece ‘Eternal Love’ came to be. I remember seeing it for the first time and I couldn’t take my eyes away. It was so interesting and I was immediately drawn to it. A Willow Tree covered in stained dichroic glass, soldered together with jewelry chain, vintage resin coated butterfly wings, a broach, shells, rock crystals, and Madonna’s half smoked, lipstick stained, clove cigarette. So when I found out it was mine, I was floored! I asked my dear friend and gallery co-owner Emma Bain to come over and join us in finding the perfect spot to display it. The three of us settled on a small wall near the dining room window where it can’t be missed.

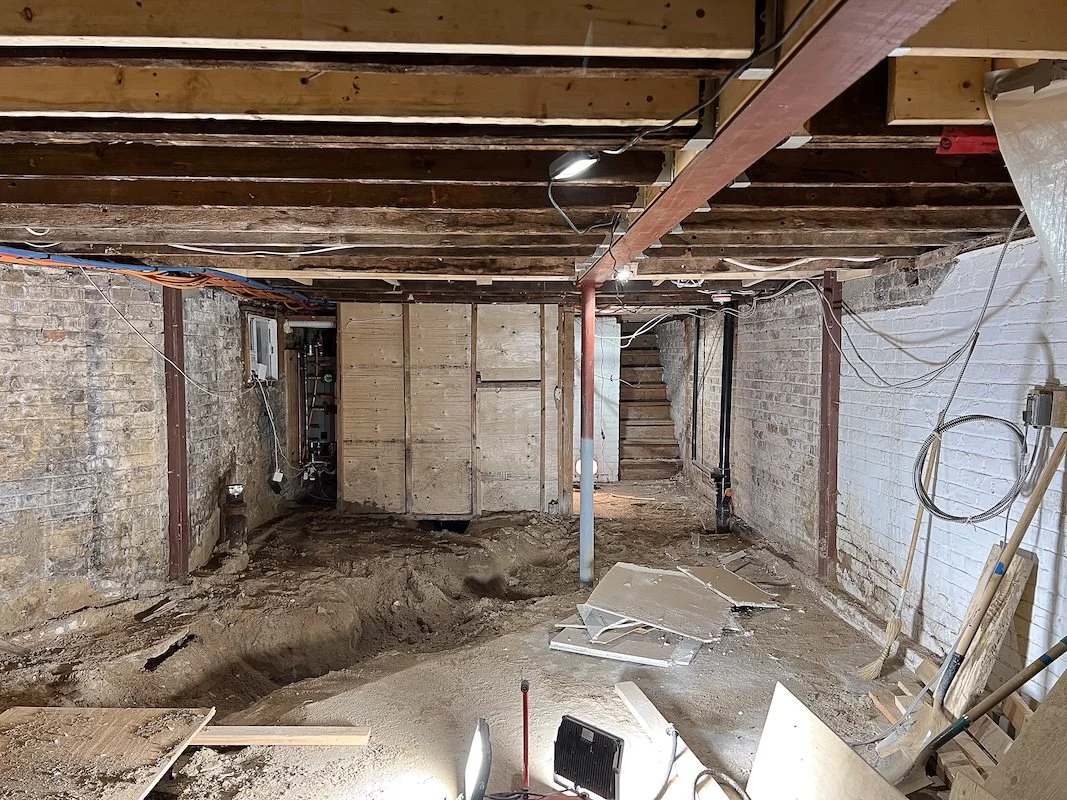
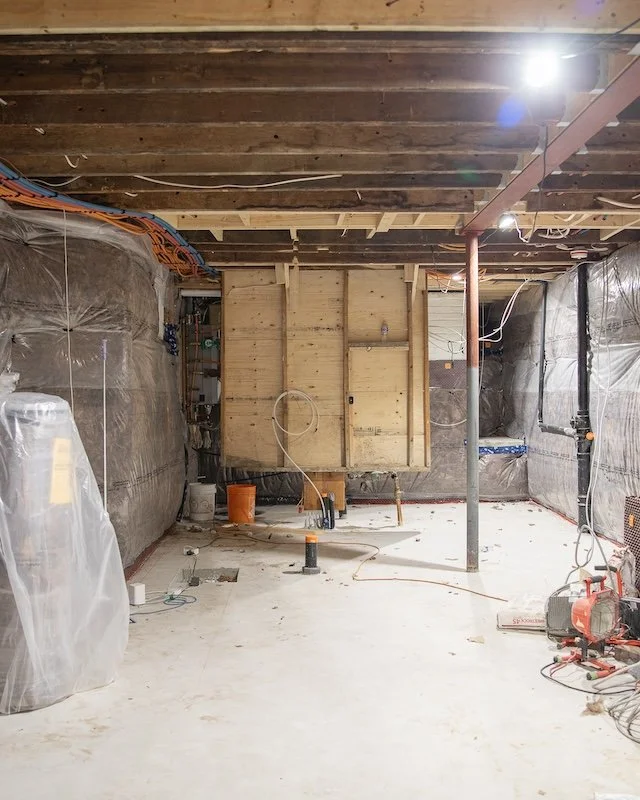
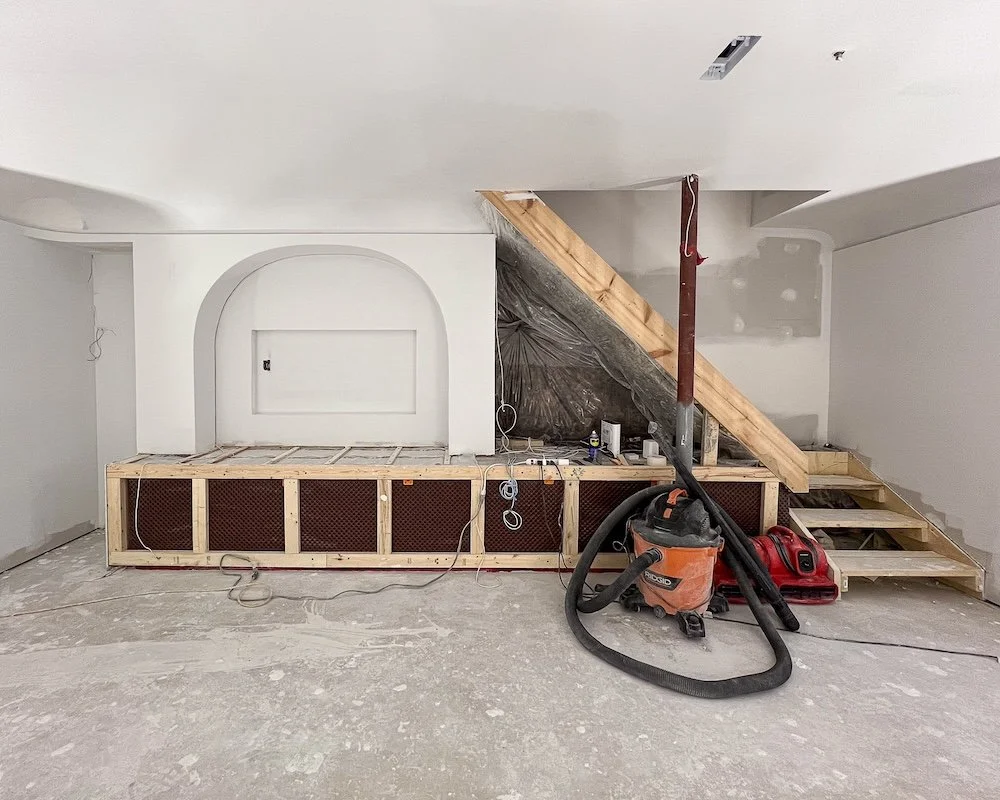
I also had a chance to paint the bright red structural pole in the basement matte white. The plan is to turn it into a light, which is a DIY project I look forward to sharing in my new series!

Victorian Home - toronto home renovation - basement renovation - microcement bathroom - microcement install - surface culture

Day 2 of Surface Culture transforming my basement bathroom/laundry room into a pink microcement heaven!

Microcement Bathroom Transformation

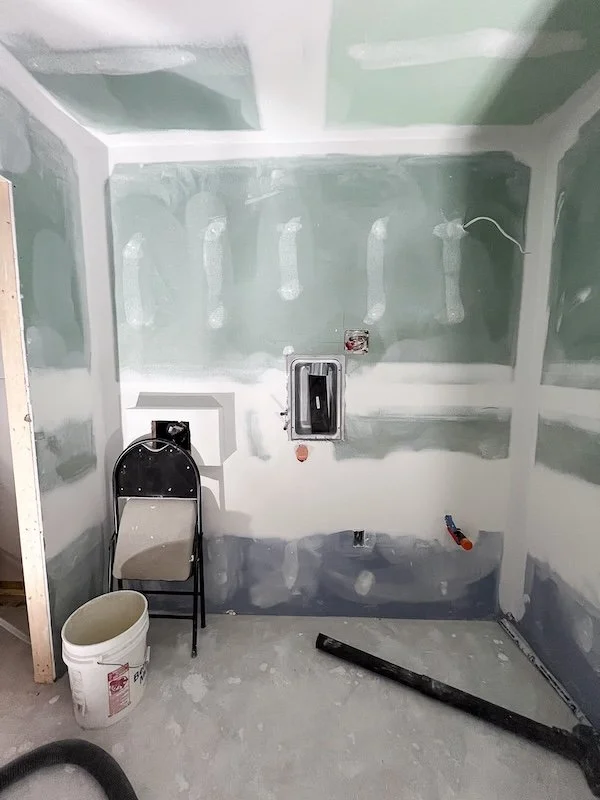
The first thing we needed to do following drywall was transformer our basement bathroom into a pink microcement heaven! Having never used or designed anything with microcement before it was incredible to witness this transformation! Unlike tile, microcement ends up being 3-4mm thick so proper application is crucial, especially in a bathroom setting. Experience and expertise is what we got from Surface Culture - masters in Venetian plaster, microcement and decorative surfaces. With over two decade of experience Hubert, the owner of Surface Culture, not only leads the charge when it comes to best practices for achieving a water tight seal, but he lives and breaths elegant finishes and offers certified advanced application courses to anyone interested in learning. For me, watching them work their magic on my basement bathroom felt like a mini crash course. Microcementing a bathroom my size typically takes about a week to complete as each layer requires time to cure and harden.


FOLLOW ME ON INSTAGRAM @ISTHATSOH


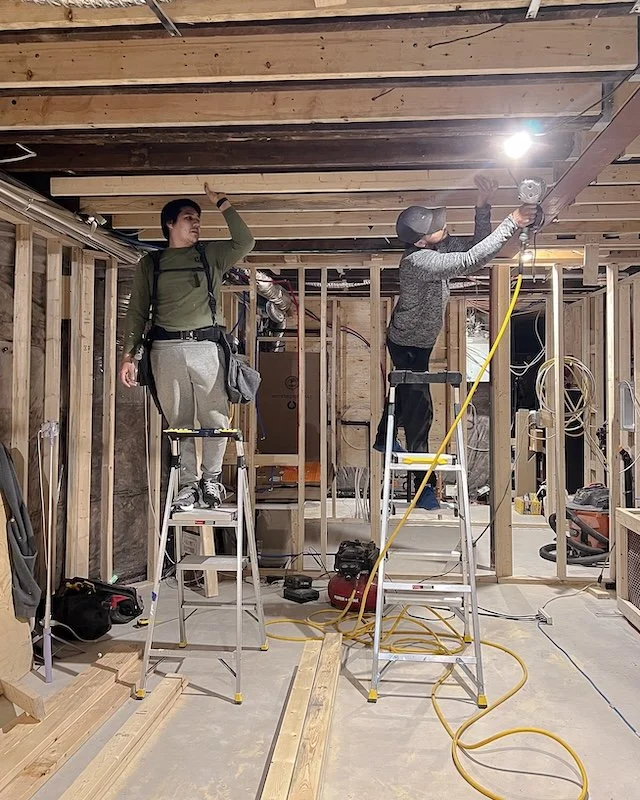
While work was being done on the bathroom my electricians stopped by to give us some working pot lights and plugs.

Victorian Home - toronto home renovation - basement renovation - microcement bathroom - green marble tile floors - checkerboard tiles - bathroom tiles

Honed checkerboard White Carrara and Ming Green Marble Tiles for our basement bathroom/laundry room

Checkerboard White Carrara and Ming Green Marble Tiles

We also moved ahead with installing the marble tiles I had spent months sourcing. A checkerboard mix of honed Ming green and White Carrara. I actually could only find the Ming Green tiles in a polished finish and had to place a special order for them to be honed. Despite the extra effort and cost I was SERIOUSLY excited to see them get installed!

Following the tiles came the staircase extension. I had asked my stair installer to turn the existing staircase stringer into a drum. He also needed to attach a winder box that finished with a bullnose step that the drum would then sit on. Needless to say he had his work cut out for him.

Following the completion of tiles in the bathroom we turned our attention to the other two rooms. Adam and I had picked a click-together engineered hardwood that floats above the radiant floors for both the TV room and office. Since it is not glued down it will have room to expand and contract without coming apart at the joints. Although we went with a more neutral colour (I needed it to work well with the incoming cabinetry for both rooms which were very different from one another) we did opt for a wide straight plank for the basement. A combination that strikes a balance between feeling substantial without dominating.

Victorian home renovation - home renovation toronto - basement renovation - theatre room - gold foil - gold ceiling - tv room

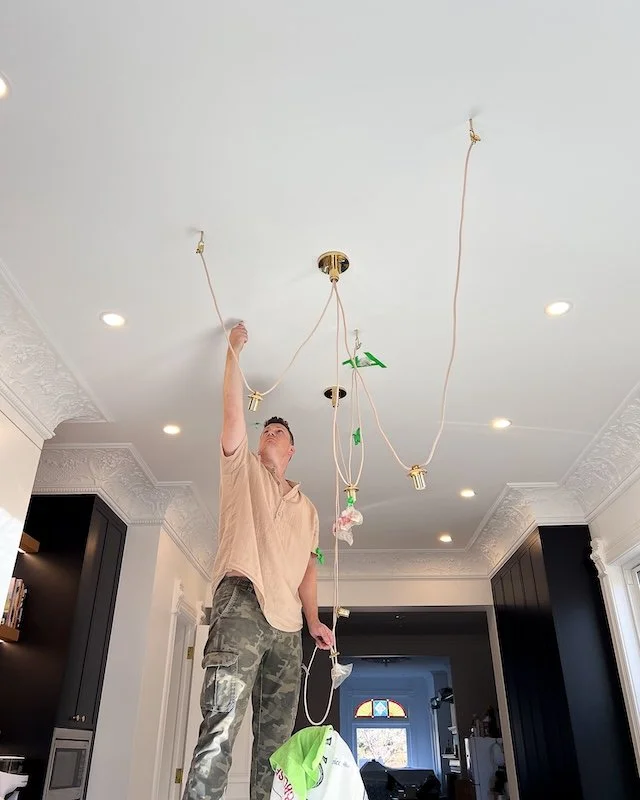
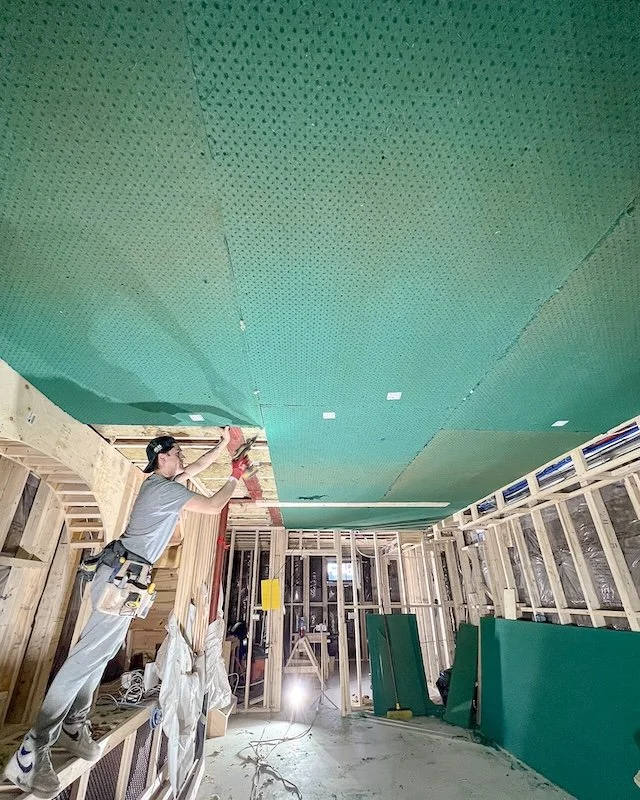
Me applying gold foil to the ceiling

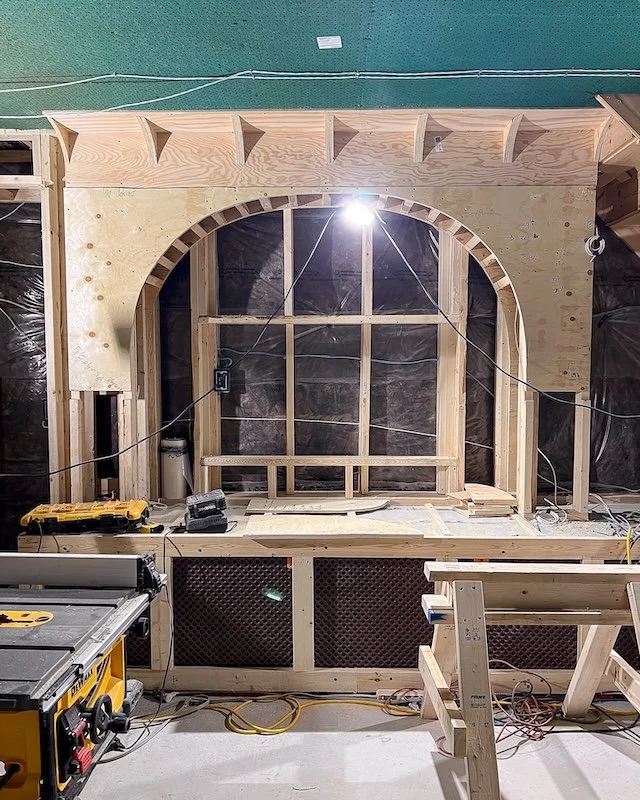
I Foiled The Ceiling For Home Theatre Vibes!

Following installation of the floors I laid floor protection on the basement floors and got to work on foiling the ceiling. Having never gold foiled anything before I was a bit nervous to start but quickly learned how fun and meditative the process can be. Still, with only naps and evenings to work on this project it took me weeks to complete. For those three or so weeks I looked like I was the host of a glitter party, with gold flakes in my hair and on my glasses. I was covered! It was so fun though and I am planning to share the DIY tutorial on Soh At Home if anyone out there is interested in learning more. I think it gives our TV room this enchanting feeling and, when paired with the recessed LED cove ceiling the room transforms into a real home theatre.

Next on the list was fine carpentry. We had three doors that needed to be hung along with all the baseboards and trim. While my carpenter got to work on that I tested my paint colours and after seeing the unexpected colour cast that the green patch sent onto the freshly foiled ceiling, I was starting the rethink my decision of doing three of the four walls green.

Victorian home renovation - home renovation toronto - basement renovation - theatre room - gold foil - gold ceiling - paint samples

I started having doubts about going green on three of the four walls after painted one wall and noticing the unexpected green cast it sent up onto the ceiling.

Once fine carpentry was complete Adam and I could move onto cabinetry! Before it could be delivered we first had to remove all the floor protection we had put down during the renovation. And I’m talking main floor too! It was so gratifying to see the floors again! It had been over a year since we first underpinned the basement and our son had never experienced the house without floor protection so it served as both a relief and reminder that we were nearing the end!

Victorian home renovation - home renovation toronto - basement renovation - theatre room - gold foil - gold ceiling

No more protective flooring! Felt so good to clean and organize prior to cabinetry install! So excited to finally cover the bench footing for good too!

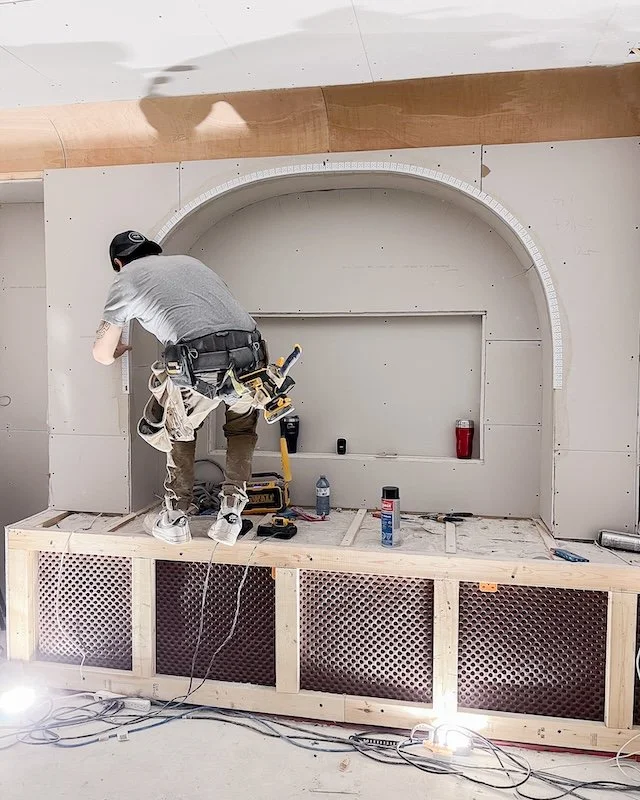
Round Slim Shaker Cabinetry for the TV Room

The more the cabinetry got pulled off the truck, the more excited I got about my final decision to go with a cream colour on three of the four walls and keep only one wall, the cabinetry wall, green. For the TV room I had decided on a round slim shaker profile which we would use on both the facia boards needed to conceal the bench footing and cabinetry doors. I had only seen this profile done in a solid wood material before so I wasn’t 100% sure how they would look in a custom paint finish but I actually really love them! It kind of has this mid century modern, 70’s feel to it but it also works well with the cove ceiling, TV arch and lighting, and the bullnose staircase. It’s that perfect mix of traditional and contemporary that I just love so much.

Following cabinetry install my carpenter returned to complete the under stair cabinetry which required some finicky work that could only be done on site. As always he did an amazing job and made it feel seamless with the newly installed fascia boards.

After that the painters got to work spraying all the baseboards, trim and doors. Adam and I were especially impressed by the transformation of the knotty pine staircase, so much so that I’m not sure I want to cover them in a runner anymore.

Once painting was complete we could move onto electrical finishes! This was such an exhilarating moment watching the TV arch, cove ceiling and all the other special features we had been working on for months come alive! Within the same week we also had our countertops and plumbing fixtures installed, leaving us with nothing left to do but enjoy!


ENJOYING THIS CONTENT? CHECK OUT SOME OF MY OTHER EPISODES AND BLOG POSTS!


Toronto Victorian home - home renovations - basement renovation - finished basement - Toronto Blogger - microcement bathroom - laundry room cabinets - ming green tiles - checkerboard tiles - surface culture

An incredible transformation by Surface Culture! So happy with my pink microcement bathroom and laundry room!

Final Thoughts on Our Finished Basement

Adam and I are so happy with how the basement turned out. I love our little microcement bathroom/laundry room, so much so that it’s almost a shame that we decided to try microcement in the basement and not in our master bathroom. It was also such a pleasure to partner with Surface Culture on this project as they did an extraordinary job and absolutely nailed the colour I wanted. Having working laundry machines in the house after so many years feels like such a luxury! I also love having a utility sink, and such a cute one at that! I actually look forward to washing a sweater by hand now and being able to hang it up to dry on the hidden bar above. The honed Ming green marble tiles and cabinetry are also the perfect colour match and when paired with the warm wood accents and hammered brass cabinetry hardware the whole room comes together perfectly!

Toronto Victorian home - home renovations - basement renovation - finished basement - Toronto Blogger - TV room - Theatre room - recessed LED lighting - cove lighting

This room is totally giving home theatre vibes!

The TV Room really feels like a theatre. I am so happy with the ratio of cream to green and how the indirect LED lights, ceiling cove, and gold foil really transform the room into a home theatre. I honestly can’t wait to start decorating this room and know it will soon become one of our favourite places to spend time together as a family and host get togethers. I’m also super excited to set up a little indoor jungle gym down here for our son and have already bought him a rope swing to try. The vintage Bang and Olufsen speakers I inherited from my parents also work so well in this space. Although vintage, they are still of a contemporary style contributing to that perfect mixture of traditional and contemporary that I can’t seem to get enough of. I also love that you can’t tell there is big concrete bench footing hiding behind the fascia boards under the TV arch and am so happy with the use of that space. We now also have tons of storage and an entire dry bar area to set up. You might notice that we ended up going for a butcher block style countertop for the bar. Since this is the only area in this room that required a countertop we decided to go BOLD with the countertop to help it really stand out from both a horizontal and vertical viewpoint. I’m planning to fill the beverage fridge up with a range of refreshments and even add a snack basket to create a proper ‘refreshment station’. Adam was super impressed with the staircase transformation! Our painter Ariel did an fantastic job filling in all the knots on the knotty pine staircase and finishing it so nicely.

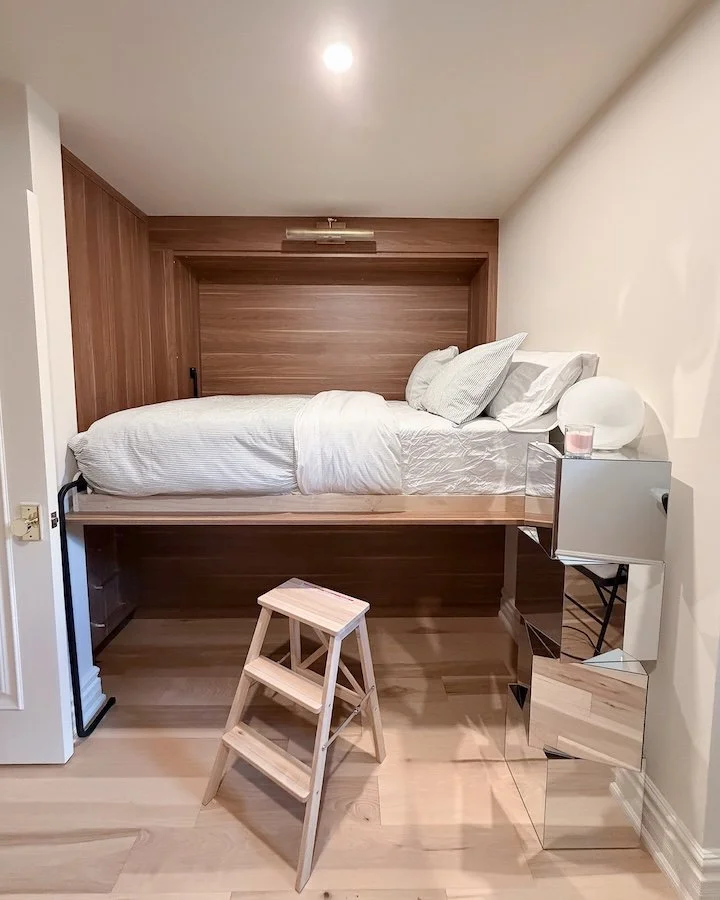
The office also has a warm, bright contemporary feel. I really love the look of the prefab walnut material we used for the cabinetry and how much storage we now have. I also love that my desk can transform into a Murphy bed should we need an extra room for guests. I can’t wait to set up my desk and get settled into the space and I know Adam is too.

With that being said, if you are interested in seeing how I DIY and decorate my Toronto Victorian home post renovations I encourage you to check out my new series ‘Soh At Home’. In episode one I tackle a master bedroom refresh which you can now watch on my YouTube channel! I also have a new Instagram account @SohAtHome where you can follow my DIY and design journey so make sure to check it out and give it a follow as well.

Other than that, it has been an absolute pleasure to share my basement renovation with you and want to reiterate how thankful I am for all the support we have received along the way!

Before I sign off, I’d also like to say a big thank you to Surface Culture for partnering with me on this project. I’m so excited to be working with local industry experts on our Toronto home renovations but want to reiterate that, like always, all opinions remain my own.

Until next time,

- Soheila

MORE BTS PHOTOS FROM THIS EPISODE


PIN THIS POST

Home Renovations Toronto - Victorian Home - Finish basement episode 14

SOH AT HOME - EP1- MASTER BEDROOM REFRESH

Toronto Home Renovations - Master Bedroom refresh - after photos reveal

Welcome to episode 1 of my new DIY and design series ‘Soh At Home”!

TORONTO VICTORIAN HOME - MASTER BEDROOM REFRESH!

I can’t believe it has taken me this long but now that our bigger Toronto home renovations are coming to an end I can finally do something about our master bedroom!

For the past four years, our primary bedroom has really taken a back seat. Adam and I have done nothing to it since we moved in and I’m ashamed to admit you can still see putty marks from where the previous owners had hung their pictures. Needless to say it was about time we did something and what a perfect project to kick off my new ‘Soh At Home’ series with!

In this new series we are going to be focused on quicker and smaller DIY’s and interior design projects aimed at turning this now nicely renovated traditional home into a house that reflects our taste and contemporary sensibility.

Previously, our master bedroom was a bit of a dumping ground. My ‘office’ took up the entire bay window area, there was clutter everywhere, a miss-mash of ‘furniture’ and window screens being stored in the corner. There was also an ungodly patch of wall behind our bedroom radiator, the ‘ceiling medallion’ was a small piece of round wood, and our ceiling fan was so old controlling it with the remote was always a hit and miss. In addition to my normal displeasures regarding the state of the primary bedroom, I have also been working on a separate linen closet project and had been storing all of the stuff from that in my master bedroom. Ugh.

The primary bedroom had so much potential though! The stained glass bay window were what made me fall in love with this room and the king size bed I inherited after my mom got rid of her Florida condo had been an absolute godsend. Regardless, we needed to get to work!

I roped in a few partners to help me with this project - so I didn’t have to do it alone - and I am really excited to share my design plans for this room which includes switching out our cast iron radiator for a newly refurbished ornate cast iron Victorian radiator from Ironworks Radiator Inc., removal and installation of a new plaster ceiling medallion from Parsiena Design, and installation of some much needed window treatments from Blinds To Go!


FOLLOW ME ON INSTAGRAM @ISTHATSOH


Toronto Home Renovations - Master Bedroom refresh - cleaned out and ready for demo

Our primary bedroom cleared out for a little demo before we begin painting!

A Green Master Bedroom

Green is a colour I have never really gravitated toward but after living in Adam's childhood bedroom for months during our Toronto home renovations, it totally grew on me. Green bedrooms are supposed to promote a sense of calm and comfort, reduce stress and foster a soothing sleep environment. The colour green also symbolizes growth, rejuvenation, and a connection to nature which all sounds pretty good to me. I mean, I get it! It’s also considered a ‘heritage paint’ colour so we are very much staying ‘on brand’ with this paint colour.

Before I could begin painting, I needed to get our cast iron radiator removed so I could tackle the ungodly patch hiding behind it. I actually had to psych myself up for this mini-demo because even though ‘Demo Soheila’ is a personality I like to get down with, you never know what you are going to find when you open a wall in an old house. Before I even started I knew this one was going to be messy as lath and plaster still make up the walls in part of this room. Thankfully, nothing remarkable was behind the patch and I was able to open and close it in an afternoon. After a few layers of mud the new patch of drywall flowed seamlessly with the existing lath and plaster wall and I was able to begin painting.

Toronto Home Renovations - Master Bedroom refresh - Parsiena Design ceiling medallion installation

My new ceiling medallion from Parsiena Design!

Ceiling Medallion Incoming!

Since my excitement for this master bedroom refresh and inability to sit still always gets the best of me, I started painting the room even before Parsiena Design installed our new plaster ceiling medallion. If you are unfamiliar with Parsiena Design, they are a manufacturer of architectural and decorative elements like mantels, plaster mouldings, ceiling medallions, and so much more. It was them that I turned to for my beautiful main floor crown mouldings that I (and apparently many of you) am obsessed with. So when I decided to take on this master bedroom refresh, I knew I definitely wanted to work them them again. They have an extensive catalogue of products to browse on their website which is exactly how I found our new ceiling medallion. I think it’s elegant, classic, and fits well with the other traditional elements I have planned for the room.

Toronto Home Renovations - Master Bedroom refresh - Parsiena Design ceiling medallion installation

Installation of our new ceiling medallion from Parsiena Design


ENJOYING THIS CONTENT? CHECK OUT SOME OF MY OTHER EPISODES AND BLOG POSTS!


Victorian Cast Iron Radiators - Like Jewellery For Your House

Speaking of traditional elements, a month prior to starting this project I paid a little visit to my friends at Ironworks Radiations Inc. During phase 1 of our home renovation I had purchased two brand new Castrads cast iron radiators from them for our kitchen along with two newly refurbished ornate radiators for our front entrance and dining room.

Not only do radiators give off amazing heat but I love the way Victorian cast iron radiators look after they have been freshly refurbished. Their freshly painted motifs add a design element to any room that I liken to jewellery and I was excited to add another piece of jewellery to mine.

During our visit to the Ironworks stockyard, owner of Ironworks Jen personally walked me through options for our master bedroom and we settled on a beautiful 10 section, 2 column Gurney with a decorative scroll depicting a vine leaf motif. So fitting with the green, right!?

Ornate Victorian Radiators waiting to be refurbished in the Ironwork Radiators Inc. stockyard.

Except, remember I wanted the radiator to stand out, so I went with a ‘pale gold’ for my custom colour which I think compliments the green walls so well while also showing off those jewellery like details.

To really bring it all together and make it look extra pretty once installed, I chose a brass radiator valve, specifically the Windsor TRV valve from Castrads (which is only available at Ironworks), along with some new brass shrouds and base plates.

Like, what an upgrade!

Bedroom Drapes and Curtain Ideas

One thing I am kicking myself for not doing sooner is getting window treatments for our primary bedroom. Would you believe this whole time poor Adam has been sleeping with a stream of ambient light from a street lamp positioned 15 feet from our master bedroom bay window. Poor guy has been getting blinded at night affecting his ability to sleep. So when I told him we were heading into Blinds To Go’s new Castlefield showroom, he was rushing me out the door.

With window measurements in hand, we explained our needs and my design ideas with a Blinds To Go design consultant who was then able to walk us through all the little details of window treatments. From types of treatments, mounting styles, mechanisms and hardware we were able to figure out everything we wanted in one visit. Although I am no stranger to Blinds To Go (I used them for my previous apartment and for a rental property I managed a refresh for) their new showroom really left a lasting impression. The upper floor has the dreamiest atmosphere, full of fabric samples to browse and inspire. You can also experience the excitement of motorized shades in their ‘smart room’. But don’t blame me if this becomes the thing you didn’t know you needed in your life. Their team is also very knowledgeable and engaged in making sure you achieve your window treatment goals and aesthetic. Plus they have thousands of fabrics to choose from. Oh, and did I mention you can go online to their website and order free fabric samples before even stepping into their store? Literally no commitment, just to help you get inspired.

For the master bedroom we are doing Romans in Julia, Seafoam (left) and black out drapes in Linen Cotton Weave in Natural (right)

We ended up choosing a combination of roman shades and drapes for our master bedroom bay window, and another small roman for the balcony door. The drapes will have a white black out curtain liner while the roman shades will have a light filtering backer. In terms of fabric we went with ‘Linen Cotton Weave in Natural’ for the drapes and ‘Julia, Seafoam’ for the romans which has a beautiful embroidered floral motif.

In addition to our master bedroom we also ordered window treatments for the nursery and back bedroom! All romans shades, all in ‘Dow Cloud’ and all black out! I just know this is going to help Cyrus nap better during the day because his room also gets a lot of light, which is yet another reason I am kicking myself I haven’t done this sooner.

Toronto Home Renovations - Master Bedroom refresh - blinds to go at home measure visit

Following our showroom visit, a Blinds To Go team member came to our house to verify measurements.

Within a week of our visit to the showroom a member of the Blinds To Go team came to our house to verify measurements. They walked us through how things would look once installed and ensured we were all on the same page before processing the order, which I really appreciated. Once the order was officially placed all we had to do was wait. Production took about three weeks but the difference these window treatments make on not just the room but our ability to have a good nights rest is life changing.

Toronto Home Renovations - Master Bedroom refresh - master bedroom makeover idea

The final result! A beautiful, calming master bedroom we just love!

Overall, I am extremely happy with how this master bedroom refresh turned out. I love how soothing the green walls are and now with the newly refurbished radiator we got from Ironworks Radiators Inc., the elegant ceiling medallion from Parsiena Design and the life changing window treatments from Blinds To Go, our master bedroom has finally been elevated to a level it deserves! Adam and I even switched out the ceiling fan for a new, more modern ceiling fan with a remote that actually works, so things are very much on the up. I do want to spend more time decorating this room, adding furniture, and maybe some built-ins, but those are projects for another episode!

Thank you so much for joining me for my master bedroom refresh. As always, if you have any questions feel free to leave them below and don’t forget to subscribe to my Instagram and YouTube channel. Special thanks as well to all my partners who teamed up with me for this project, I would not have been able to achieve this transformation without your help and I appreciate the faith you have in me that makes you want to partner with me, again and again.

Until next time,

- Soheila

*as always, all opinions remain my own


PIN THIS POST

Toronto Home Renovations - Master Bedroom refresh - pinterest

EPISODE 13: FULL SPEED AHEAD - RENOVATING MY VICTORIAN HOME

We are half way through finishing our basement and we have a lot to catch you up on!

* Please Note - Some links in this blog post are affiliate links *

Renovating My Toronto Victorian Home - Episode 13!

After a 6-month ‘new baby break’, we are back!

In the last episode we finished a basement underpin on our Toronto Victorian home (a much needed transformation from the ‘scary sandbox’ below it once was) and in today’s episode we begin work on finishing the basement!

From framing to HVAC, plumbing, and electrical, we have made some really great progress on our basement renovation over the last few months so first things first, let’s bring you up to speed.

Come fall we were itching to get back at it and begin basement renovations again on our Toronto Victorian home

BASEMENT RENOVATION

Adam and I always planned to renovate our basement. The structural work we did at the beginning of our Toronto home renovation left it in complete disarray. So 10 months after we moved in and found out I was pregnant, we decided to pull the trigger on underpinning our basement. With a baby on the way we were eager to make the basement space livable and inviting, especially now that the room we used as our ‘at home office’ was about to be transformed into a nursery. The plan has always been to divide the finished basement up into multiple rooms, a front office for Adam with a Murphy bed so it can double as a spare bedroom should we need it; a large TV/basement theatre room with a kid corner for toys; and finally a bathroom and laundry room combo. To put into words my excitement, Adam and I haven’t had a working laundry machine in the house since we took possession three years ago, so the concept of actually having a laundry room feels like such a luxury! Once the underpin was complete our basement went from a chaotic 6 feet to nearly 8’4” with radiant floor heating and a newly poured concrete floor.

FULL SPEED AHEAD!

Come November, Adam and I were finally getting the hang of being new parents and felt we MIGHT have the bandwidth again to continue working on the project… along with other house things we had on our running to-do list.

One such item included some masonry work on the side of a house - adding a lentil to a window, replacing a few bricks, and doing some much needed tuck pointing.

INTRODUCING OUR NEW KITCHEN CHANDELIER

Adam and I also finally purchased some more lighting! Haha! It’s comical how slow I am on buying light fixtures but we finally found the perfect kitchen chandelier for over the island. A push-and-pull between organization and chaos, it hangs like a necklace from the ceiling. With delicate oval-shaped milk glass globes and polished unlacquered brass elements, it adds the je ne sais quoi we were looking for. Not too much to overpower our gorgeous crown mouldings or make the room feel stubby, and just elegant enough to hold your gaze.

Lastly and in preparation for framing, we had blanket insulation installed on all exterior walls in the basement.

Once December rolled around we were full speed ahead with finishing the basement. The first crew that arrived were the framers. They had quiet a challenge ahead of them because not only did they need to build all exterior and interior walls but until the HVAC guys turned on the radiant floors, they couldn’t 100% secure the bottom plates into the concrete.

As soon as we had a few walls to work with, our HVAC crew were able to come through and within a few hours we could see exactly where all the radiant floor loops were. With the framing secured down our HVAC contractor could rig up the basement HRV system, install air vents and drill holes for a new bathroom fan and laundry dryer exhausts.

Home renovations Toronto - radiant floor heating - in floor heating loops - basement renovations - toronto blogger

FOLLOW ME ON INSTAGRAM @ISTHATSOH


During week one of ‘finishing our basement‘ the plumbers did a site visit and pointed out that the drain hole we had left open during the concrete pour was 2 inches too far into the room. If we wanted to place our bathroom wall where we were planning, we needed to remove a chunk of it so the plumbers could actually hook up the tub drain. If you have never cut concrete before, it is a messy and unpleasant job… you do not want to be breathing that stuff in. Thankfully Pablo come in over the weekend to carefully grind down and chip away at the concrete so on Monday the framers could finish all interior walls and the plumbers could begin working on the tub insulation, waterlines, venting and pipes.

Victorian home interior - Home renovations Toronto - toronto blogs - basement renovation

The hole for the tub drain that we needed to grind away at for the plumbers

SIDE ITEM: Since we never actually vented the plumbing system out of the roof and since everyone was on site at the same time, we finally checked that task off our to-do list too!

Once the plumbing was complete, the framers could continue their work starting with building the TV arch and framing out the concrete bench. Adam and I want to conceal the concrete bench as much as possible so we thought using it as a stand for our TV would be the perfect way to do just that in our fancy new ‘basement theatre room’. In the office we will hide it with some built-in cabinetry that will house the Murphy bed. Ideally we want to get a Murphy bed with a desk so that I can also set up my home office to edit videos and write blog posts like this one. With Christmas around the corner though there was only so much we could accomplish. We did manage to complete the arched shower niche, frame the tub and level the ceilings but the TV room cove ceiling detail needed to wait until the new year.

Like a horse out of the gate, 2025 began with us closing all our remaining permits!

Our electricians also arrived to completely wire up the basement in just a few short days. During this time we also had our stair guy do a site visit. Now that we had completed an underpin we had to build an extension for our exiting staircase. Not only was he able to measure up the space for our new extension but I was also able to share some design ideas I had been noodling and iron out the details with him.

With the majority of the framing now complete it was time to begin work on one of the more intricate details I had planned for the basement. Since the middle room was going to be transformed into a TV/Entertainment space, I wanted to create a cozy, theatre feel by utilizing only indirect lighting. To do this I wanted to create a ceiling cove with a recessed LED light channel that projects light upwards, bouncing off the curved ceiling and illuminating the room. This, in addition to recessed LED lighting in the TV arch and floating shelves in the bar, would make up the majority of the lighting in this room, giving it a real relaxing feel.


ENJOYING THIS SERIES? CHECK OUT SOME OF MY PREVIOUS EPISODES & BLOG POSTS!


CEILING SOUNDPROOFING

Before the framers could even begin work on the TV Room ceiling cove, we first needed to finish all the soundproofing in the ceiling of the TV room. This meant our insulation crew needed to come back to pack safe and sound between each joist before securing Sonopan panels directly onto them. Since Adam is going to have his office in the basement we also want to make sure that the sound from the TV room doesn’t travel between floors or rooms as much as possible. To achieve this we would be packing more safe and sound insulation in the walls a few weeks later as well as more Sonopan panels on the interior walls and ceiling.

CEILING COVE WITH RECESSED LED LIGHTING

With the ceiling now completely soundproofed, the framers could begin building out walls and creating boxes for our ceiling cove detail. Once several of these boxes were built they would attach them to the walls, ceiling and bulkheads to create our curved ceiling effect. This one design detail alone took over a week to complete and getting those 90 degree corners just right were definitely one of the more challenging part of the entire project.

Toronto Victorian Home - Home renovations in Toronto - Basement renovations - toronto blogger - Basement Theatre room - soundproofing - cove ceiling with indirect ceiling lighting

The basement theatre room is now complete with our cove ceiling detail finished

I also had the guys anchor these heavy duty 360 swing hooks into the steal beam so we could create a little jungle gym for baby. Although he might be a little young for all the attachments now, as he grows we can hang ladders, swings, gymnastic rings, ropes, etc onto them and keep him and his friends entertained when they come over to play.

With the framing now behind us and insulation/soundproofing complete, we called our drywall crew in to hang some sheets. I was so ready to close up the walls and begin drywall. We were two months into basement renovations and seeing those drywall sheets go up felt like all our hard work was paying off. Drywall though definitely brought its own set of challenges and required a lot of attention to detail. You’d think drywall would be one of the easier stages in a renovation but Adam always says it’s the hardest because it can cause a lot of headaches down the road if special attention is not paid. Regardless of the challenges it was really cool to see all the little details come together.

Feels so good to see all the little details come together after drywall. I love how the ceiling cove turned out!

BATHROOM IS PREPPED AND READY FOR MICROCEMENT!

Over the past few months Adam and I have been learning a lot about microcement! We both love the look of a microcement bathroom but needed to get a better understanding of how it is applied in a bathroom setting to make it waterproof. Since we were in the middle of building out the basement bathroom we also wanted to gain a better understanding of what we needed to do to prepare the bathroom (especially the tub area) for a microcement application. Interestingly enough, its not the exact same steps as what you would normally do for a tile application.

What we learned and ended up doing was using a fiberglass underlayment called DensShield in and around the tub shower area and a moisture resistant drywall in the laundry machine section. This was because the laundry area will have cabinetry and not be exposed to a lot of water where as the tub/shower will be exposed to a lot of water and traffic. Also since microcement ends up being about 3-4mm think once installed and cured, you need a strong underlayment to avoid dents when hit. That’s not all, when the mudders came to tape and finish off the drywall, we also had to get them to do a ‘level 5’ on all the DensShield so as to have a smooth surface to later apply the microcement to. We also had to cover all cracks, knots, and screw holes in the plywood tub frame with mud and get the whole space ‘paint ready’ meaning everything needed to be sanded and primed as if you are ready for painting.

After taking the time to learn about microcement this past season, Adam and I are happy to share that we are going to be moving forward with microcementing our basement bathroom and that we have also secured a microcement master as a partner, Surface Culture. If you are interested in seeing what a microcement bathroom looks like or learning more about its application and what makes it waterproof, we’re going to be sharing a lot more about it in the next episode!

Thank you so much for checking in once again on our Toronto home renovation series and reading this blog post. If you have any questions about renovating a Victorian home, what it’s like to live in Toronto or need recommendations for Toronto contractors/suppliers, hit me up in the comments below!

Until next time,

- Soheila


PIN THIS POST

Home Renovations Toronto - Victorian Home - Finish basement episode 13