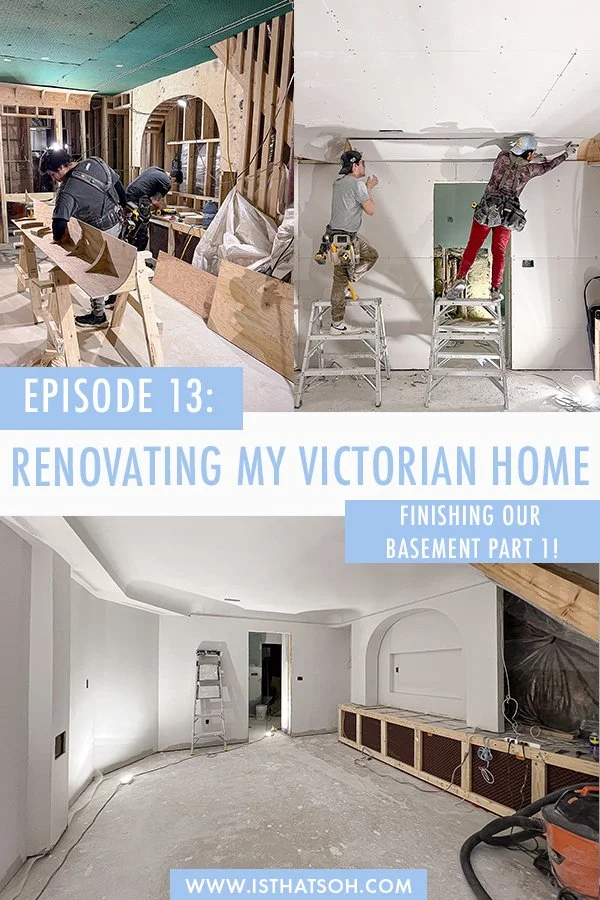
EPISODE 13: FULL SPEED AHEAD - RENOVATING MY VICTORIAN HOME

We are half way through finishing our basement and we have a lot to catch you up on!

* Please Note - Some links in this blog post are affiliate links *

Renovating My Toronto Victorian Home - Episode 13!

After a 6-month ‘new baby break’, we are back!

In the last episode we finished a basement underpin on our Toronto Victorian home (a much needed transformation from the ‘scary sandbox’ below it once was) and in today’s episode we begin work on finishing the basement!

From framing to HVAC, plumbing, and electrical, we have made some really great progress on our basement renovation over the last few months so first things first, let’s bring you up to speed.

Come fall we were itching to get back at it and begin basement renovations again on our Toronto Victorian home

BASEMENT RENOVATION

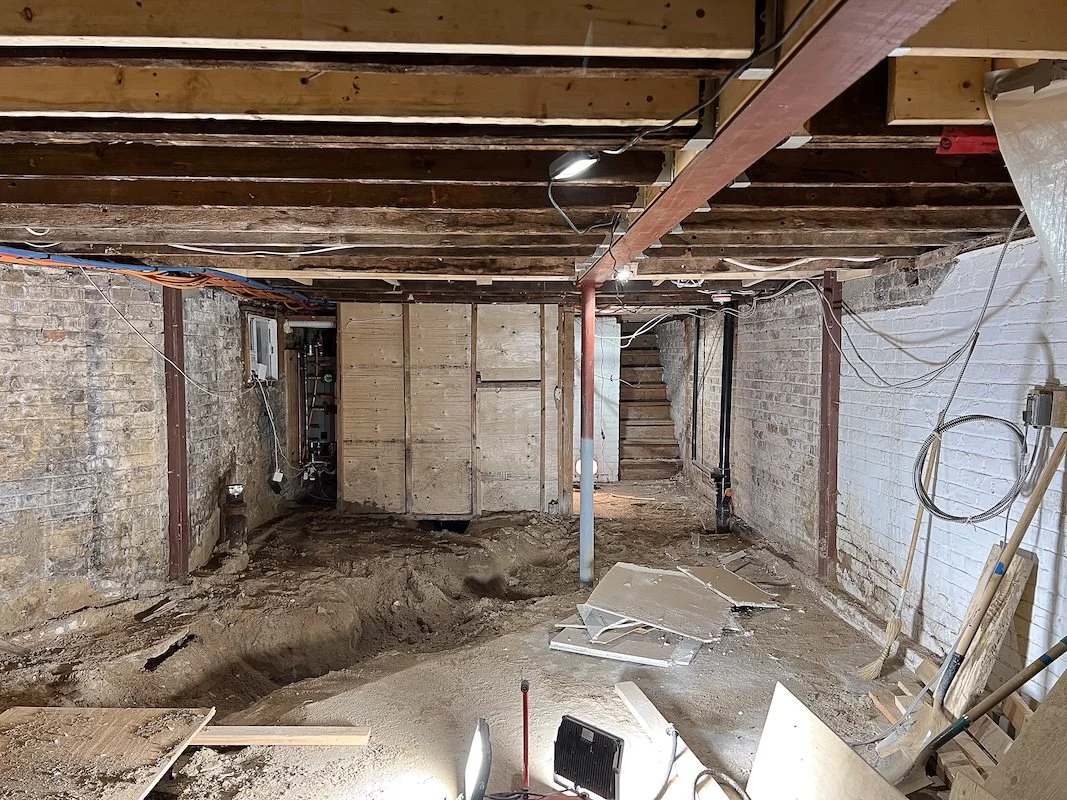
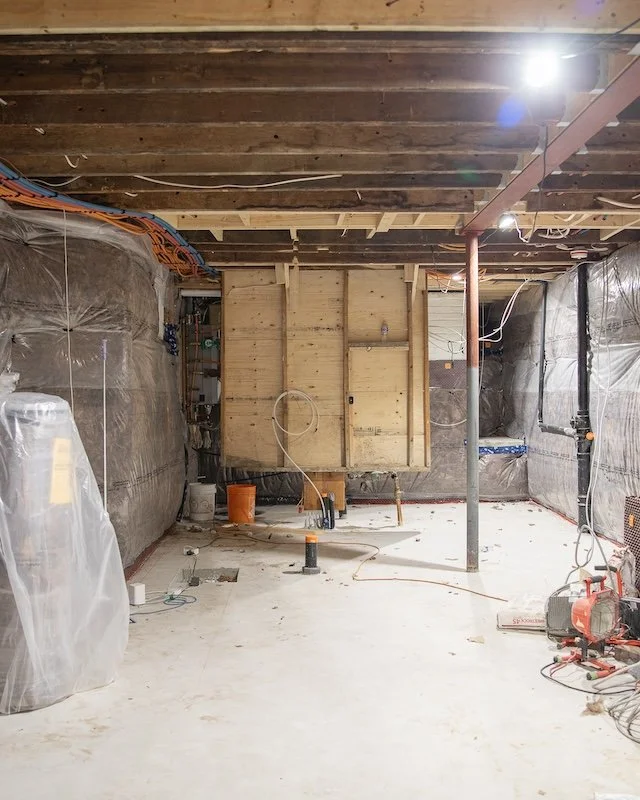
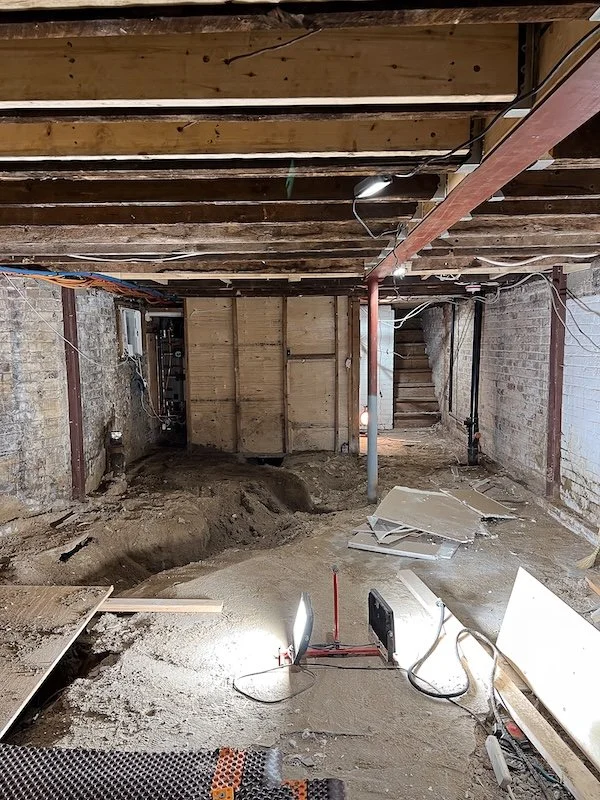
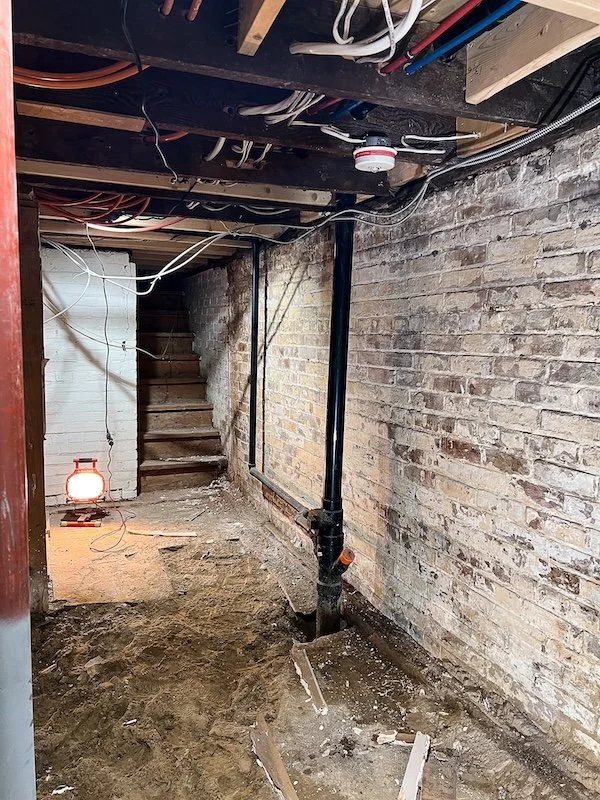
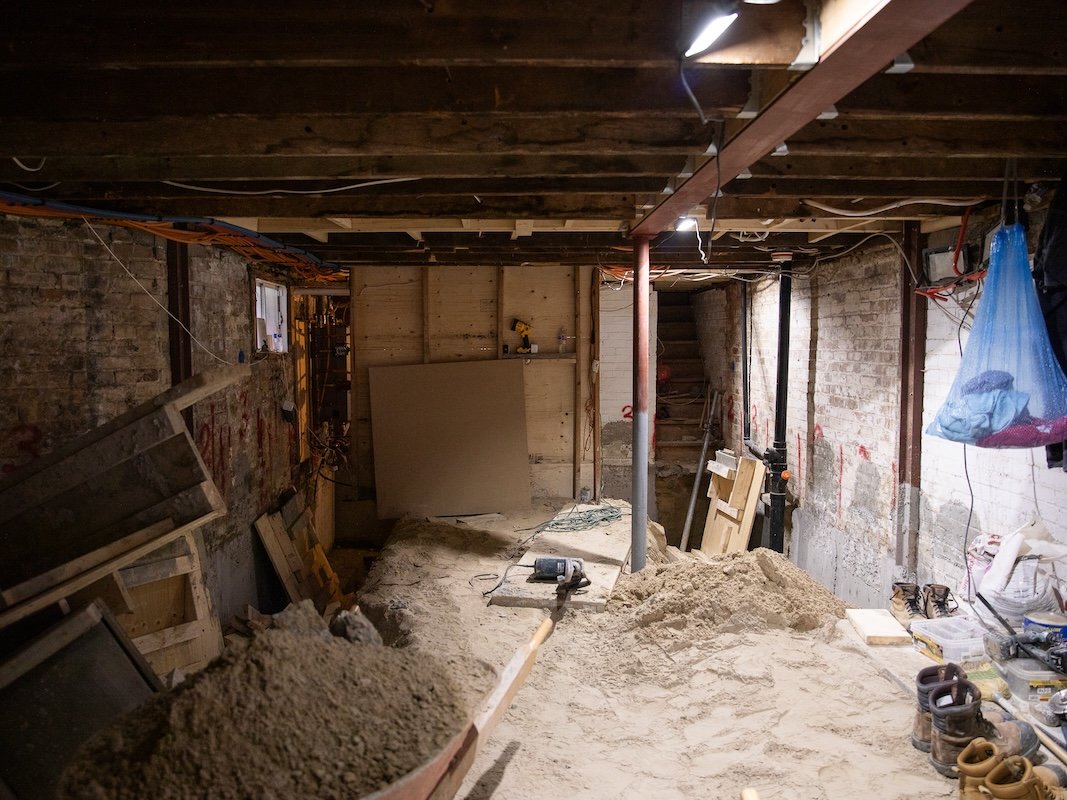
Adam and I always planned to renovate our basement. The structural work we did at the beginning of our Toronto home renovation left it in complete disarray. So 10 months after we moved in and found out I was pregnant, we decided to pull the trigger on underpinning our basement. With a baby on the way we were eager to make the basement space livable and inviting, especially now that the room we used as our ‘at home office’ was about to be transformed into a nursery. The plan has always been to divide the finished basement up into multiple rooms, a front office for Adam with a Murphy bed so it can double as a spare bedroom should we need it; a large TV/basement theatre room with a kid corner for toys; and finally a bathroom and laundry room combo. To put into words my excitement, Adam and I haven’t had a working laundry machine in the house since we took possession three years ago, so the concept of actually having a laundry room feels like such a luxury! Once the underpin was complete our basement went from a chaotic 6 feet to nearly 8’4” with radiant floor heating and a newly poured concrete floor.

FULL SPEED AHEAD!

Come November, Adam and I were finally getting the hang of being new parents and felt we MIGHT have the bandwidth again to continue working on the project… along with other house things we had on our running to-do list.

One such item included some masonry work on the side of a house - adding a lentil to a window, replacing a few bricks, and doing some much needed tuck pointing.

INTRODUCING OUR NEW KITCHEN CHANDELIER

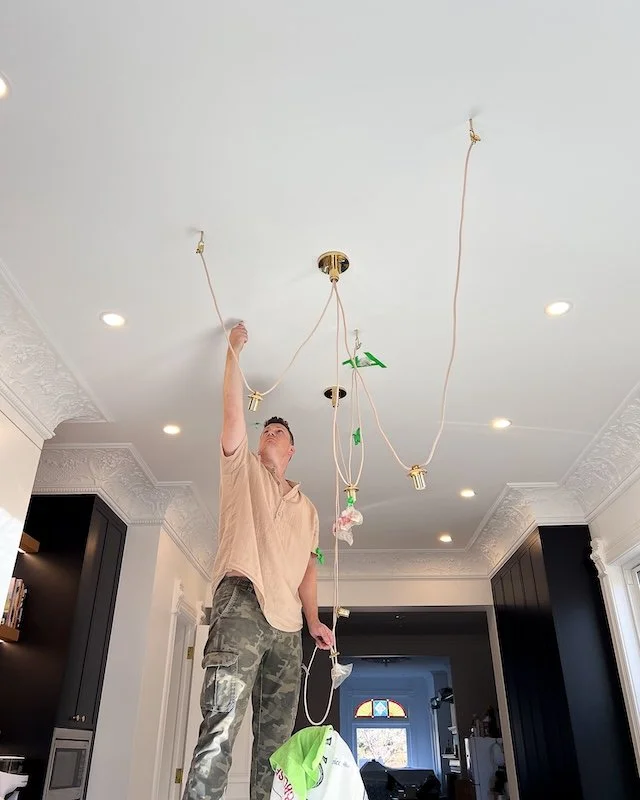
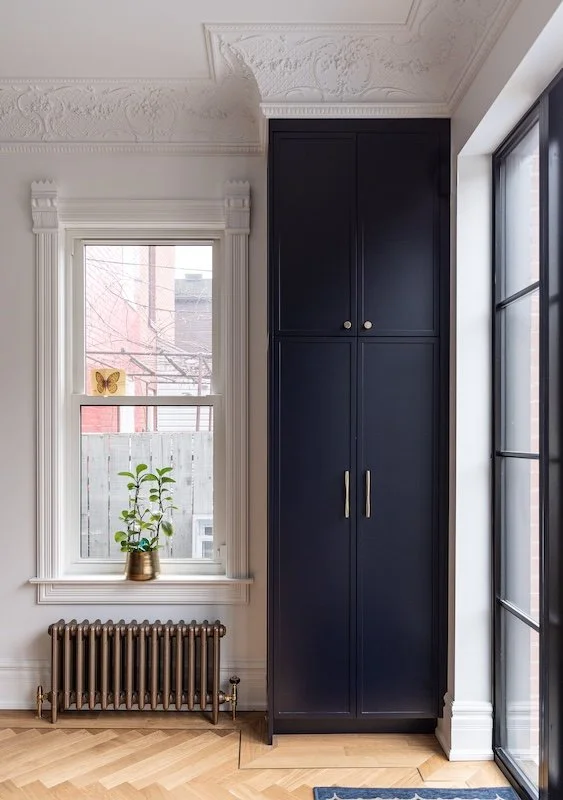
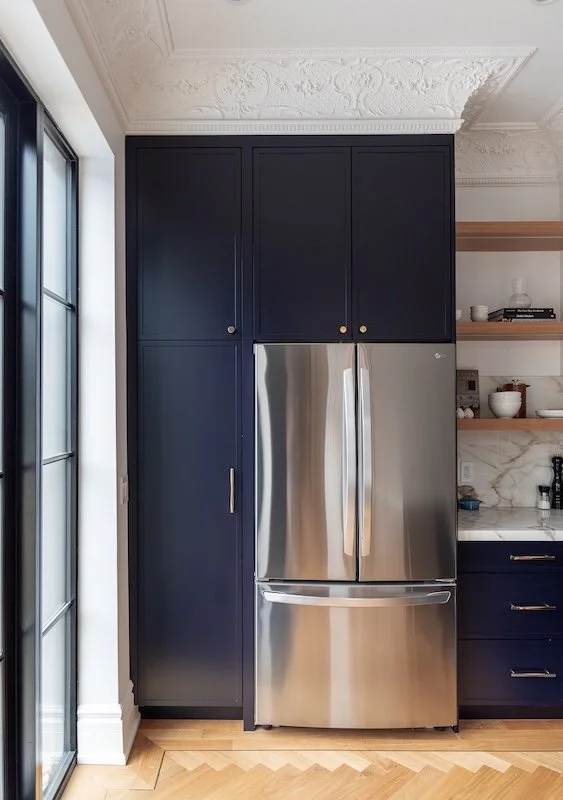
Adam and I also finally purchased some more lighting! Haha! It’s comical how slow I am on buying light fixtures but we finally found the perfect kitchen chandelier for over the island. A push-and-pull between organization and chaos, it hangs like a necklace from the ceiling. With delicate oval-shaped milk glass globes and polished unlacquered brass elements, it adds the je ne sais quoi we were looking for. Not too much to overpower our gorgeous crown mouldings or make the room feel stubby, and just elegant enough to hold your gaze.

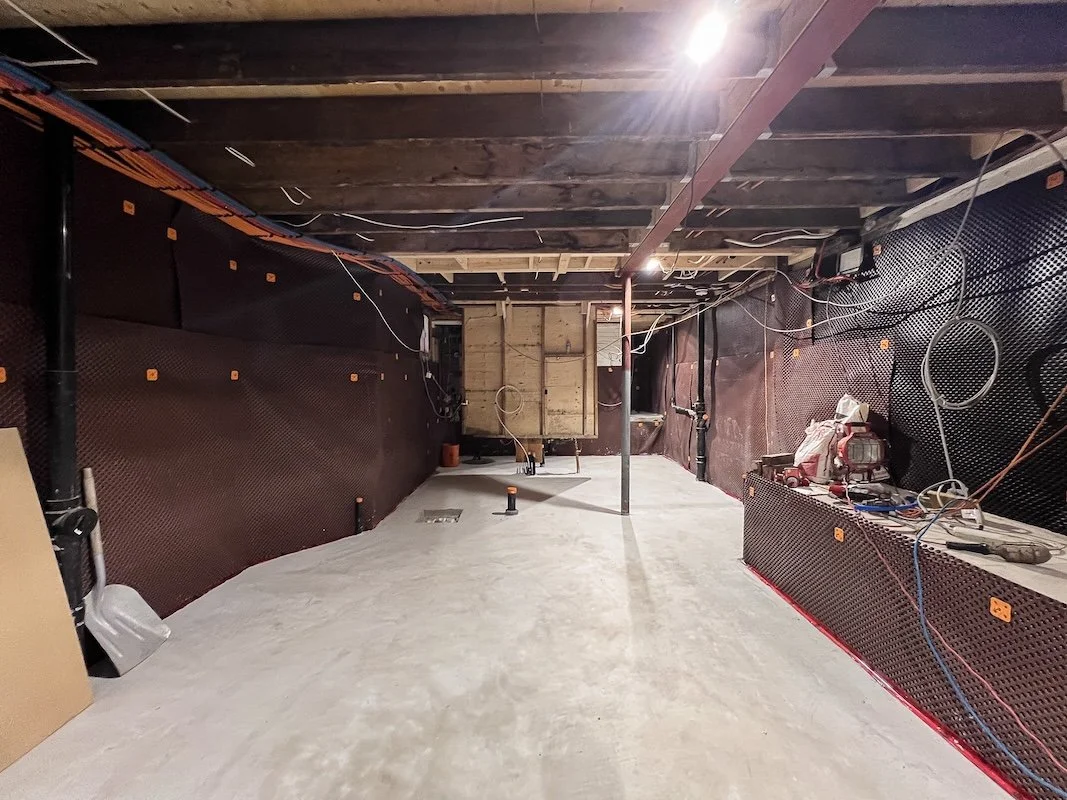
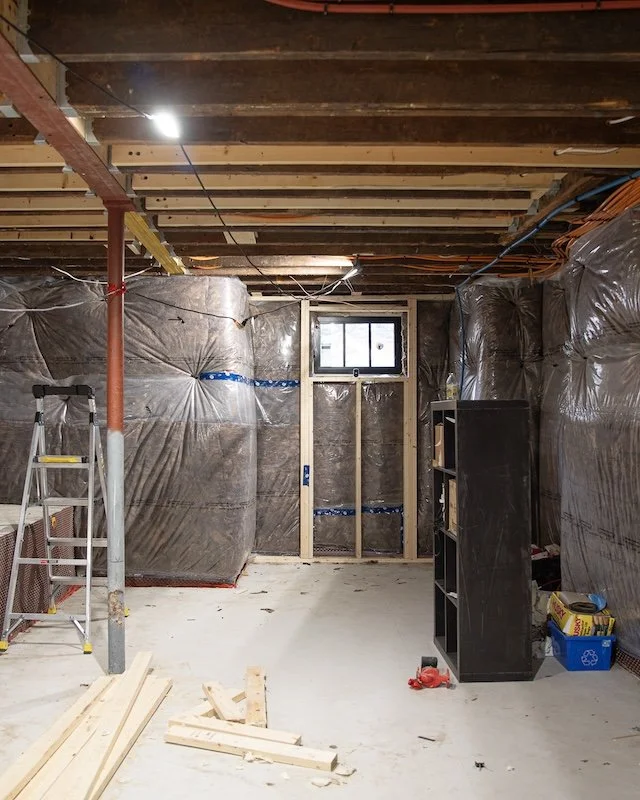
Lastly and in preparation for framing, we had blanket insulation installed on all exterior walls in the basement.

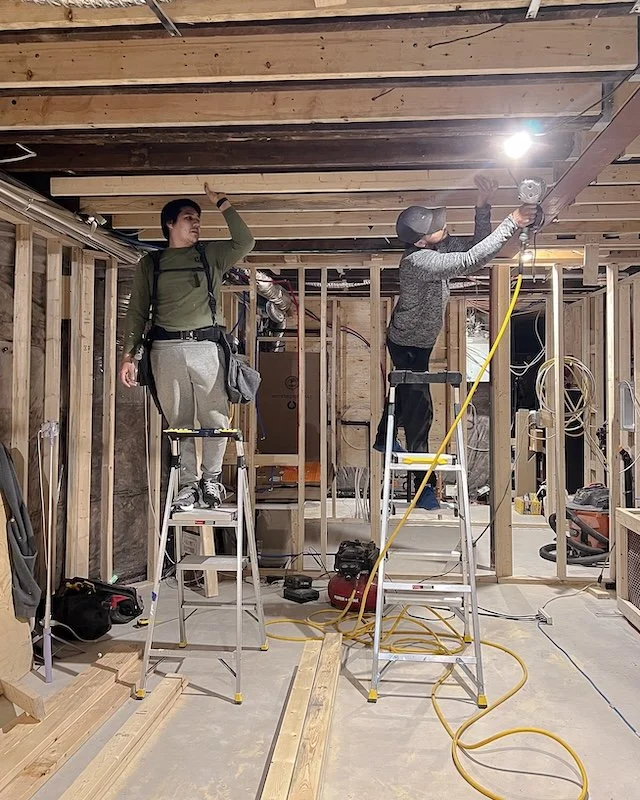
Once December rolled around we were full speed ahead with finishing the basement. The first crew that arrived were the framers. They had quiet a challenge ahead of them because not only did they need to build all exterior and interior walls but until the HVAC guys turned on the radiant floors, they couldn’t 100% secure the bottom plates into the concrete.

As soon as we had a few walls to work with, our HVAC crew were able to come through and within a few hours we could see exactly where all the radiant floor loops were. With the framing secured down our HVAC contractor could rig up the basement HRV system, install air vents and drill holes for a new bathroom fan and laundry dryer exhausts.

Home renovations Toronto - radiant floor heating - in floor heating loops - basement renovations - toronto blogger

FOLLOW ME ON INSTAGRAM @ISTHATSOH


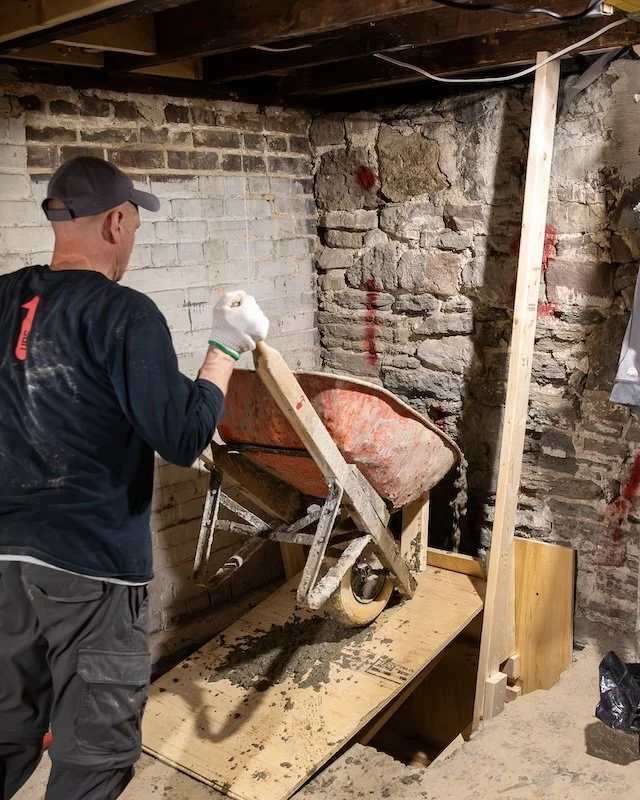
During week one of ‘finishing our basement‘ the plumbers did a site visit and pointed out that the drain hole we had left open during the concrete pour was 2 inches too far into the room. If we wanted to place our bathroom wall where we were planning, we needed to remove a chunk of it so the plumbers could actually hook up the tub drain. If you have never cut concrete before, it is a messy and unpleasant job… you do not want to be breathing that stuff in. Thankfully Pablo come in over the weekend to carefully grind down and chip away at the concrete so on Monday the framers could finish all interior walls and the plumbers could begin working on the tub insulation, waterlines, venting and pipes.

Victorian home interior - Home renovations Toronto - toronto blogs - basement renovation

The hole for the tub drain that we needed to grind away at for the plumbers

SIDE ITEM: Since we never actually vented the plumbing system out of the roof and since everyone was on site at the same time, we finally checked that task off our to-do list too!

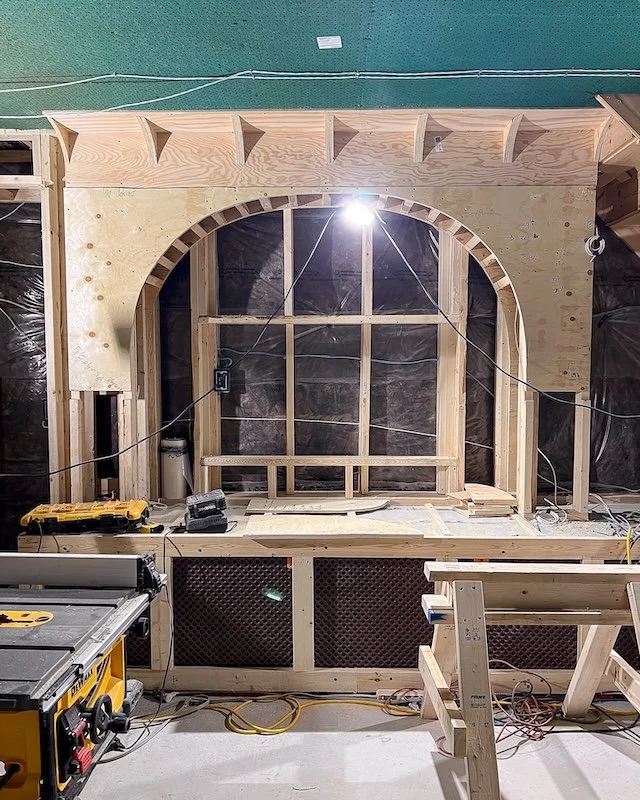
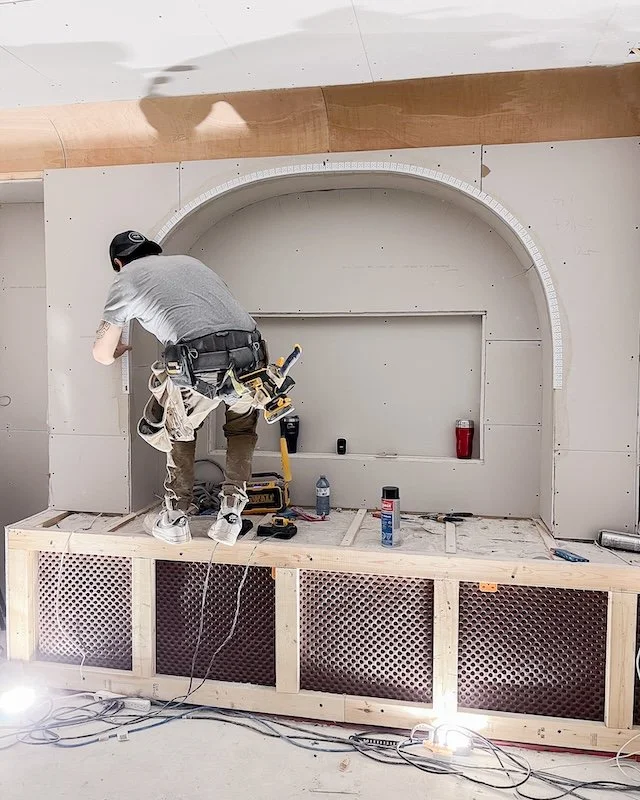
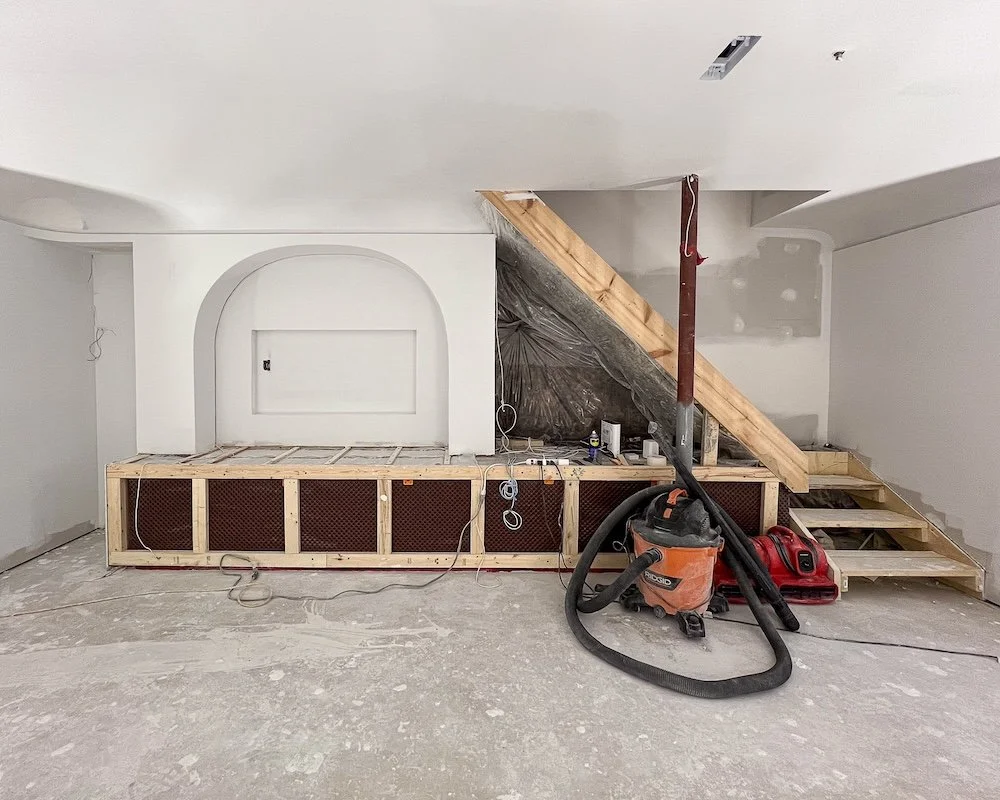
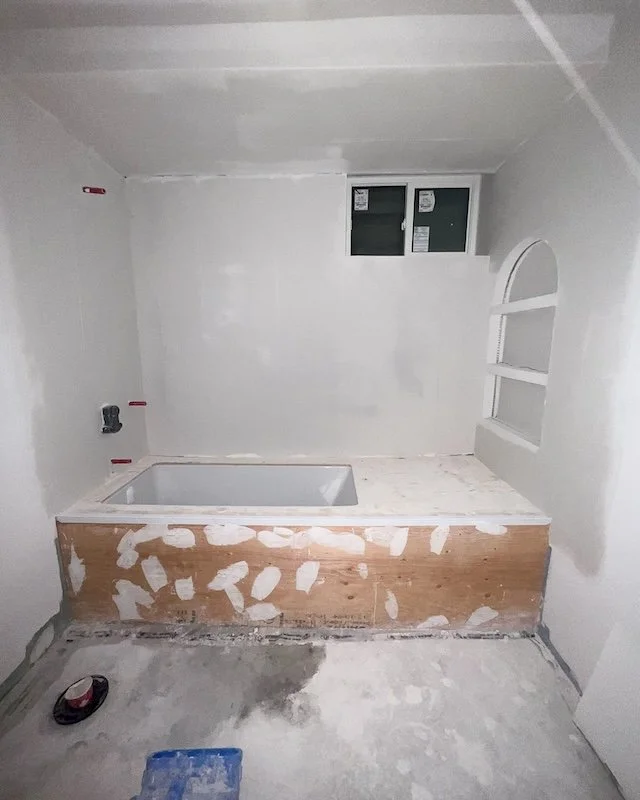
Once the plumbing was complete, the framers could continue their work starting with building the TV arch and framing out the concrete bench. Adam and I want to conceal the concrete bench as much as possible so we thought using it as a stand for our TV would be the perfect way to do just that in our fancy new ‘basement theatre room’. In the office we will hide it with some built-in cabinetry that will house the Murphy bed. Ideally we want to get a Murphy bed with a desk so that I can also set up my home office to edit videos and write blog posts like this one. With Christmas around the corner though there was only so much we could accomplish. We did manage to complete the arched shower niche, frame the tub and level the ceilings but the TV room cove ceiling detail needed to wait until the new year.

Like a horse out of the gate, 2025 began with us closing all our remaining permits!

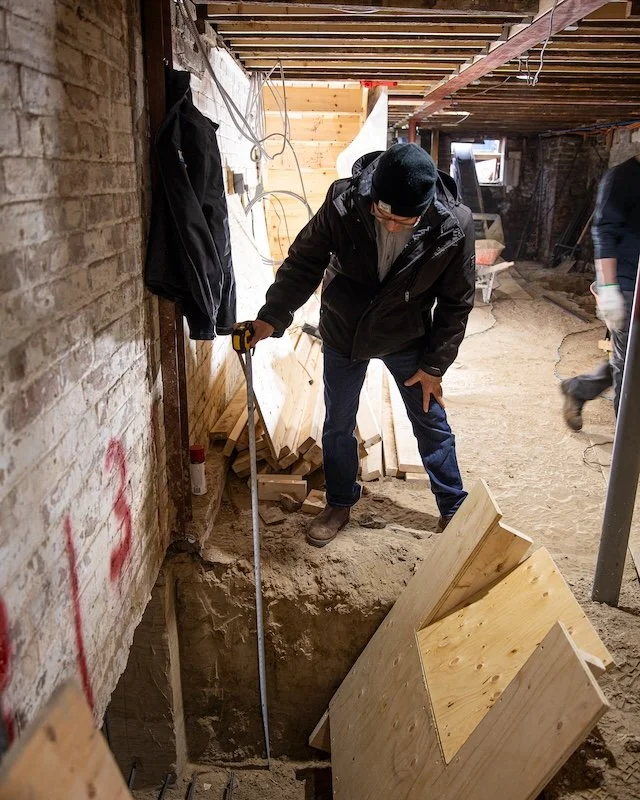
Our electricians also arrived to completely wire up the basement in just a few short days. During this time we also had our stair guy do a site visit. Now that we had completed an underpin we had to build an extension for our exiting staircase. Not only was he able to measure up the space for our new extension but I was also able to share some design ideas I had been noodling and iron out the details with him.

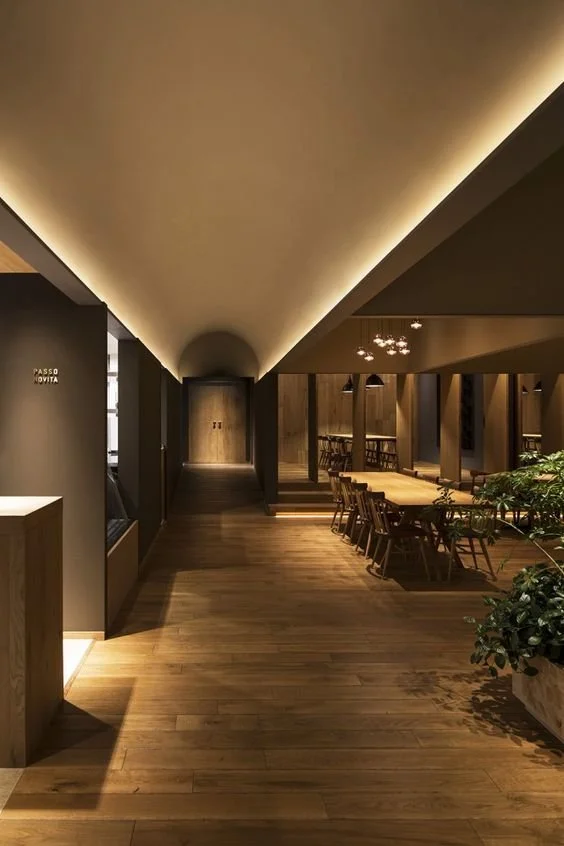
With the majority of the framing now complete it was time to begin work on one of the more intricate details I had planned for the basement. Since the middle room was going to be transformed into a TV/Entertainment space, I wanted to create a cozy, theatre feel by utilizing only indirect lighting. To do this I wanted to create a ceiling cove with a recessed LED light channel that projects light upwards, bouncing off the curved ceiling and illuminating the room. This, in addition to recessed LED lighting in the TV arch and floating shelves in the bar, would make up the majority of the lighting in this room, giving it a real relaxing feel.


ENJOYING THIS SERIES? CHECK OUT SOME OF MY PREVIOUS EPISODES & BLOG POSTS!


CEILING SOUNDPROOFING

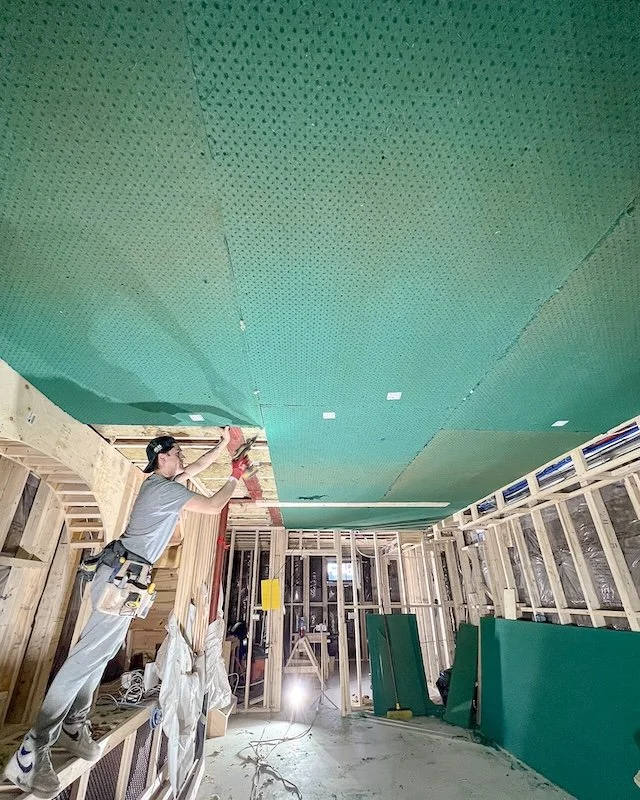
Before the framers could even begin work on the TV Room ceiling cove, we first needed to finish all the soundproofing in the ceiling of the TV room. This meant our insulation crew needed to come back to pack safe and sound between each joist before securing Sonopan panels directly onto them. Since Adam is going to have his office in the basement we also want to make sure that the sound from the TV room doesn’t travel between floors or rooms as much as possible. To achieve this we would be packing more safe and sound insulation in the walls a few weeks later as well as more Sonopan panels on the interior walls and ceiling.

CEILING COVE WITH RECESSED LED LIGHTING

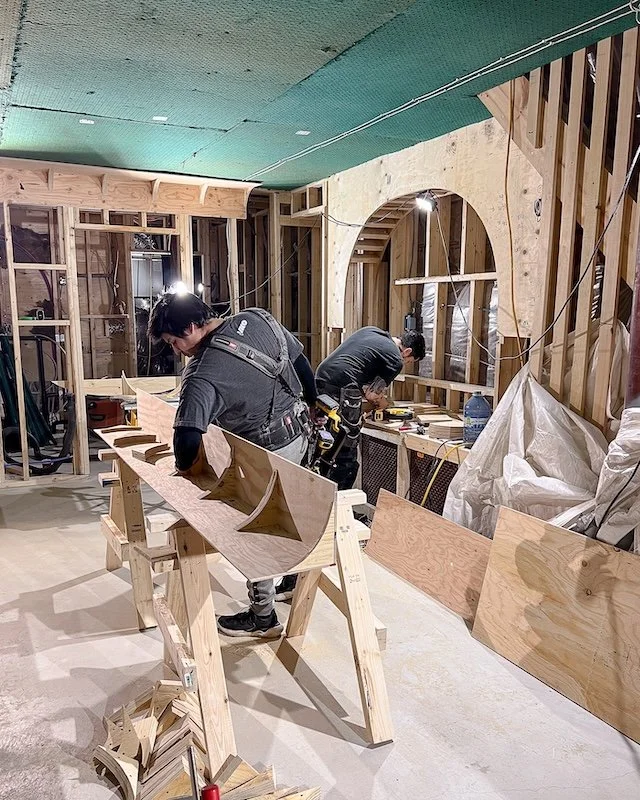
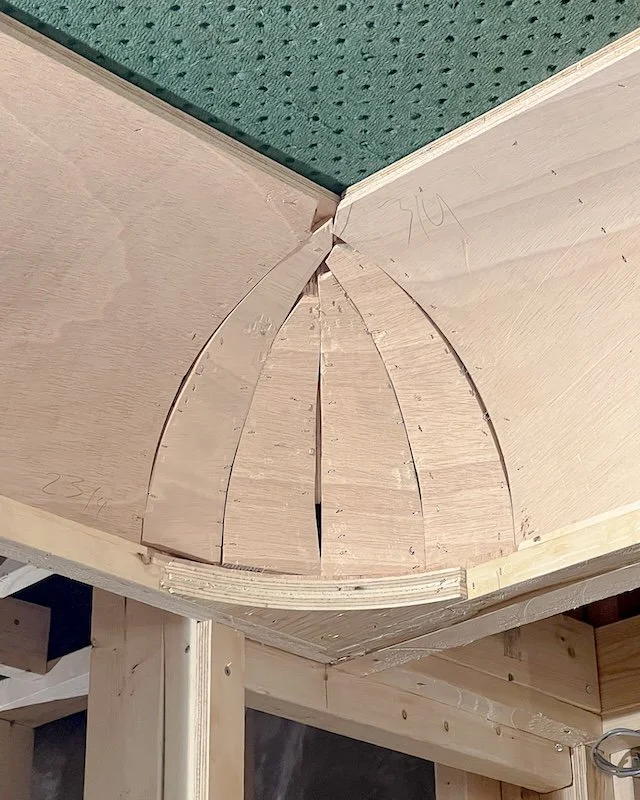
With the ceiling now completely soundproofed, the framers could begin building out walls and creating boxes for our ceiling cove detail. Once several of these boxes were built they would attach them to the walls, ceiling and bulkheads to create our curved ceiling effect. This one design detail alone took over a week to complete and getting those 90 degree corners just right were definitely one of the more challenging part of the entire project.

Toronto Victorian Home - Home renovations in Toronto - Basement renovations - toronto blogger - Basement Theatre room - soundproofing - cove ceiling with indirect ceiling lighting

The basement theatre room is now complete with our cove ceiling detail finished

I also had the guys anchor these heavy duty 360 swing hooks into the steal beam so we could create a little jungle gym for baby. Although he might be a little young for all the attachments now, as he grows we can hang ladders, swings, gymnastic rings, ropes, etc onto them and keep him and his friends entertained when they come over to play.

With the framing now behind us and insulation/soundproofing complete, we called our drywall crew in to hang some sheets. I was so ready to close up the walls and begin drywall. We were two months into basement renovations and seeing those drywall sheets go up felt like all our hard work was paying off. Drywall though definitely brought its own set of challenges and required a lot of attention to detail. You’d think drywall would be one of the easier stages in a renovation but Adam always says it’s the hardest because it can cause a lot of headaches down the road if special attention is not paid. Regardless of the challenges it was really cool to see all the little details come together.

Feels so good to see all the little details come together after drywall. I love how the ceiling cove turned out!

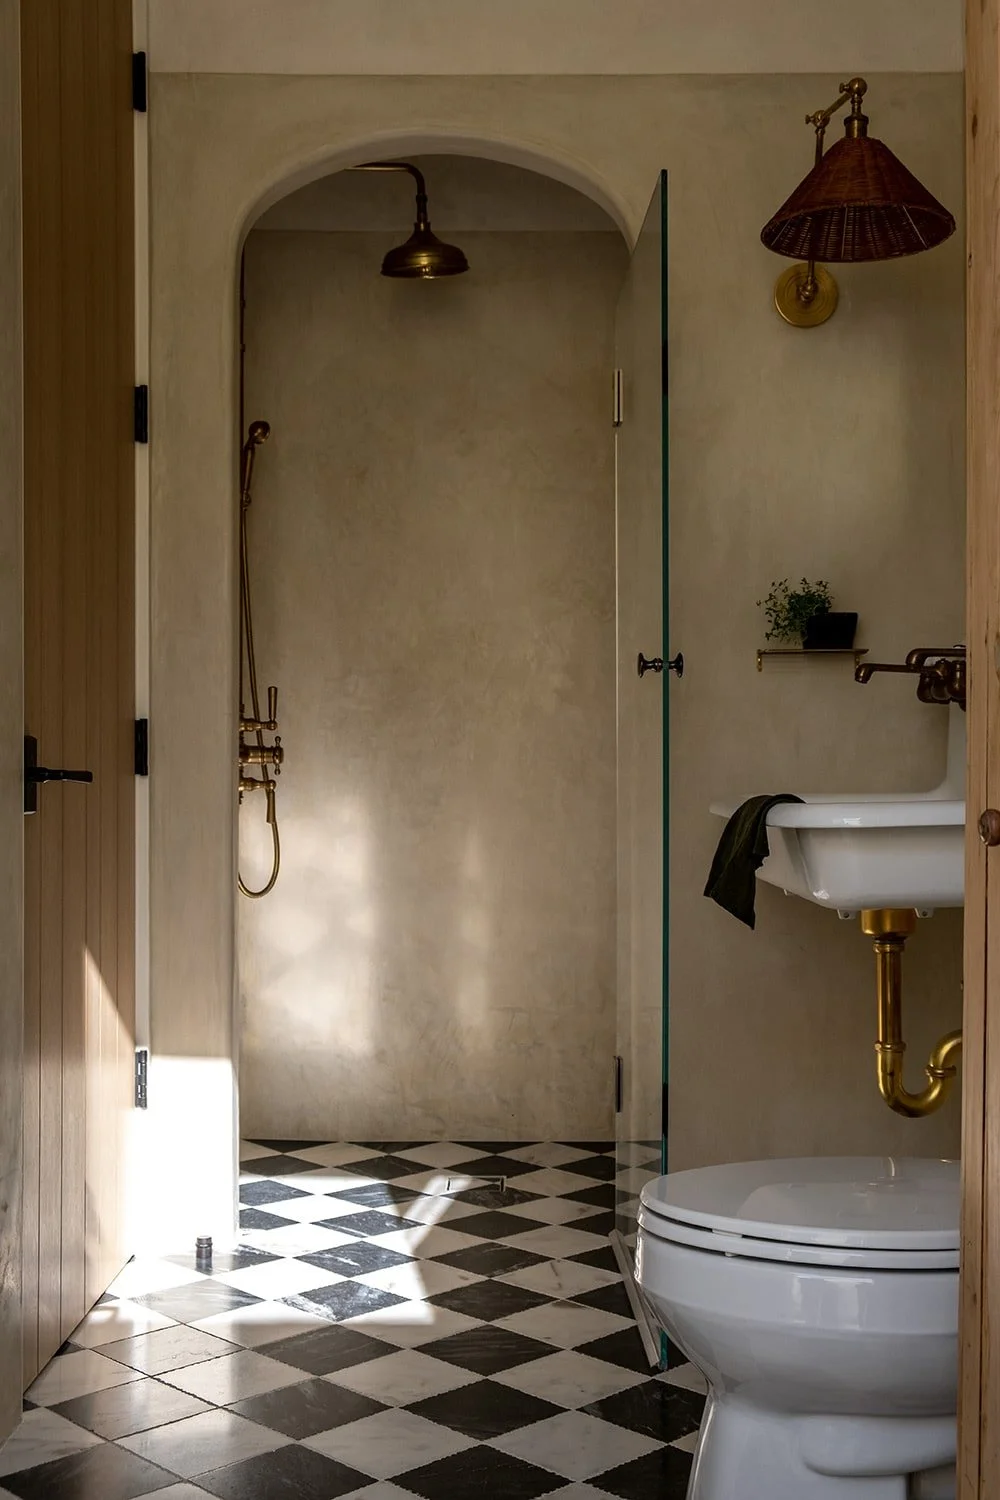
BATHROOM IS PREPPED AND READY FOR MICROCEMENT!

Over the past few months Adam and I have been learning a lot about microcement! We both love the look of a microcement bathroom but needed to get a better understanding of how it is applied in a bathroom setting to make it waterproof. Since we were in the middle of building out the basement bathroom we also wanted to gain a better understanding of what we needed to do to prepare the bathroom (especially the tub area) for a microcement application. Interestingly enough, its not the exact same steps as what you would normally do for a tile application.

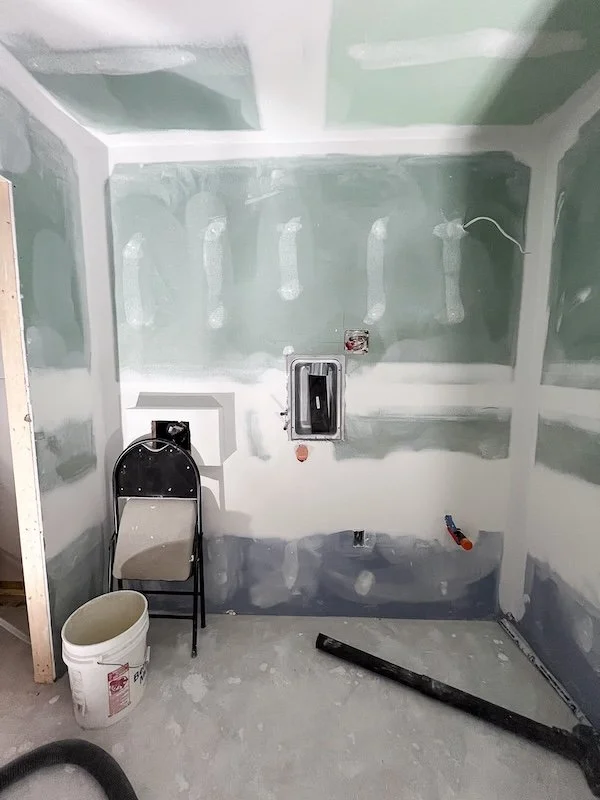
What we learned and ended up doing was using a fiberglass underlayment called DensShield in and around the tub shower area and a moisture resistant drywall in the laundry machine section. This was because the laundry area will have cabinetry and not be exposed to a lot of water where as the tub/shower will be exposed to a lot of water and traffic. Also since microcement ends up being about 3-4mm think once installed and cured, you need a strong underlayment to avoid dents when hit. That’s not all, when the mudders came to tape and finish off the drywall, we also had to get them to do a ‘level 5’ on all the DensShield so as to have a smooth surface to later apply the microcement to. We also had to cover all cracks, knots, and screw holes in the plywood tub frame with mud and get the whole space ‘paint ready’ meaning everything needed to be sanded and primed as if you are ready for painting.

After taking the time to learn about microcement this past season, Adam and I are happy to share that we are going to be moving forward with microcementing our basement bathroom and that we have also secured a microcement master as a partner, Surface Culture. If you are interested in seeing what a microcement bathroom looks like or learning more about its application and what makes it waterproof, we’re going to be sharing a lot more about it in the next episode!

Thank you so much for checking in once again on our Toronto home renovation series and reading this blog post. If you have any questions about renovating a Victorian home, what it’s like to live in Toronto or need recommendations for Toronto contractors/suppliers, hit me up in the comments below!

Until next time,

- Soheila


PIN THIS POST

Home Renovations Toronto - Victorian Home - Finish basement episode 13

EPISODE 11: UNDERPINNING OUR BASEMENT - RENOVATING MY VICTORIAN HOME

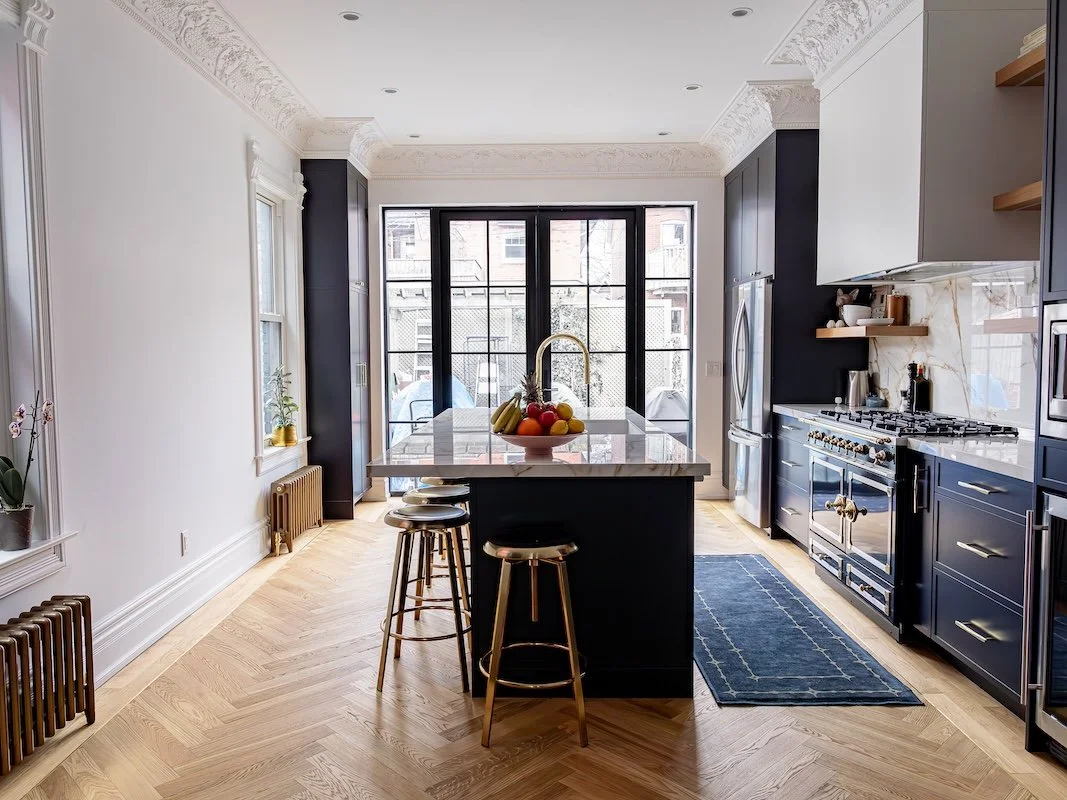
Toronto home renovations - renovating a victorian home - navy kitchen with slim shaker cabinets and la cornue range - la cornue kitchens

Lots of progress has been made sine our last episode including the completion of our navy blue kitchen renovation!

Renovating my Toronto Victorian Home - Episode 11!

What a trip around the sun it has been! This time last year Adam and I were nearing the end of our Toronto home renovations and putting the finishing touches on our Toronto Victorian home. Since then we have moved in, planned our destination wedding, and got married in Tuscany at the beautiful Abbazia di San Galgano Abbey before jetting off on our Croatia honeymoon.

To add a cherry on the figurative cake, Adam and I came back from our honeymoon to find out I was pregnant!

It was a little to early to share our big news with everyone here and on social media, and with Christmas around the corner, we decided to wait to tell our families first before sharing this amazing news with all you.

With that being said, this new discovery motivated us to start preparing for phase 3 (the final phase of our home renovation) - basement underpinning!

home renovation in Toronto - renovating a victorian home - basement underpinning and basement waterproofing toronto - toronto blogs

We had to clear the front yard of our house (which included the removal of our beloved smoke bush) to prepare for phase 3 of our renovation, underpinning the basement. Don’t worry, I have plans to bring the smoke bush back!

What is underpinning?

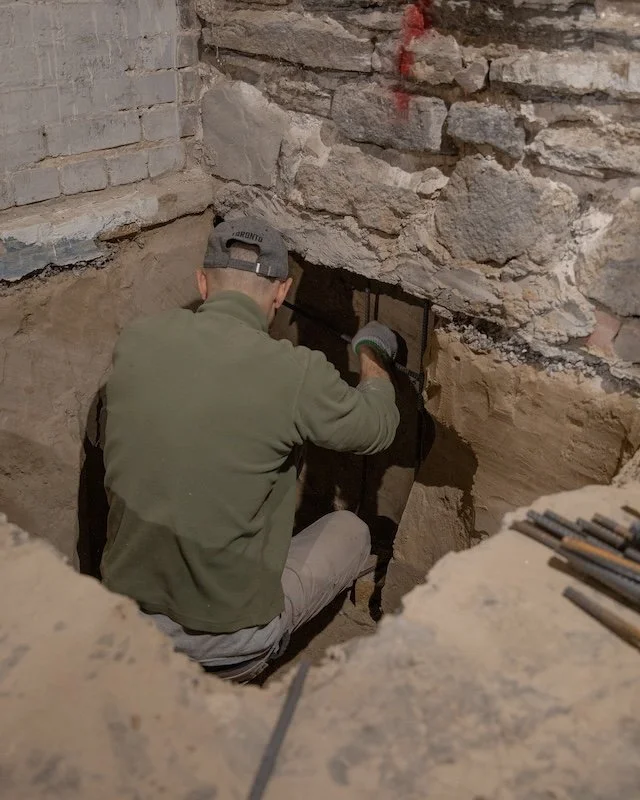
Underpinning a house is when you reinforce or strengthen the foundation’s structure by excavating small, spread-out, portioned-out sections, before filling them back in with concrete. House underpinning can be required for a number of reason like:

  1. When the original foundation is no longer strong enough to hold the house and is in need of serious repair.

  2. If you want to increase the capacity of the existing foundation to support another story.

  3. To dig out the basement so as to lower the basement floor and achieve a higher ceiling height (as in our case).

How much does basement underpinning cost?

The cost of underpinning varies depending on the state of your current foundation walls, the square footage of your basement, how deep you want to go with the underpin/how much you want to lower your basement floor and how much additional work (i.e. waterproofing, installing radiant floors, main drain replacement/lower, additional plumbing rough-ins) is required.

We received a range of quotes for our basement between $55,000 - $80,000 but in generally, it is said that you should budget for $80 a square foot (as an average) to underpin and dig out your basement two feet.

In order to set ourselves up for success the first thing we needed to do was call our Toronto structural engineer Ken Davis. Having previously worked with K H Davis Engineering on the first two phases of our Victorian home renovation, we knew he was the perfect man for the job.

Toronto blog - home renovation in Toronto - basement renovations toronto - basement underpinning foundation - site visit by Toronto Structural engineer Ken Davis

Our Toronto Structural Engineer Ken Davis doing a site inspection during the underpinning of our basement.

Since 1999 Ken has worked on over 3000 residential projects and has a great reputation for helping homeowners and contractors alike achieve their design and renovation goals. From new builds to additions, laneway home and garden suits, K H Davis Engineering can do it all. He has also worked on many century homes in Toronto, including many Victorian homes like ours, which has provided him with a knowledge base we are always keen to leverage.

A couple site visits and a few measurements later, we were well on our way to finalizing revised plans! In the meantime, we had enough ironed our to start reaching out to contractors that specialize in basement underpinning and waterproofing in Toronto to solicit quotes.


FOLLOW ME ON INSTAGRAM @ISTHATSOH


Toronto home renovations - renovating a victorian home - floating shelves with lights - navy kitchen with slim shaker cabinets and la cornue range - la cornue kitchens

Our kitchen from Domani Design Group is finally complete after the installation of our range vent cover and under floating shelf lighting!

As we waited for underpinning quotes to trickle in, we were able to turn our attention over to finishing off the kitchen.

Since the last episode of our home renovation series we still had two items to check off before the kitchen was FINALLY finished. The first was get our electrician back in to install the last of the lights, and the second was to install the range vent cover. Thankfully we were able to complete both items with a month to spare before Christmas which meant Adam and I could get familiar with our new stove and practice our menu before hosting our family and friends for Christmas dinner. Having now spent a few months putting it to the test, Adam and I are so happy with our kitchen from Domani Design Group. Not only is it beautiful, but very well made. Every door and cabinet is soft close, I have more storage than I know what to do with, the layout is designed with functionality in mind and we absolutely love how much counter space we have!

Needless to say, celebrating our first Christmas at home was absolutely magical. Adam and I splurged on a 9 foot Fraser Fir and rented tables and chairs for our 20 person Christmas dinner. Not only were we able to show off our newly renovated house for the first time to many of our family members, but we were also able to share our pregnancy news with them, which made the whole season even more enchanting.

Following the holiday season, we received a call from our structural engineer Ken Davis to discuss our architectural drawings for the basement. It was concluded after a soil test that we would need to take a hybrid approach to our basement renovation that would involve underpinning about 75% of our basement and bench footing the remaining 25%. Given the sandy consistency of our basement and the fact that our neighbours house on one side is only 6 inches away (and their basement was slighting shorter than our current basement), there was a concern that underpinning that 25% section could undermine our neighbours foundation wall. To ensure everyone’s safety and the integrity of both houses, going with a hybrid underpinning and bench footing approach was the best option.

What is bench footing?


Unlike underpinning where you have to dig under the foundation wall, a bench footing is another way to support a foundation wall and lower the floor in your basement by creating a ledge or ‘bench’ out of concrete that sits along the existing wall. The downside to a bench footing approach is that it encroaches on your usable space. In our case, we have plans to build storage cabinets over-top of our bench footing as a way to not only hide the bench but make use of the space above it.

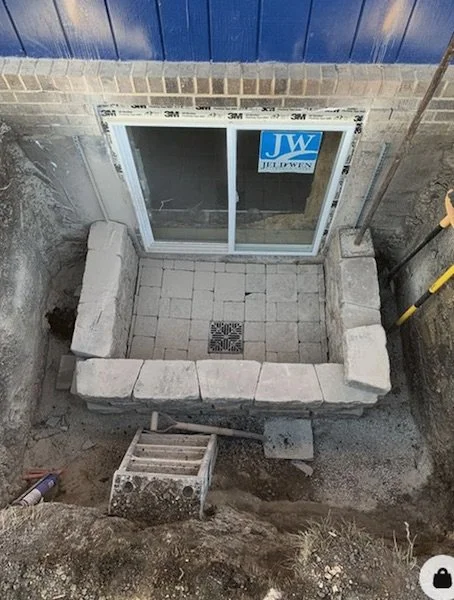
In addition to the hybrid underpinning / bench footing approach we also decided to turn one of the existing windows into an egress window. This would allow us to have a safety exit, should we ever need it and although we don’t have plans to rent out the basement or put a permanent bedroom down there, it’s good to have in case of an emergency. Given we are in the midst of doing a big renovation as well, there is probably no better time than now to action installing one.

What is a basement Egress window?

A basement Egress window provides a quick and safe emergency exit for your home, and an unobstructed opening from which someone can escape from. This means that a window, large enough for a human body to fit through (see Egress Window Size specifications based on your municipality code) must be able to open from the inside so that an escape can be made via an Egress window well or clearing in front of the window.

Once we were all in agreement regarding the best course of action, Ken was able to submit our architectural drawings to the city and get us our permit within two week! Remarkable!

Toronto blogs - Renovating a victorian home - Toronto home renovations - Basement Renovations and underpinning a house by ICYReno to lower floor in basement - basement waterproofing contractor Toronto

Allow me to introduce our Toronto Basement Underpinning & Waterproofing Contractor - ICYReno! #Partner

Meet our Toronto Basement Underpinning & Waterproofing Contractor

As we waited for our underpinning permit to be approved, Adam and I settled on an underpinning and basement waterproofing contractor in Toronto. Enter ICYReno, a fully insured and licensed waterproofing and underpinning company with over 10 years of experience. Not only have they helped homeowners across the GTA lower their basement floor but they are pros when it comes to interior and exterior waterproofing, back water valve and sump pump installation, drainage systems, concrete work, and more. They also came with an impressive endorsement from our structural engineer who had overseen a few of the basement underpins they had worked on in the past and was impressed by their quality of work. And if that wasn’t enough to seal the deal, their price was also one of the most competitive!

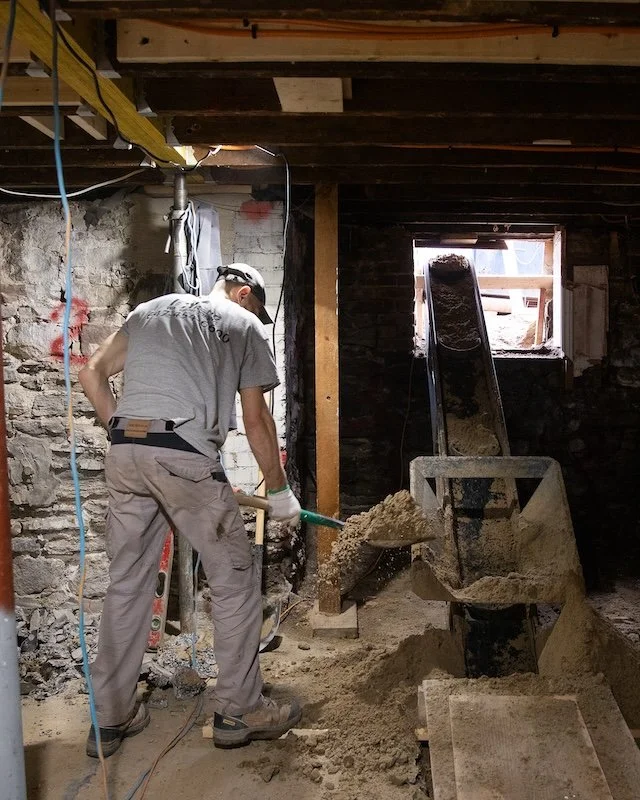
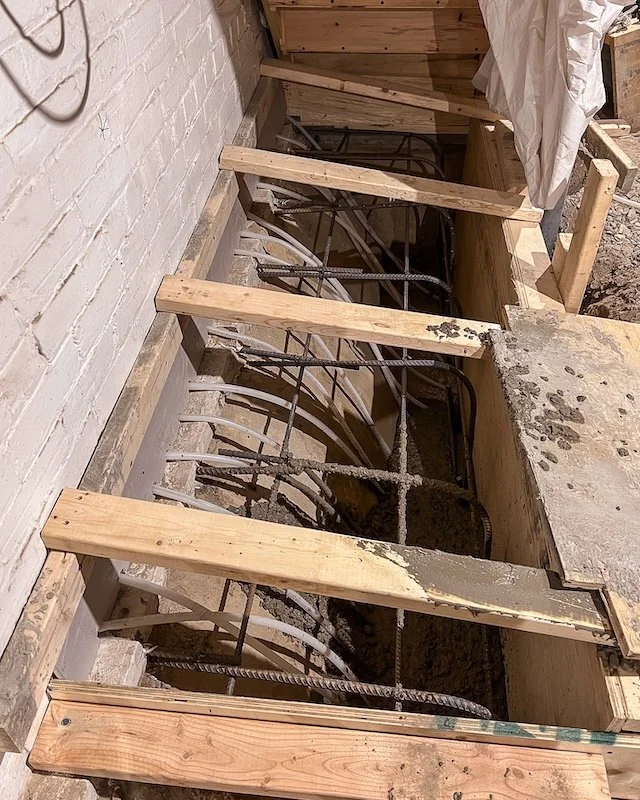
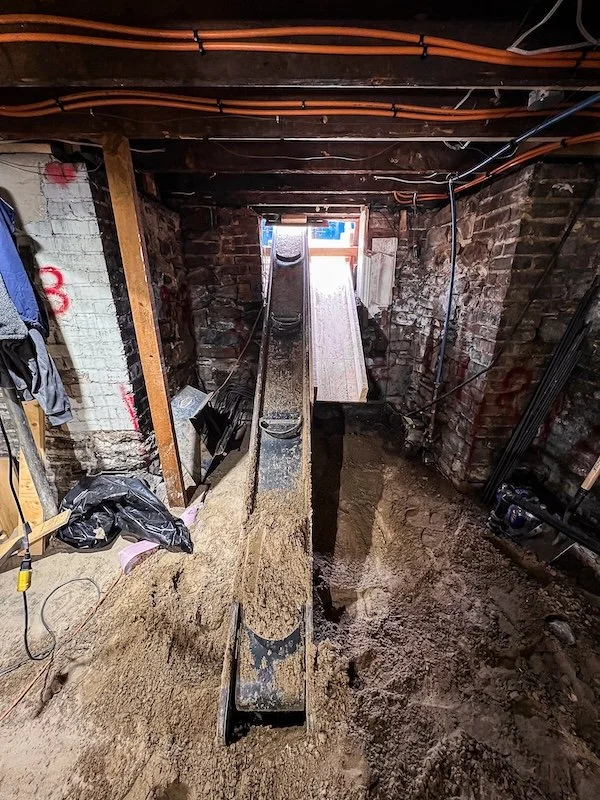
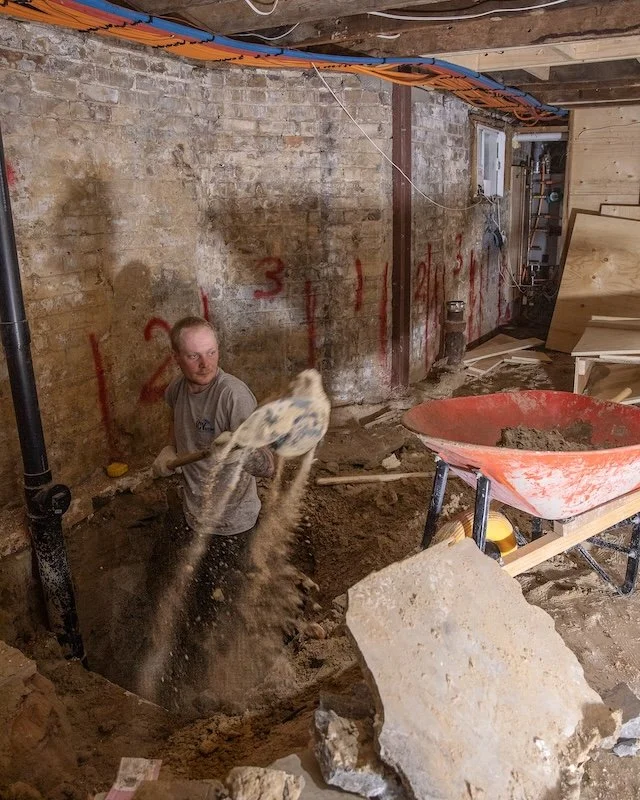
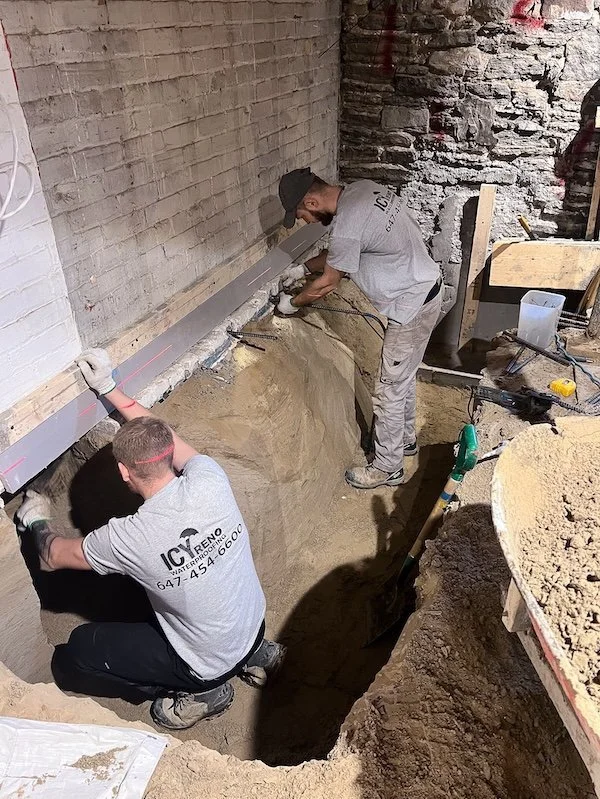
Within a week of receiving our permit, ICYReno began work on our basement. Before they could begin underpinning the foundation, they first had to demo the remaining drywall, stripping back all the layers until it was bare bones. Once complete they divided up the basement into small sections and began excavating and reinforcing each section, pouring new concrete footings before moving on.

Now, two weeks into our Toronto basement renovation it’s clear that ICYReno not only runs a tight ship with well organized bin drop offs and concrete pouring schedules, but their crew is highly trained and hard working. Having completed 50% of the underpin in just two weeks, it’s clear that they need no micro managing and can take care of everything from scheduling site visits with our structural engineer Ken Davis to booking appointments and sharing progress photos with our city inspector. They also sometimes work on Saturday, and given that I’m currently 7 months pregnant and ICYReno promised a 4-6 week timeline for completion, I appreciate their outstanding work ethic! Time is of the essence after all and at this rate they may even be done early! *fingers crossed*


ENJOYING THIS CONTENT? CHECK OUT SOME OF MY PREVIOUS EPISODES & BLOG POSTS!


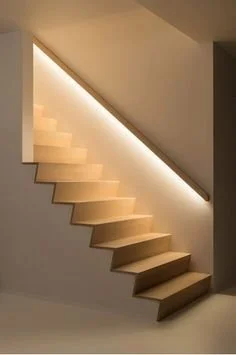
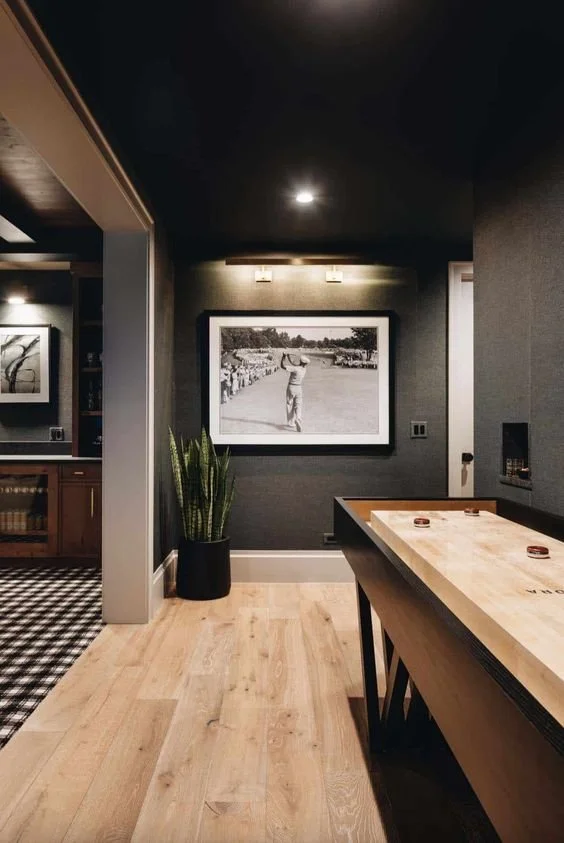
Meanwhile, I have been gathering inspiration for the basement. Given that we have to move our upstairs office into the basement to make room for our future nursery, we plan to divide the basement up into three major sections, a closed off front office that could double as a spill over bedroom should we need it, a larger open concept recreational room with a wet bar and perhaps a small play area where we can attempt to keep all the kids toys contained, and a conjoined bathroom-laundry room at the back where we can finally install our washer and dryer (which have been sitting in our living room for almost a year now)! YAY!

FUTURE FINISHED BASEMENT INSPIRATION

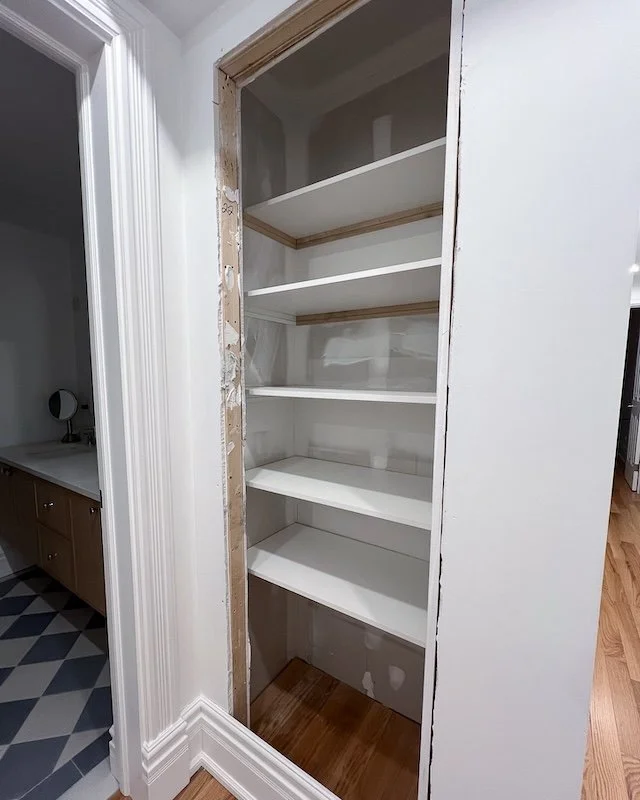
A few additional things we were able to check off our ‘To Do’ list since the last episode was install some new light fixtures on the main floor, finish off the powder room, make progress on the upstairs hidden linen closet and order new windows for the basement.

Next up on our list of things to tackle: prep the nursery for the baby’s arrival (I have plans to install a feature mural on one wall and paint the other walls), finish the underpinning, rough-in drains for the basement bathroom/laundry room and wet bar, install weeping tile and complete interior basement waterproofing, install radiant floors, dig and landscape for a new basement egress window, pour a new concrete slab floor and install a new basement egress window. Hopefully while this is all happening I can also source some tiles for our future basement bathroom!

Toronto blogs - Renovating a victorian home - Toronto home renovations - Basement Renovations and underpinning a house by ICYReno to lower floor in basement - basement waterproofing contractor Toronto

Basement renovation in progress….

Although Adam and I are not putting any pressure on ourselves to finish the basement before the baby arrives, it would be nice to have it as a functional space to work from and do laundry in. As much as I love visiting my parents every weekend to do laundry, it’s only going to get tougher once a newborn is in the picture. Anyways, that is all I have to share with you in this episode and blog post. If you have any questions about renovating a Victorian home, what it’s like to live in Toronto or need recommendations for Toronto contractors, hit me up in the comments below!

Before I sign off, I’d also like to say a big thank you to K H Davis Engineering and ICYReno for partnering with me on this project. I’m so excited to be working with such reputable companies on our Toronto basement renovations but want to reiterate that, like always, all opinions remain my own.

Until next time,
- Soheila


MORE BTS PHOTOS FROM THIS EPISODE


PIN THIS POST

Home renovations in Toronto - A Toronto Victorian Home - kitchen renvovation reveal and underpinning foundation in basement

HOME SWEET HOME - A PRE RENO HOUSE TOUR!

Welcome To My New Victorian House!

This past August was a whirlwind of a month to say the least! My fiance and I got back from our trip to Powell River only to celebrate my birthday and take possession of our new house all in the same day! It took us a good three days to get all of our stuff into the new place (with a lot of unexpected surprises along the way), but we are finally here!

I honestly could not be more thrilled to share my new house journey with you, but if you are new and are just tuning in now, this new chapter has been almost a year in the making. I vividly remember last September when Adam (my boyfriend at the time) and I deciding to sell my condo and start looking for a house together. I had just spent the entire summer at his family cottage and loved having the extra living space to enjoy. The idea of returning to condo life in a city still under COVID restrictions felt very daunting and I knew one day soon I wanted to find a house in the city instead. Little did I know, selling my condo was going to be even more challenging than I anticipated!

If you’re in a similar life stage as me, you may have already started paying attention to the real estate market. Perhaps you are thinking it’s a great way to invest you money and want a place to call your own - which it is - but since the beginning of the pandemic, the real estate market has been going crazy in big cities like Toronto. Condo’s have seen huge fluctuations in demand and value. Further, home prices have skyrocketed thanks to low interest rates and a lack of supply. Needless to say, what I thought would be a quick transaction turned into a few months of my condo being on the market before I accepted an offer I was happy with.


FOLLOW ME ON INSTAGRAM @ISTHATSOH


The next phase of actually buying a house did not get any easier. Between skyrocketing prices, shady antics from agents, and lack of supply, it took us 4-5 months of searching, over 50 viewings, and 11 offers before we won a bid. If you’re looking to start your own house hunting journey soon, you should read my recent blog post about tips for first time home buyers on how to psychologically prepare. It was a really tough process for me - harder then I ever imagined - but I’m happy to say now it was worth the sweat, mental frustration, and tears because in the end I landed a beautiful home that is beyond anything I imagined I would end up with and I can’t wait to share it with you!

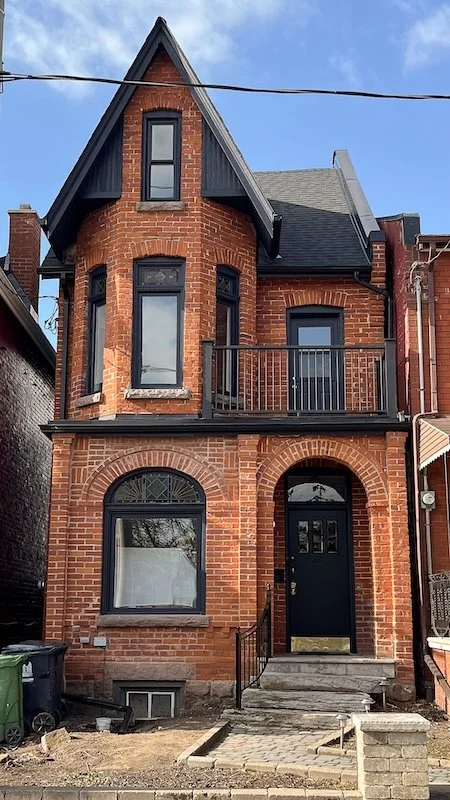
Since starting our house hunting journey a lot has also happened in my personal life including getting engaged to my boyfriend at the end of May. A few weeks later, we visited this beautiful Victorian style house in one of the most coveted neighborhoods in downtown Toronto and I instantly fell in love. The house is over 125 years old, and had so much original character, putting in an offer was a no brainier.

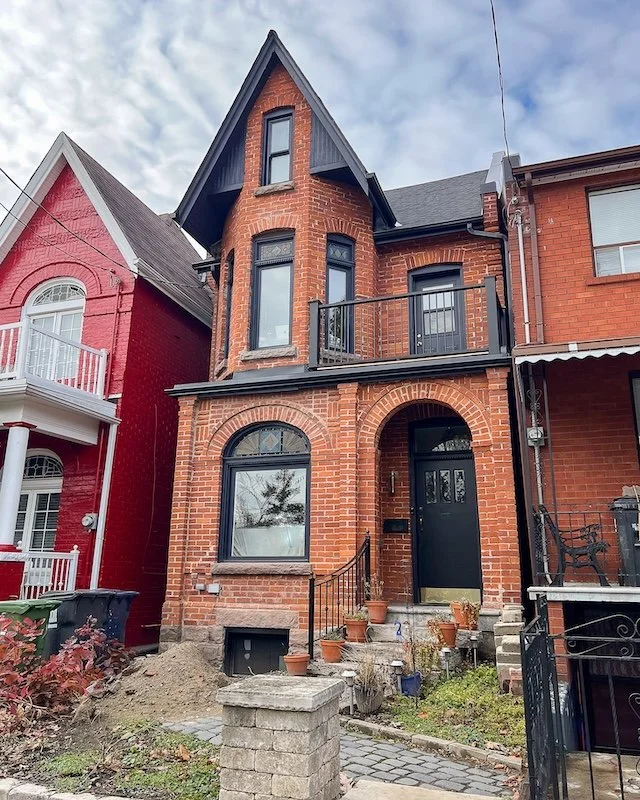
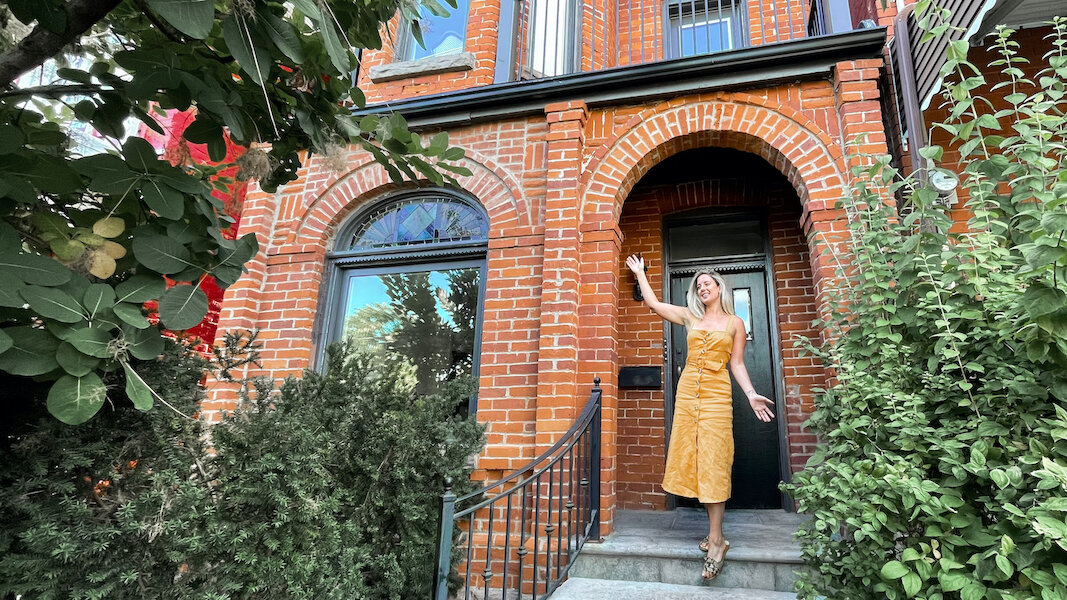
One of the first things that caught my eye was the beautifully arched brick entrance way! You could tell that the front of the house had been landscaped recently with a cobble stone pathway and large stone slab stairs, not to mention it was hard to miss the glorious smoke bush tree out front that provides a bit of privacy to anyone sitting in the front living room. It felt like it could be a scene from a movie - one where a young couple runs up to the front archway trying to duck out of the rain right before one of them gets the courage to lean in and steal their first kiss. Can you see it? Haha!

Perhaps it’s the romantic in me but the love affair with this house didn’t stop at the front door. The house also featured so much original molding and stain glass that I instantly became smitten.

Prior to even starting our house hunt in Toronto I had always loved old homes. Downtown Toronto is full of old homes and Victorian style houses are definitely my favorite, but unfortunately as we learned, a lot of them are not being very well taken care of, and the ones that are have lost a lot of their original charms due to updates/renovation. 90% of what we saw during our house hunting journey were that Victorian house style and I think at one point I started to drive my boyfriend nuts because I wouldn’t budge on what I wanted. But there is no denying the beauty of a Victorian home! Especially ones still full of original character! It’s rare, trust me I’ve looked! Lesson being, I am so glad I stuck to my guns!


ENJOYING THIS POST? CHECK OUT SOME OF MY OTHER LIFESTYLE POSTS!


As I walked through the house, my romantic entanglement only grew. The front living room definitely became (and still is) my favorite room in the entire house as it feature so much original Victorian house interior character and a beautiful stain glass motif! In the morning, warm light shines through the window and casts large rainbows of light on the walls inside! There is something very bright and airy about the space that always gives me really good vibes anytime I spend time in here. Since moving in, it has definitely become the room I enjoy working from the most - as a matter of fact, I am writing this very blog post from it now!

Even though we fell in love with the house after only one visit, we do have plans to do some renovations to it. Since the house is actually broken up into two units (check out the video below for the full tour) we originally planned on renting half of it out to Adam’s brother. As fate would have it (and unexpected issues with the house and our ‘new’ appliances) we decided to push up the renovations and start them this fall. Don’t worry, we are keeping as much of the original Victorian charm as we can!

Turning our house back into a single family home is going to be a lot of work but I’m really looking forward to starting renovations in a few months and putting in my dream kitchen. Before we start the renovations though, I wanted to do a quick home tour with you so you can see the canvas I am working with. In this video I will be walking you through my downtown Toronto Victorian house as well as giving you a little sneak peek on what we are planning on changing.


I hope you fell in love with the house as much as I did when I first saw it. If you have any questions or comments about this video, feel free to leave them down below!

I'm also going to be creating a lot of new content around my new home (renovations, home DIY's, and sharing about my interior decorating journey) so if you are interested in following along, feel free to subscribe to my YouTube channel or follow me on Instagram @IsThatSoh!


MORE FUN VIDEOS FROM OUR ‘FIRST TIME HOME BUYER’ JOURNEY IN TORONTO!


PIN THIS BLOG POST!