STRAWBERRY PIE WITH SHORTBREAD CRUST!

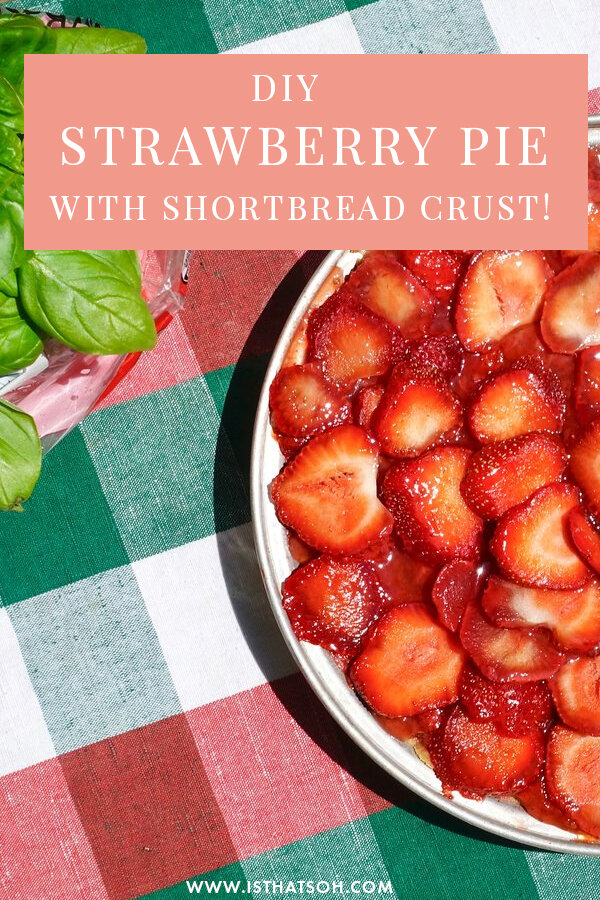
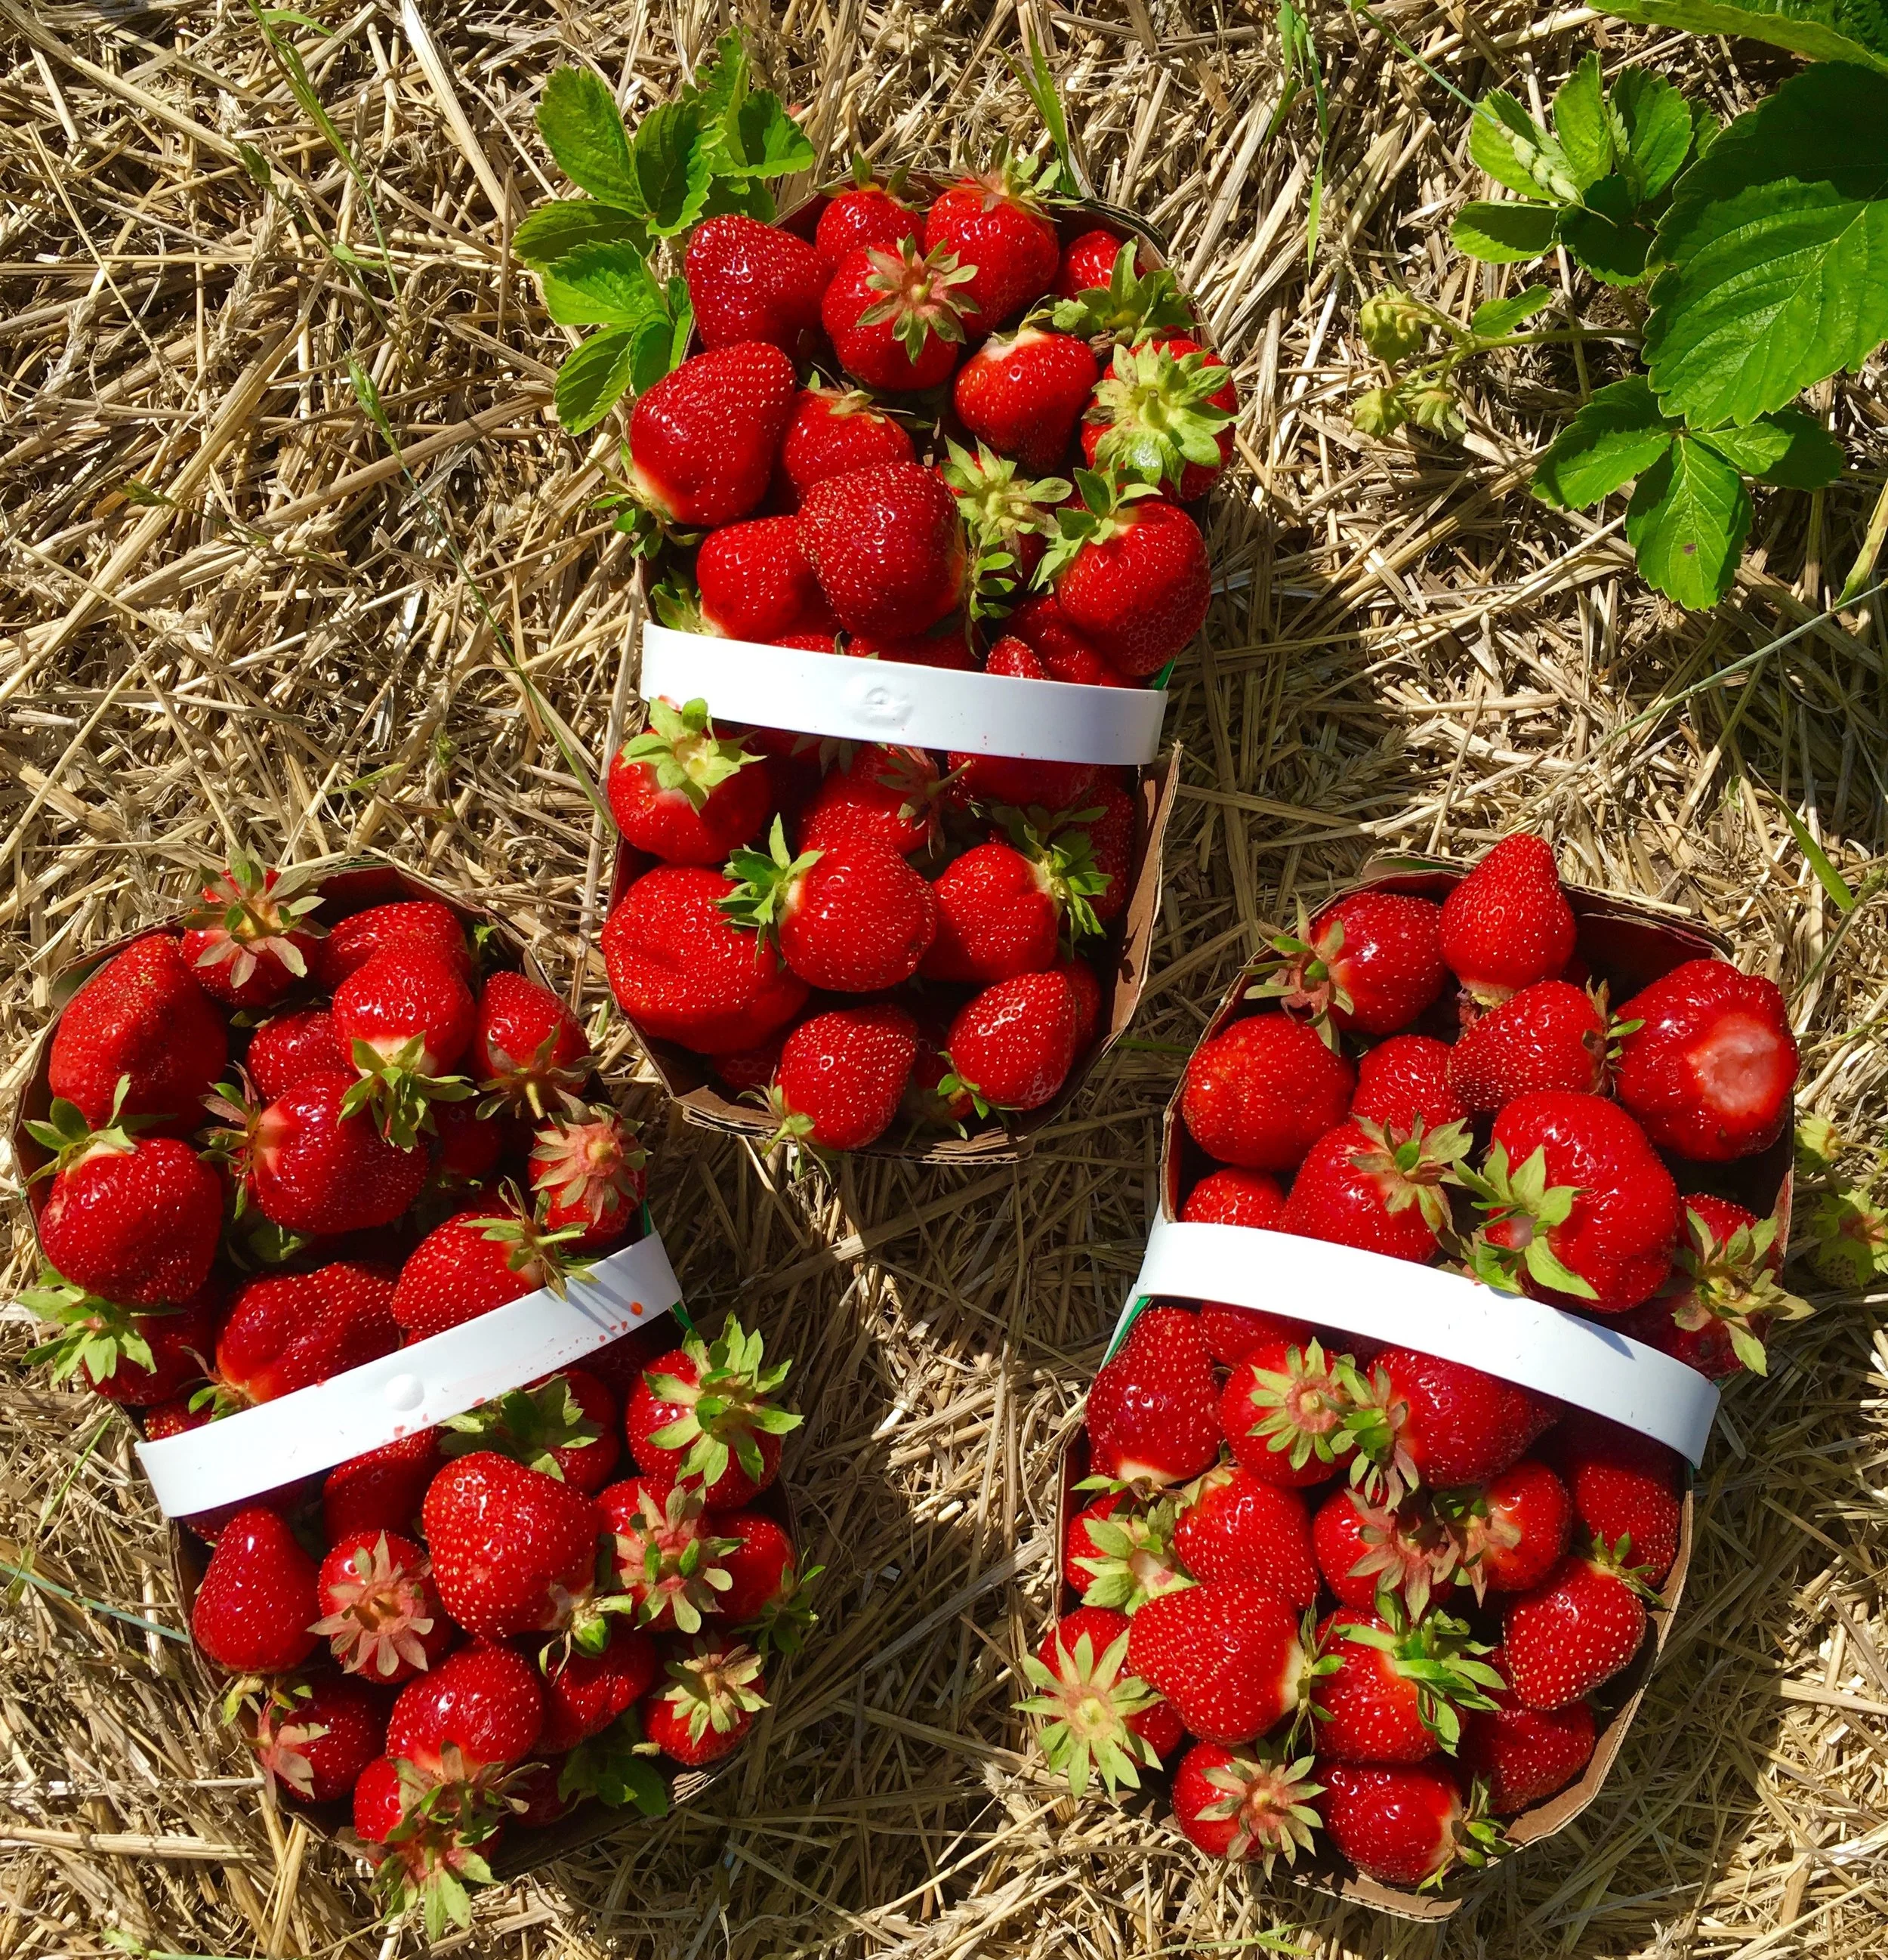
Since strawberry season is upon us I thought it would be perfectly fitting to make a strawberry pie last weekend. Since I was at the cottage and there is a lovely organic strawberry picking farm close by, off I went to pick my own strawberries! The result of that adventure was of course this delicious strawberry pie recipe. What is so clutch about this recipe (and can easily be used for any pie recipe) is the shortbread cookie crust bottom! WOW it's good! The best part is that even for a non pie maker/baker like me this recipe was so easy. Not to mention that the pie got devoured in one sitting and I had to make three more - I didn't mind.

INGREDIENTS:

CRUST
1/2 Cup of Butter (Softened)
1/4 Cup of Sugar
1 Cup of All Purpose Flour

STRAWBERRY FILLING

1 Quart of Strawberries (divide into two portions)
1 Cup of White Sugar
3 TBSP of Cornstarch
3/4 Cup of Water

DIRECTIONS:

Beat the soft butter with the sugar until fluffy.

Add in flour bit my bit until crumbly cookie dough starts to form. Press dough into a 9 Inch pie pan. Refrigerate for 10 minutes to harden

Preheat Over to 400 degrees (200 Celsius). After pie crust has been in the fridge for 10 minutes let bake in the oven for 10-15 minutes until golden and firm. Set aside to cool.

Separate the strawberries into two parts - you are going to mash half to create the filling and keep the other half to place on top for decoration.

Take the mashed strawberries and place in a sauce pot and bring to a boil, add in sugar and stir often for 10 minutes.

Mix cornstarch and water in a bowl and add into the boiled strawberry mixture - reduce heat to a simmer and allow to thicken.

Once ready remove from heat and let cool.

Once your strawberry sauce is cooled pour into shortbread crust and top with remaining strawberries.

Keep in fridge until ready to serve! It is great on its own or with some ice cream!

Enjoy!

Fresh Organic Ontario Strawberries

PIN THIS POST

LINGUINI MARINARA WITH CLAMS

I recently made this dish for a family dinner and I had to share! It was so delicious and quick to make - its honestly the perfect seafood dish to add to a meal. The sauce is light yet flavorful so you can still taste those delicate clams. I went for a thicker linguini noodle so as to get more sauce with each bite. If you are into Italian food you gotta try this recipe! It will be having your guest asking to take home leftovers...that's if there is any!

Makes Pasta for 5 People

INGREDIENTS:

3 TBSP of Olive Oil
2 -3 Shallots (minced)
2 Garlic Cloves (minced)
1 TSP of Dried Basil
1 TSP of Dried Oregano
Salt and Pepper to taste
2 Cans of San Marzano Tomatos (Drained and Chopped)*
3/4 Cup of White Wine
50 Clams (I used Little Neck Clams and washed them to remove any sand or dirt on the shell)
750 grams of Linguini (usually 150 grams per person is good)
A handful of fresh Italian Parsley (for garnish)

*Keep the juice just in case you want to add it in later for an even lighter sauce

DIRECTIONS:

Heat oil on medium in a nice big sauce pan. Add in your shallots, turn your heat down to low/medium and let those shallots sweat a little.

Once your shallots are starting to become translucent add in your garlic followed by the dried basil, oregano and a pinch of salt and pepper.

Once garlic has released its flavor into the mixture add in your strained and chopped tomatoes. Mix well and let the water in the pan evaporate a little before adding in the wine.

In a separate pot bring water to boil, add salt followed by your linguini.

Once you add in the wine let that sit for a while to reduce before adding in the clams. As the clams open up they release the flavor of sea water so the dish may need to thicken up a little bit but you also need to cover the dish so to properly steam the clams to open.

Once clams are fully open, add your cooked linguine, garnish with fresh Italian parsley and you are ready to serve!

ENJOY!!!


I hope you enjoyed this recipe as much as I do. If you have any comments please leave them below and I'll be happy to answer them as soon as I can! Bon Appetite!!!


PIN THIS POST

#FOODIEFRIDAYS EPISODE 3 - CHEF HAROLD'S SMOKED DUCK

For episode 3 of #FoodieFridays I teamed up with Summerhill Market and Chef Harold to show you how to make delicious smoked chicken duck sandwiches using his smoked product available at Summerhill Market.

For all of you who are not familiar with Chef Harold he makes fabulous smoked products that he sells directly to restaurants and high end grocery stores here in Toronto and Montreal. To check out his full range of products click -> HERE

Again I also would like to reiterate that creating this YouTube series has long been a dream of mine and I am a true believer in giving thanks where it's due so,... Thanks again to everyone who helped make it possible. Also thank you everyone who showed me love and support over my first year blogging! You guys rock!

SWEET HONEY SOY SHRIMP MARINADE - GLUTEN FREE OPTION!

This recipe is so easy! I paired this dish with some Japanese sticky rice but you can use any starchy base you like. I would also recommend pairing this with Asian noodles, quinoa if you want to be a little bit healthier or even just on its own if you are trying to optimize your protein intake. This recipe is perfect if you are looking for something to prepare for dinner that is super quick or if you invited someone over last minute. I always keep some frozen shrimp in my freezer so that on the occasion I need to whip up something I have this awesome recipe to fall back on! ENJOY

INGREDIENTS:

1/3 cup of honey
1/3 cup of soya sauce (you can substitute for a gluten free soya sauce if you want)
2-3 crushed garlic cloves (or minced)
1 tbsp of grated fresh ginger
1 lbs of uncooked, cleaned shrimp
1 tbsp of olive oil
1/4 cup chopped green onion (for garnish)

DIRECTIONS:

Mix the honey, soya sauce, garlic and ginger in a large flat bowl. Add in your shrimp and allow to marinate in the fridge for at least 15 minutes

*If you are cooking a starchy base I would start cooking/prepping it now while the shrimp marinade

Heat up a pan on medium heat and add in your olive oil. When the olive oil is warm add in your shrimp including marinade and allow to cook until bright pink! Apx 4-6 minutes.

Remove from heat and add onto your rice (or whatever starch you choose). Garnish with some chopped green onions and enjoy!


I hope you enjoy this recipe as much as I do. If you have any comments please leave them below and I'll be happy to answer them as soon as I can! Bon Appetite!!!


PIN THIS POST

HOMEMADE PUFFED RICE GRANOLA WITH SMARTIES!!!

If you like to cook and get creative like me sometimes you end up with a lot of left over ingredients filling up all the space in your pantry. The great thing about homemade granola bars are that you can really use whatever you have on hand. If you want to make them naturally sweet use more dried fruit. Not worried about calories - sweeten with chocolate or caramel! Granola is a great way to create something out of what you've got while still tasting good and satisfying those cravings in a healthy way. Today I made puffed rice granola with walnuts, pine nuts, shredded coconuts and even some crushed smarties! If you are interested in making granola bars at home I have included the recipe below! ENJOY!

INGREDIENTS:

1/3 cup of brown sugar
1/4 cup of honey
1/4 cup of unsalted butter
1 tsp of vanilla extract
1/4 tsp of salt
2.5 cups of rice puffs
1/3 cup of shredded coconut
1/4 cup of crushed walnut
1/4 cup of pine nuts
1/4 cup of crushed smarties

DIRECTIONS:

In a small sauce pan on medium heat melt the brown sugar, honey and butter together. Stir until completely liquefied. Remove from heat, add in your vanilla extract and salt before setting aside.

In a large bowl mix in your puffed rice, shredded coconut, walnuts, pine nuts and crushed smarties - mix up that goodness!!!

Once the melted sugar, butter mixture has cooled a little (dont want it to melt your chocolate) add it to the big bowl of puffed rice and mix until fully incorporated.

Take a deep flat dish and line with aluminum foil before pouring in granola mixture. Spread around using a spatula and let chill for at least 2 hours in the fridge before chopping in granola bars!!! 


I hope you enjoy this recipe as much as I do. If you have any comments please leave them below and I'll be happy to answer them as soon as I can! Bon Appetite!!!


PIN THIS POST