EPISODE 4: HOUSTON, WE HAVE A PROBLEM! - RENOVATING MY TORONTO VICTORIAN HOME

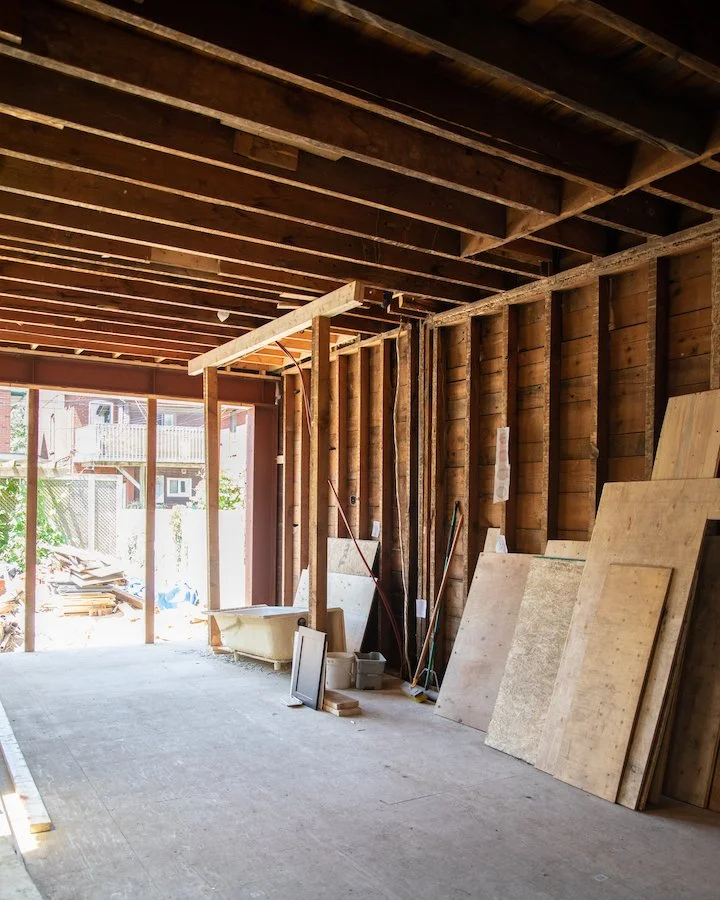
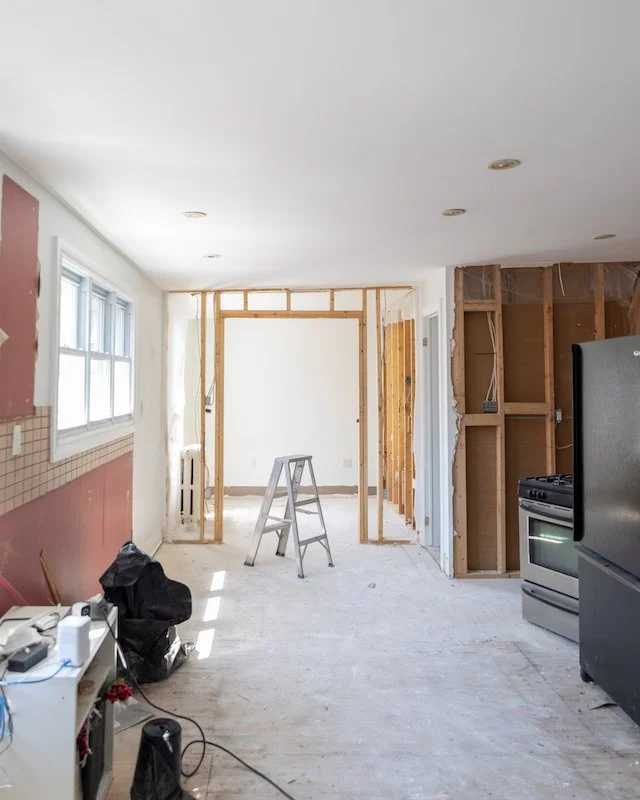
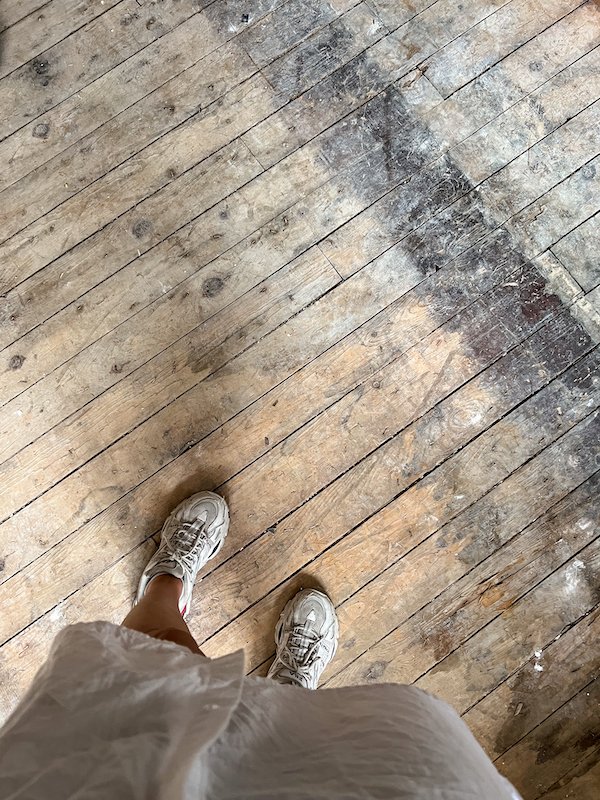
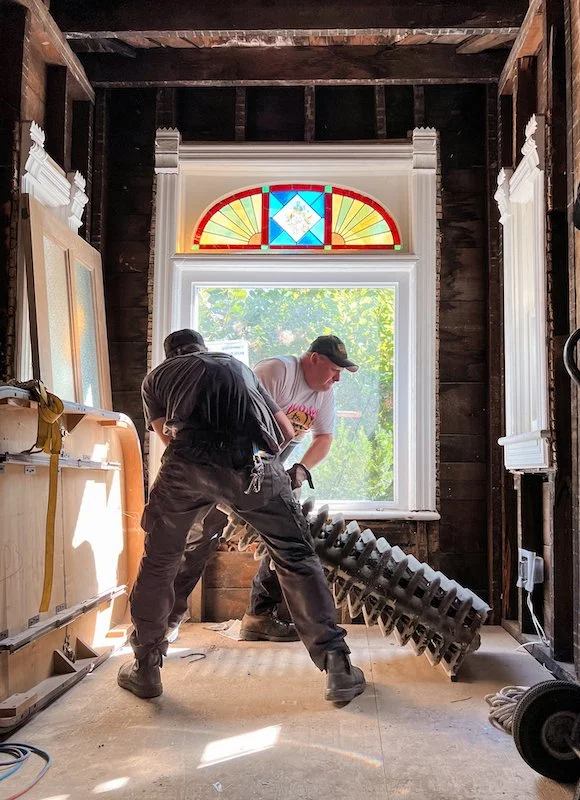
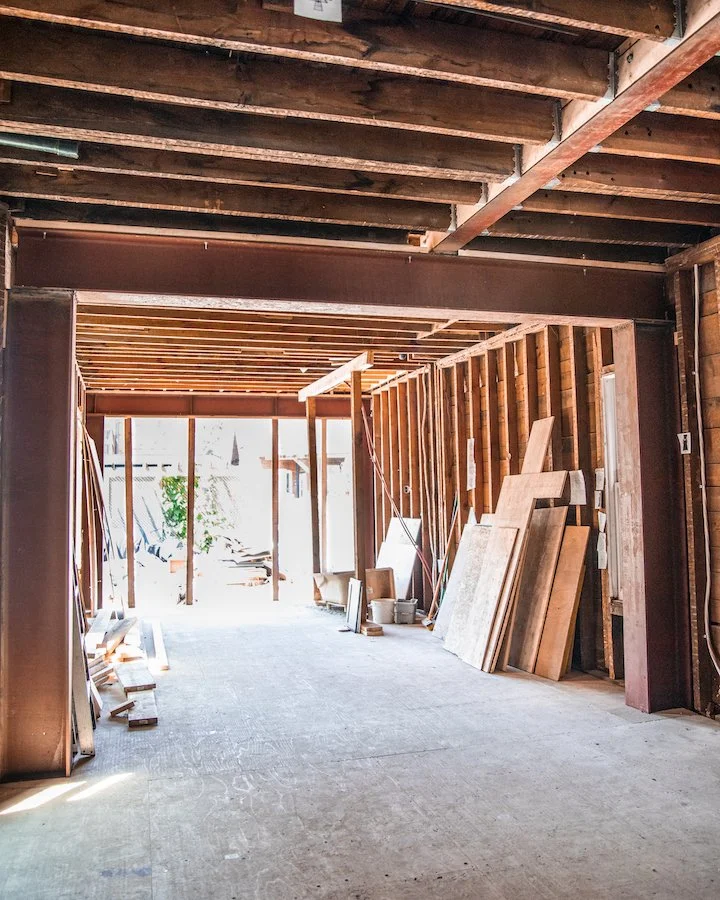
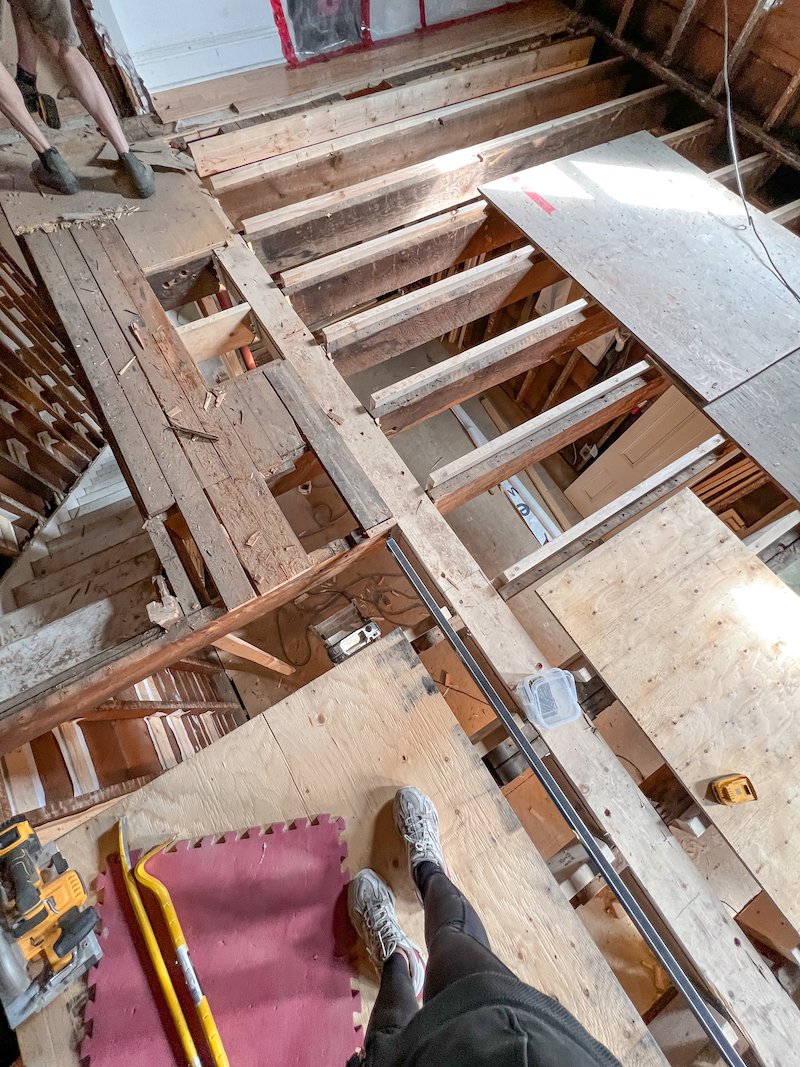
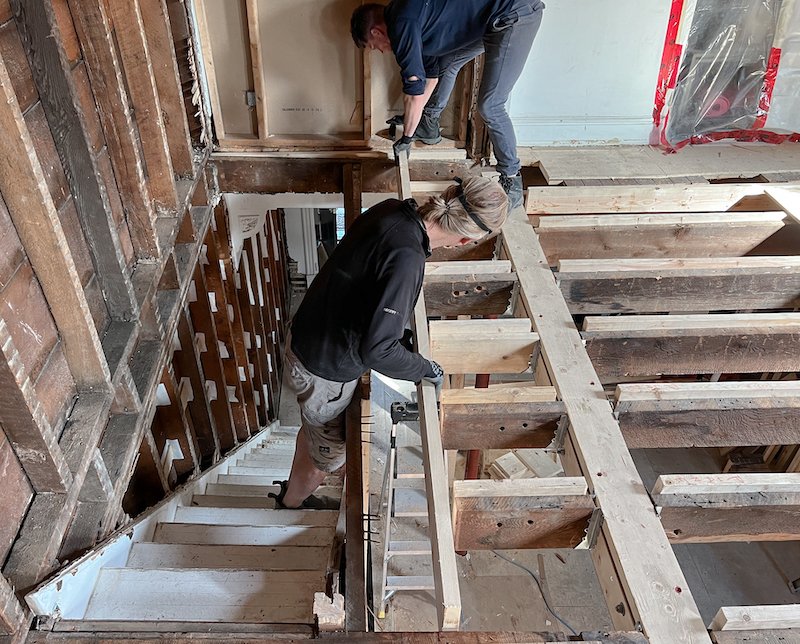
Preparing to demo the middle half of the 2nd floor

RENOVATING MY TORONTO VICTORIAN HOME - EPISODE 4!

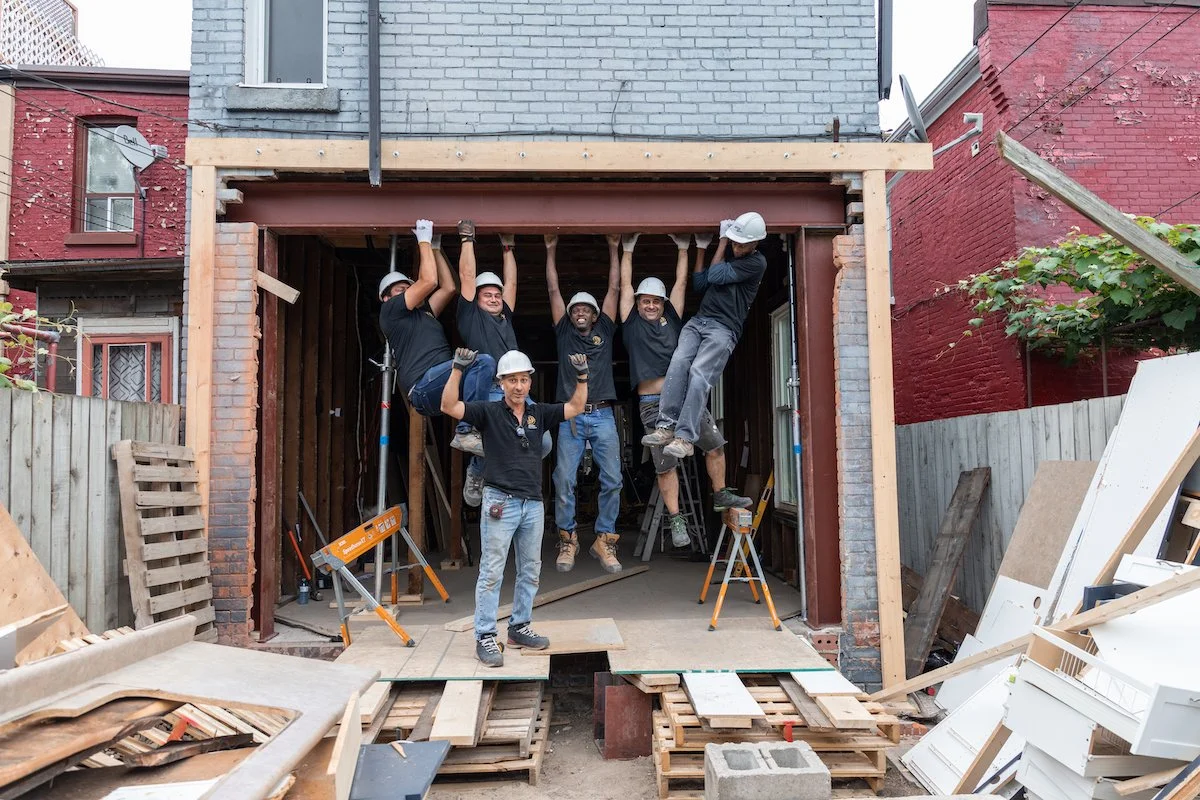
Following the completion of the work we did in the back half of the house, Adam and I were definitely riding an emotional high. We knew that even a seasoned contractor would have found the task we had decided to take on to be challenging and the fact that we figured it out ourselves only fuelled our fire to keep going. There was plenty of work still to be done but nothing could have prepared us for what was to come.

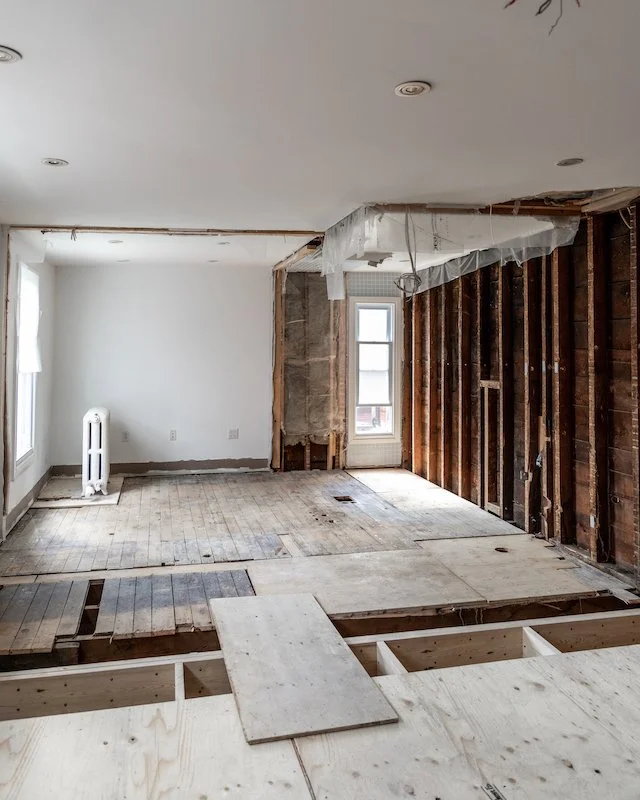
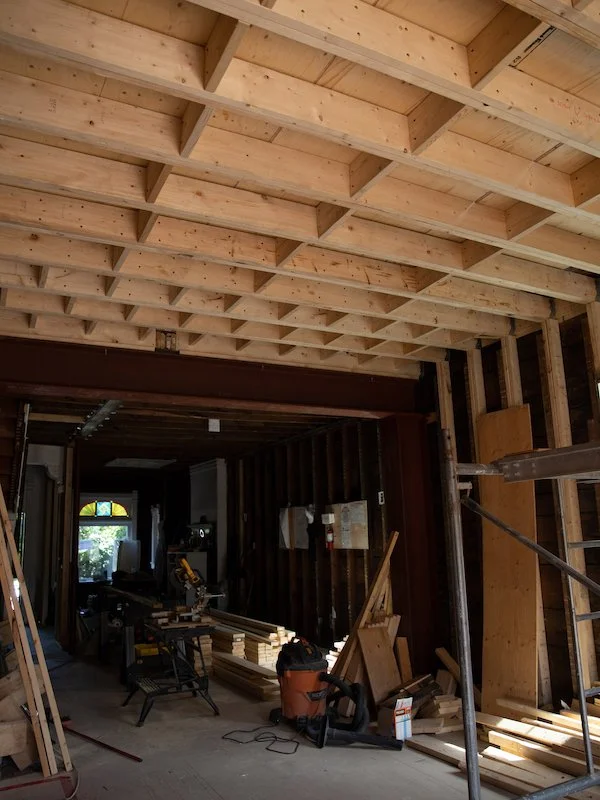
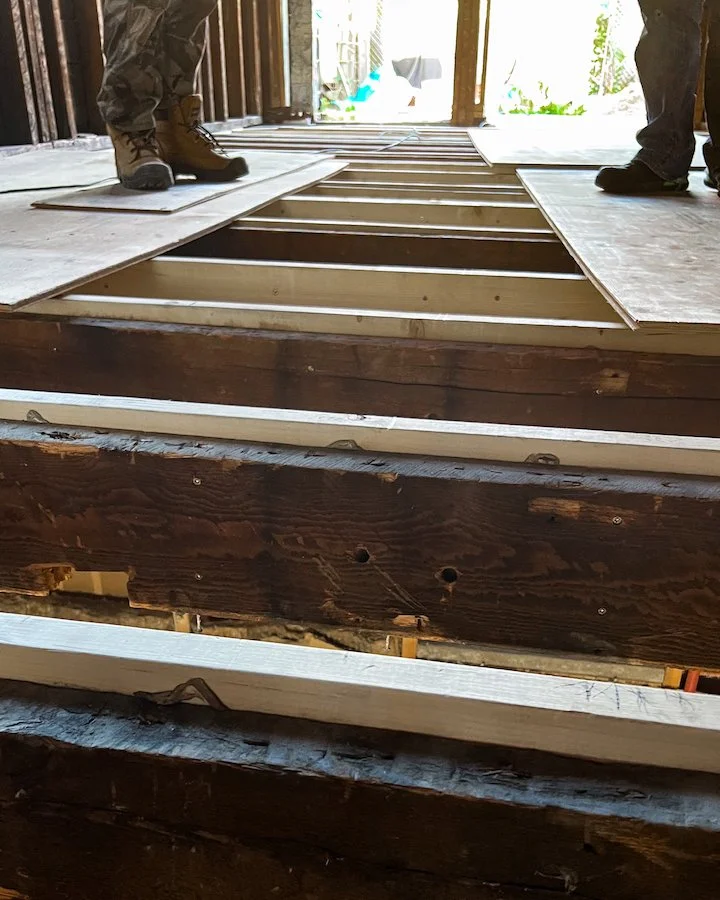
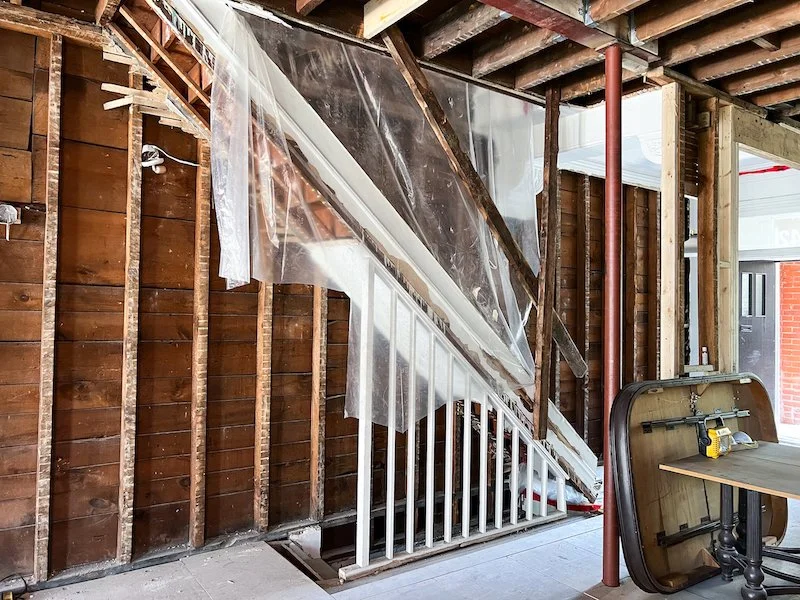
Proceeding to lay down a new sub floor on the back half of the second floor, Adam and I still had to demo the walls, ceiling and floors in the middle half of the second floor. Originally we had only planned to widen the staircase in this area but now that we had pulled the second floor into Phase 1 of our renovation, this area would occupy our new hallway that runs along side the stairs as well as our new master bathroom. In order to prepare for framing the new second floor layout though, we would first need to finish demoing this area.


FOLLOW ME ON INSTAGRAM @ISTHATSOH


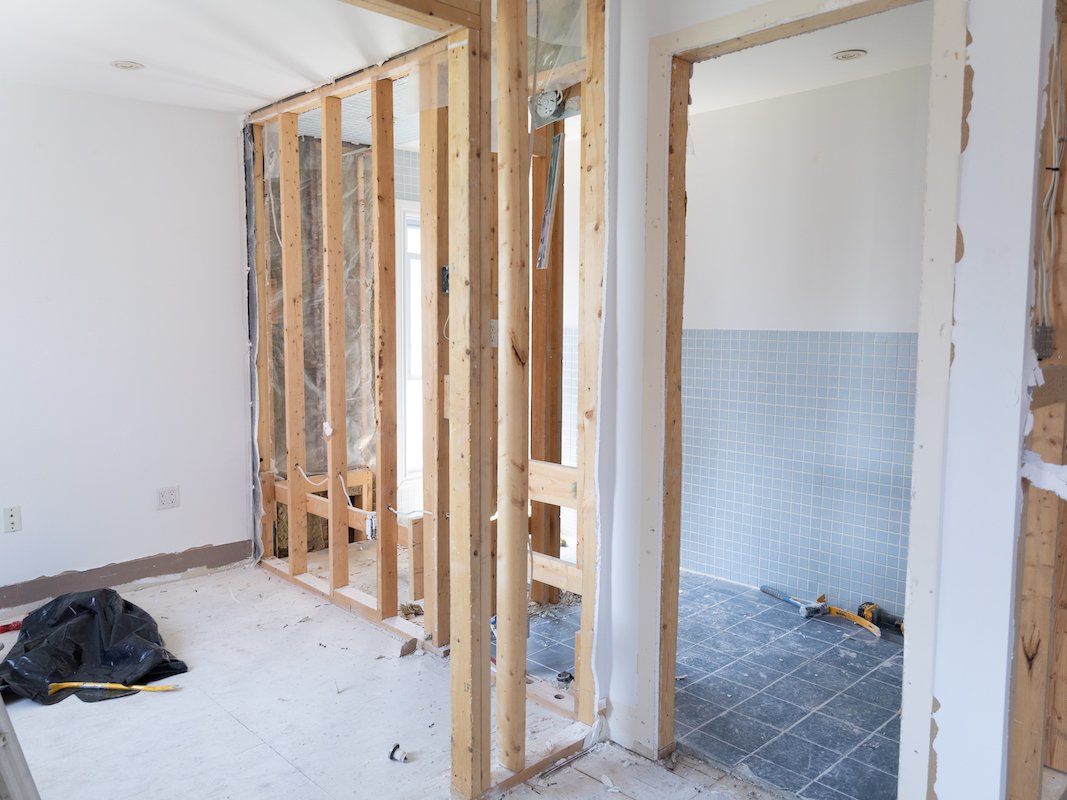
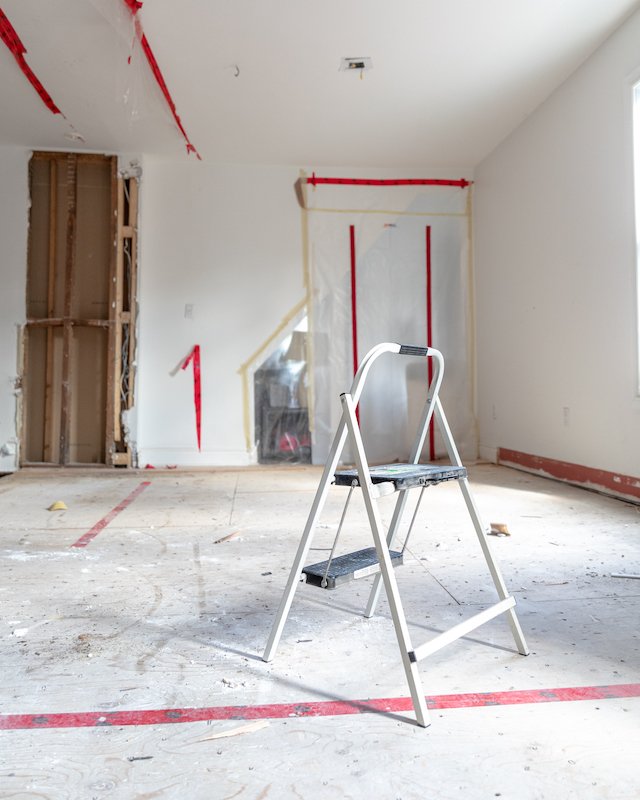
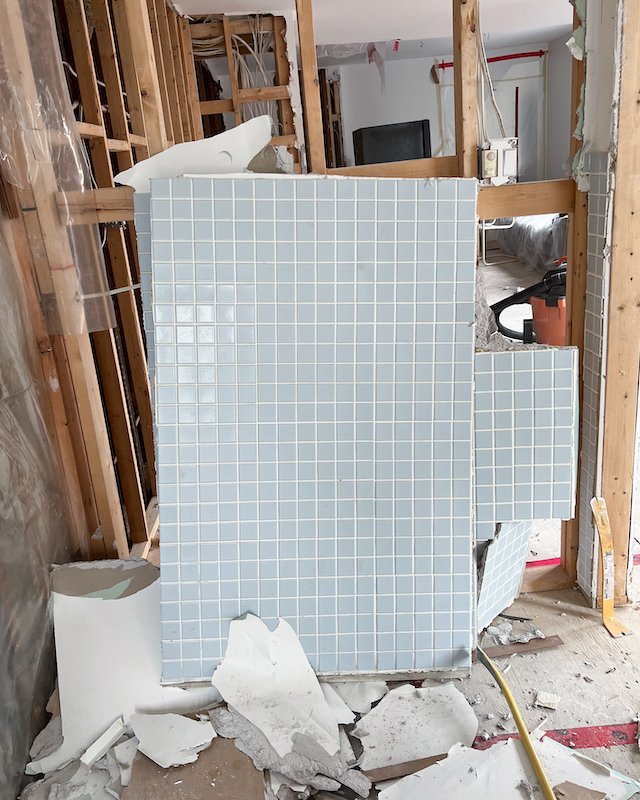
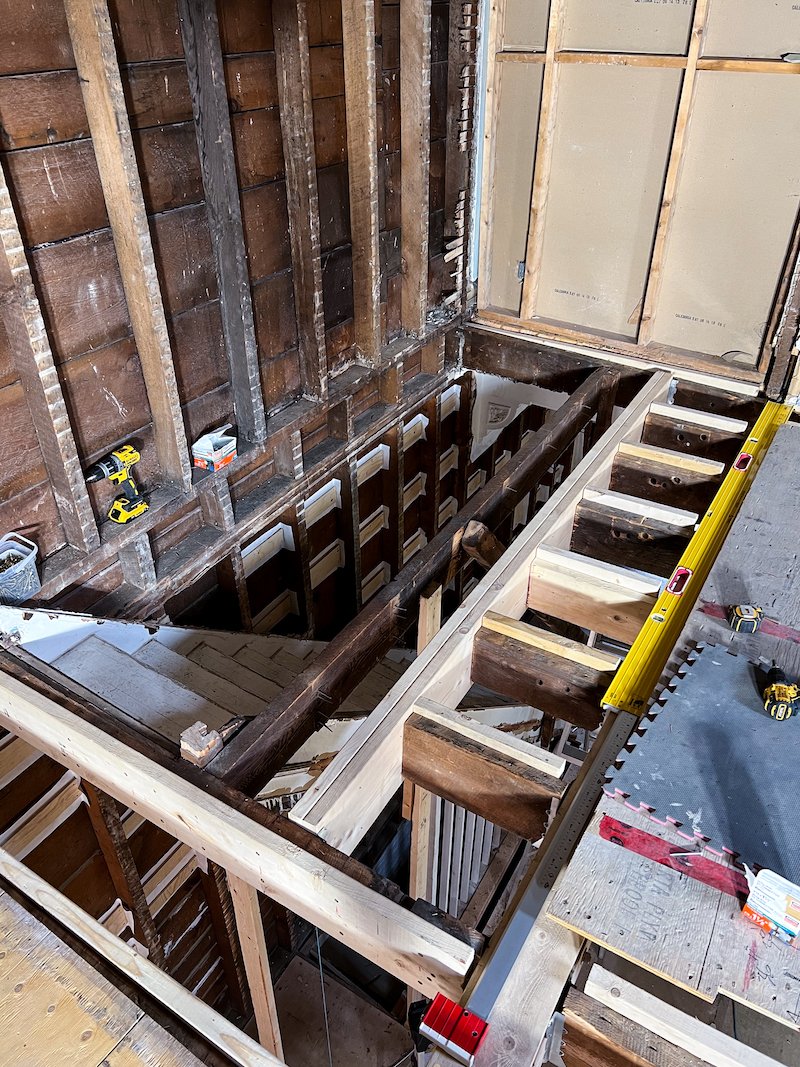
BEFORE AND AFTER PHOTO’S FROM OUR SECOND FLOOR DEMO!

Chaotic doesn’t even begin to describe how this next task went. Adam and I waded through rubble of lath and plaster, drywall, steel mesh and insulation for hours. The room was so thick with dust we could barely see more then 10 feet in front of us. Thankfully we were prepared with protective Tyvek suits, commercial grade respirators, and lots and lots of garbage bags. In order to avoid the dust from going to other parts of the house we had barricaded ourselves in by first covering the staircase opening with plastic before laying down planks of wood across it and covering it with plywood. There was no way in or out, and Adam and I had to keep going until all the work was done. Six hours, 80 garbage bags, and what felt like 10 pounds of sweat later, we were done. Despite wearing protective gear my legs were black and my face looked like I had a charcoal mask on. We were filthy and completely depleted!

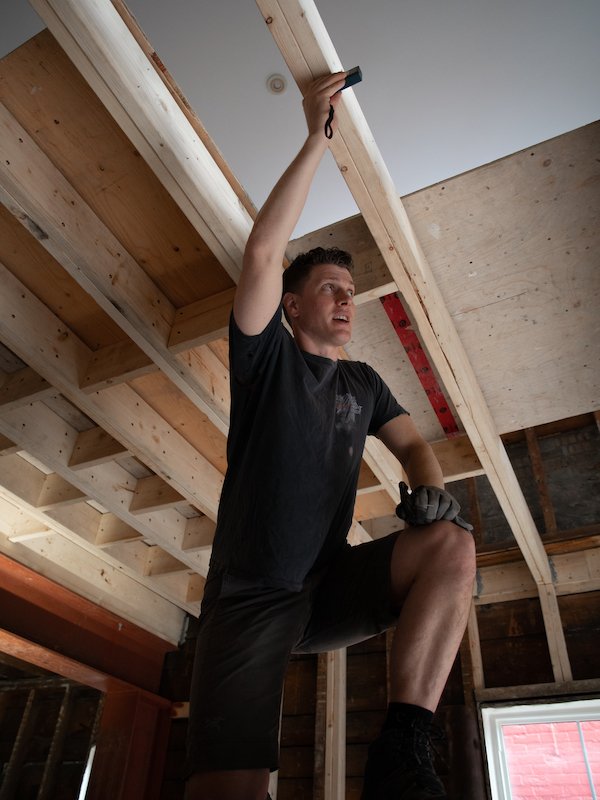
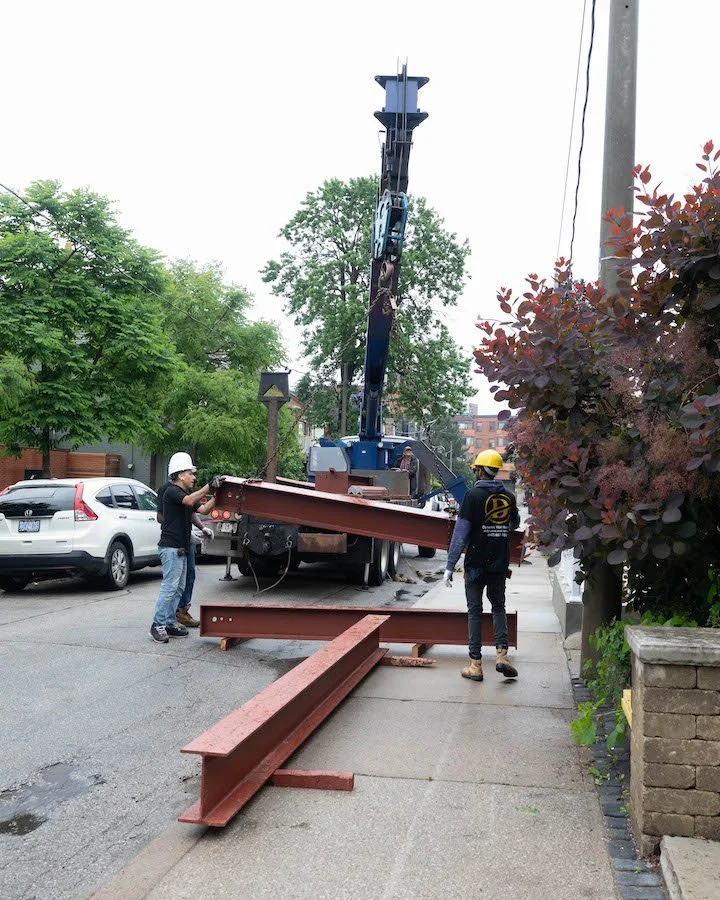
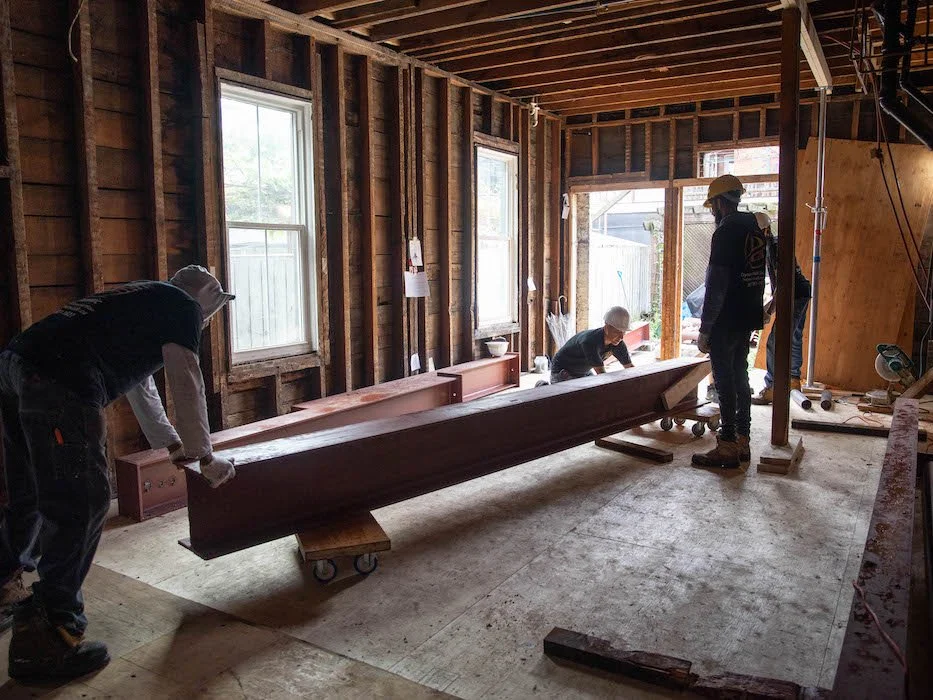
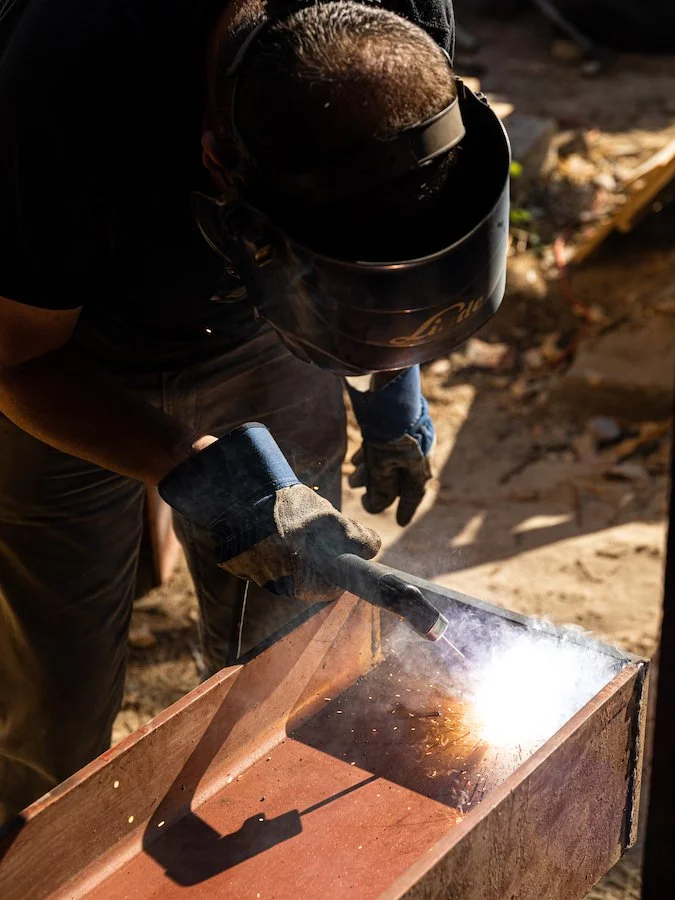
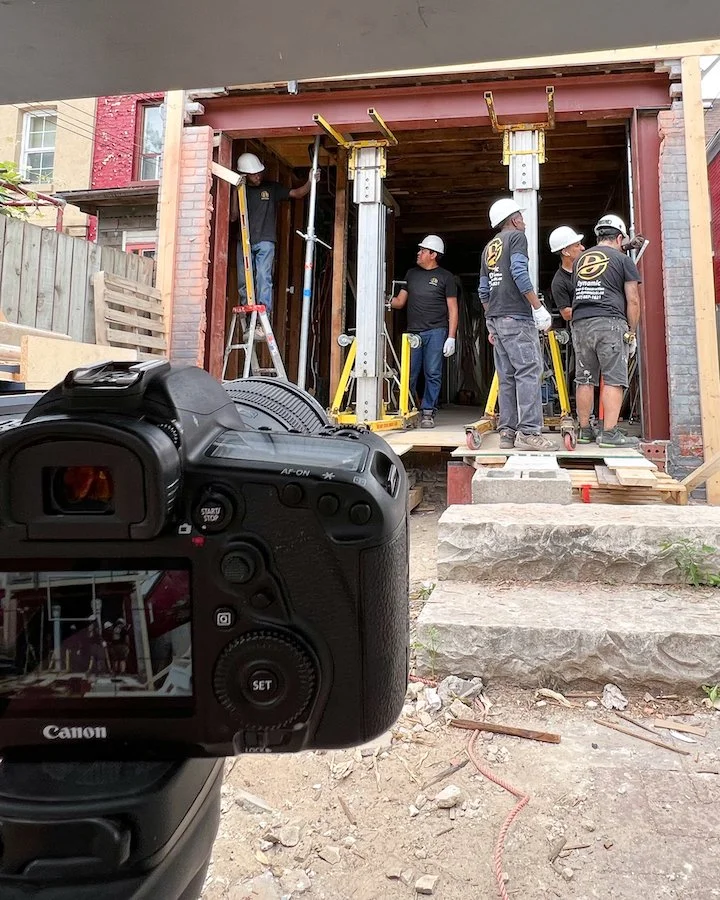
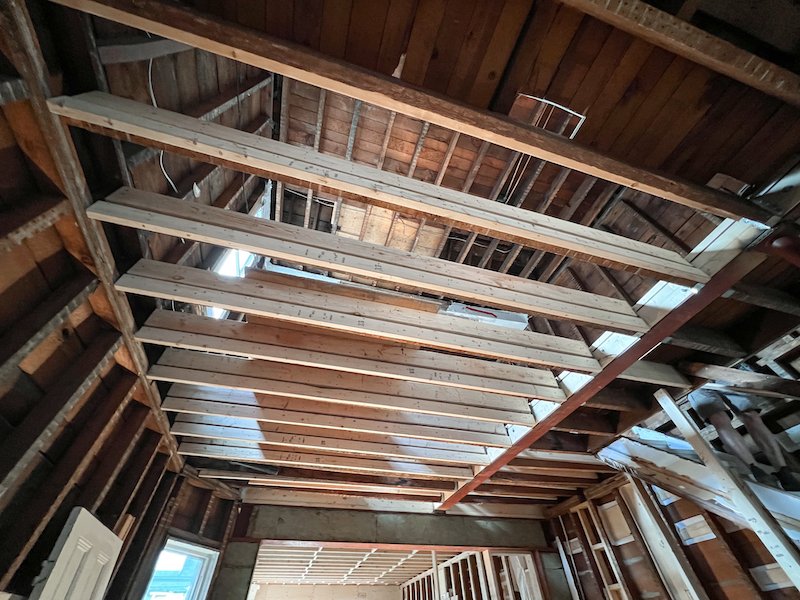
What we didn’t anticipate to find was that the ceiling joists in this section of the house actually run the opposite way as the joists in the rest of the house. This came as a complete shock to us and totally added an unexpected challenge. Unsure of how this would change our plans to frame out a new layout, we knew we would have to have our residential structural engineer to come back in and take stock of our new findings.

STRUCTURAL ENGINEER

Since the very beginning, our structural engineer Ken Davis of K.H. Davis Engineering Consultants LTD has been nothing but amazing. Not only does he have great credentials and has worked on numerous Toronto century homes before, but he has been tremendously helpful with answering all our questions. Whenever a problem has arose during our home renovation that has caused concerns or a need to pivot, he’s been the first one we call and has always found a solution that works for our budget. If you’re even thinking about removing a load barring wall in your house, trust me when I say you’ll want someone like Ken on your team.

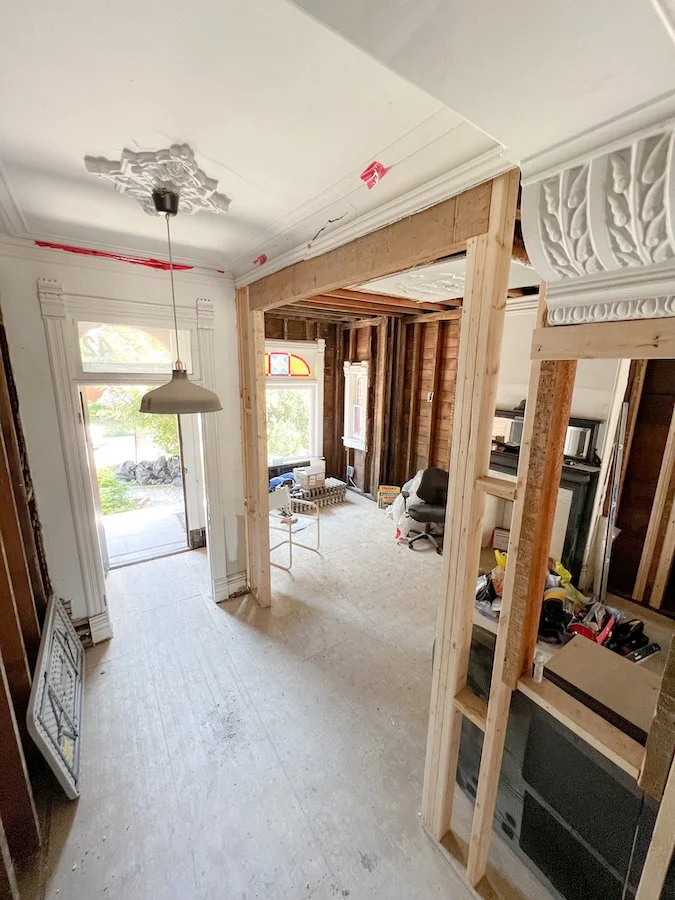
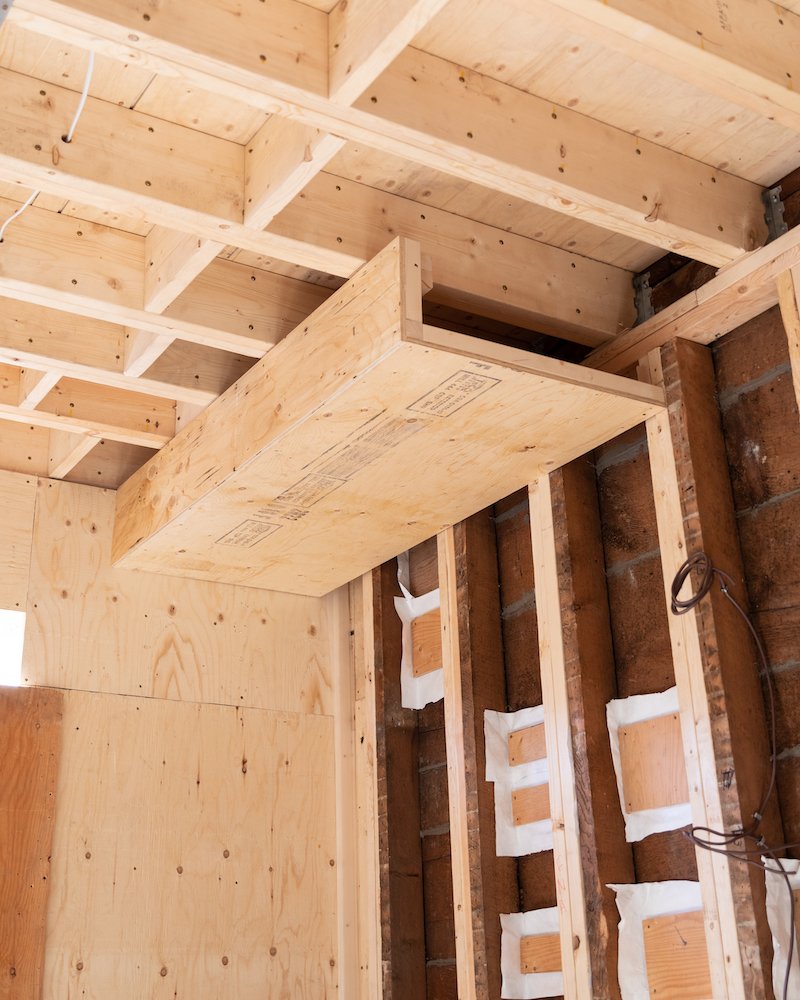
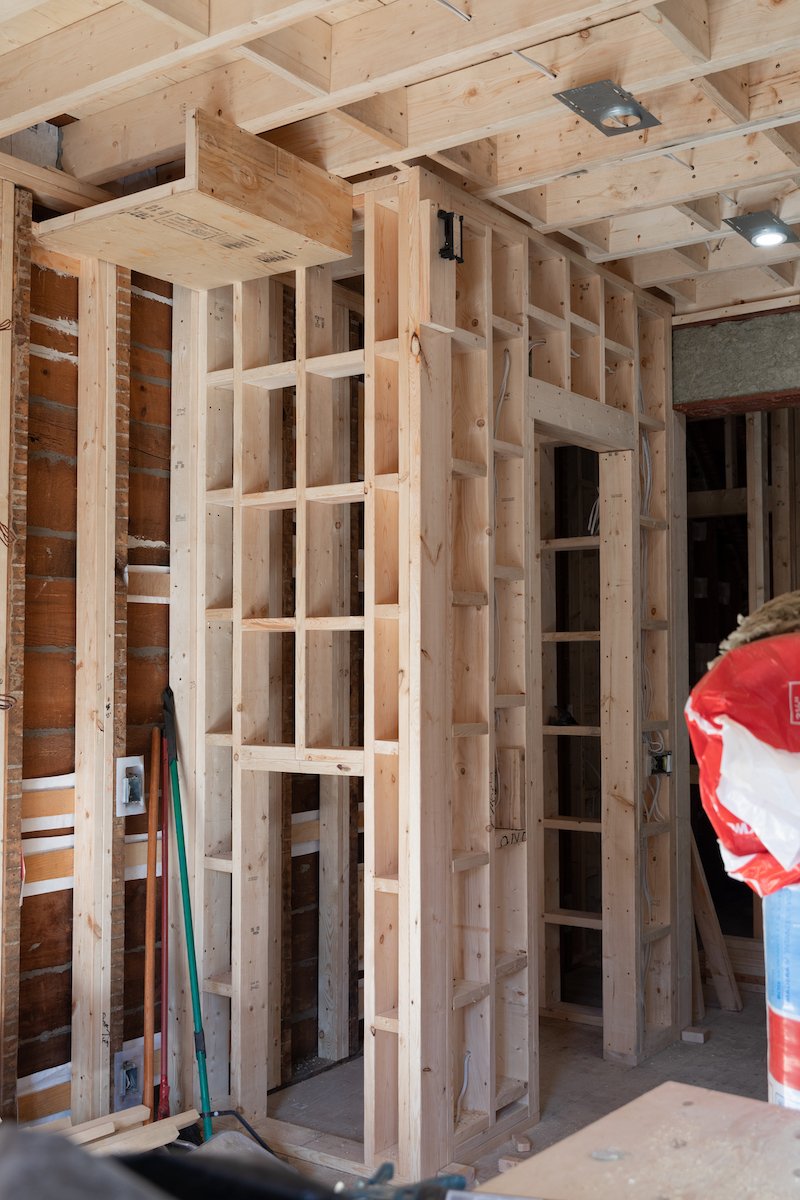
As we awaited news from Ken, we still had a lot of work to do. We still needed to finish widening the staircase and level the floors in the middle section of the second floor and we still needed to finish framing the first floor including build bulkheads for our incoming kitchen cabinets. Compared to the joist work we had previously done these tasks were a piece of cake and I actually quite enjoyed learning how to properly frame out a house.

HARDWOOD FLOORING IN TORONTO

Chestnut Flooring Showroom is located at 8601 Jane St, Concord, ON L4K 5N9 Tel: (905) 761-6655

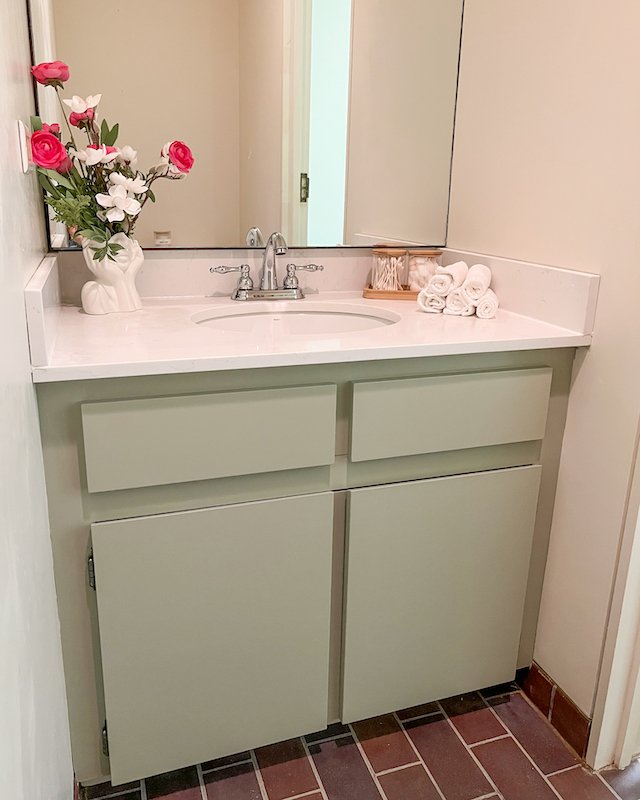
Although our Toronto Victorian home renovation did see yet another unexpected delay, it also gave us time to go shopping for additional flooring for the second floor. Prior to starting our home renovation and my new home renovation series on YouTube, Adam and I talked extensively about what our dream house would look like. One design feature that I was obsessed with incorporating into our renovation was herringbone floors throughout the main floor. Only once we started to visit showrooms and look for a good suppliers did we stumble upon Chestnut Flooring in Vaughan.

Chestnut Flooring is a family-owned, full service, one-stop-shop for all your flooring needs. They offer a wide range of flooring products including hardwood, engineered, laminate, carpet, vinyl and even tile from both well-known domestic and international brands.

Since Adam and I were very happy with the white oak herringbone floors we previously bought from Chestnut Flooring a few months earlier, it was a no brainier for us to pay their showroom another visit now that we needed floors for the second floor. Within an hour we were in and out of the showroom, having found numerous suitable option and given the helpful advice we had received from the co-owner Sherry. I have never been one to make a design decision quickly and even shocked myself with how fast I was able to make a decision. I guess when you know, you know, and being in good hands with a great supplier gave me the comfort I needed to not have to think twice.

Chestnut Flooring has a wide selection of hardwood flooring, engineered flooring, laminate, carpet, vinyl and even tile from both well-known domestic and international brands.

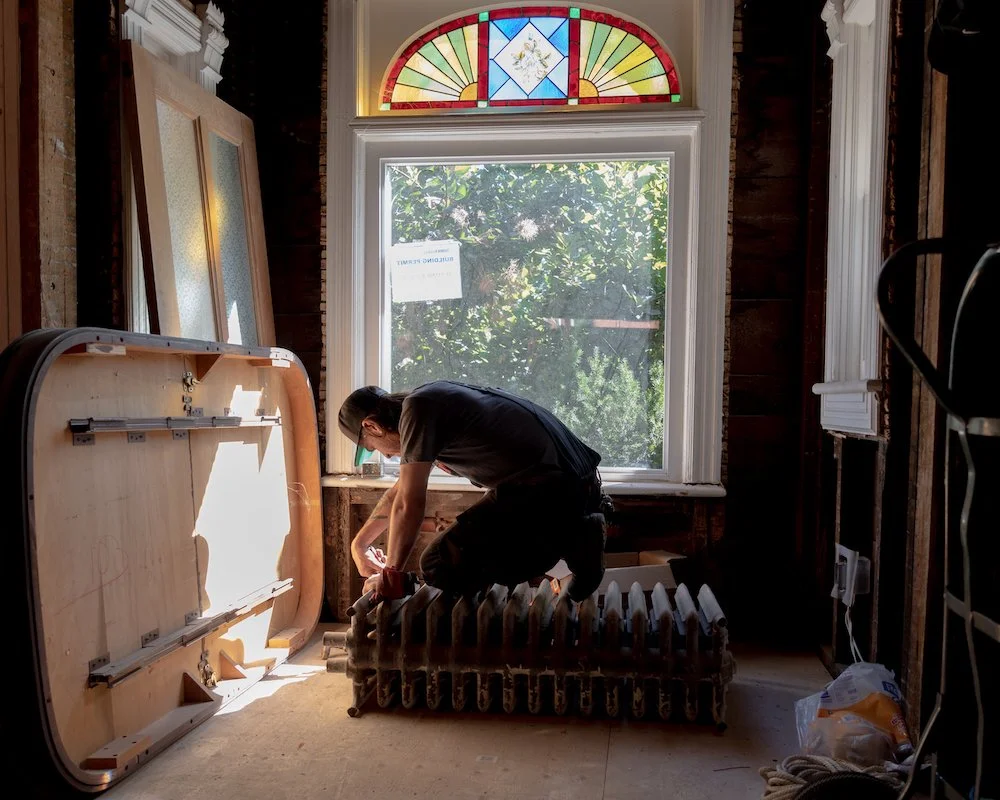
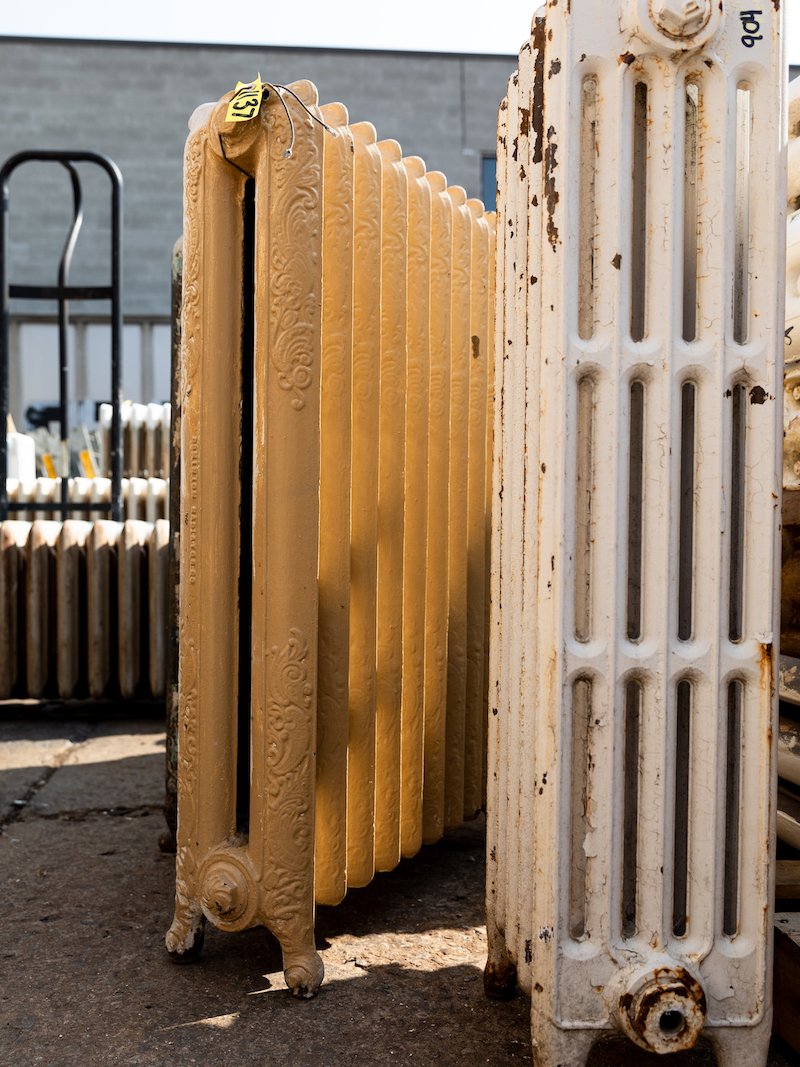
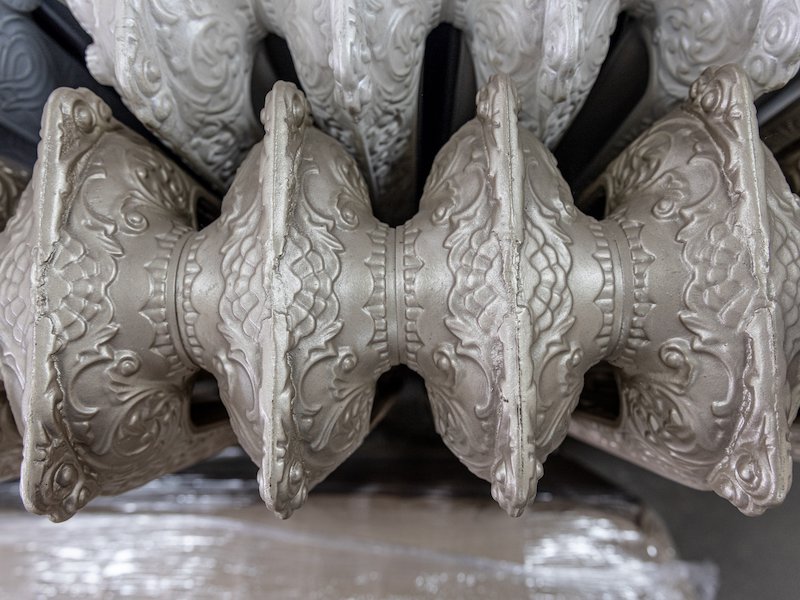
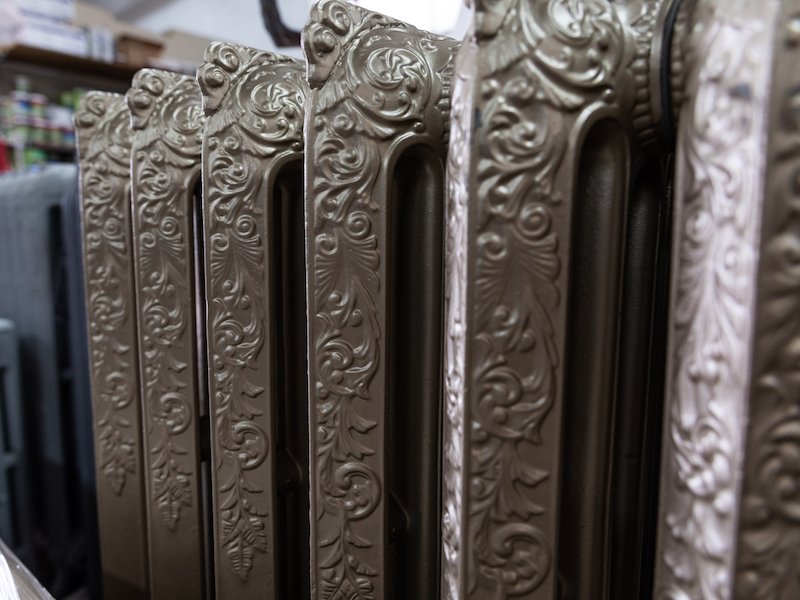
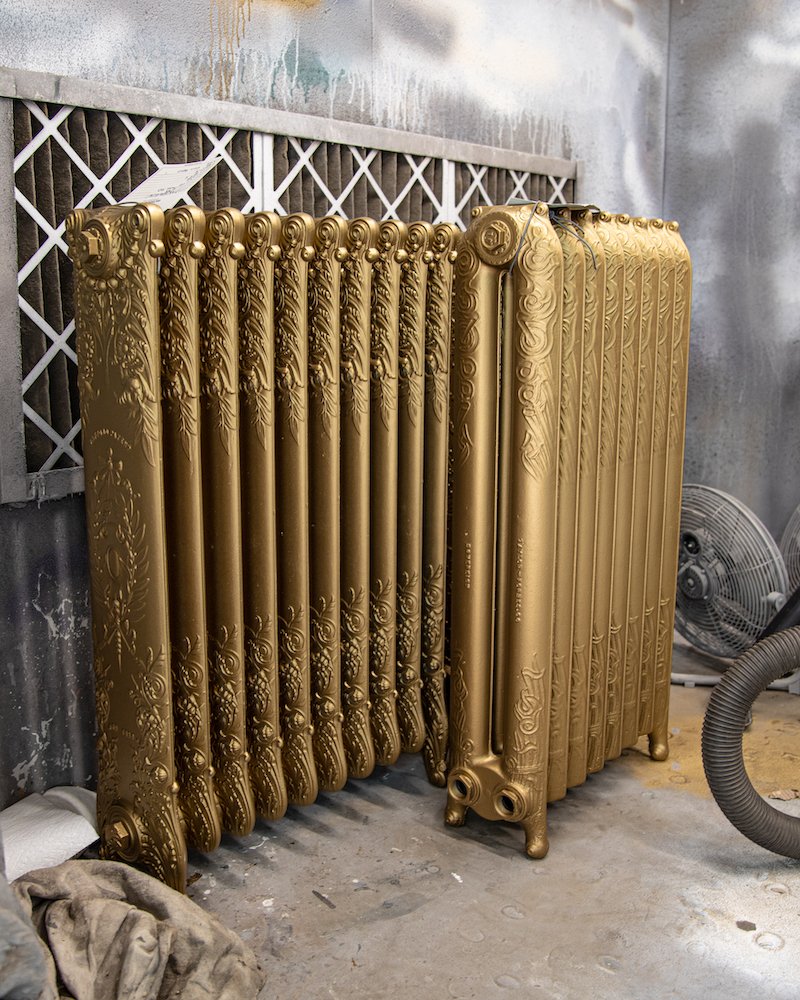
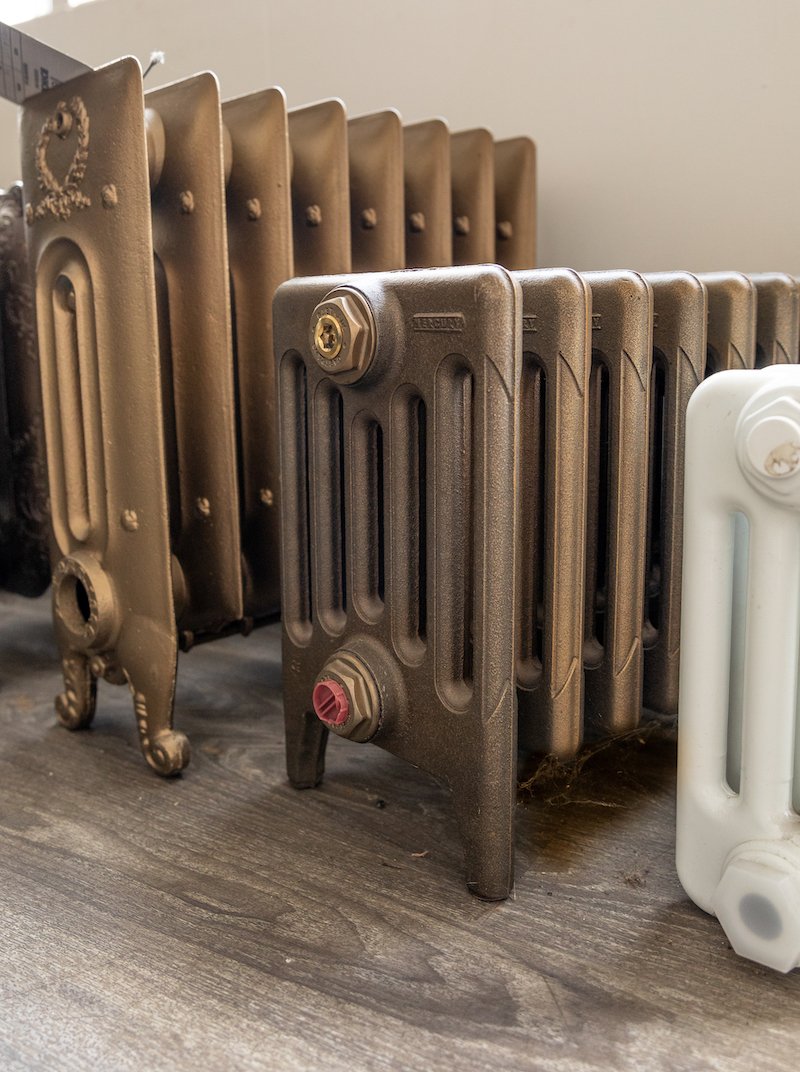
UPDATES ON MY CAST IRON RADIATORS

Following the pickup of our cast iron Victorian radiators for refurbishment, I heard from Ironworks Radiators Inc that one of our radiators did not pass its pressure test. Unfortunately, the ornate Victorian column radiator that we had found hiding behind a clunky rad cover on the main floor was missing a leg and where that leg used to be, was a tiny hole. In order to repair the radiator they would have had to saw it into three pieces, remove that cast iron column where the hole was and solder the remaining two pieces back together. Although Ironworks has successfully done this repair before, there was no guarantee it would work for our Victorian radiators so Adam and I decided that the safest approach to this problem would be to buy an additional vintage cast iron radiator from Ironworks Radiators Inc stockyard.

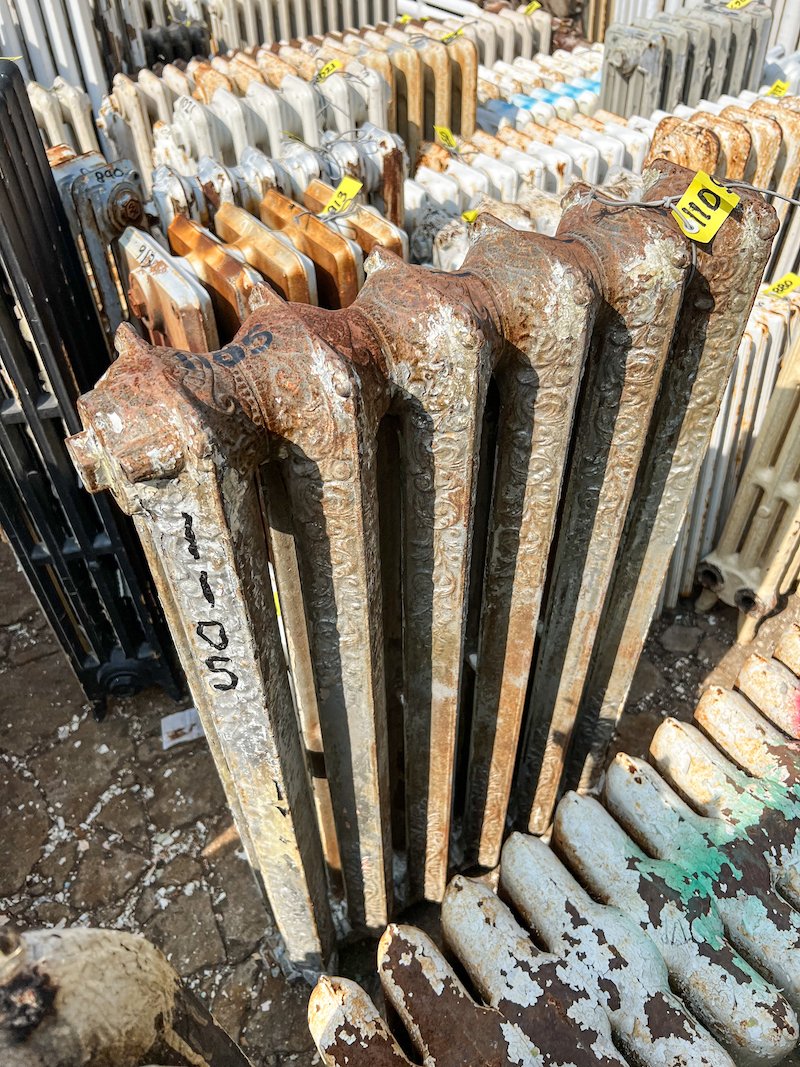
Ironworks Radiators Inc Stockyard - Located at 367 Bering Ave Etobicoke, ON M8Z 3B1 - By Appointment Only!

Located on the boarder of Toronto and Etobicoke, Ironwork’s stockyard is full of vintage radiators waiting to be refurbished! The owner of Ironworks Jennifer, has been collecting radiators for years often going into old homes and removing all the ornate radiators before they are demolished. She’s always adding new and unique finds and her inventory is always changing which makes each visit fun to her stockyard a fun little treasure hunt. Once there, not only was I able to quickly make a decision about which vintage Victorian radiators I wanted to purchase for refurbishment, but I also got to see a model of the two new Castrad radiators I was planning to purchase for under the twin kitchen windows. I would also come to realize later how helpful browsing her showroom and shop was when it came time to selecting custom colours for all the cast iron radiators I was purchasing! A decision I struggled with for weeks!!

PHOTO’S FROM MY VISIT TO THE IRONWORKS STOCKYARD

Well there you have it, our renovation continues to move ahead now that we have heard back from Ken regarding the second floor. Turns out we will need to do some additional structural work to the second floor, but it’s nothing that Adam, his dad and I can’t handle ourselves. Stay tuned for more on this in the next episode!


ENJOYING THIS CONTENT? CHECK OUT SOME OF MY OTHER EPISODES AND DIY’S


Home sweet Home! My smoke bush out front has grown out of control over the summer! I am looking forward to doing more landscaping and gardening next year!

If you don’t want to wait for the next episode to catch a glimpse of what is happening behind the scenes you can always follow me on Instagram where I share up-to-date stories of my interior design and renovation progress!

Thank you so much for joining me today and for checking out my new Toronto home renovation series on Youtube. I am super excited to be modernizing a Victorian home while still keeping the charm of an old Victorian house. If you have any questions about my Victorian house renovations, what it’s like to live in Little Portugal, Toronto or recommendations for Toronto contractors, hit me up in the comments below!

Before I sign off, I’d also like to say a big thank you to Chestnut Flooring and Ironworks Radiator Inc for partnering with us on this project. I’m so excited to be working with local industry experts on our Toronto home renovations but want to reiterate that, like always, all opinions remain my own.

Until next time,

- Soheila

A shot of the Toronto city skyline in the fall of 2022


PIN THIS POST!

EPISODE 3: SWEAT EQUITY - RENOVATING MY TORONTO VICTORIAN HOME

RENOVATING MY TORONTO VICTORIAN HOME - EPISODE 3!

When Adam and I first started talking about renovating our Toronto Victorian home, we knew we had to split it up into two phases. Phase 1 would focus on fixing the structural issues and redoing the entire main floor, while Phase 2 would focus on re-configuring the layout of the second floor and enlarging the third floor by replacing the back half of the roof with a new dormer.

What we didn’t anticipate, was how bad the condition of the main floor ceiling joists were in the back half of the house. Half didn’t span the entire width of the room, big chunks were cut out of them, and many were being held together by other, smaller, pieces of wood. We were Shoooketh!

Many of the ceiling joist on the main floor did not span the full width of the house!


FOLLOW ME ON INSTAGRAM @ISTHATSOH


Originally, we thought all we would have to do was sister each ceiling joist (to sister a joist you add an extra identical joist to the existing over-spanned, damaged or inadequate joist, and tie the two together with glue and screws (or nails) to add structural support – sounds super easy, right!?), but after the demo was completed and structural work commenced, it became obvious that there was way more work to do! For one thing, 80% of the ceiling joists needed to be replaced. In order to do that, we would need to demo whatever was above. And yes, I’m talking about the second floor!

our 2nd floor ktichen before our renovation

We had not anticipated needing to renovate the 2nd floor kitchen (above) or the 2nd floor bathroom (below)

At that time, that area of the second floor was occupied by our second floor kitchen, my little back office, and a small bathroom with a stand-up tub shower. If I’m being honest, I didn’t love the quality of the cabinetry and the ‘master bath’ left much to be desired, but we were willing to wait. True, we had no real bedrooms but we had our master and two small twin rooms on the third floor that were being used as his and her closets. The house definitely needed more bedrooms and a bathroom worthy enough to be considered a master, but still, we had a plan, two phases.

p.s. I had not taken any photos of the second floor prior to the demo, so this was all I could find. The kitchen photo is from our viewing, prior to buying the house!

I guess this is the part where I should tell you that we not only did we end up pulling the second floor into the first phase of our Toronto home renovation but we decided to do it ourselves! In episode 3 of my home renovation series I share the last two months of sweat equity Adam, his dad, and myself poured into fixing our Toronto Victorian home. In this episode, we tackle the demolition of the second floor, how we replaced each ceiling joist one by one, us installing a new levelled subfloor as well as everything that happened behind the scenes! The crucial question is, will our work pass inspection? Find out in Episode 3: Sweat Equity! Haha!

Adam and I are ready to start replacing ceiling joists!

PHOTO’S FROM OUR SECOND FLOOR DEMO!

While Adam and I were busy working on the house, a few things did happen behind the scene. For one, our appliances finally showed up along with our new natural oak herringbone floors from Chestnut Flooring.

Chestnut Flooring - Herringbone flooring companies in Toronto

Our order from Chestnut Flooring arrived! We ordered some beautiful natural oak herringbone floors for the main floor!

If anyone is in the market for flooring, I highly recommend visiting Chestnut Flooring’s showroom in Vaughan. They are a family-owned, full service (that’s right, they don’t just sell you the flooring, they will help you install it too!), one stop shop for all your flooring needs. They offer a wide range of flooring products including hardwood, engineered, laminate, carpet, vinyl and even tile from both well-known domestic and international brands.

When Adam and I first began to look for herringbone floors we visited numerous showrooms but none stood up to the quality and variety that Chestnut Flooring provided. Their engineered herringbone flooring was superior in both top layer thickness and durability which meant down the road, if we ever wanted to re-sand and re-finish the floors we could do it without issue. Of course they also offer solid hardwood floors however, given our Canadian climate, engineered hardwood flooring is better suited for herringbone oak floors. Since the core of engineered hardwood consists of 5 to 7 layers of plywood pressed together in a crisscrossed pattern, it is its construction that makes engineered hardwood flooring less likely to shift, expand or contract when exposed to environmental changes in temperature, moisture and humidity (and when it comes to specialty floors like herringbone and chevron you don’t want movement). Further, our installer who had worked with numerous types of flooring from numerous flooring companies in Toronto, independently suggested we visit their showroom and commented on how he preferred the quality of Chestnut’s flooring products over others he has worked with. So really, that sealed the deal for us! Of course, now that we are redoing the second floor we will be revisiting the Chestnut Flooring showroom to order additional flooring. Stay tuned for our selection!

OUR TORONTO HOME RENOVATIONS - BTS PHOTOS OF US REPLACING JOISTS BETWEEN THE MAIN AND SECOND FLOOR.

Additionally, Adam and I also pulled the trigger on getting two of our column radiators refurbished! Prior to the demo of the main floor, we discovered a beautiful ornate Victorian radiator in the main floor bedroom. It had been hidden behind a clunky rad cover, had not been maintained and desperately needed to be refurbished, but it was beautiful and I was ecstatic about its discovery!

Victorian Radiator repair - Ironworks pickup

Ironworks Radiator Inc picking up my Victorian radiator for refurbishment

Of course, since we were doing such a big renovation, the possibility of switching from cast iron radiators to forced air was an option but after learning more about the pros and cons of other types of central heating systems (particularly a forced air system) – like how they can collect dust and cause allergies, how the duct systems require regular cleaning, and that the furnace system serviced – central heating radiators just seemed like less yearly maintenance. Further, cast iron radiators are spectacular in moist climates such as Canada where we get tons of snow in the winter and rain in the spring. They are known for keeping basements bone dry during these months not to mention don’t require additional bulkheads like a forced air system. Lastly, they can be a beautiful showpiece (like a piece of jewellery for your home!) when refurbished and considering I am trying so hard to keep the charm of my Toronto Victorian home intact, it was an obvious choice.

In order to pass Toronto building code we would have to meet a certain BTU output, so enlisting the help of a heating experts at Ironworks Radiators Inc felt like the ideal next step.

CAST IRON RADIATOR REFERBISHMENT & REPAIR

Based in Toronto, Ironworks Radiator Inc. offers a multitude of services including consultation, radiator resizing, refurbishment (which includes custom repainting), is a supplier of radiator parts and accessories (including super fancy radiator bleeder keys), and offers pickup and delivery services. They also have a huge stockyard of rare vintage radiators to choose from and are licensed distributor for various new steel and cast iron radiator from international industry leading brands like Castrad.

Discovering Ironworks has been immensely beneficial for us. Not only were we interested in getting two column radiators refurbished, but we were in the market for an additional vintage radiators and two new custom modern radiators for under the twin windows in the kitchen. Jennifer at Ironworks was an invaluable help, organizing the pickup of our cast iron radiators for refurbishment (a rare service that many moving companies including piano moving companies won’t attempt because of how heavy they are!) and recommending new and vintage cast iron radiators to meet our BTU requirement, aesthetic and new main floor layout. She didn’t just recommend product though, she also provided a personalized consultation explaining the best course of action for the main floor given what we currently had to work with in other areas of the house. She really took the time to explain things to me as well, which I very much appreciated because I had a lot of questions! Central heating was a whole new world to me and I was on a mission to drill down and get all of the details. Our consultation of course ended with an invitation to come check out her stockyard. Inventory changes frequently in the Ironworks stockyard so who knows what rare Victorian radiator I will find when I go! I can tell you one thing for certain though, this is one treasure hunt I could not be more excited for! Stay tuned for more on this in the next episode!

If you don’t want to wait for the next episode to catch a glimpse of what is happening behind the scenes you can always follow me on Instagram where I share up-todate stories of my interior design and renovation progress!


CHECK OUT THESE OTHER HOME & LIFESTYLE BLOG POSTS


PHOTOS AFTER SISTERING AND REPLACING THE CEILING JOISTS IN OUR TORONTO VICTORIAN HOUSE

Thank you so much for joining me today and for checking out my new Toronto home renovation series on Youtube. I am super excited to be modernizing a Victorian home while still keeping the charm of an old Victorian house. If you have any questions about my Victorian house renovations, what it’s like to live in Little Portugal, Toronto or recommendations for Toronto contractors, hit me up in the comments below!

Before I sign off, I’d also like to say a big thank you to Chestnut Flooring and Ironworks Radiator Inc for partnering with us on this project. I’m so excited to be working with local industry experts on our Toronto home renovations but want to reiterate that, like always, all opinions remain my own.

Until next time,

- Soheila


PIN THIS POST!

EPISODE 2: INDESTRUCTIBLE - RENOVATING MY TORONTO VICTORIAN HOME

Toronto Victorian Ceiling Medallion

TORONTO VICTORIAN HOME RENOVATIONS

Prior to starting renovations on my Toronto Victorian home, I knew that we were going to need to do some structural work.

When we bought the house it was split into two units and there was a big bedroom located in the middle of the main floor. In order to change the layout, we were going to need to remove a load bearing wall which meant finding a structural engineer and structural contractor in Toronto.

Additionally, the staircase was original and very narrow. Its condition was worse for wear and you could clearly see it was starting to tilt to one side. Eventually, it was going to need to be replaced and if we ever wanted to get a king mattress up the stairs, increasing the size was a must.

Lastly, Adam and I also noticed that there was some serious sagging in the floors. We suspected a load bearing wall was removed in the basement and if I ever hoped to install herringbone floors, this would need to be fixed as well.

Structural work is no joke though. In Toronto, you are legally required to get a permit and getting over this hurdle meant finding a seasoned structural engineer who has had plenty of experience dealing with issues like ours as well as a structural contractor that was capable of removing walls and installing both LVLs and steel beams.


FOLLOW ME ON INSTAGRAM @ISTHATSOH


TORONTO HOME RENOVATIONS - MODERNIZING A VICTORIAN HOME

In episode two of my new home renovation series we launch right into structural work! In total we spent over a month focusing on improving the structural elements of the house including installing structural beams, sistering joists, levelling floors, adding several new footings and steel posts in the basement and installing two massive steel moment frames that pretty much make our house indestructible!

If this is your first time tuning into my new home renovation series, make sure to check out my previous episode ‘Sledgehammer Therapy’ and keep up with upcoming episodes by subscribing to my YouTube channel!

TORONTO CONTRACTORS

Our search for a good structural engineer and structural contractor in Toronto wasn’t easy. Adam and I reached out to a handful while putting together our budget for this reno and definitely ran into a few characters along the way. Finding someone ‘word of mouth’ proved challenging, especially since a lot of people we knew hadn’t taken on a renovation of this magnitude before. Since Adam and I weren’t interested in bringing on a general contractor we instead researched potential companies, looked at their reviews/references, spoke with the owners, made sure they were licensed and insured, and scheduled site visits. Even after all that, making a decision was hard and given the gravity of the ask and the money it would require, it was imperative we make the right one.

K.H. Davis Engineering Consultants LTD has a great reputation in Toronto. During our search for construction trades, Ken Davis’s name popped up a few times. A couple of them had worked with his plans before and mentioned how thorough they were. One also mentioned how responsive he was when a question arose because it saved him from delaying his project. After meeting Ken Davis himself during a site visit, we knew he was the guy we wanted to work with. He was incredibly knowledgeable, had worked on Toronto century homes before and was familiar with how they were generally constructed. He also assured us that he could address all our issues and was happy to apply for the permit and deal with the city on our behalf. When we finally pulled the trigger and started to work with him he scheduled a meeting with us to walk us through every aspect of the plans. It was clear during this meeting that he was not only taking into account what we wanted to do in this phase of our Toronto home renovations, but also our next phase which we really appreciated. Even after receiving our permit, when we hit a snag and needed to pivot, he shared a few possible solutions with us so we could figure out a financially feasible new strategy. When you are dealing with old homes, Adam and I knew that things don’t always go as planned but we both definitely appreciated having Ken by our side to guide us.

Toronto Contractors - Home renovations - dynamic design and construction

Raouf and his team at Dynamic Design and Construction - our Toronto structural contractor

Finding the right structural contractor proved even more challenging. Many of them had experience with removing a load barring wall and installing LVL’s but installing a steal beam was a whole different ball game. We needed a Toronto contractor with steel beam experience and know how.

With over 15 years in the industry Raouf has been leading his team at Dynamic Design and Construction through numerous Toronto home renovations of varying magnitudes. He has restored century homes in Rosedale, built houses from the ground up, and has plenty of experiences removing load bearing walls and installing structural steel beams like the H beams we had in our plans. Once we started to work with Dynamic, any anxiety I had going into this next step of our Toronto Victorian home renovations subsided. Raouf was great at communicating his needs, questions and concerns so that we could prepare and avoid possible upcoming challenges. His dedication to getting the job done and getting it done right was duly noted and appreciated, along with the commitment of his hard working team. I watched both moment frames get installed and moving heavy H beams into place is no easy task. Like a conductor and his orchestra, Raouf and his team worked together harmoniously, positioning and installing 7 steel beams and a steel post in one day. It was incredible!

He also levelled my floors, sistered joists, installed several footings in the basement, widened our staircase opening, poured concrete in our crawl space, created concrete footings for one of our moment frames and installed two steal frames on the foundation walls for the other. Adam and I knew it was going to be a challenging assignment and Dynamic Design and Construction rose to the occasion with total competency and professionalism.

P.s. If you are starting a Toronto home renovation and need some contractor recommendations Adam and I have put together a stellar list of contractors and tradesman for this project! I’ll be sharing more about our renovation process in upcoming episodes and the companies we are using but if you can’t wait, feel free to leave a comment below or shoot me an email via my contact form for a recommendation!

Dynamic Desing and Construction - Toronto Home Renovation Contractors

Roufe and his team celebrating after installing 6 steel beams that make up the two moment frames we needed to install in our Toronto Victorian home.


CHECK OUT THESE OTHER HOME & LIFESTYLE BLOG POSTS


soheila hakimi of isthatsoh

Me after another day of home renovations!

So there you have it! Stage two of our Toronto home renovations is complete and we can now move onto the next step, framing, plumbing and electrical work.

While the structural work was going on we also finally receive our kitchen appliances (including our new La Cornue range) and finalized our new kitchen designs with Domani Design Group. Everything we are going to be doing in our Toronto home renovation moving forward will be preparing us for the install of our new kitchen, a large Crittall style back door and a whole new main floor layout! Plus I have some BIG NEWS which I will be revealing in my next episode, so don’t miss out and subscribe!

Additionally, behind the scenes I also started my search for tiles to replace the ones we had in our basement bathroom as well as demoed the area around our staircase, cleaned up the mechanical room and removed a large old decommissioned cast iron stack from the side of the house. If you want to see more behind the scenes you can always follow me on Instagram where I share more up to date stories of my interior design and renovation progress!

PICTURES FROM AFTER THE STRUCTURAL WORK HAS BEEN COMPLETE IN MY TORONTO HOME RENOVATIONS!


Thank you so much for joining me today and for checking out my new Toronto home renovation series on Youtube. I am super excited to be modernizing a Victorian home while still keeping the charm of an old Victorian house. If you have any questions about my Victorian house renovations, what it’s like to live in Little Portugal, Toronto or recommendations for Toronto contractors, hit me up in the comments below!

monarch butterfly

PIN THIS POST

HOW TO PAINT MELAMINE CABINETS - A SMALL BATHROOM MAKEOVER DIY

BATHROOM MAKEOVER DIY - PAINTING MELAMINE CABINETS

So I was at my mom’s house the other day and she asked if I could help her with her powder room. Essentially the powder room in her basement is so out of date it’s practically screaming for help. It has had the same melamine counter top and vanity since the house was built over 30 years ago. To make it worse, it also has a super gross drop-in sink and old acrylic faucet knobs that need to go!

In order to update this bathroom I decided to upgrade the counter top and faucet with something nice but keep the melamine vanity as is and just give it a fresh coat of paint.

For the counter top I went with white quarts with an under-mount sink already installed from a local fabricator. The counter top and sink cost me under $400. The faucet I got at Canadian Tire was simple and in chrome. It was on sale and was under $100 so I was really happy about that. I also got my paint brush, a small foam roller, a painter tray, and some painters tape while at Canadian Tire, which was another $30-ish.


FOLLOW ME ON INSTAGRAM @ISTHATSOH


Can You Paint Melamine?

When it comes to the melamine vanity, I had plans to paint it. Painting melamine cabinets is actually super easy it just takes awhile because you have to let the paint dry in between coats. Before you paint any melamine surfaces it is important to roughen up the surface before applying a primer though so that the colour paint adheres properly to the melamine.

Bathroom Vanity Makeover - Before Photos

When you are starting a project like this the first thing to do is prep your space. I like to put some cardboard down to protect the floor and remove any hardware. In this case both the hinges and doors needed to be removed. I tried to remove the fake drawers as well but the sink was in the way and I was unable to get in there to remove the screws, so I just left them attached.

MELAMINE CABINET MAKEOVER

Home DIY Projects - Bathroom Makeover DIY - Painting cabinets

Next I sanded the melamine vanity down using 120 grit sandpaper and my sanding mouse.

NOTE: You want to roughen up the surface so that the primer paint adheres well to it but you don’t want to over sand it to the point you start to dull corners or ruin the surface.

In places that I couldn’t get into with my sanding mouse I went in by hand with some sanding paper.

After you are done sanding take a damp cloth and wipe the whole vanity down.

While the vanity dries, repeat those three steps with the doors making sure to sand down and wipe the sides of the vanity doors.

PAINTING CABINETS

Once everything is dry you can start painting the melamine cabinets with your first coat of primer. I like to paint one side and 3 of the 4 edges of each door first then let it dry for 12 hours before returning and doing the opposite side and final edge.

I used a small foam roller on the doors and a mix of roller and brush on the vanity.

I purchased 1 quart of Benjamin Moore Stix® Waterborne Bonding Primer for this project and it was more than enough.

After both sides have been primed and given time to dry, I then did two coats of Benjamin Moore ADVANCE Interior Paint- Semi Gloss in ‘October Mist’ which is this beautiful sage green colour that is so popular right now and one of my favourites.

Home DIY Projects - Bathroom Makeover DIY - painting a vanity

I used the Benjamin Moore colour ‘October Mist’ for this bathroom vanity makover

As for the doors I used the same technique of painting one side and 3 of the 4 edges before leaving that to dry for 12 hours and returning to do the other side and last edge.

Once you get two colour coats on both the vanity and doors, and everything has fully dried, you can go ahead and reinstall your doors.


ENJOYING THIS POST? CHECK OUT THESE OTHER LIFESTYLE POSTS!


After I finished painting the vanity, the new quarts countertop with an undermount sink went in along with my new faucet from Canadian Tire and voila, my bathroom makeover is complete!

Home DIY Projects - Bathroom Makeover DIY - painting melamine

My Small Bathroom Makeover DIY After Painting Melamine Cabinets


Thank you for joining me today as I shared this bathroom vanity makeover with you. I hope enjoyed this bathroom makeover DIY and found painting melamine cabinets to be easy too. If you have any questions about this bathroom makeover on a budget or have any questions regarding home DIY projects or painting a vanity, feel free to leave them in the comment section below!

Until next time!

-S


PIN THIS POST

8 INTERIOR DESIGN TRENDS TO WATCH OUT FOR IN 2022!

8 INTERIOR DESIGN TRENDS TO WATCH OUT FOR IN 2022

Image by Ksenia Chernaya

INTERIOR AND HOME DECOR
TRENDS FOR 2022

It has been a long winter and many fresh trends have materialized since my last interior design report. I too have not laid idle and have finally started renovations on my Toronto Victorian home! It seems like dreams and plans are finally colliding and as I continue to collect design inspiration I’ve noticed a few new approaches bubbling up to the surface. Some feel like the natural progression of previous trends while others feel seductively fresh and appealing. One thing is for sure, they all seem to favour bold accents and colours over the previously beloved monochrome aesthetics. We are approaching a time of careful curation and intentional living. Although people are no longer forced to stay home, it continues to be where the majority of their time is spent. Instead of focusing solely on comforts and cozy atmospheres though, there has been a shift as the desire to entertain and welcome guest takes center stage. For that reason, I thought now is the perfect time to share 8 interior design trends for 2022.

BIOPHILIC ARCHITECTURE & DESIGN

Interior Design Trends 2022 - biophilic architecture and design

Biophilic Design by Joe Mortell

Biophilic Design is the concept of creating a stronger connection to nature while in our home environment. Just because you’re continuing to spend the majority of your time at home doesn’t mean you want to seclude yourself from the outdoors completely. Opening the windows to allow fresh air and natural light in may be the easiest way to remove a rooms stagnant energy, but Biophilic interior design encourages you to take things one creative step further. Use natural materials like timber, concrete and stone to help you imitate elements you would see outdoors or incorporate indoor plants, fresh cut flowers, and foliage for a more obvious approach. Research has also shown that images depicting nature can be effective in producing a calming atmosphere to reduce stress, improve cognitive function and spur creativity while also improving our overall well being and hastening healing. That’s pretty remarkable, if you ask me! Where once using dried flowers like pampers grass used to be a popular decor trend, now it is all about fresh, vibrant, living greens. Additionally, the idea of creating a conservatory at home seems to be ever more appealing as we continue to embrace Biophilic architecture and crave connections to the outdoors.


FOLLOW ME ON INSTAGRAM @ISTHATSOH


THE SLOW BUILD

When it comes to intentional living and careful curation, the slow build plays into peoples' desires to do away with ‘fast furniture’ and pursue more sustainable practices. Artisanal, vintage and one of a kind pieces invite the fascination of your guest and welcome conversation around the stories behind them. They also make your space fell uniquely you! Make time to visit second hand stores and go antiquing when you can. Look for investment pieces that could elevate your collection and consider decluttering to make room for them when you finally do make a purchase. Minimalism is still very much trending so don’t think you need to overwhelm your space with expensive stuff for it to be beautiful. In fact, a few carefully curated items is really all you need.

REIGNITED FASCINATION WITH THE 70S AESTHETIC

Interior Design Trends 2022 - 70s Aesthetic

A livingroom inspired by 70s Interior Design

There is no denying that in the past few years cane and rattan decor has seen a major comeback. Perhaps it is because of our fascination with a ’70’s aesthetic’ has been reignited. Where once unique shapes, bold prints, colours, textures and futuristic design were used to express excitement, push boundaries, and create amazing spaces to host parties, today’s mindset echos that. It’s why we love velvet furniture, animal print rugs, and macrame, and why you might be gravitating towards a curved sofa, brightly coloured small appliances or an egg rattan chair. I’m not saying go ahead and install wall to wall shag carpets, but don’t be afraid to play on the psychedelic inspiration of the 70’s aesthetic through the use of bold cushions, prints and cheery colours.

STATEMENT WALLS

Interior design trends 2022 - Statement walls and grandmillennial wallpaper

Hand Painted de Gournay Wallpaper

Grandmillennial interiors may not be for everyone but statement walls are still a great way to adds drama to a room or even a whimsical feeling. I’ve seen lots of wallpaper with beautiful, intricate motifs popping up in magazines and my Pinterest feed but none have caught my attention more than de Gournay, a French hand painted wallpaper company who’s designs are simply remarkable. Statement walls are not only being achieved through the use of wallpaper though. Metallic panels are another quick way to draw and hold someone’s attention. The door is left open with this trend and it’s up to you to get creative with how you want to incorporate it into your space.


DULUX COLOUR PAINT TRENDS FOR 2022

Dulux colour paint experts identified three colour stories they predict will resonate for homeowners and professional painters in 2022. Born from the overarching theme ‘Horizon’, Dulux says these palettes, “represents our current state of hope, reflection and new beginning.”


ARCHWAY DOORS, CURVED SOFA, EGG SHAPES, CURVES STEAL THE SPOTLIGHT

Home Design Trends 2022 - arch design - cathedral archway

Cathedral archways add a beautiful structural element to this livingroom by Sonja Jonss

Curves of all kinds seem to be gaining popularity in recent months as structural style furniture like curved sofas, hanging egg chairs, elliptical tables, and even arched mirrors continue to hold our attention. Perhaps it’s our need to be fluid and adaptive to our ever changing environment that has caused our love for curves to now transcend beyond just decor to structural elements within a home like archways, pantry doors, built in bookshelves and windows. Just because curves are in, doesn’t mean straight lines are out. There is definitely enough room in my house for both of them to coexist, ha! I just think curves of all kinds are having a ‘moment’ and I’m here for it.

ATTENTION GRABBING BOLD STRIPES

Palm Beach style from Jennifer Ash Rudick’s new book - morning room of La Follia

There is something so timeless and elegant about bold stripes that it is no surprise that they are coming back in a big way. A great way to catch peoples attention, incorporating striped rugs, cushions, throws or even wallpaper can give your space a very eye pleasing, contemporary and timeless look. It is also an easy and effective way to give a tired room a full reset. I’ve already seen many home decor design stores running with this trend so it shouldn’t be hard to incorporate either! Just remember, when it comes to the size of the stripe, stick to big thick, bold stripes!


ENJOYING THIS POST? CHECK OUT THESE OTHER LIFESTYLE POSTS!


ELABORATE, ELEGANT TABLESCAPES!

2022 home decore trends - elegant tablescapes

An elegant tablescape captured by Paula O’Hara via Green Wedding Shoes

Elegant tablescape go hand in hand with entertaining which is why elaborate arrangements with linen napkins, candles and flowers are going to be all the range. People don’t just want to welcome people into their homes again, they want to dazzle guest and set the stage to an unforgettable evening. A little more effort and care will be put into presentation because distance from our friends and family only made the heart grow fonder. If you need inspiration for your next dinner party, here are some tablescapes I’m currently swooning over.

RASPBERRY CABINETRY

Raspberry Kitchen Cabinetry by Cochineal Design

Earlier on in the year I stumbled across my first raspberry kitchen and instantly fell in love, sharing it on my Instagram stories! Since then raspberry cabinetry has been popping up everywhere which makes me feel even more invested! Research shows that the colour of a room can impact our moods and reds are said to ignite your appetite. How fitting it is then that we find the sex appeal and moodiness of raspberry cabinetry alluring! Furthermore it goes well with all wood tones and earthy browns often found in home decor. Moody kitchens aren’t for the faint of heart through. You may not want to commit to a whole kitchen in raspberry cabinetry but that doesn’t mean it can’t also find its place in a powder room or pantry! I myself don’t know if I’ll be partaking in this trend but that doesn’t meant I’m not excited to watch where the trend goes.


Thank you for joining me today and taking interest in the 8 interior design trends I have uncovered for 2022! If you have any questions or comments about biophillic design, the 70’s aesthetic, archway doors and designs, or decor trends like rattan decor and curved sectional sofa, feel free to leave them in the comment section below!

Until next time,

-S


PIN THIS POST