CHOCOLATE RICE KRISPIE TREATS FOR VALENTINE'S DAY

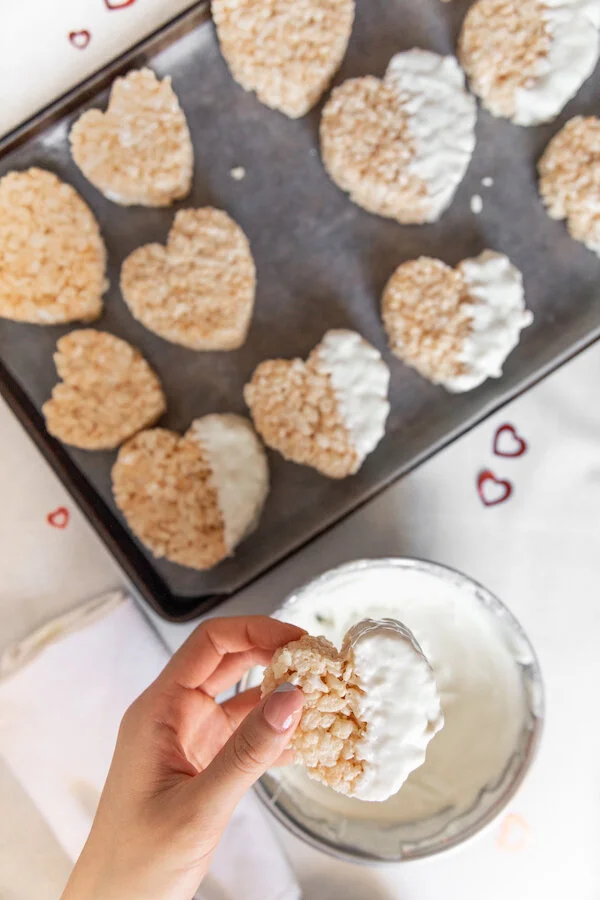
If you are looking for a fun Valentine’s Day recipe that is not only adorable but easy and fun to make, I highly recommend trying this chocolate rice krispie treats recipe!

When it comes to the best rice krispie treats recipe this one takes the cake because they are so incredibly soft and chewy! Of course, the steps for this recipe are the same for regular rice krispie squares but I thought using a heart cookie cutter would be a great fit for Valentine’s Day. This recipe for chocolate rice krispies will have you reminiscing about childhood bake sales and exchanging Valentine’s day cards with friends. Speaking of exchanging, they are also super fun to decorate and make a great gift so my advice is to double the recipe and giving a few away! Enjoy!

* Please Note - Some links in this post may be affiliate links *

INGREDIENTS:

Makes Apx 12 Hearts

1/2 CUP of Unsalted Butter
5 Cups of Marshmallows - separated into two portions - 1 of 4 Cups and 1 of 1 Cup.
6 Cups of Rice Krispies Cereal
1.5 TSP of Vanilla Extract
2.5 CUPS of White Chocolate Wafers
Pink Food Colouring

You Will Also Need:
Heart-Shaped Cookie Cutter
Baking Tray
Wax Paper


CHECK OUT THESE OTHER FUN VALENTINE’S DAY RECIPES


DIRECTIONS:

In a large sauce pan melt the butter on medium heat.

Once melted add in 4 cups of marshmallows and reduce heat to low. Continue stirring until completely melted.

Next, remove melted marshmallow and butter mixture from heat and add to large bowl with the Rice Krispie cereal, remaining marshmallows and vanilla extract. Mix until well incorporated.

Using wax paper, line a baking tray and press the rice crispy into the baking tray creating an even thickness all round. Place the baking tray in the fridge for 20 min to cool before removing and cutting out heart shapes using a heart shaped cookie cutter. Place the hearts on a wax paper lined baking sheet. NOTE: You can take the remainder of the mixture that you were not able to use and press it into the heart shaped cookie cutter to create 1 or 2 more heart shapes so you don’t have to waste any of the precious mixture.

Using the ‘double boil’ method, melt the white chocolate wafers. Set 1/2 aside and add a ladybug size amount of pink food colouring to it. Stir well to turn the chocolate pink.

Dip each heart into either the white or pink chocolate until half the heart is submerged before placing it back on the baking sheet to dry. You can also use a fork or piping bag to create decorative patterns on top using alternating chocolate colours.

Store hearts in cool place until you are you are ready to enjoy.

chocolate rice crispy treats
)

FOLLOW ME ON INSTAGRAM @ISTHATSOH


I hope you enjoyed this chocolate rice krispie treats recipe as much as I do. If you have any comments or suggestions about how to make rice krispy treats please leave them below and I'll be happy to answer them as soon as I can! Happy baking!!!



PIN THIS POST

chocolate rice crispy treats

MOROCCAN BROCCOLI SALAD - GLUTEN FREE, KETO & VEGAN

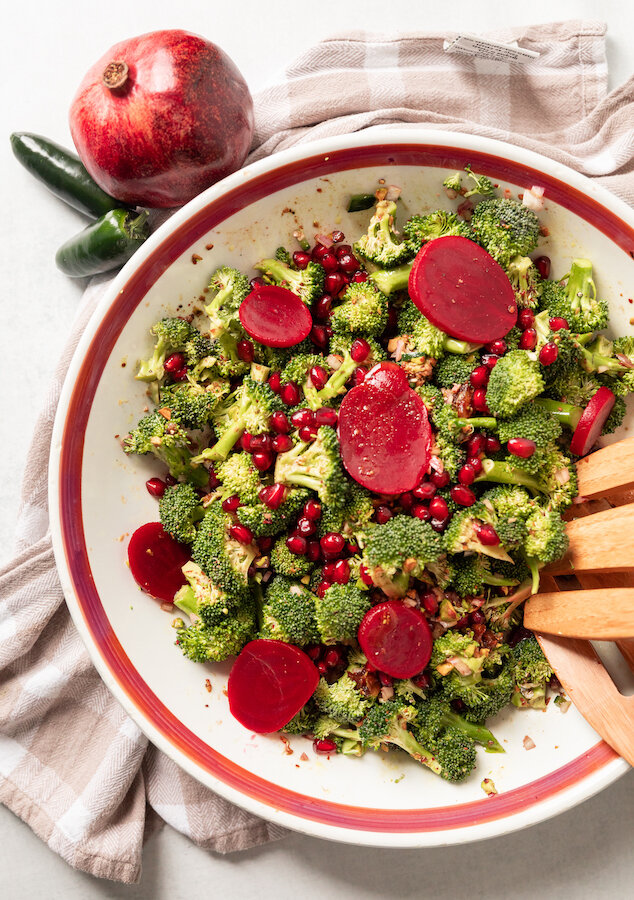
Packed full of antioxidants, this delicious Moroccan raw broccoli salad is both beautiful to look at and packed full of nutrients. If you, like me, are looking for ways to eat healthier without compromising on taste, this gluten free, vegan, keto broccoli salad is perfect. Since it can be prepared a day in advance and keeps well in the fridge, it also is great for meal planning or a grab-and-go snack. Not to mention it takes only a few minutes to make!

Enjoy!

INGREDIENTS:

Serves 4

- Dressing -
6 TBSP of Grape Seed Oil
1 TSP of Ras-El-Hanout Spice
1 Garlic Clove (pressed or chopped finely)
2 TBSP of Fresh Lemon Juice
2 TBSP of Balsamic Vinegar
1 TBSP of Honey (can be substituted with Agave if you are vegan)
Salt and Pepper to taste

- Salad -
6 CUPS of Broccoli Florets
1 Shallot (chopped Finely)
1 Jalapeno (chopped finely)
1/3 CUP of Dates (pits removed and chopped finely) - reduce the amount or leave out if you want more of a keto broccoli salad)
1/4 Cup of Roasted Pistachios (chopped finely)
Salt and Pepper to taste

- Optional Garnish-
1/4 CUP of Pomegranate Seeds
5-6 Slices of Pickled Beets (use sugar-free pickled beets if you want more of a keto broccoli salad)


LOOKING FOR SOME HEALTHY RECIPES? CHECK THESE OUT TOO!


DIRECTIONS:

Remove sauce pan from heat and add in lemon juice, balsamic vinegar, and honey (or agave). Salt and pepper to taste and set aside to cool.

Next, add your broccoli, shallots, dates, jalapenos and pistachios to a large salad bowl. Dress with your ras-el-hanout dressing, toss and garnish with pomegranates and slices of picked beats. Salt and pepper once again to taste.

Cover and chill if prepared in advance otherwise enjoy!


FOLLOW ME ON INSTAGRAM @ISTHATSOH


I hope you enjoyed this gluten free, vegan, keto broccoli salad recipe as much as I do. If you have any comments please leave them below and I'll be happy to answer them as soon as I can! Happy cooking!!!


PIN THIS POST

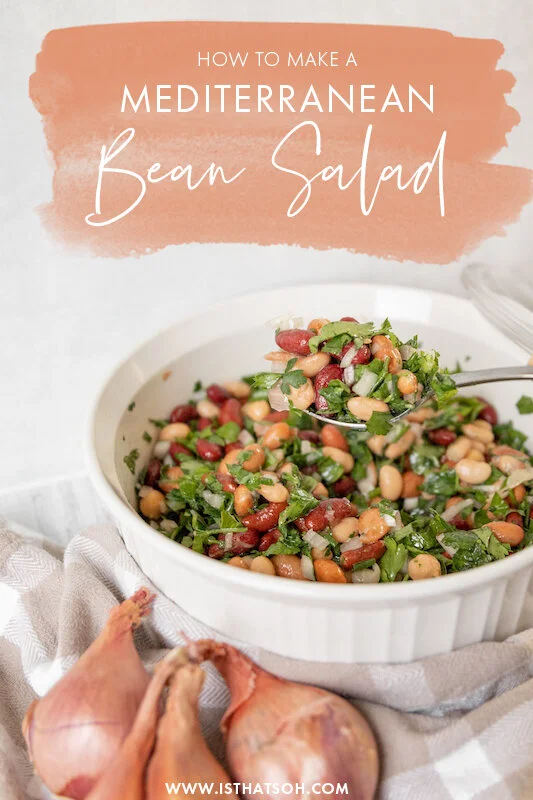
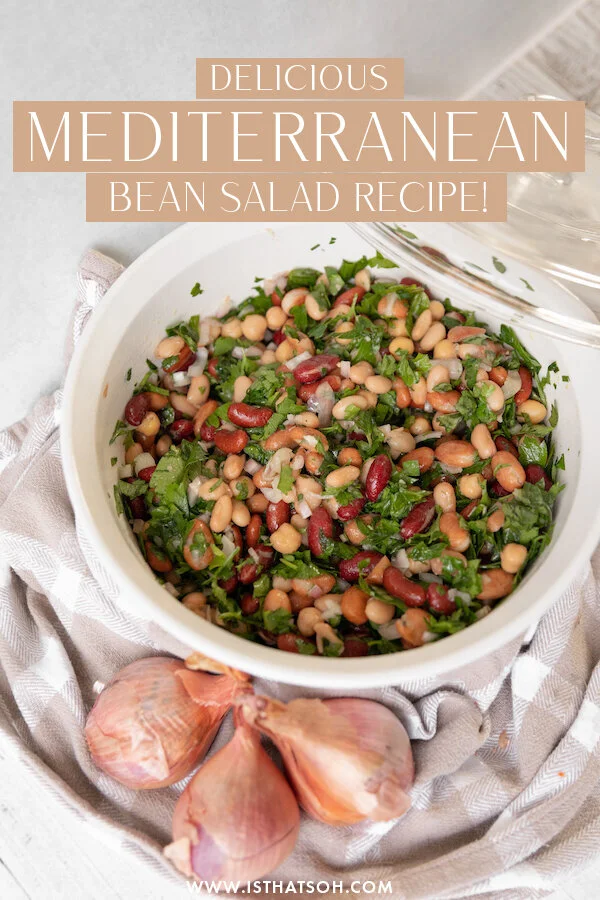
MEDITERRANEAN VEGAN BEAN SALAD!

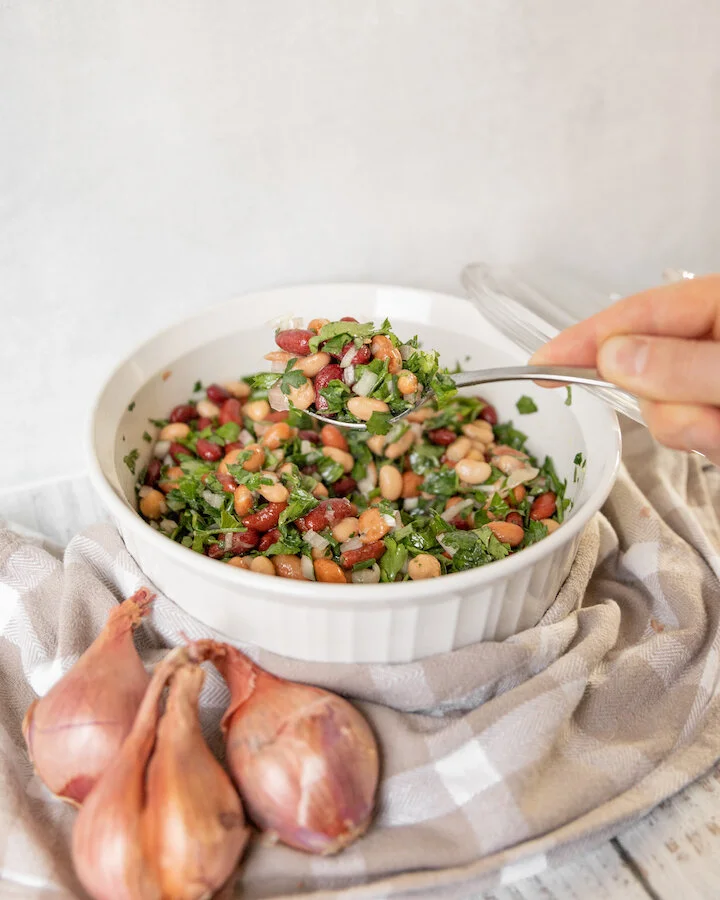
As someone who is always looking for ways to make ‘honouring my body’ easier, following a balanced diet such as the traditional Mediterranean diet makes doing so not only satisfying but undeniably more delicious! If you are looking for ways to add more protein to your diet without always gorging on meat, mix bean salad make a great substitute. Packed full of protein and carbs, this Mediterranean vegan bean salad will give you a boost of energy to help sustain you throughout the day. It has more nutritional value than a regular leafy green salad and keeps well for 3-4 days in the fridge, making it perfect for meal planning. It’s also very inexpensive to make and can be whipped up in less then 10 minutes! Regardless of your motivation, I know you’ll not only love the flavour, but feel good about eating it too!

Enjoy!

INGREDIENTS:

Serves 4-5

1 Shallot (finely chopped)
3TBSP of White Wine Vinegar
1/2 Cup of Parsley (roughly chopped)
1/4 Cup of Chives (roughly chopped)
1/4 Cup of Mint (roughly Chopped
Olive Oil
2 x 15 oz Mix Bean Medley
Salt and Pepper


LOOKING FOR VEGAN RECIPES? CHECK THESE OUT!


DIRECTIONS:

Add white wine vinegar to shallots and set aside for 5 minutes.

Next get a large bowl and add in your chopped parsley, chives and mint. Coat in olive oil. Add bean medley. Salt (generously) and pepper to taste.

Lastly add in your white wine vinegar shallots, toss and serve!


FOLLOW ME ON INSTAGRAM @ISTHATSOH


I hope you enjoy this vegan bean salad recipe as much as I do. If you have any comments please leave them below and I'll be happy to answer them as soon as I can! Happy cooking!!!


PIN THIS POST

CHOCOLATE COVERED CHRISTMAS WAFER RODS

This chocolate covered Christmas wafer rod recipe is so easy to do and makes for a fun DIY you can get your nieces and nephews involved in. Plus, they are super festive and another great way to dress up the dessert table or package and added to your Christmas gifts as a personalized decoration!

Enjoy!

INGREDIENTS:


1 Can of Pirouline Wafer Rods
1 Bag of Pure White Chocolate Chips
1 Bag of Milk Chocolate Chips

- Toppings -
Sprinkles
Candy Cane - crushed
Cookie Icing

- Tools -

Wax Paper
2 Small Sauce Pans for Melting Chocolate
Piping Bag for Icing


CHECK OUT THESE OTHER FESTIVE RECIPES


DIRECTIONS:

Prepare a banking sheet by lining it with wax paper.

In a bowl, place one bag of chocolate chips and slowly melt using a double boiling method, stirring every once and a while until completely melted.

Dip wafers into chocolate or use a spoon to pour chocolate over 2/3rds of the wafer and gently shake off excess before placing on the wax paper to cool.

Immediately after, coat in sprinkles or crushed candy cane so they adhere to the chocolate-covered wafers.

If you are going to dress a few rods with cookie icing, first allow them to cool completely before adding icing and moving them to a new clean baking sheet with a new sheet of wax paper to dry.

Make sure all rods are dry before removing from the wax paper before packaging or displaying, or store in an airtight container at room temperature.


FOLLOW ME ON INSTAGRAM @ISTHATSOH


I hope you enjoyed this recipe as much as I do. If you have any comments please leave them below and I'll be happy to answer them as soon as I can! Happy cooking!!!

PIN THIS POST

MY GRANDMOTHERS EASY OLD FASHIONED APPLE CRISP RECIPE! THE PERFECT THANKSGIVING DESSERT!

Apple season is upon up which means I’m getting request left, right, and center from my family to make some of our household fall favorites including my grandmothers old fashioned apple crisp recipe! It’s the perfect and easiest dessert to make if you are having a small gathering and is always a crowd please, not to mention its super delicious! If you’re looking for a dessert that gives you all the fall feels and is sure to be a hit, this is it!

Enjoy!

INGREDIENTS:

Serves 10-12 People

Crumble Topping
1.5 Cups of Flour
2 Cups of Old Fashion Oats
1.5 Cups of Brown Sugar
1/2 TSP of Salt
1.5 TSP of Cinnamon
1 Cups of Cold Butter - grated

Apple Filling
12 Granny Smith Apples - Peeled and cut into pieces
1.5 TSP of Cinnamon
1/2 TSP of Salt
1/2 a Cup of Granulated Sugar
1 TSP of Vanilla

Butter - to coat your baking tray or casserole dish ( I used a 13x9 Inch casserole dish)

DIRECTIONS:

Preheat oven at 375 degrees.

Butter your baking tray or casserole dish with butter.

In a large bowl, mix your crumble topping ingredients together and using your hands, mix ingredients together until butter feels evenly spread throughout and the flaky dry flour texture is gone. About 5-6 minutes. When done, place in fridge to keep cold.

In another large bowl, add in your apple filling ingredients and mix using clean hands. Apple slices should be evenly coated in all ingredients.

When ready, dump apple filling into buttered casserole dish, cover with crumble and place in oven to bake for 45-50 minutes or until you start to see the top turn golden brown and the juice from the apple filling to bubble up the sides.

When ready, remove and allow to cool for 5 minutes before serving either alone or with a slice of vanilla ice cream.

Enjoy!


FOLLOW ME ON INSTAGRAM @ISTHATSOH


I hope you enjoyed this recipe as much as I do. If you have any comments please leave them below and I'll be happy to answer them as soon as I can! Happy cooking!!!

PIN THIS POST