CHOCOLATE ZUCCHINI BREAD

If you are trying to sneak more veggies into your diet, I highly recommend giving this zucchini bread a go. If you are looking to be a little healthier feel free to omit the chocolate, it still tastes great without it. Not only is this recipe nutritious but the bread is also so moist but it freezes well. My boyfriend and I love to enjoy a slice with some earl grey tea as the combo is simply divine.

Enjoy!

INGREDIENTS:

Makes 1 Loaf of Chocolate Zucchini Bread

Unsalted Butter - for greasing the loaf pan
4 OZ Bittersweet Chocolate - Chopped
1 CUP of All-Purpose Flour
1/2 CUP of Whole Wheat Flour
1/3 CUP Instant Oats
1 TSP of Baking Soda
1/2 CUP of Unsalted Butter
1/2 CUP of Sugar
2 Eggs
2 TBSP of Plain Yogurt
1 TSP of Vanilla
1/2 a TSP of Lemon Zest
2 CUPS of Zucchini - Shredded

You will also need:
Loaf Pan
Parchment Paper

DIRECTIONS:

Preheat oven to 350 degrees

Greece loaf pan and line with a piece of parchment paper.

Melt your chocolate on medium-low heat in a small saucepan on the stove.

In a bowl, combine flour (both - all-purpose and whole wheat), oats, and baking soda. Give it a whisk until well incorporated.

In a separate large bowl, combine sugar and butter and using a hand mixer, cream together until light and fluffy.

Next add eggs, yogurt, vanilla, lemon rind, and melted chocolate to your sugar and butter bowl, and beat until well incorporated.

Next, stir in your shredded zucchini before adding the flour mixture in a cup at a time and beating until nicely mixed. Make sure to scrape the sides and get all the flour built up there.

Lastly, spread your batter in the loaf pan and bake for 45 minutes or until a toothpick comes out clean.

Allow the zucchini loaf to cool in the pan for 20 minutes before removing it and letting it continue to cool on a cooling rack.

Enjoy!


I hope you enjoyed this recipe as much as I do. If you have any comments please leave them below and I'll be happy to answer them as soon as I can! Happy baking!!!


PIN THIS POST

ELOTE - MEXICAN STREET CORN

Elote or Mexican street corn is one of my favorite appetizers!! Whenever I go out for tacos I always have to order the Mexican street corn otherwise the dining experience isn't complete! The thing you might not realize is that it is so simple to make and you can do it so easily right at home. I made mine on the bbq this past week which I think was even better than boiling it because when you boil it you dilute the sugars in the kernels whereas if you bbq it, they get sealed in and the corn tastes extra sweet! Give it a go, you’ll be surprised just how delicious and easy it is to make.

INGREDIENTS:

Sweet Corn - Two per person is my usual estimate
Butchers Twine
2 TBSP of Vegetable Oil
Cream Fresh
Chipotle Chilli Seasoning Spice
Feta Cheese, Cotija Cheese or Queso Fresco
Lime Wedges - optional

DIRECTIONS:

Peel back the husk of corn and tie back with a piece of butchers twine

Coat corn in a light layer of oil and place on the bbq, turning frequently so that it becomes only slightly charred

When the corn is ready, drizzle with creme fresh, sprinkle with chipotle seasoning and garnish with cheese.

Serve warm with a slice of lime.

Enjoy!


I hope you enjoyed this recipe as much as I do. If you have any comments please leave them below and I'll be happy to answer them as soon as I can! Happy cooking!!!


PIN THIS POST

RECIPE REVIEW: STRAWBERRY GOAT CHEESE BRUSCHETTA RECIPE

I found this recipe online while trying to find inspiration and had to try it out. I am a huge fan of goat cheese and the mix of sweet and salty flavors, so right off the bat it caught my attention. I did make an adjustment to the original recipe which called for thyme instead of mint, and I am so happy I did. The freshness of the mint perfectly complimented the strawberries and it tasted just heavenly. If you have a sweet tooth or like sweet fruits with cheese, you got to try this strawberry bruschetta recipe! Feel free to also get creative and change up the cheese! I am sure it would also taste amazing with feta cheese and a little balsamic glaze or cream cheese if that’s all you have!

INGREDIENTS:

Serving: 3-4 People

1/2 CUP of balsamic vinegar
Bread cut into slices - I used baguette but the original recipe calls for Italian
1 TBSP of olive oil
1 LB of Fresh Strawberries (cut into small morsels)
2 TSP of Fresh Mint (chopped) - original recipe calls for thyme
1 CUP of Goat Cheese - Keep at room temperature for easy spreading
Salt and Pepper to Taste


LOOKING FOR AN INTERESTING APPETIZER? CHECK OUT THESE OTHER RECIPES!


HOW TO MAKE STRAWBERRY BRUSCHETTA:

The first thing you want to do is reduce the balsamic vinegar into a glaze so in order to do this you need to heat it in a small pot or pan over medium to low heat. Let it simmer there for 8 to 10 minutes, it should reduce by about half and thicken nicely to a glaze. Once it is done, remove from heat and allow it to cool back to room temperature.

Next, you have to toast the bread. You can either do this in bulk using a foil-lined baking sheet, drizzling them with olive oil, and placing them in the oven at 400 for 5-10 minutes. The timing here can vary depending on how thick you cut the slices and how golden/crunchy you want them so keep an eye on them so they don’t burn.

While the bread is in the oven, combine cut-up strawberries with fresh mint in a bowl and add in the room temperature vinegar glaze. Salt and pepper the mixture to your taste.

Once the bread is ready you can go ahead and spread goat cheese across each piece before spooning the strawberry bruschetta mixture over each piece. Garnish with more mint and serve!

Enjoy!

To check out the original recipe, click HERE!

If you are looking for an authentic traditional Italian bruschetta recipe with tomatoes, click HERE!


FOLLOW ME ON INSTAGRAM @ISTHATSOH

Gallery Block
This is an example. To display your Instagram posts, double-click here to add an account or select an existing connected account. Learn more

If you like this strawberry bruschetta recipe or have any comments/questions, feel free to leave them in the comment section below!


PIN THIS POST

KETO SAFFRON CHICKEN VEGETABLE SOUP

So being Persian I grew up having some amazing home cooked middle eastern meals. I would have to fight my brother and sister over the tahdig (the toasted crunchy bites at the bottom of the rice that would be caramelized together by the butter and saffron) because in our household it was a prize possession. Anything with saffron usually gets my seal of approval, which is why the other day when it was -15 in Toronto and I was craving soup I decided to make a KETO friendly chicken veg soup recipe with a Persian twist. The results - heavenly! This soup is so jammed packed with flavor and immune boosting nutrients you feel like you're getting a hug from the inside out. ENJOY!

INGREDIENTS:

1/2 Cup of Salted Butter
A Pinch of Saffron (ground)
2 S/M Sweet Onions (chopped finely)
5 Carrots (peeled and chopped)
3 Celery Stocks (chopped)
2L of Chicken Stock
1 Rotisserie Chicken (remove skin and shred chicken meat)
2-3 Cups of Fresh Spinach
Fresh Pepper to taste

DIRECTIONS:

Melt butter in a large soup pot on medium heat. Add in the freshly ground saffron and l let it turn the butter a golden color.

When the butter is hot, throw in your finely chopped onion and coat that in the saffron and butter. Let this cook down until the onions become translucent and soft - about 5 minutes.

When ready add in your chopped carrots and celery, tossing everything so it is all coated in saffron butter. Cover and let the excess water escape from the celery and carrots. Stir every 3-4 minutes so nothing burns and the butter is well distributed among all the vegetables.

Once  the vegetables have soften you can add in you chicken stock, stir and let come to a low simmer.

Next add in your shredded chicken and fresh spinach. Make sure to stir and submerge the spinach into the soup. Cover and let the soup continue to simmer on low heat for about 3-4 minutes to get that spinach soft and then keep stiring until it is submerged into the soup completely.

Add pepper to taste (you shouldn't need salt but if you want more you can add it now).

That's it! Enjoy!


If you like this recipe or have any comments/questions, feel free to leave them in the comment section below!


PIN THIS POST

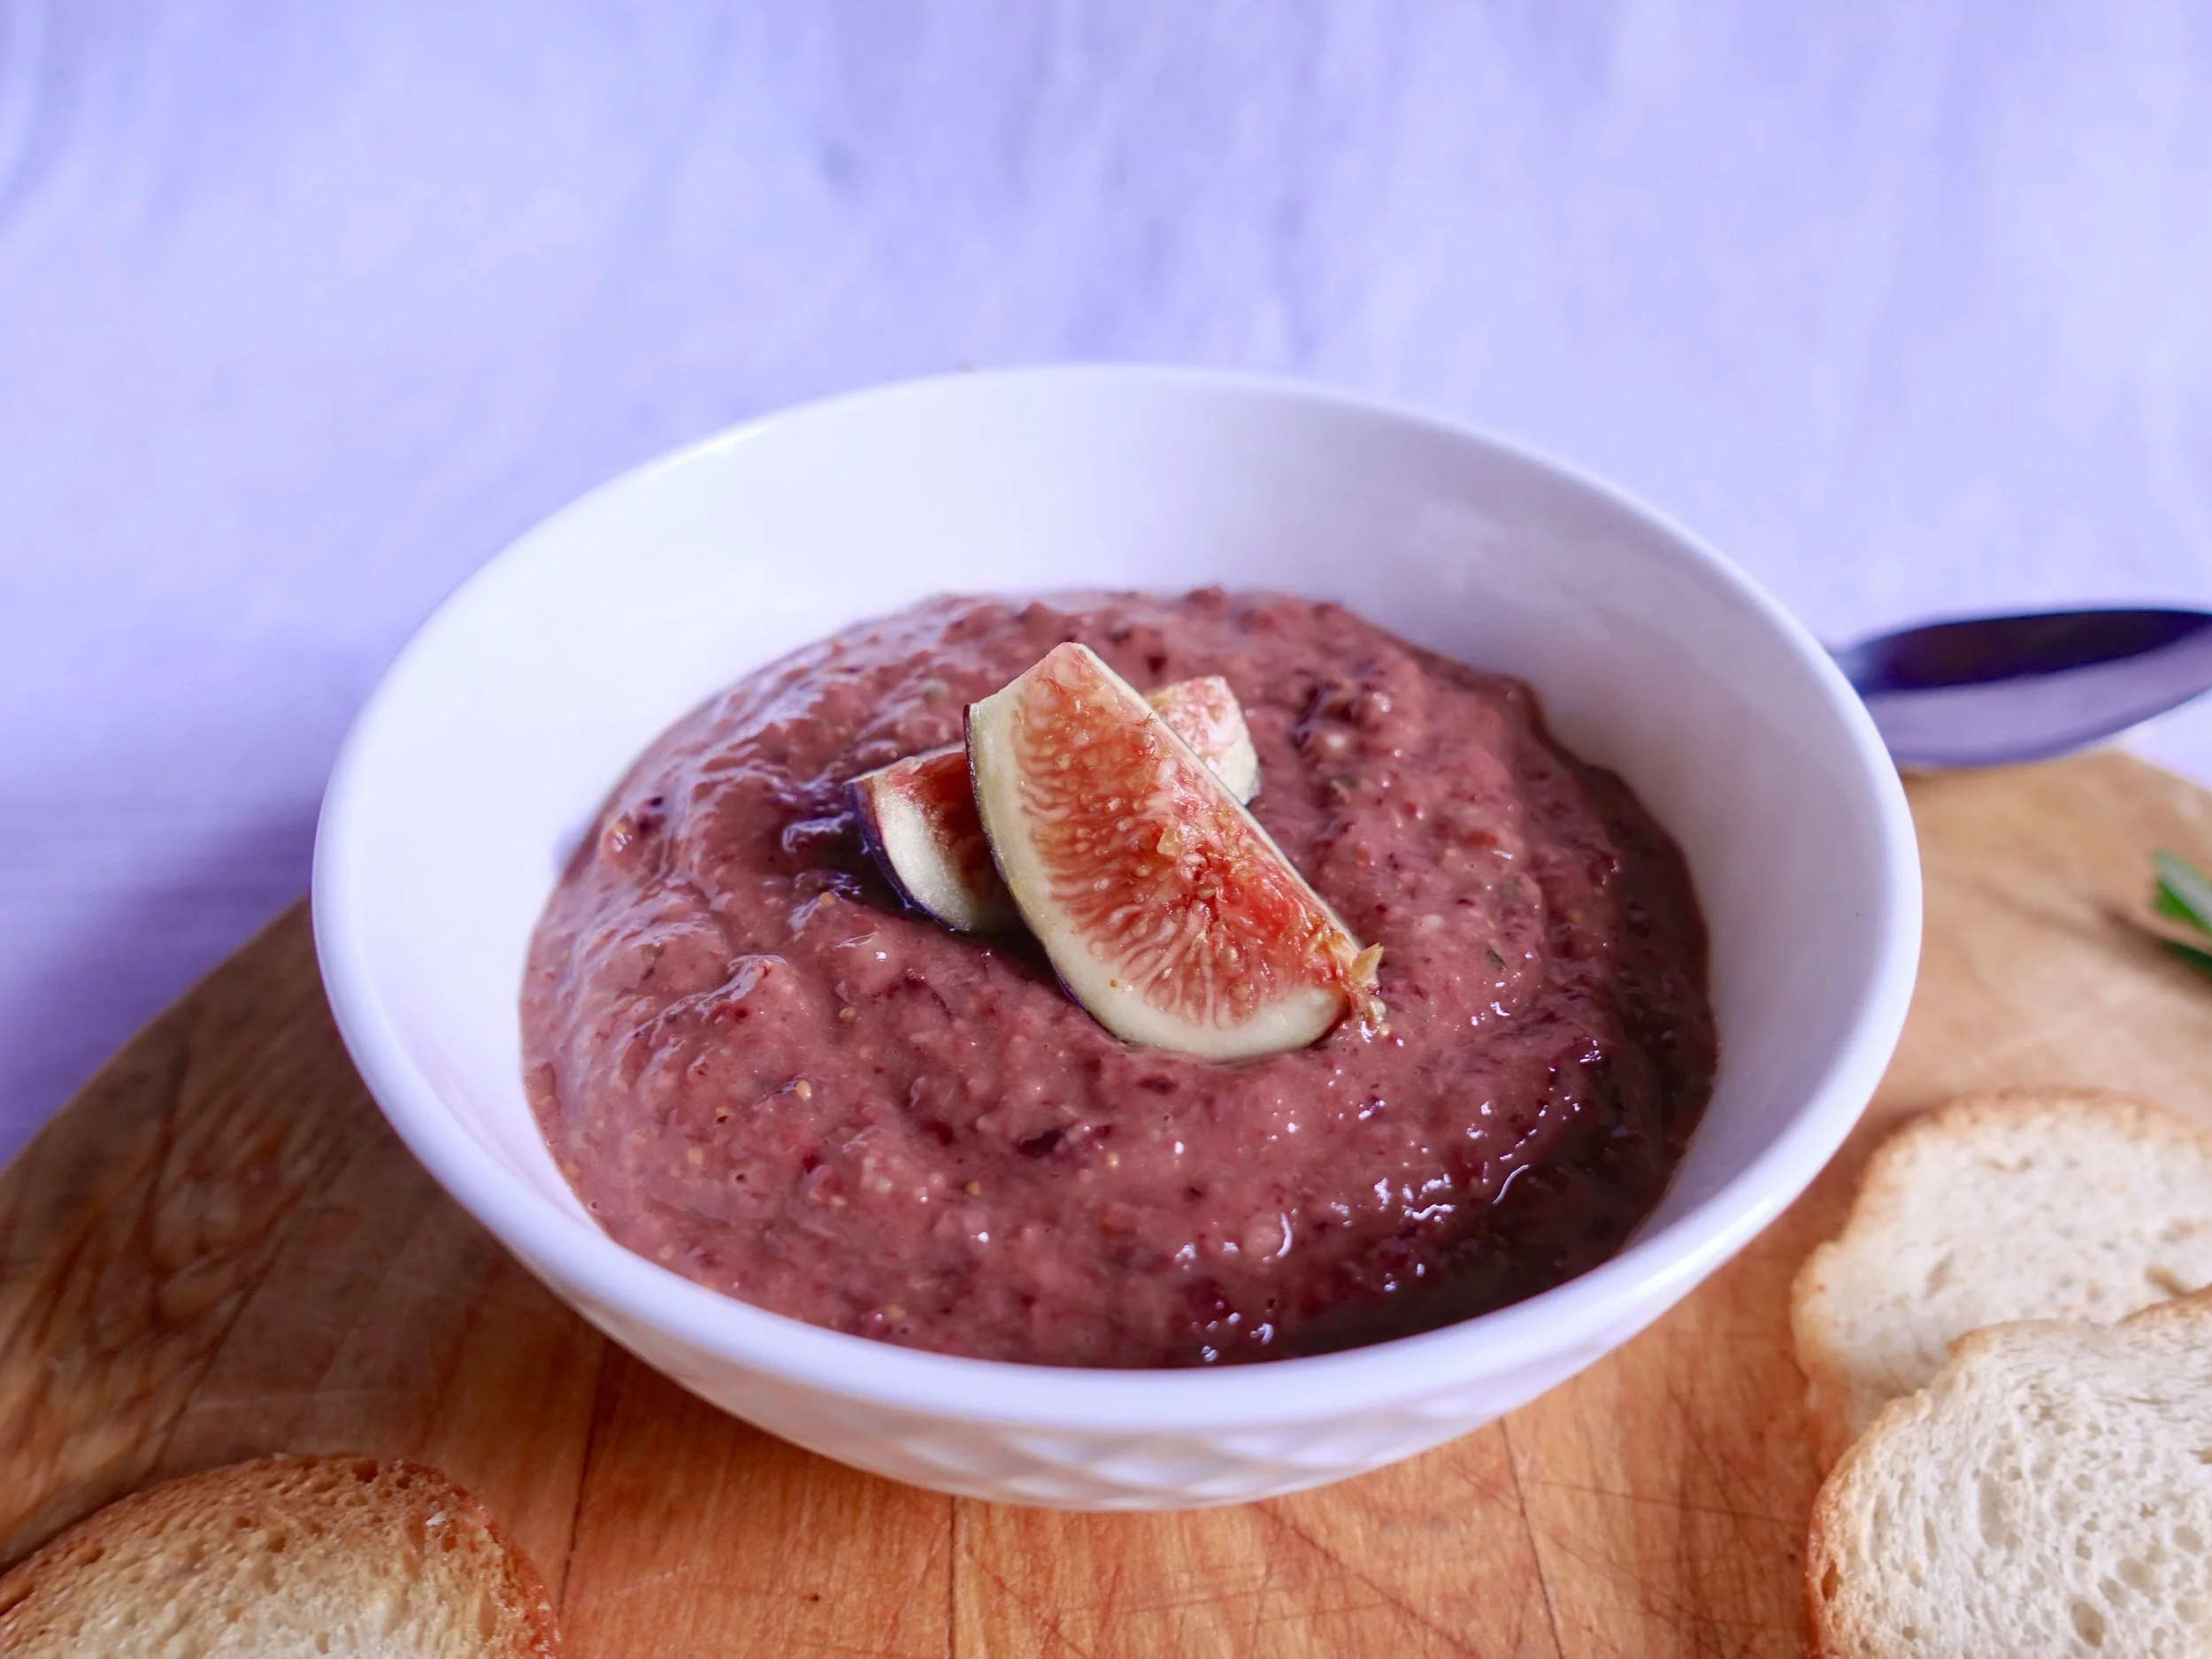
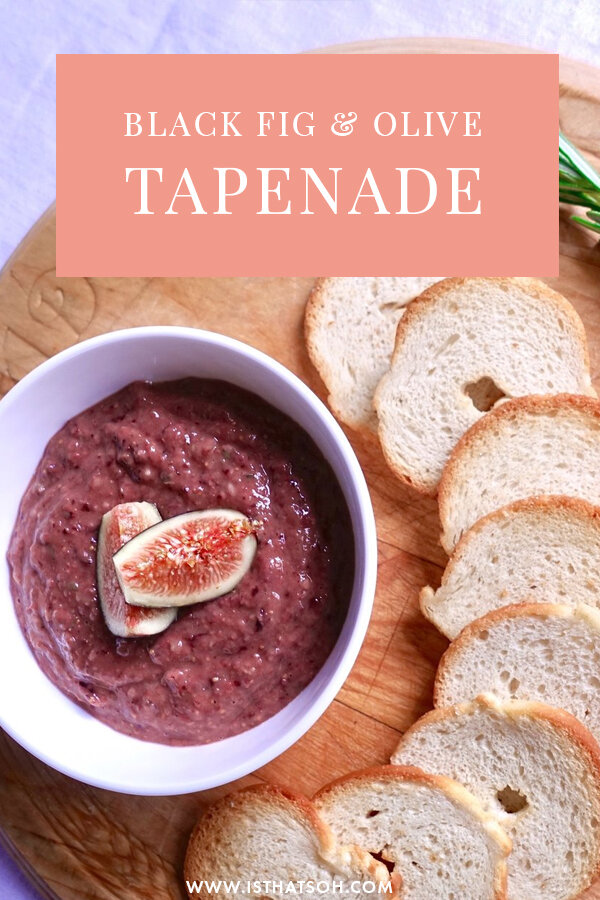
BLACK FIG & OLIVE TAPENADE

Is it just me or does the combination of sweet back fig and savoury black olives sound like the perfect pairing! I love this recipe for that exact taste profile and spread across a crisp or accompanied with Parmesan cheese it is a perfect appetizer. If you're looking for something to serve at your next dinner party that's both quick to whip up and as easy as throwing everything into a food process - this tapenade is perfect! Enjoy!

INGREDIENTS:

Yields 1.5 Cups of Tapenade

1 Cup of Black Fig - Rinsed and Cut Up
1/2 Cup of Pitted Black Olives
1 Clove of Garlic Clove - peeled and chopped
2 Tsp of Capers - drained and rinsed
1 Tsp of Fresh Rosemary
Squeeze of lemon
1/4 Cup of Olive Oil
Salt and Pepper to taste

DIRECTIONS:

Place figs, pitted olives, garlic, capers, and rosemary in the food processor and blend until pureed.

Add a good squeeze of lemon juice and continue to mix.

While the motor is running add the olive oil. Season with salt and pepper as per your taste (I usually add a little salt no pepper but to each their own).

Black Fig and Olive Tapenade

I hope you enjoyed this recipe as much as I do. If you have any comments please leave them below and I'll be happy to answer them as soon as I can! Bon Appetite!!!


PIN THIS POST