CHOCOLATE COVERED STRAWBERRIES

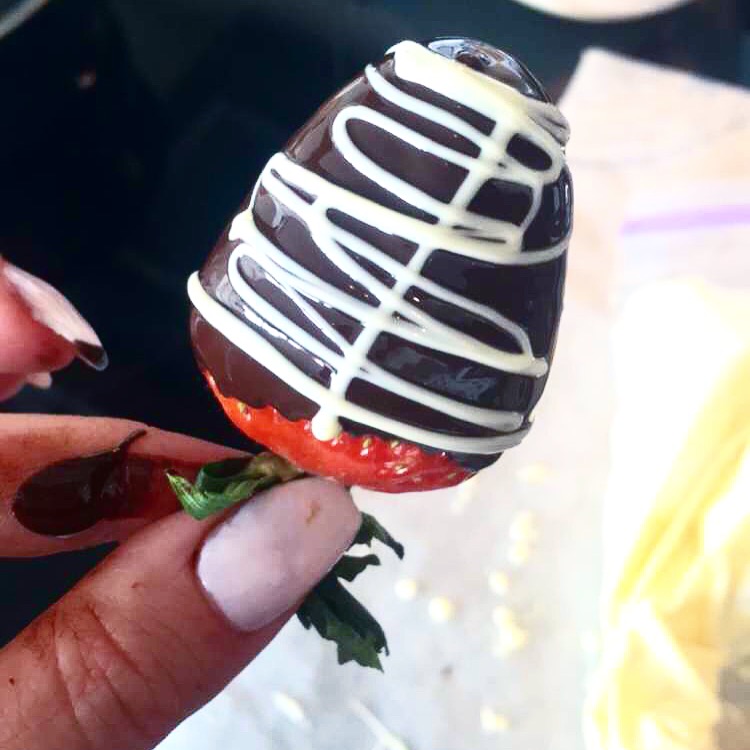
Chocolate covered strawberries are a great dessert to have at your party or event. There are so many cool designs techniques that make them versatile for different occasions and really fun to make. I made mine using dark chocolate and white chocolate but you can easily interchange those with milk chocolate or ground walnuts! Just have fun with it :)

INGREDIENTS:

15 Large Strawberries
170 Grams of Dark Baking Chocolate (you an also use milk chocolate)
1/2 a bag of White Chocolate (I used Hersey's mini chocolate chips)

**You will also need toothpicks, Styrofoam and a zip-lock bag!

DIRECTIONS:

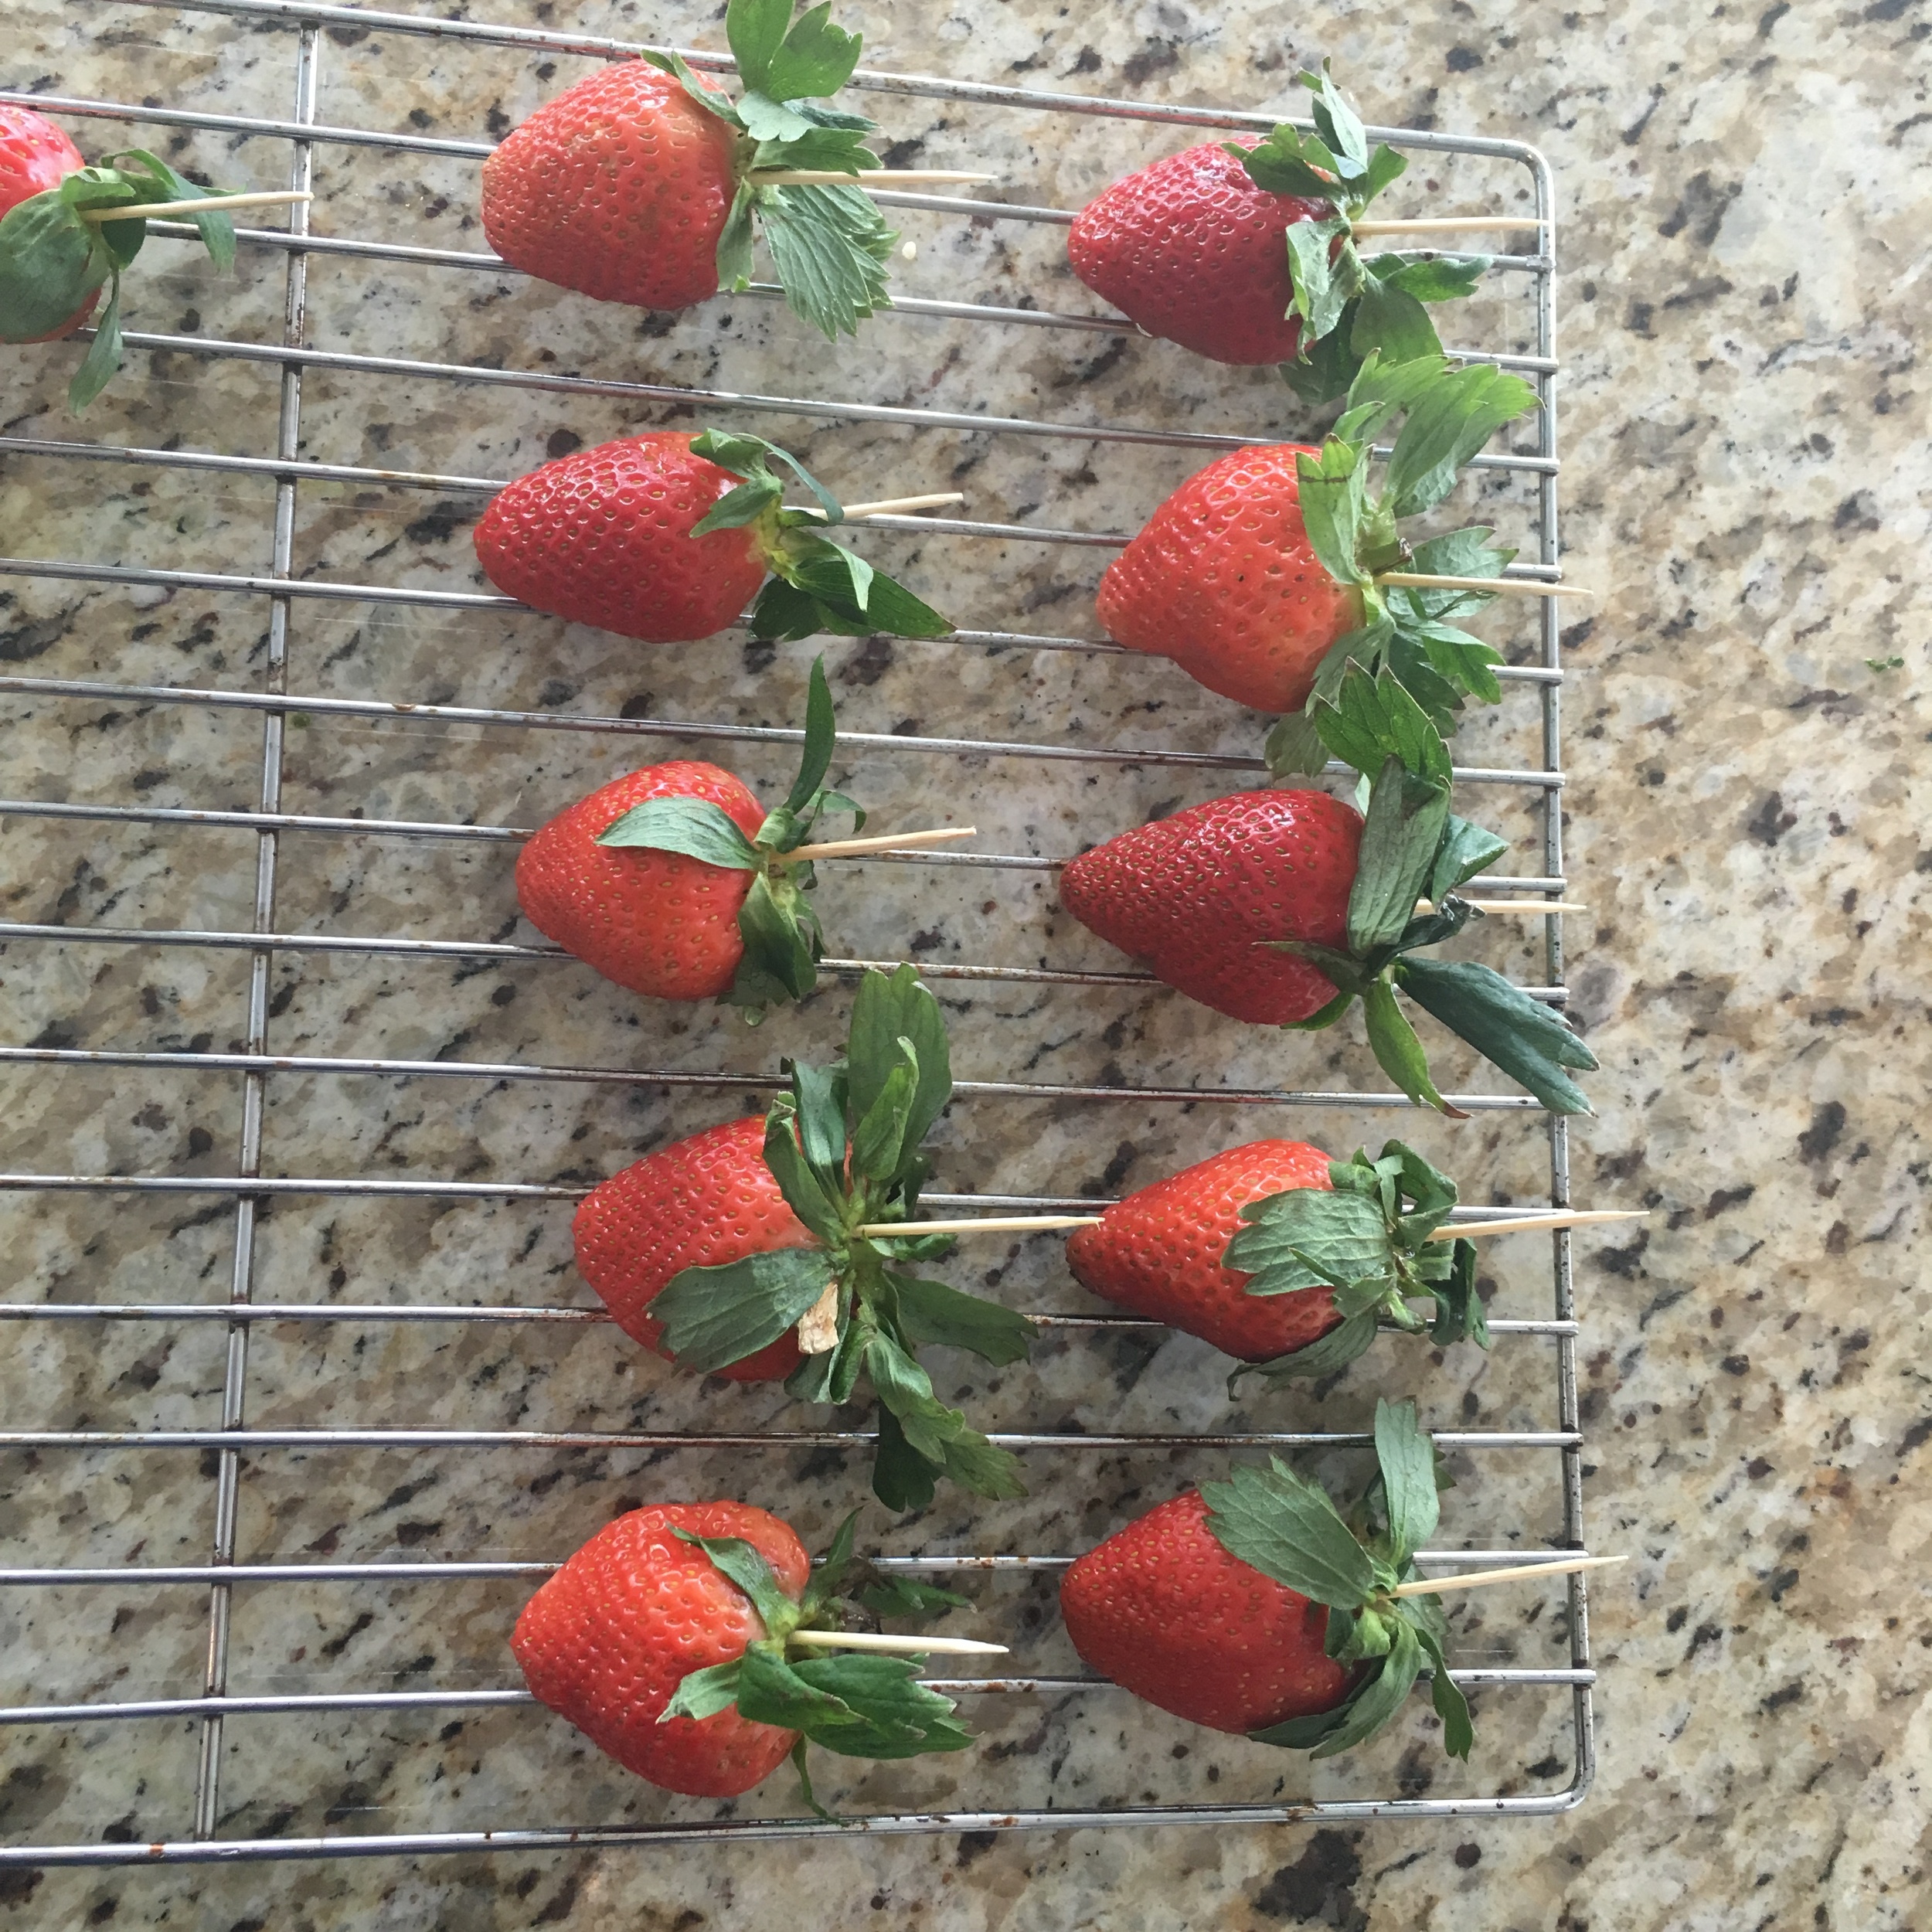
Wash your strawberries and place them on a drying rack. It is important for them to be free of moisture before you coat them so leave them to dry for at least an hour. Stick a toothpick in the fat end of the strawberry to help you grip them better.

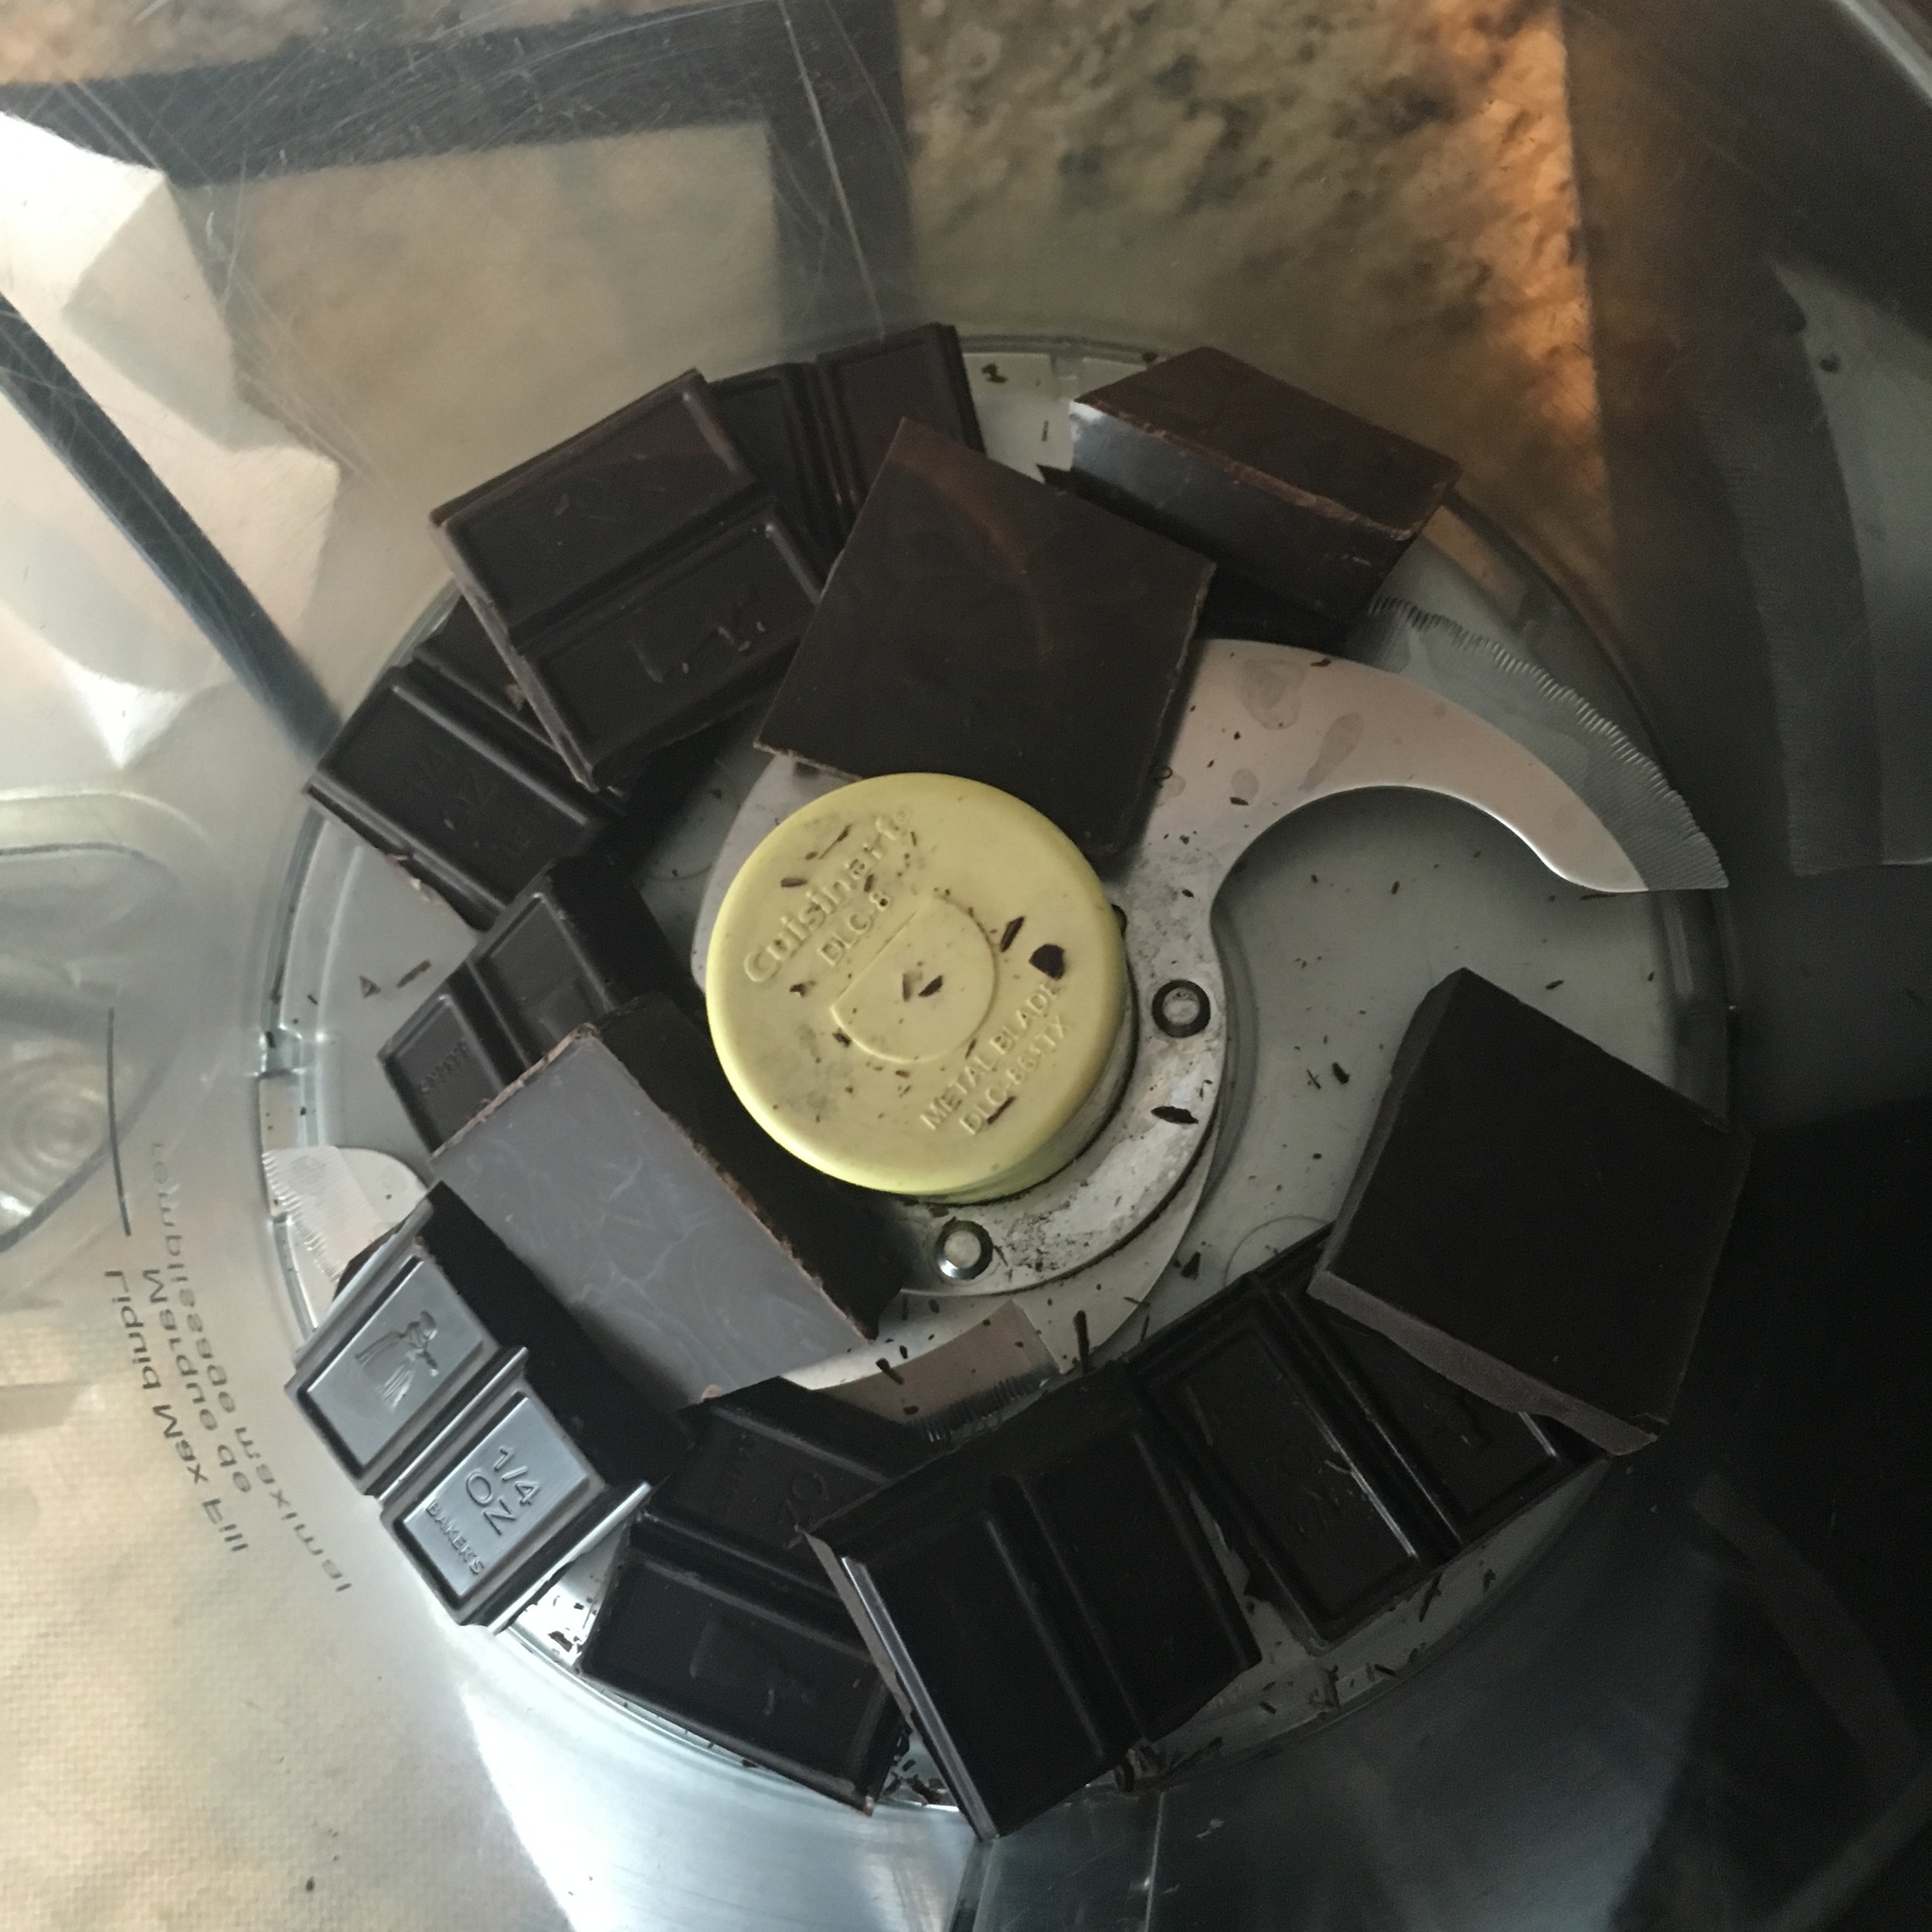
If your dark chocolate comes in a bar break it up into smaller chunks so it melts faster and evenly. I used a food processor to do this quickly.

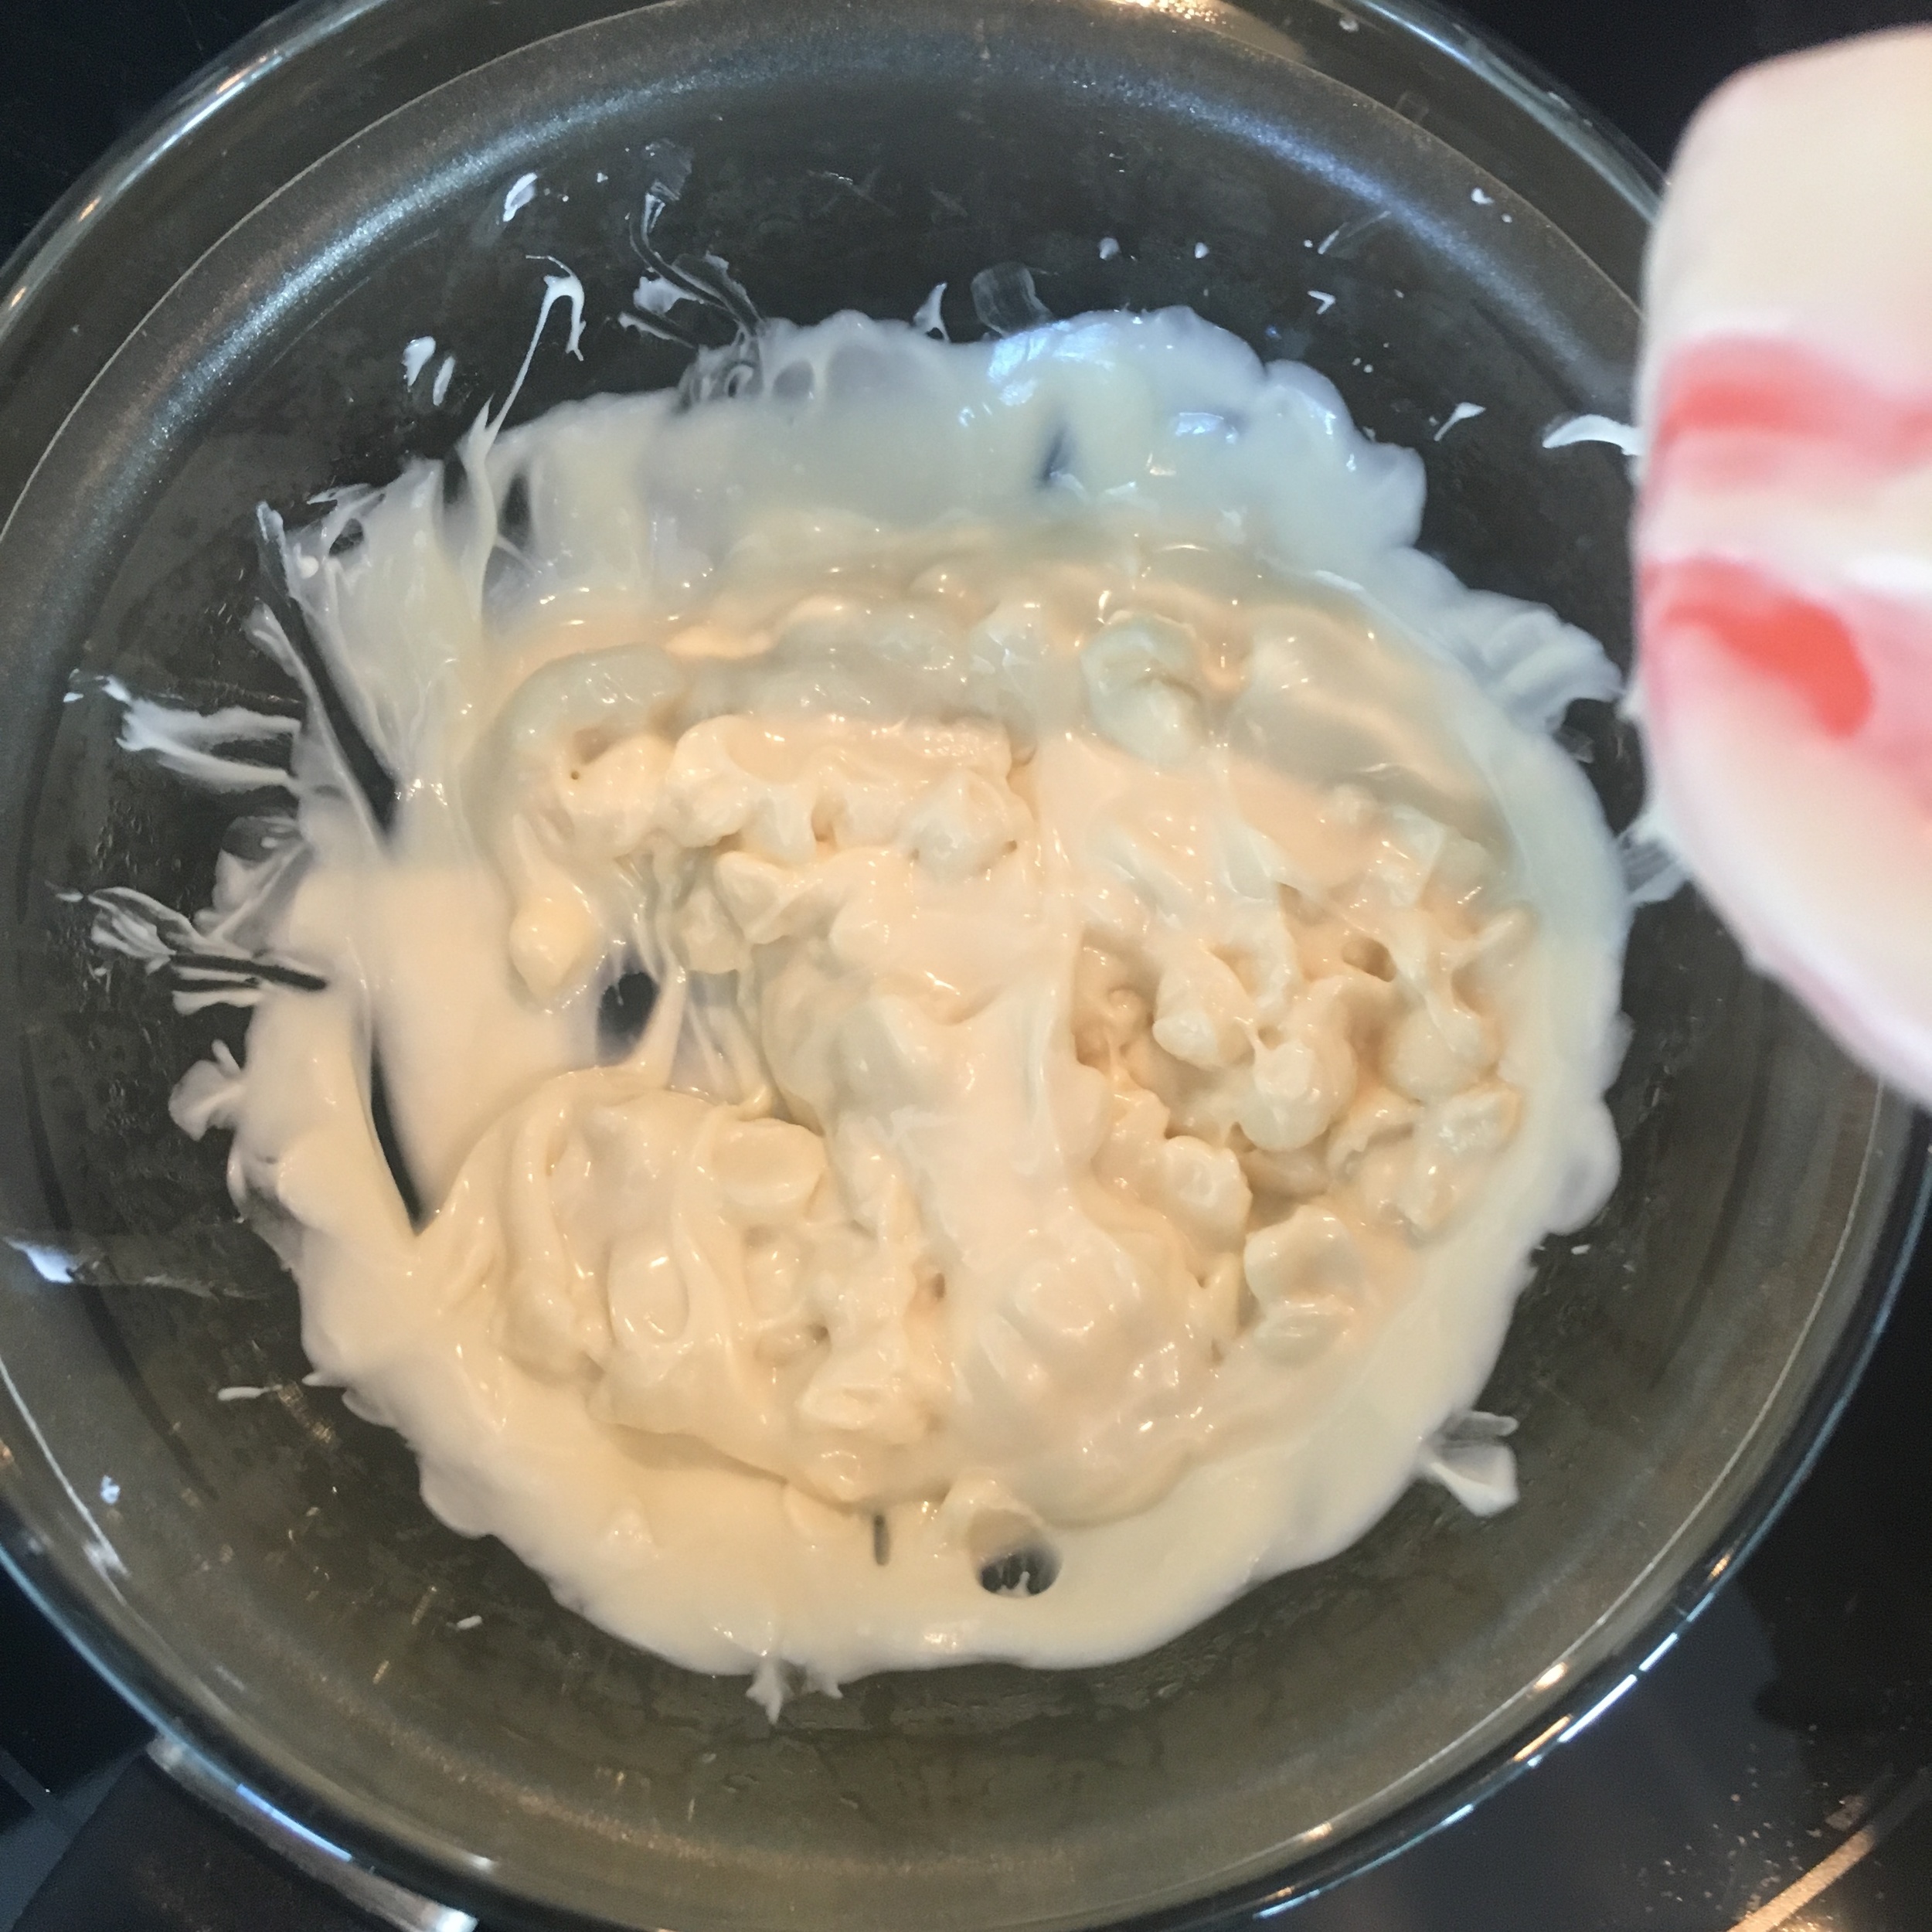
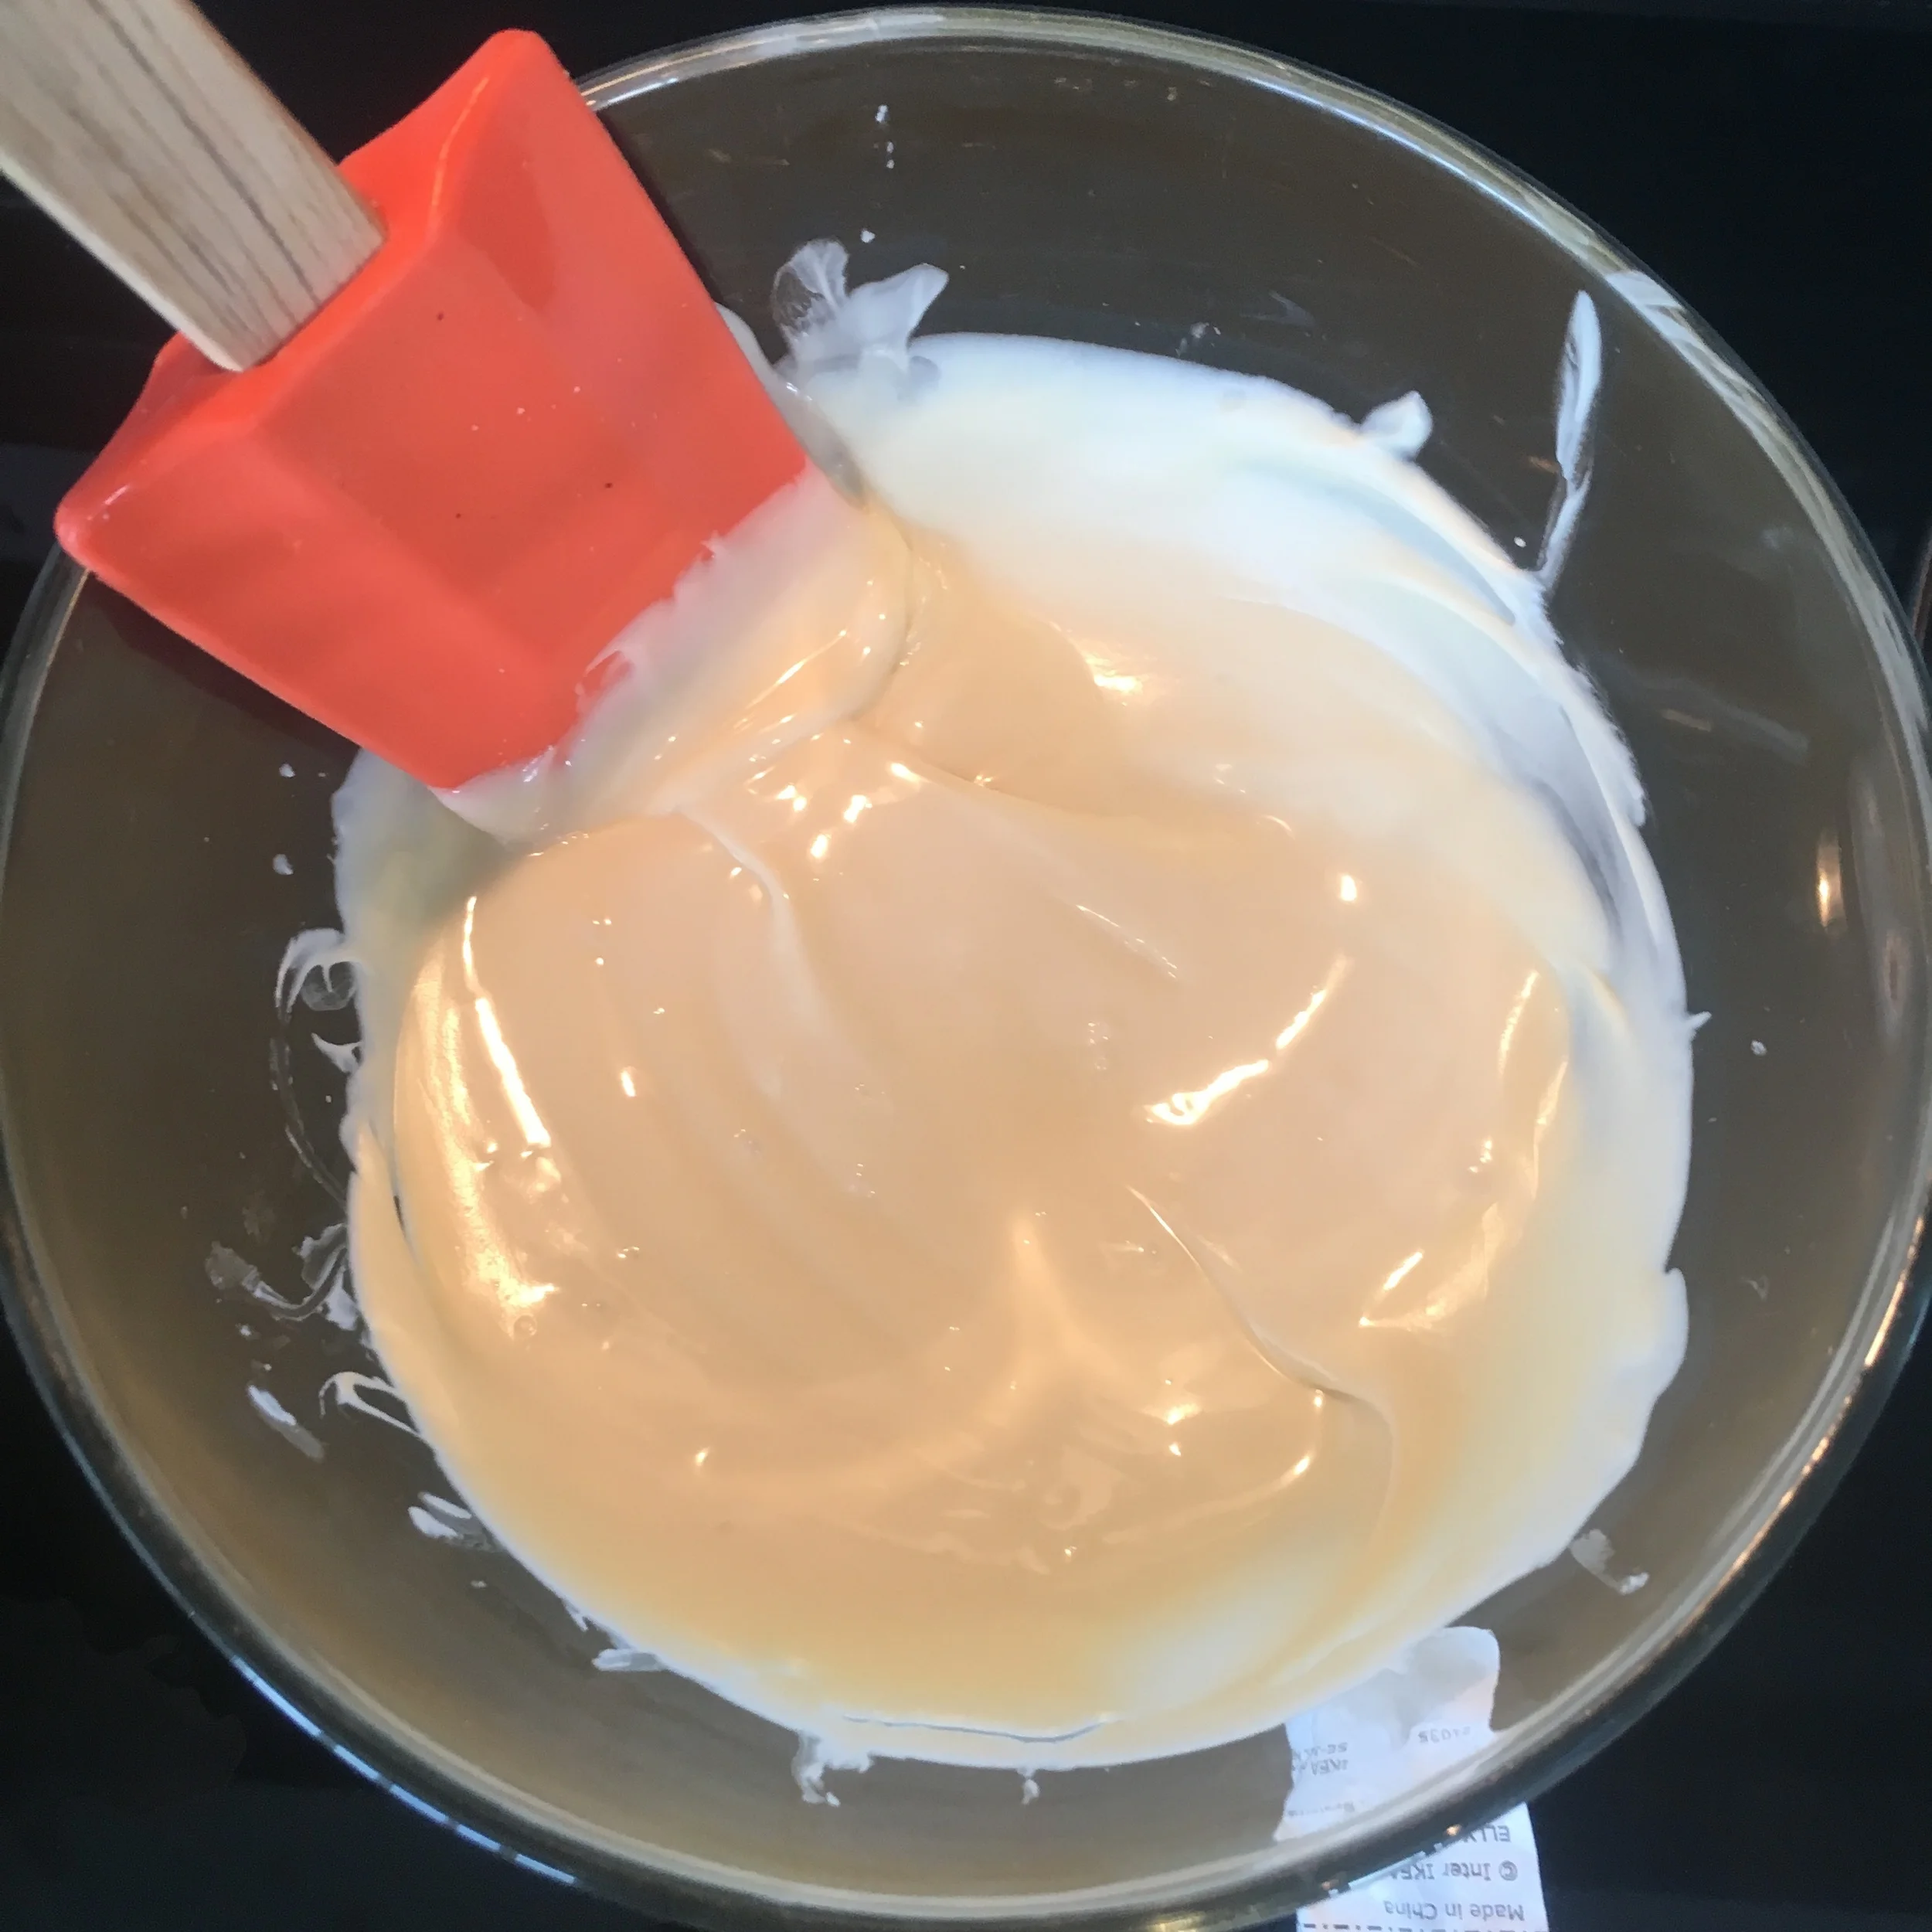
The best way to melt chocolate is to use a method called "double boiling" on low heat. This is done by filling up a small pot with water and bringing it to a light simmer. One the water starts to simmer reduce heat to low.

Next place your chopped up chocolate into a glass bowl slightly bigger then the pot so that the bottom of the glass bowl does not hit the bottom of the pot but is still submerged in the water (see photos)

You will slowly start to see the chocolate melt. Using a spatula move the chocolate around so that it evenly melts. Stir often with spatula in order to get the best consistency. Make sure no water gets into the chocolate!

Repeat the double boil process in a new glass bowl with your white chocolate.

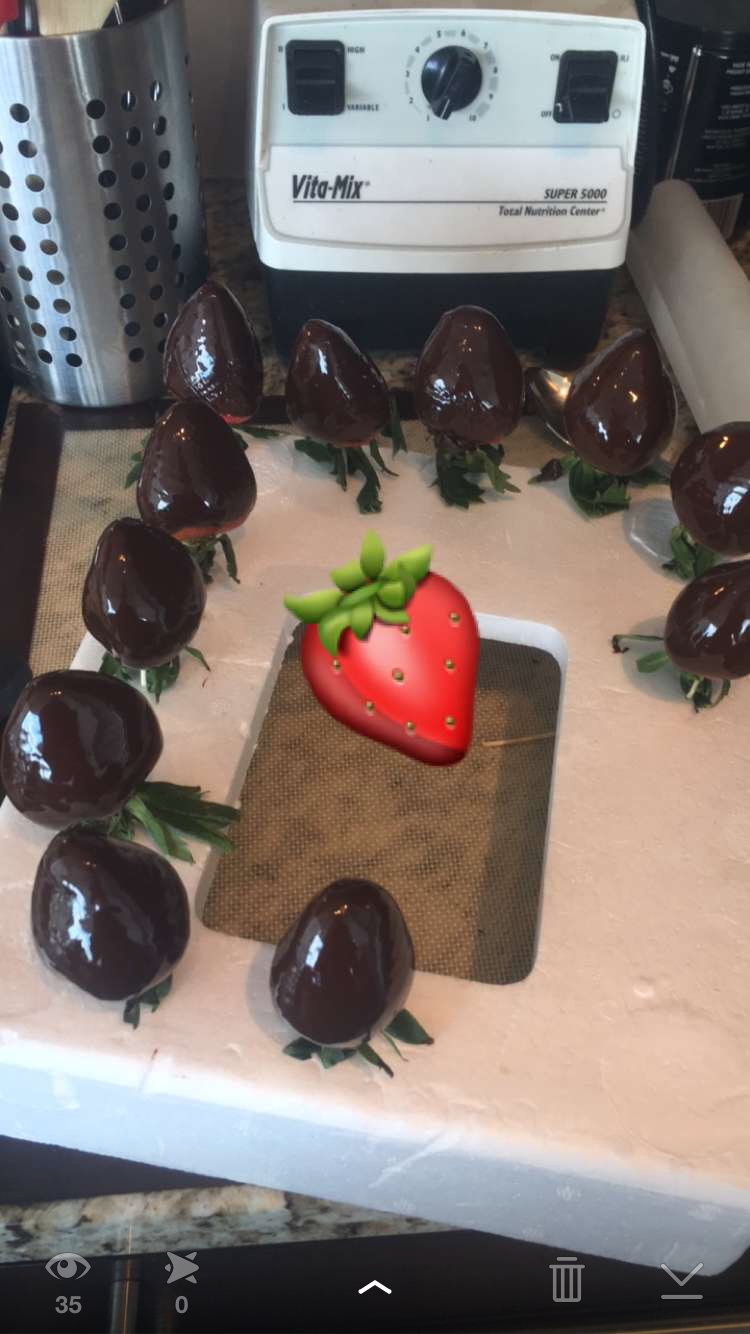
Dip your strawberries in the dark chocolate. Use the toothpick to help you rotate the strawberry so it is evenly covered in chocolate on all sides. Allow access chocolate to drip off before placing it upside down to dry so the toothpick is in the Styrofoam.

Continue until all the strawberries are covered and place upside down on the Styrofoam to dry.

Next put the white chocolate in a zip lock bag and push it to one corner. Cut a small hole in that corner so that the white chocolate can come out slowly. Pick up a strawberry and quickly move across it (side to side or back and forth) while squeezing the white chocolate bag to create your design. Place it back upside down on the Styrofoam. Repeat with remaining strawberries.

Once finished place strawberries and Styrofoam in the freezer for 30min to 1 hour to harden. Once harden you can serve them to your guest.


I hope you enjoyed this recipe. I would love to know your thoughts! If you have and suggestions or question please feel free to leave them in the comments below!

MINI ROSE APPLE PIE

Recently I've been searching for new recipes to try and add to my Superbowl Sunday menu. Next weekend is the Super Bowl which means a lot of friends across the nation will gathered around together and spend their entire Sunday eating and cheering for their favorite team! Even though I'm not a big football fan I still do enjoy participating in this event and getting together with friends to watch the game, drink and eat food. Since most of the time these gatherings don't involve an actual sit down meal finger foods and bite-size food are always a good choice. This way as people get hungry they can just grab a little bite and don't even need a plate necessarily. That is why I decided to try these mini rose apple pies. They are small enough to fit into your palm and take about two's bites to devour. Just enough of the dessert to satisfy you without having to commit to filling up on this one dessert choice. It also helps that they are super pretty! hehe

Servings: One 200Gr Pie Crust makes about 6 mini pies roses.

INGREDIENTS:

3 Apples (Washed and cut into quarters, remove seeds than slice thinly)
6 TBSP of White Granulated Sugar
1/4 -1/2 of a Lemon (juiced)
400Gr PiIlsberry Pre-made Pie Crust
Cinnamon Spice (as desired)
Icing sugar for garnish (as desired)

*You will also need toothpicks and a baking tray covered in wax paper/ nonstick baking sheet.
 

DIRECTIONS:

In a sauce pan add in your thinly sliced apples, 2 TBSP of sugar and lemon juice. Fill sauce pan with water to submerge your apples and place on stove on High heat. Bring your water to a boil, then reduce heat letting it simmer for an additional two minutes before draining the water.

Lay the apples out on a absorbent cloth to suck up any access water.

Preheat over to 350 Degrees.

Next lay out one of your pie crust. Sprinkle it with the remaining sugar (more or less as you please) and cinnamon.

Cut the dough into 3/4 to 1 inch strips and place your apple slices slightly overlapping along the strip. Roll the strip and tie off the end using a toothpick to hold it in place. 

Place strip on baking tray (previously covered with wax paper)

 Bake for 20 to 25 minutes or until golden.

 Remove from oven and allow to cool before sprinkling icing sugar on top. Enjoy!!!


I hope you enjoyed this recipe as much as I do. If you have any comments please leave them below and I'll be happy to answer them as soon as I can! Happy cooking!!!

TRADITIONAL MEXICAN CEVICHE

I love me some ceviche and I found that discarded avocado skins make a great serving device for dinner parties because they are easy to carry, they wont leak and they are of course biodegradable! Ceviche originally came from Peru but has since evolved and been expanded on with other South American cuisines. One of my favorite styles is typically seen in Mexican cuisines where they use whole white fish and habanero peppers to give it a refreshing and spicy flavor. Enjoy.

Makes 15 Avocado Cups (small servings)

INGREDIENTS:

2lbs of White Fish (Sea Bass works)
8-10 Garlic Cloves (chopped finely)
2 TSP of Salt
1 TSP of Black Pepper
1 Habanero (remove seed and chop finely)
4 TSP of Cilantro (chopped)
20 Limes (juiced)
1 Medium Red Onion (chopped finely)

DIRECTIONS:

Mix all ingredients except the onion in a bowl. Make sure all ingredients are covered in lime juice. Cover and place in fridge and allow to marinate for 2-3 hours.

After the two or three hours add the onion into the mix, place in avocado cups and serve.


I hope you enjoyed this recipe as much as I do. If you have any comments please leave them below and I'll be happy to answer them as soon as I can! Happy cooking!!!


CRACK CHICKEN MARINADE

This is one of my favorite marinades my boyfriends dad uses to make chicken thighs. The chicken comes out moist with a crispy outside layer. It smells and taste delicious and is not overly spicy. I really enjoy this chicken recipe and I'm sure if you like dark meat so will you.

INGREDIENTS

12 Boneless Skinless Chicken Thighs (rinsed)
1-2 TBSP of Olive Oil
1 TSP of Ginger
1 TSP of Celery Salt
1 TSP of Cayenne Pepper
2 TBSP of Soy Sauce

DIRECTIONS

Add all ingredients to a flat bowl and allow chicken to marinate for at least 30 minutes before cooking. Store in cool place while marinating.

Preheat oven to 350 degrees.

Place marinated chicken thighs on a baking tray lined with aluminum foil.

Bake or 30-40 minutes.

If you want them crisp broil them for an additional 10 minutes at the end.


I hope you enjoyed this recipe as much as I do. If you have any comments please leave them below and I'll be happy to answer them as soon as I can! Happy cooking!!!

BEEF AND BARLEY SOUP


Beef and Barley soup is the quintessential fall/winter hearty soup. There are so many nutrients and vegetables in this soup that will pick you up if you are felling sick.  The beef and broth will also warm you right up on a cold day and give you the energy to continue on. My mom always made this soup when I was sick because she knows it was my favorite and I guess its only right to pay that forward. When I asked me mom to send me the recipe I was not really surprised to see it was a Barefoot Contessa recipe. Of course it is, she is queen - all hail the Contessa! Ill post the original link below. ENJOY!

INGREDIENTS:

1 TBSP of Olive Oil
2 Lbs of Stewing Beef
2TSP of Salt (divided into 1 TSP portions)
2 TSP Pepper (divided into 1 TSP portions)
2 Cups of Leek (clean and chopped white bit - green bit is no good)
2 Cups of Carrots (peeled and chopped)
1 Large Spanish or Yellow Onion (chopped)
1 Cup of Celery (copped)
3 Bay Leaves
2 Stings of Thyme
8 Cups of Beef Broth
1 Cup of Uncooked Barley (rinsed)

DIRECTIONS:

In a large pot heat up your oil on medium heat. Once ready throw in your stewing beef. Add 1 TSP of salt and pepper. Allow to cook for about 10 minutes stirring periodically. You want the beef to be browned on all sides and to let out the fat and juices.

Once the beef is browned remove the beef and set aside but leave the juices!! We are going to use the juice to cook the vegetables so once the beef is out throw in the leeks, carrots, celery, and onion! Let that cook releasing the water from the vegetables and cooking them down for 10 minutes. They will also absorb some of the oils/fats left behind from the meat - YUM!

Once the vegetables are cooked down you can add your meat back in as well as your 2 springs of thyme, bay leaves, and beef broth. You can also add in your remaining salt and pepper at this time. Bring to a boil before lowering to a simmer and covering. You will need to let the soup continue to cook on a simmer for an hour.

In the meantime, we are going to cook the barley so bring four cups of water in a separate pot to a boil and throw in your barley and reduce to a simmer. Let the barley simmer UNCOVERED for 30 minutes before you drain and set it aside.

When the 60 minutes are up for the soup throw in the barley and continue to cook for 15-20 minutes. Depending on how you like your soup you may want to add some salt and pepper before serving. Also, I like to remove the thyme and bay leaves so that they don’t get in people’s bowls.


Original Recipe -> http://www.foodnetwork.com/recipes/ina-garten/rich-beef-barley-soup-recipe.html

I hope you enjoyed this recipe as much as I do. If you have any comments please leave them below and I'll be happy to answer them as soon as I can! Happy cooking!!!