EPISODE 2: INDESTRUCTIBLE - RENOVATING MY TORONTO VICTORIAN HOME

Toronto Victorian Ceiling Medallion

TORONTO VICTORIAN HOME RENOVATIONS

Prior to starting renovations on my Toronto Victorian home, I knew that we were going to need to do some structural work.

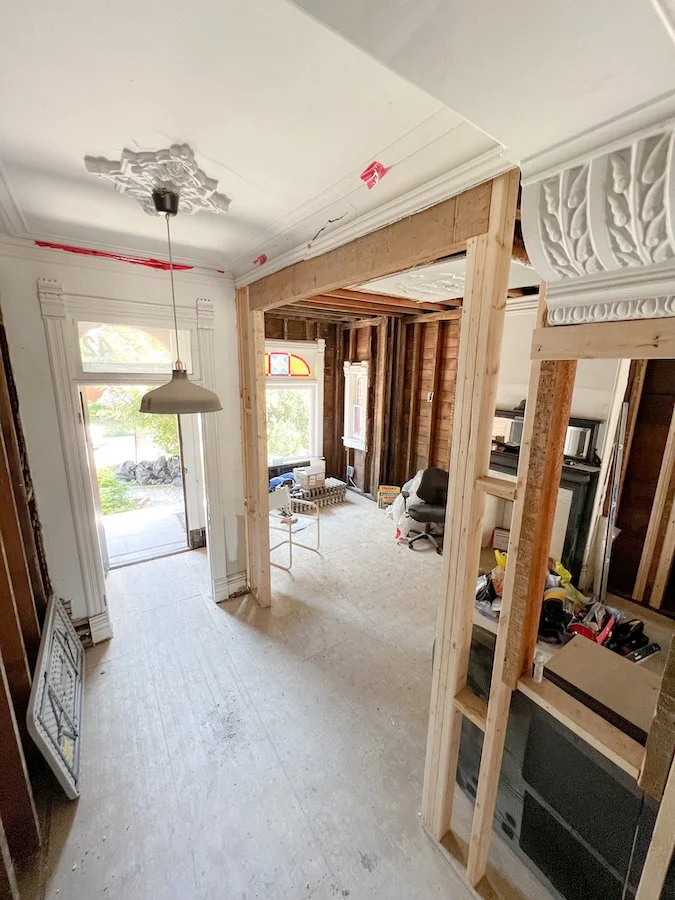
When we bought the house it was split into two units and there was a big bedroom located in the middle of the main floor. In order to change the layout, we were going to need to remove a load bearing wall which meant finding a structural engineer and structural contractor in Toronto.

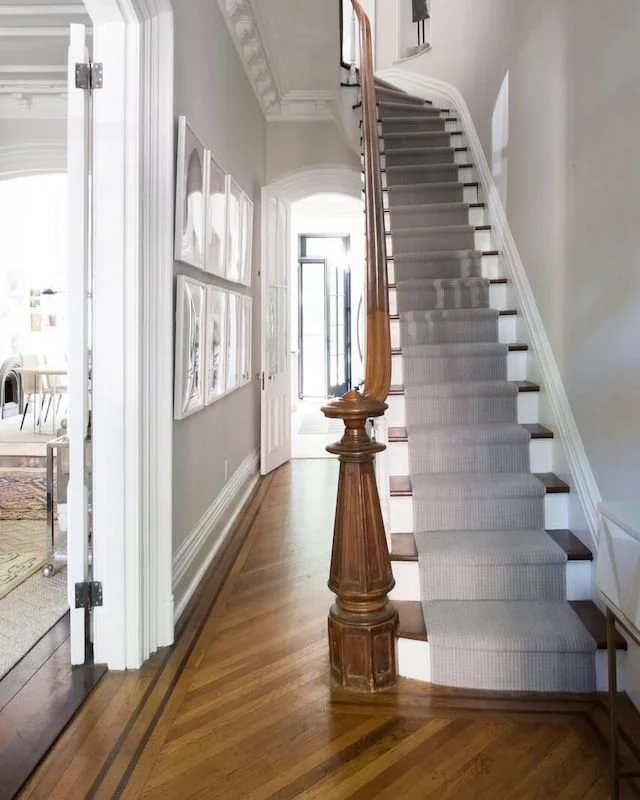
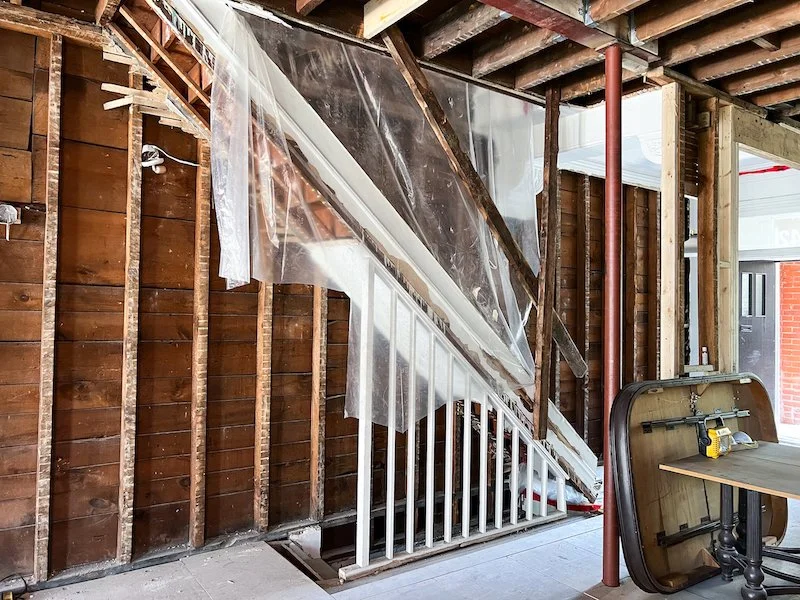
Additionally, the staircase was original and very narrow. Its condition was worse for wear and you could clearly see it was starting to tilt to one side. Eventually, it was going to need to be replaced and if we ever wanted to get a king mattress up the stairs, increasing the size was a must.

Lastly, Adam and I also noticed that there was some serious sagging in the floors. We suspected a load bearing wall was removed in the basement and if I ever hoped to install herringbone floors, this would need to be fixed as well.

Structural work is no joke though. In Toronto, you are legally required to get a permit and getting over this hurdle meant finding a seasoned structural engineer who has had plenty of experience dealing with issues like ours as well as a structural contractor that was capable of removing walls and installing both LVLs and steel beams.


FOLLOW ME ON INSTAGRAM @ISTHATSOH


TORONTO HOME RENOVATIONS - MODERNIZING A VICTORIAN HOME

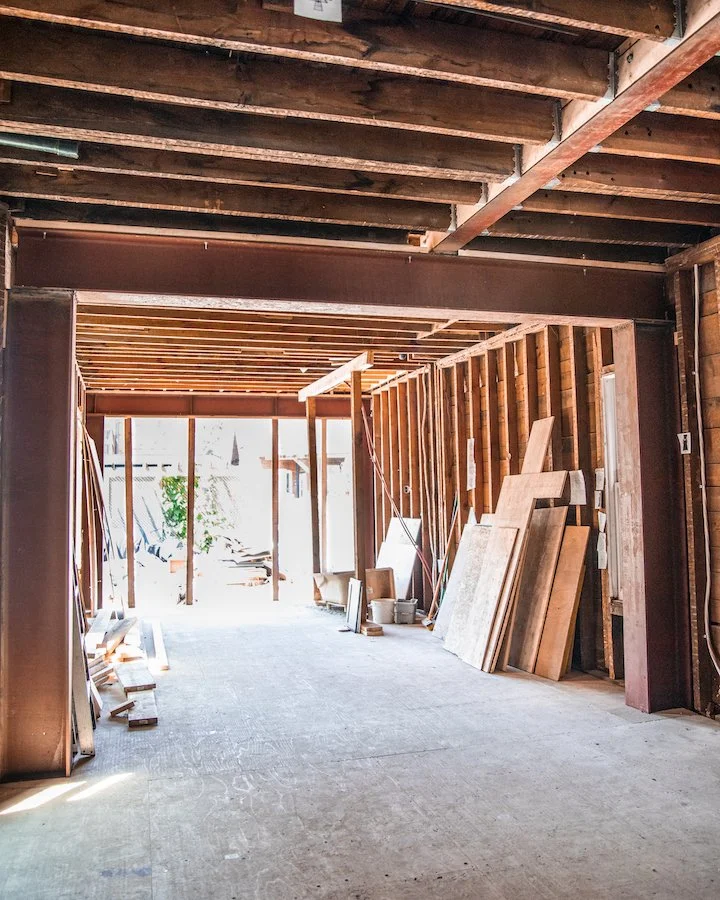
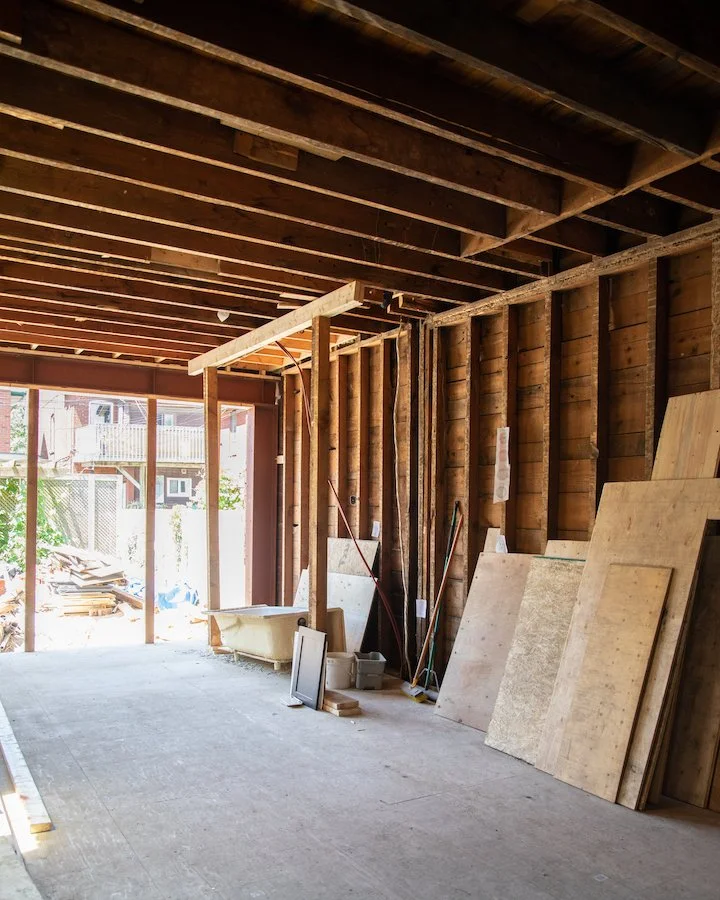
In episode two of my new home renovation series we launch right into structural work! In total we spent over a month focusing on improving the structural elements of the house including installing structural beams, sistering joists, levelling floors, adding several new footings and steel posts in the basement and installing two massive steel moment frames that pretty much make our house indestructible!

If this is your first time tuning into my new home renovation series, make sure to check out my previous episode ‘Sledgehammer Therapy’ and keep up with upcoming episodes by subscribing to my YouTube channel!

TORONTO CONTRACTORS

Our search for a good structural engineer and structural contractor in Toronto wasn’t easy. Adam and I reached out to a handful while putting together our budget for this reno and definitely ran into a few characters along the way. Finding someone ‘word of mouth’ proved challenging, especially since a lot of people we knew hadn’t taken on a renovation of this magnitude before. Since Adam and I weren’t interested in bringing on a general contractor we instead researched potential companies, looked at their reviews/references, spoke with the owners, made sure they were licensed and insured, and scheduled site visits. Even after all that, making a decision was hard and given the gravity of the ask and the money it would require, it was imperative we make the right one.

K.H. Davis Engineering Consultants LTD has a great reputation in Toronto. During our search for construction trades, Ken Davis’s name popped up a few times. A couple of them had worked with his plans before and mentioned how thorough they were. One also mentioned how responsive he was when a question arose because it saved him from delaying his project. After meeting Ken Davis himself during a site visit, we knew he was the guy we wanted to work with. He was incredibly knowledgeable, had worked on Toronto century homes before and was familiar with how they were generally constructed. He also assured us that he could address all our issues and was happy to apply for the permit and deal with the city on our behalf. When we finally pulled the trigger and started to work with him he scheduled a meeting with us to walk us through every aspect of the plans. It was clear during this meeting that he was not only taking into account what we wanted to do in this phase of our Toronto home renovations, but also our next phase which we really appreciated. Even after receiving our permit, when we hit a snag and needed to pivot, he shared a few possible solutions with us so we could figure out a financially feasible new strategy. When you are dealing with old homes, Adam and I knew that things don’t always go as planned but we both definitely appreciated having Ken by our side to guide us.

Toronto Contractors - Home renovations - dynamic design and construction

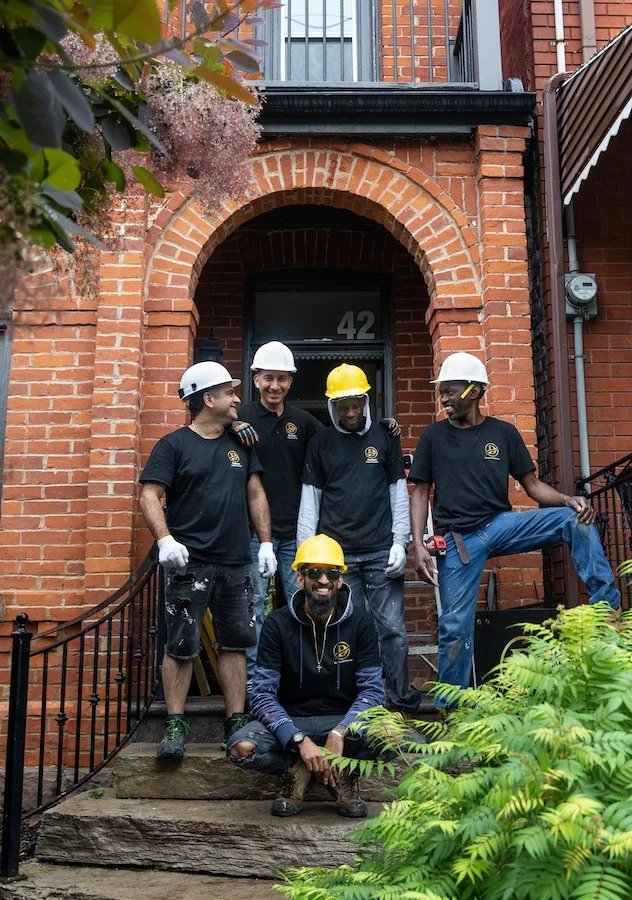
Raouf and his team at Dynamic Design and Construction - our Toronto structural contractor

Finding the right structural contractor proved even more challenging. Many of them had experience with removing a load barring wall and installing LVL’s but installing a steal beam was a whole different ball game. We needed a Toronto contractor with steel beam experience and know how.

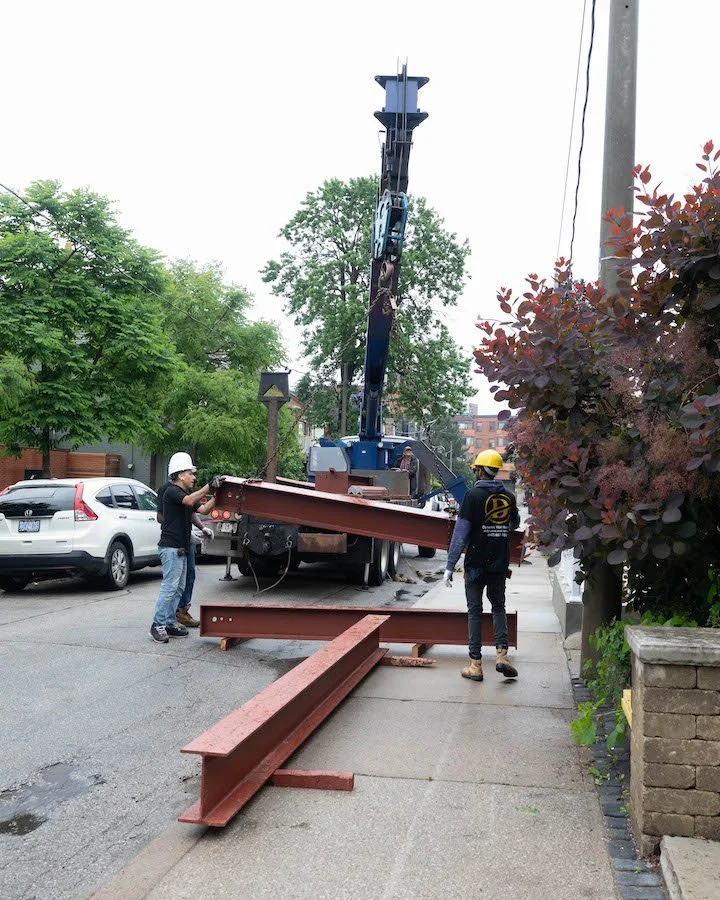
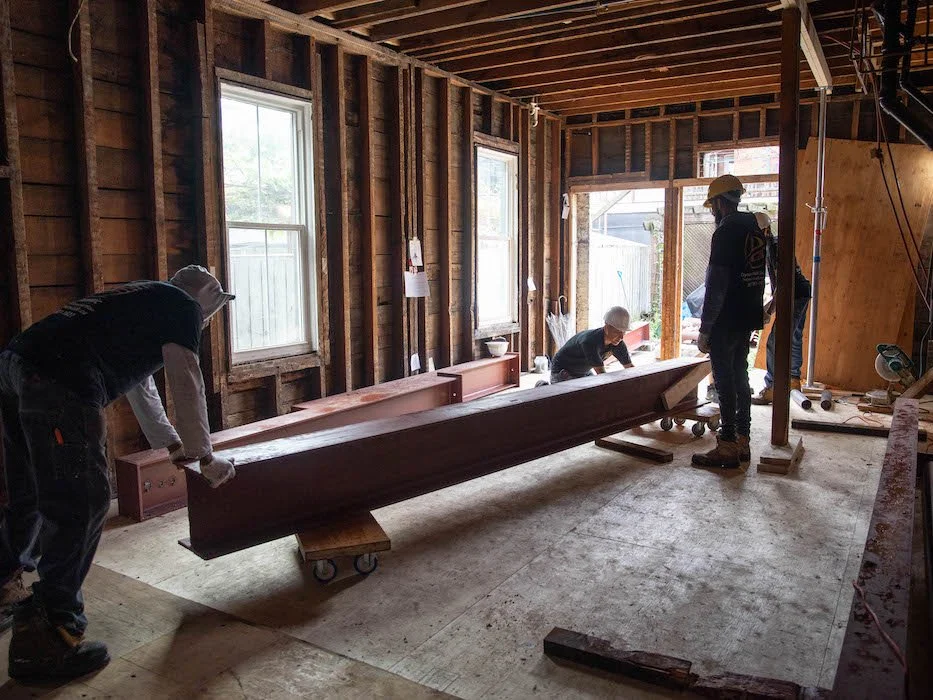
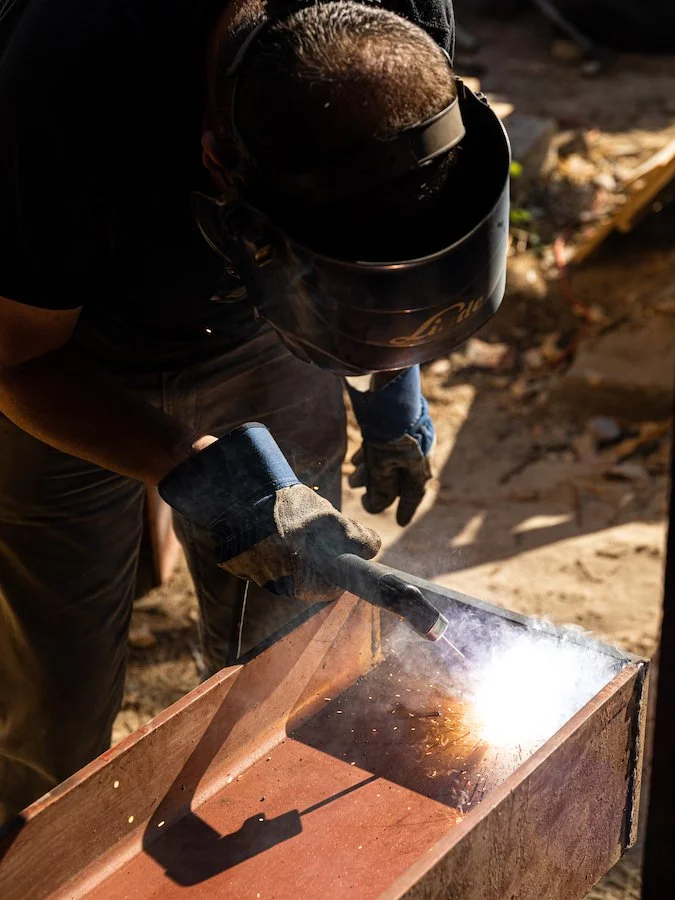
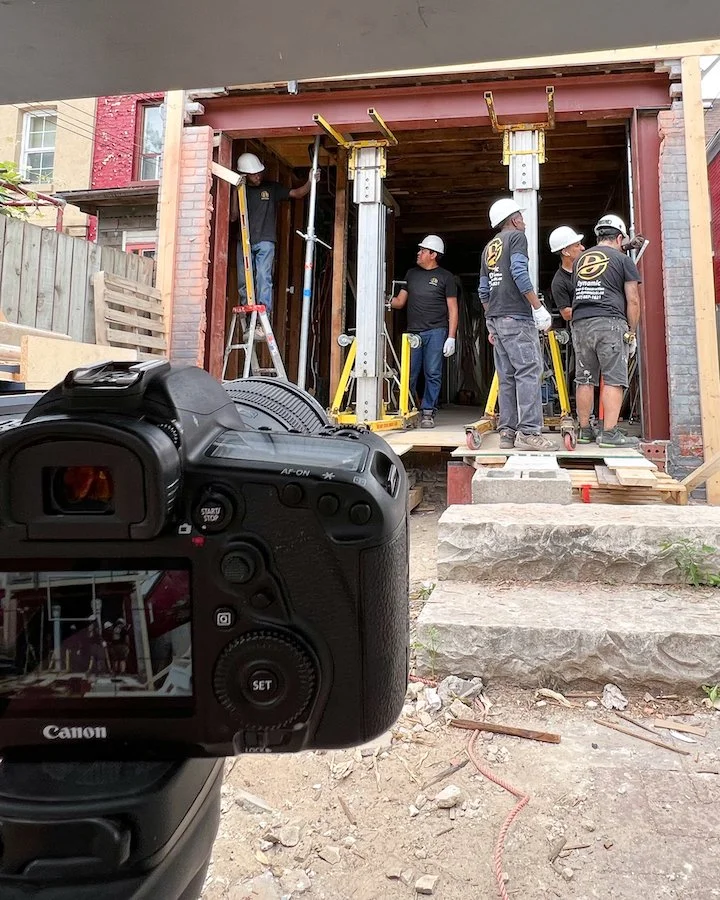
With over 15 years in the industry Raouf has been leading his team at Dynamic Design and Construction through numerous Toronto home renovations of varying magnitudes. He has restored century homes in Rosedale, built houses from the ground up, and has plenty of experiences removing load bearing walls and installing structural steel beams like the H beams we had in our plans. Once we started to work with Dynamic, any anxiety I had going into this next step of our Toronto Victorian home renovations subsided. Raouf was great at communicating his needs, questions and concerns so that we could prepare and avoid possible upcoming challenges. His dedication to getting the job done and getting it done right was duly noted and appreciated, along with the commitment of his hard working team. I watched both moment frames get installed and moving heavy H beams into place is no easy task. Like a conductor and his orchestra, Raouf and his team worked together harmoniously, positioning and installing 7 steel beams and a steel post in one day. It was incredible!

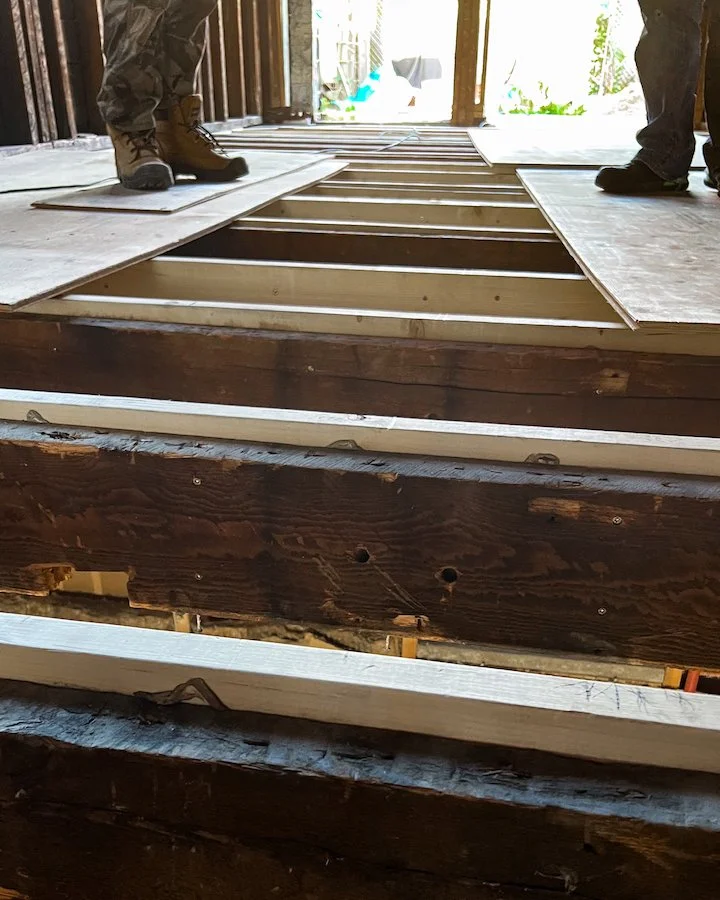
He also levelled my floors, sistered joists, installed several footings in the basement, widened our staircase opening, poured concrete in our crawl space, created concrete footings for one of our moment frames and installed two steal frames on the foundation walls for the other. Adam and I knew it was going to be a challenging assignment and Dynamic Design and Construction rose to the occasion with total competency and professionalism.

P.s. If you are starting a Toronto home renovation and need some contractor recommendations Adam and I have put together a stellar list of contractors and tradesman for this project! I’ll be sharing more about our renovation process in upcoming episodes and the companies we are using but if you can’t wait, feel free to leave a comment below or shoot me an email via my contact form for a recommendation!

Dynamic Desing and Construction - Toronto Home Renovation Contractors

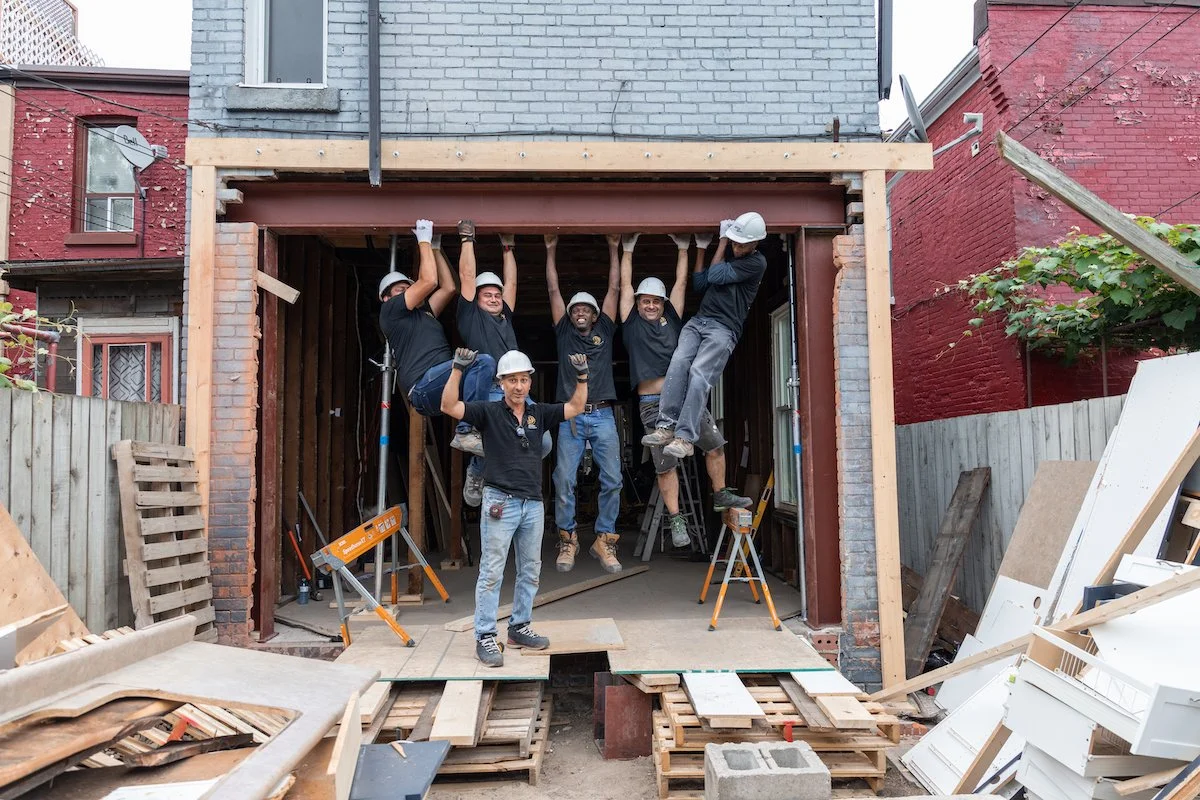
Roufe and his team celebrating after installing 6 steel beams that make up the two moment frames we needed to install in our Toronto Victorian home.


CHECK OUT THESE OTHER HOME & LIFESTYLE BLOG POSTS


soheila hakimi of isthatsoh

Me after another day of home renovations!

So there you have it! Stage two of our Toronto home renovations is complete and we can now move onto the next step, framing, plumbing and electrical work.

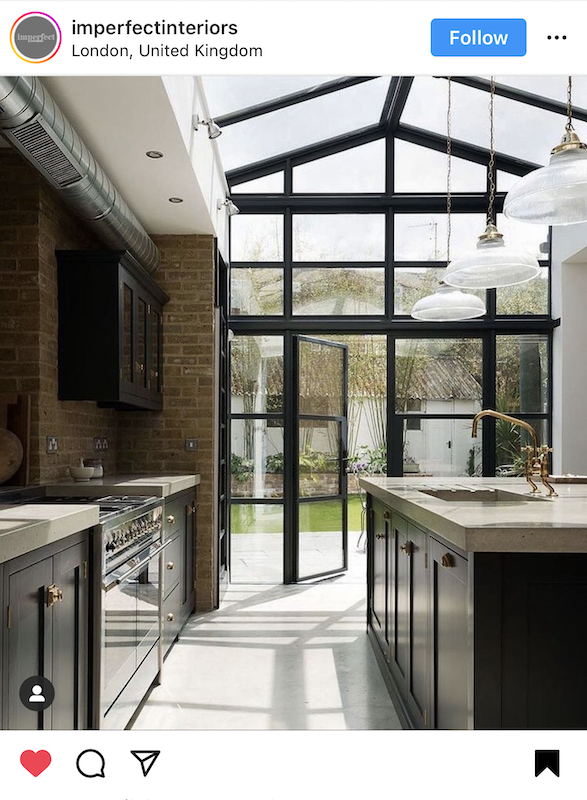
While the structural work was going on we also finally receive our kitchen appliances (including our new La Cornue range) and finalized our new kitchen designs with Domani Design Group. Everything we are going to be doing in our Toronto home renovation moving forward will be preparing us for the install of our new kitchen, a large Crittall style back door and a whole new main floor layout! Plus I have some BIG NEWS which I will be revealing in my next episode, so don’t miss out and subscribe!

Additionally, behind the scenes I also started my search for tiles to replace the ones we had in our basement bathroom as well as demoed the area around our staircase, cleaned up the mechanical room and removed a large old decommissioned cast iron stack from the side of the house. If you want to see more behind the scenes you can always follow me on Instagram where I share more up to date stories of my interior design and renovation progress!

PICTURES FROM AFTER THE STRUCTURAL WORK HAS BEEN COMPLETE IN MY TORONTO HOME RENOVATIONS!


Thank you so much for joining me today and for checking out my new Toronto home renovation series on Youtube. I am super excited to be modernizing a Victorian home while still keeping the charm of an old Victorian house. If you have any questions about my Victorian house renovations, what it’s like to live in Little Portugal, Toronto or recommendations for Toronto contractors, hit me up in the comments below!

monarch butterfly

PIN THIS POST

SPILLING TEA: ALL MY JUICY RENO PLANS & INSPO!

My Romanesque style Toronto Victorian home


It’s been almost six months since we moved into our Toronto Victorian Home and yet waking up and walking from one room to the next still feels so unreal sometimes. The spark we first felt when we initially toured the house is still very much alive and it all just goes to show that our crazy first time home buyer experience was worth the struggles. In the end, we found a beautiful house in a great neighborhood that we have been loving learning more about and exploring.

OUR CREEPY HIDDEN STAIRCASE

Being over 125 years old, our Romanesque style Victorian home does come with its fair share of quirks. For one, we discovered a creepy hidden staircase in a wall while planning out our main floor renovations! We suspect it was closed off to hide plumbing to the second floor bathroom and make room for a new staircase to the basement, but given it features the same high baseboards you see in other parts of the house, the staircase was likely part of the original house.

Additionally, when we bought the house we noticed that the floors sagged. This is a common characteristic of old houses usually equated to their age, but upon further inspection by our structural engineer, we began to suspect that load bearing walls in the basement had been removed by a previous owner at some point. Thankfully the foundation of the building is sound and our renovation plans will address this issue.


FOLLOW ME ON INSTAGRAM @ISTHATSOH


One thing I am 1000% doing is preserving the historical charm of the house as much as possible. Both the entrance way and drawing room feature high baseboards and crown molding centered around exquisite Victorian ceiling medallions. I also love the original ornamental molding that can be found throughout the first floor that embellishes the doorways including the main entrance. Unfortunately, a lot of these decorative molding features have been removed from the second floor, so one thing I’m definitely including on my ‘to do’ list is custom mill work to incorporate it back in.

Speaking of ‘to do list’, the reason why I am sharing today’s post is not only to expand on my pre reno tour, kitchen appliance tips, and share interior design inspiration for my upcoming renovations but it’s also to introduce a new Youtube series I’m going to be filming, documenting our renovation journey! I feel like this house and first floor renovation is going to be an amazing opportunity to share about my love for design and create entertaining content to excite you. There no doubt will be challenges but it’s in those challenges that great stories are made so I hope you will join me on this journey.

Of course, by way of this blog post I also wanted to give you a sneak peak into all the beautiful inspiration I’ve been collecting, what we are planning, and why we called in a structural engineer to help us. SPOILER: it goes beyond sagging floors!


RENOVATING A VICTORIAN HOME

Given our budget after buying the house and the fact that it is currently split into two units, Adam and I decided the best way to approach our top to bottom renovation is to split each floor into phases. This way, we can continue to live in the house during the renovations while still having a working kitchen on the second floor.

As you have probably guessed by now, phase one of this project is going to include a complete first floor renovation. Structural changes to support this, including widening the staircases on both the main and lower floor, will also be taking place as well as reintroducing an entrance way from the front hallway into the drawing room and removing unoriginal walls to create an open concept layout towards the back of the house where you will find a new kitchen, powder room, and bar. The sun-room at the back of the house will eventually be demolished so as to reclaim more of the backyard and a larger door opening will be created to replace it allowing for maximum natural light.

I will be elaborating further about these design choices throughout this blog post as well as providing inspirational images to help you visualize what we are planning. So without further ado, let’s start with diving into each element our renovation plan starting with structural changes.


STRUCTURAL CHANGES

I knew prior to starting our first time home buying journey that I loved Victorian homes so while on our quest we visited many renovated Toronto Victorian homes. A common repeated feature we noticed was an open concept layout on the first floor which, when paired with high ceilings, not only made the house look bigger but grander! Since original walls only seem to exist at the front of our house, Adam and I had no hesitations when deciding to alter the main floor layout by removing walls to make room for a larger kitchen and overall entertaining space. We learned that making these layout changes would require additional steel beams to provide stability and prevent structural issues that could arise later in the other phases of our renovations.

Additionally, since we wanted to demolish the sunroom and reclaim more backyard space we saw this as an opportunity to install a larger opening for a new doorway leading to the backyard. Doing this would require a steal frame to be installed to support the brick wall at the back of the house.

Pre Reno Kitchen and Sun Room - Photo Cred Raffi Tutundijan @jaggedlens

CRITTALL STYLE DOORS

Originally, Adam and I were thinking of doing a large steel Crittall style doors as the back entrance door, however after pricing it out and seeing what the lead times would be to have one made big enough for the opening (it would have to be custom made) we got cold feet.

Living in a cold climate, steel Crittall doors aren’t known for being the most energy efficient door systems since they aren’t great at preventing heat from escaping or blocking the cold from coming in. The Toronto Building Code does have a minimum thermal break requirement for all external doors which is why aluminum doors or fiberglass doors are more common (they offer superior energy efficiency when compared to steel) as well as cheaper. Alas, we are still undecided which way we will go but here’s some inspiration of what we are thinking.


ENJOYING THIS POST? CHECK OUT SOME OF MY OTHER RECENT LIFESTYLE POSTS


Further, it wasn’t until we moved in and tried to get furniture to the second floor and basement that we realized how narrow our staircases are! When it comes to staircases, Toronto’s current building code requires staircases in new builds to be a minimum of 36 inch wide. Historically, staircases were never this wide and although our staircase is not original, the opening was never widened by a previous owner. Our staircase comes in at 27 inches making it extremely hard to fit assembled furniture upstairs. For the longest time Adam and I wracked out heads trying to figure out how the previous owners managed to get the kitchen appliances up to the second floor. It wasn’t until we finally measured the width of the doorway to the small front balcony off our master bedroom that we figured out they must have removed the door temporarily and craned them in through the small balcony! Crazy right!? One of the biggest and possibly most pivotal decisions we had to make when putting together our renovation plans was figuring out whether we were going to address our narrow stair issue, how it would impact the structure of the home, and how much widening and replacing both staircases would be.

WOOD STAIRCASE DESIGNS

After finally deciding to move forward with widening the staircases, Adam and I debated whether to go more modern or keep it classic with the new stairs. We both love the look of floating stairs but given how much traditional character the house has, we ended up going for a more traditional design. But I’m sure we will add a modern twist somehow.

Lastly, structural issues in the basement that caused the floors on the main level to sag needed to be addressed before we can lay down a new subfloor and install new floors. To do this it seems that a few new beams will have to go in on the lower level - especially at the front of the house - to ensure the new floors won’t buckle a few years down the road. Installing these new beams will be also help us address the issues on unsupported over-spanned joists that we believe were caused by the removal of a load bearing wall in the basement by a previous owner.

Speaking of floors, I’ve been obsessed with mosaic and herringbone floors for years! Prior to buying a house, I told Adam that I hope whatever we ended up with needed new floors so I would have an built in excuse. During our viewings we saw a few Toronto Victorian's with mosaic and inlaid floors that only continued to fuel my obsession.


CURRENT FLOORING

Currently, the main floor has three different types of flooring going on, one of which does look original. However, it’s only a small section at the back and they aren’t in the greatest shape. If there was more of it and it was in better shape I may reconsider redoing the floors, but in our case this is one ‘out with the old in with the new’ sacrifice I’m willing to make. Traditionally herringbone floors were made of oak and these days you can get them in engineered oak in many different sizes and colours. Narrowing it down to a size was exceptionally hard given the size of the space. Too large and you don’t notice them, but too small and it’s all you notice. It needs to be balanced! In the end we went with a 90 mm natural oak herringbone colour which I am so excited about. It’s going to add warmth back into the space and match beautifully with what we have planned for the kitchen. I can’t wait!

HERRINGBONE FLOOR INSPO

I’ve shared a little bit about the kitchen appliances we ordered a few months back but when it comes to designing my dream kitchen you can bet it won’t be all white! In order to ensure flawless execution for this part of the project, I brought in the big guns, Domani Design Group. Not only does Domani distribute luxury European brands like Pedini but they also specialize in custom cabinetry for both kitchens and bathrooms as well as custom millwork! Just what I needed!

To us, the kitchen is truly the heart of the house and both Adam and I love to cook and entertain. With 10 foot ceilings and an open concept layout, I wanted the kitchen to feel airy but still anchoring, warm and full of natural light. Currently we have two big beautiful windows in our hallway that we plan to position the island between. For cabinetry we are keeping it simple, timeless, and classic but modern with a shaker style kitchen in a dark French navy to match our La Cornue range in the same colour with brass accents. The La Cornue range is going to be the centrepiece so I wanted cabinetry to compliment it, but not compete.

SHAKER STYLE KITCHEN INSPO

A warm porcelain countertop in a Calacatta with brown-gold warms up the space and plays on the natural oak herringbone floors. Floating shelves in a cool natural wood surround a simple and understated range hood which extends all the way to the ceiling to accentuate the height of the room. Bar seating will surround the kitchen island sink. I have even gone so far as to start to think how I will organize the kitchen and have submitted special millwork request to Oscar at Domani including a pull out spice rack and cabinet pull out drawers for my small appliances! I’m so excited!


KITCHEN STORAGE & ORGANIZATION IDEAS


I obviously don’t expect this renovation to go smoothly. I’m actually banking that it’s not so that I have some great stories to come back and share, but I am super excited for all that is to come. I’m also super excited to document and create my Youtube series around it so you guys can get a sense of the process too! If you aren’t following me already make sure to subscribe to my YouTube channel and follow me on Instagram for updates on this phase 1 renovation and more design projects I have in mind!


PIN THIS POST