EPISODE 10: IT'S FINALLY HAPPENING - RENOVATING MY VICTORIAN HOME

Toronto home renovation - victorian style house - winckelman tiles - victorian mosaic tiles with Border design - bathroom renovations in Toronto - powder room ideas

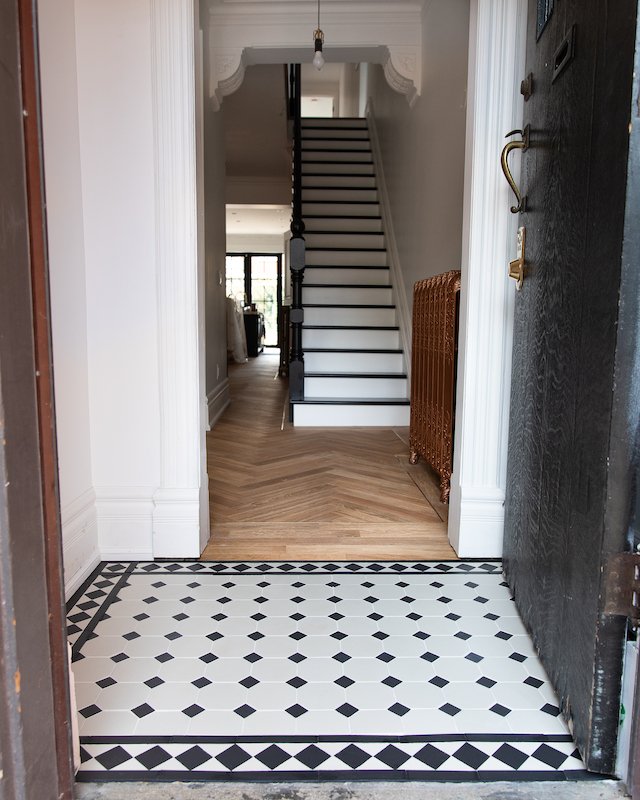
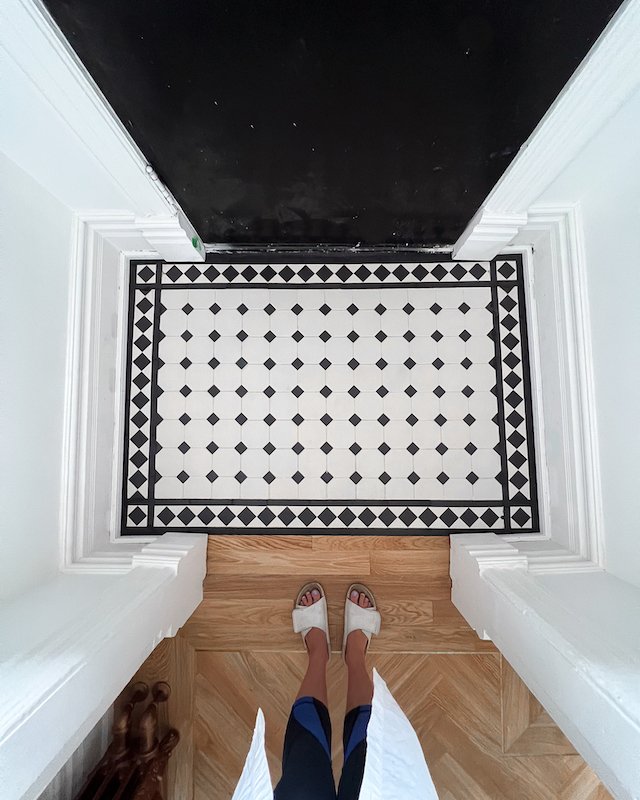
We finally installed the Victorian mosaic tiles I ordered from Winckelmans in the powder room!

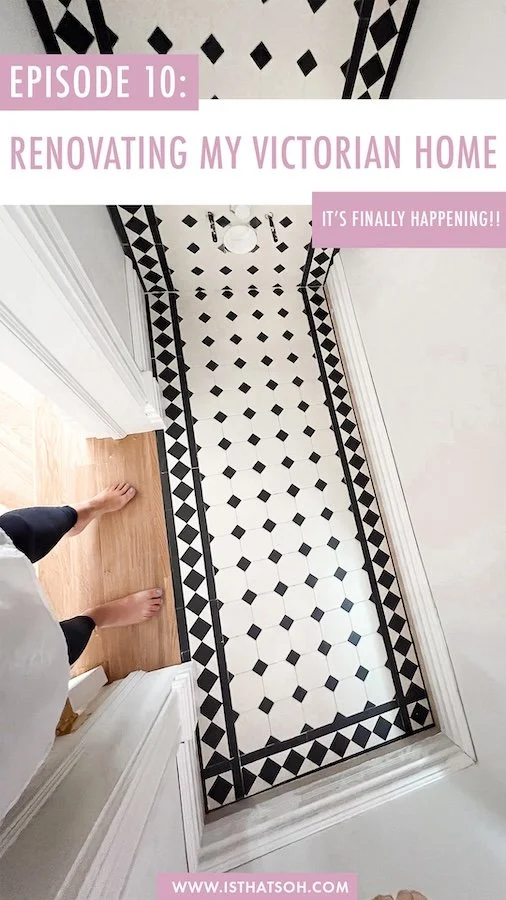
RENOVATING MY TORONTO VICTORIAN HOME - EPISODE 10!

I know it’s been a few months since I last released an episode of my home renovation series but that is not because Adam and I have been relaxing and enjoying the summer, quite the contrary! Since moving back into the house and getting ourselves settled in, we have had to put our bigger renovation plans on the back burner and switch gears to concentrate on planning our wedding and getting married in Italy!

If you missed our big news, this past September Adam and I got married in Tuscany at the beautiful San Galgano Abbey. We kicked off our trip with a whirlwind weekend in Florence with friends before heading to Tuscany to check into our wedding villa where we would be hosting the majority of our wedding event. On the first night we hosted a large welcome dinner under the stars for all our guests before getting married the following day in front of all our family and friends. It was such a beautiful wedding and reception - a total dream come true! After one week in Italy, Adam and I headed to Croatia for our honeymoon where we spent a few days at a luxury boutique hotel in Hvar before sailing around to a few Croatian islands and finishing up in Dubrovnik for the last couple nights.

modern victorian house - home renovations toronto - foyer tiles - winckelman tiles black and white victorian tiles with boarder design

My dreams of having Victorian Tiles in my house have finally come true!

Installation of My Victorian Mosaic Tiles From Winckelmans Tiles

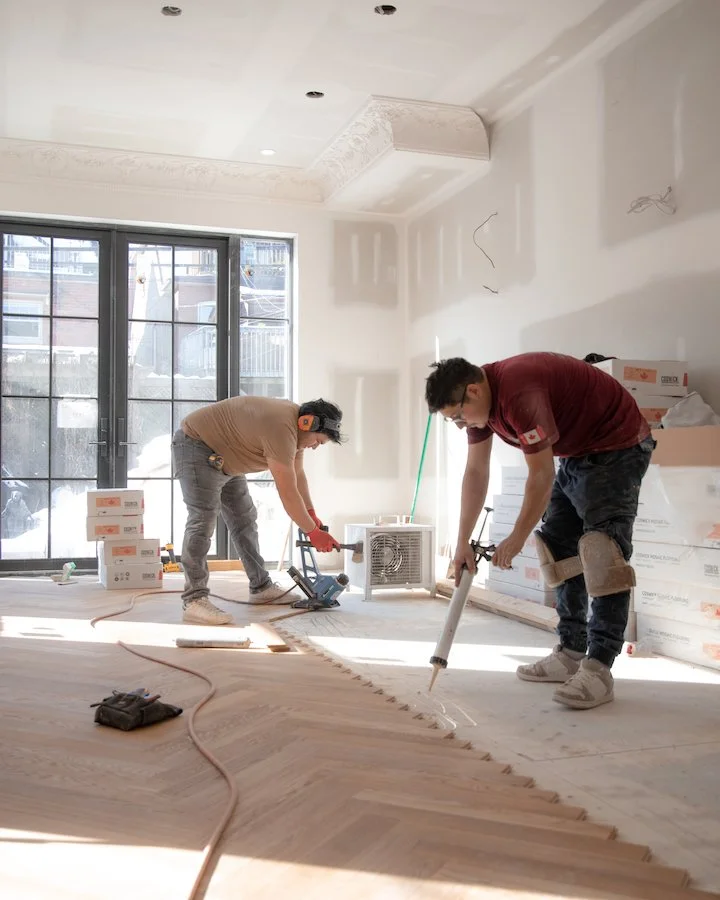
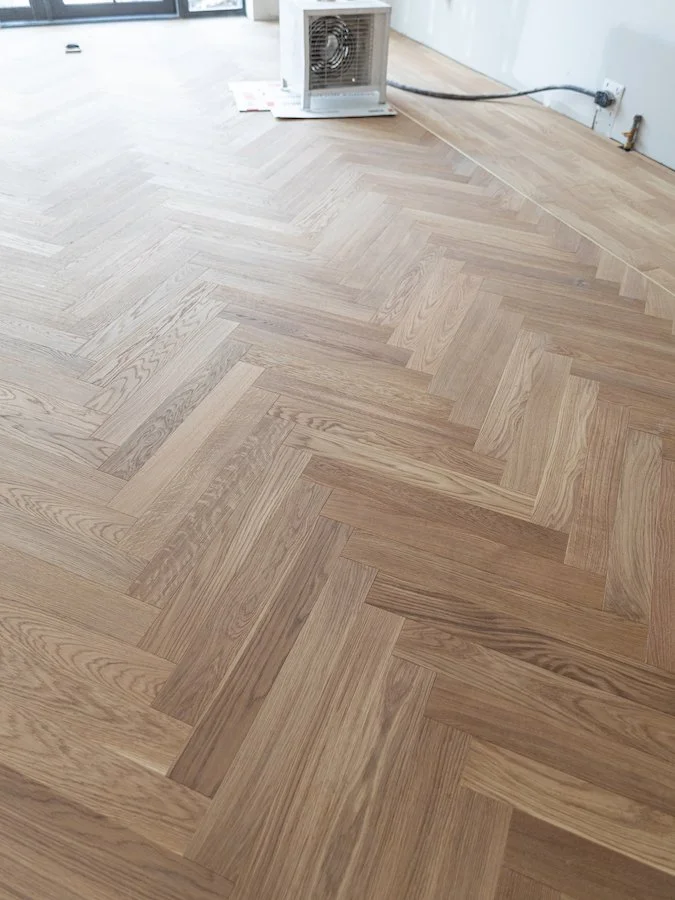
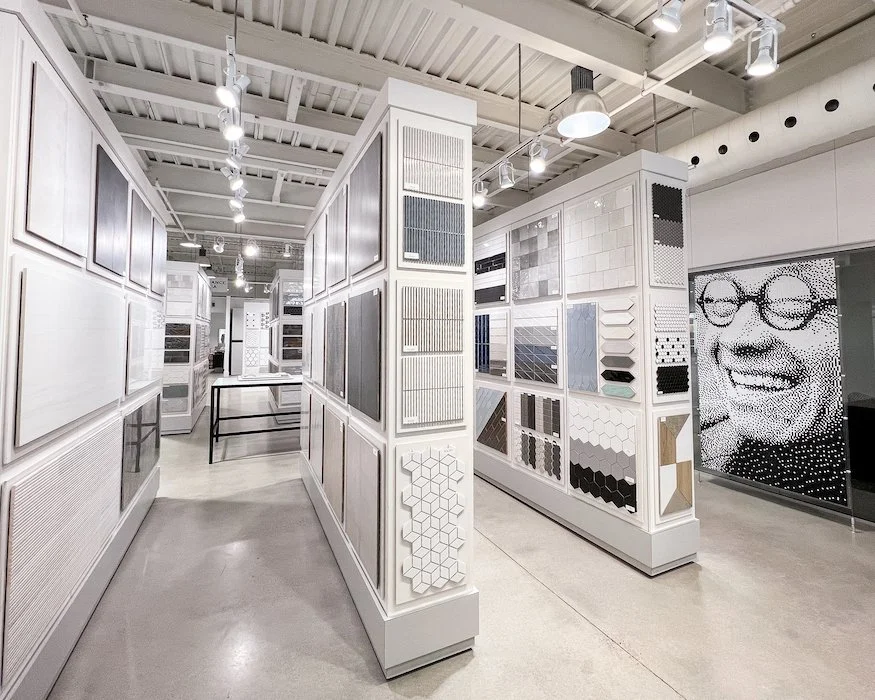
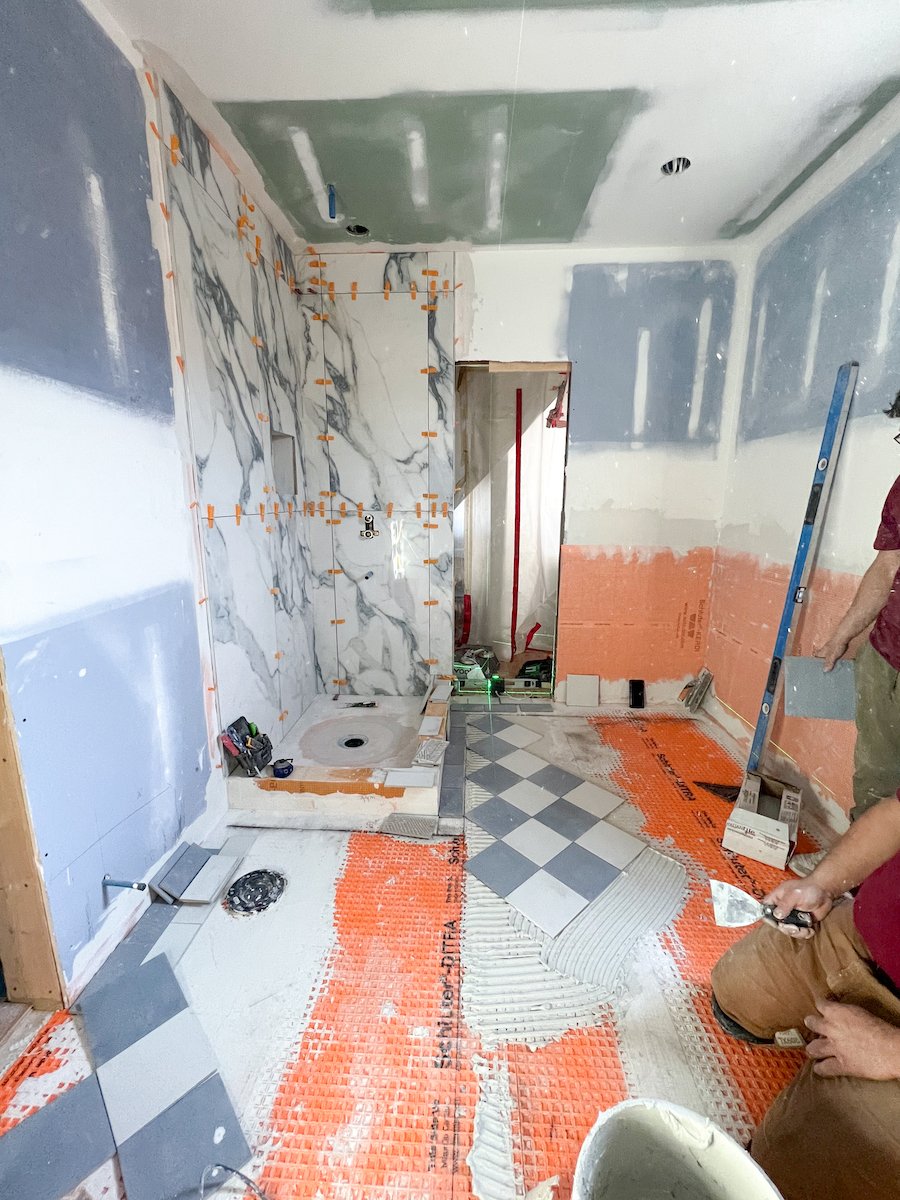
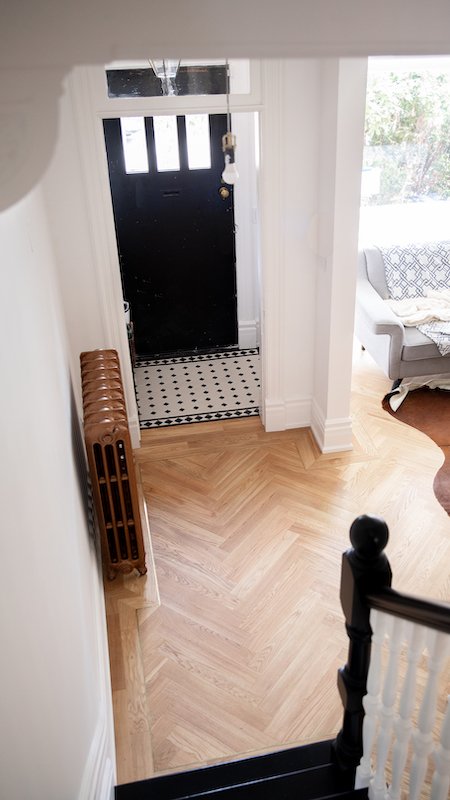
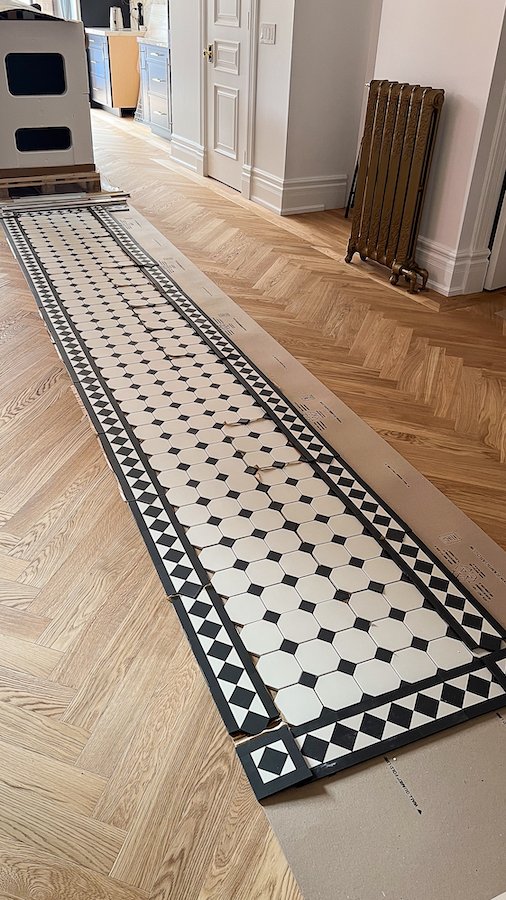
Before leaving for our wedding, we were able to get a few things off our to-do list including the installation of our new Victorian mosaic tiles from Winckelmans Tiles that we had previously picked up from their distributor in Toronto, Deco Tile.

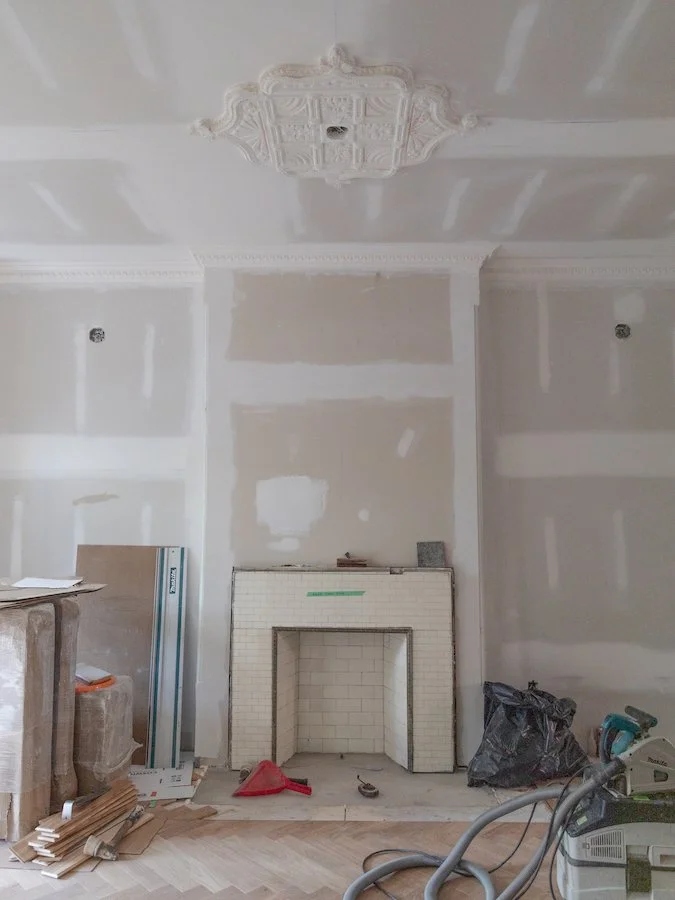
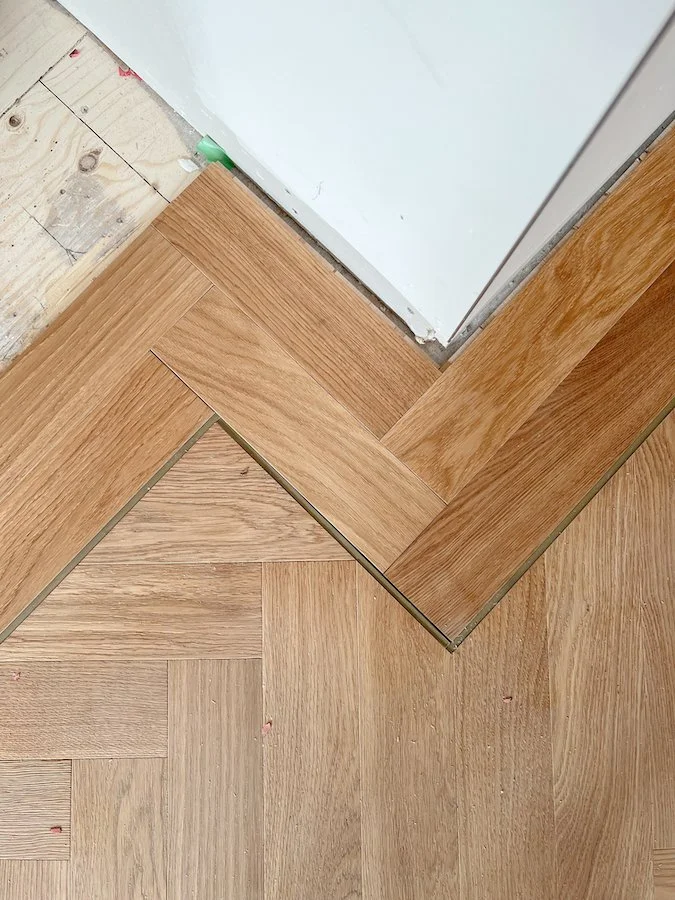
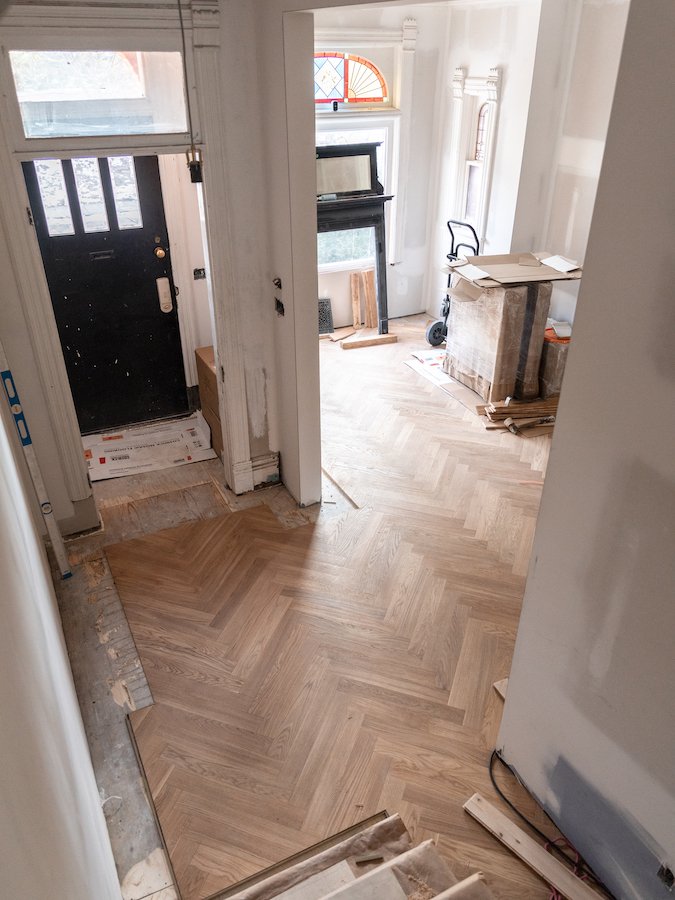
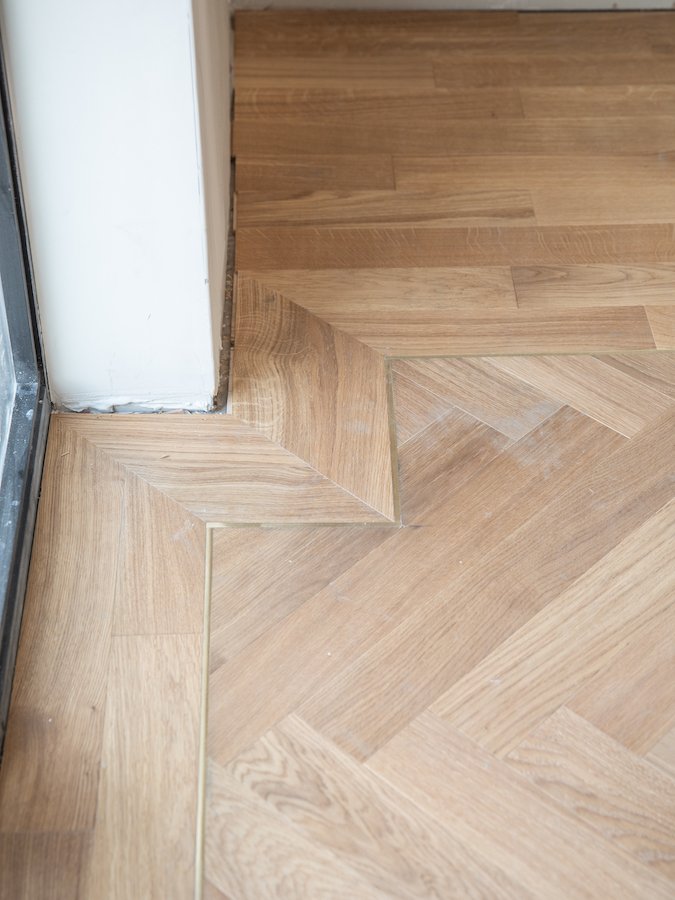
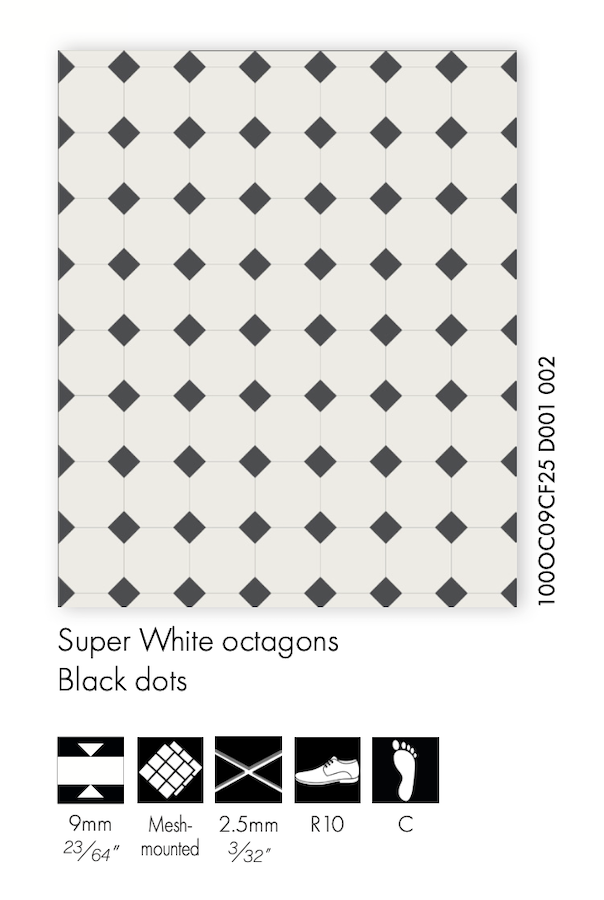
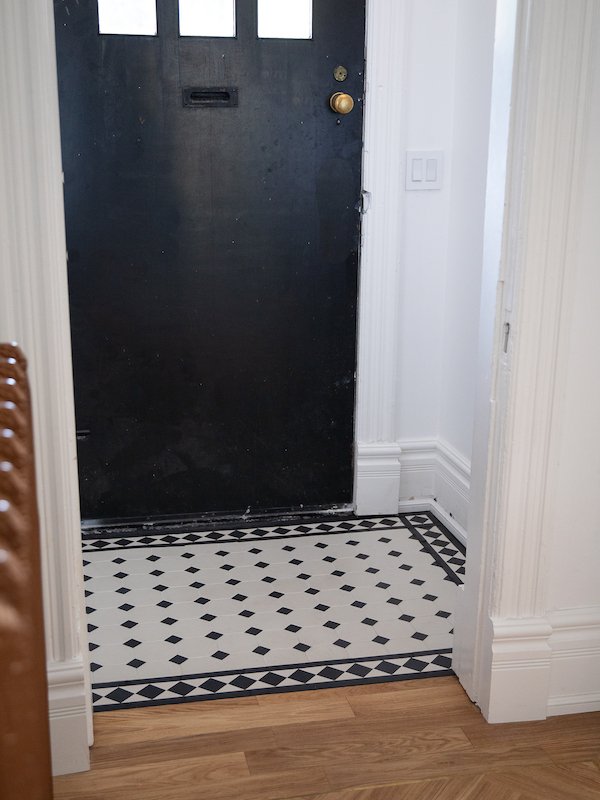
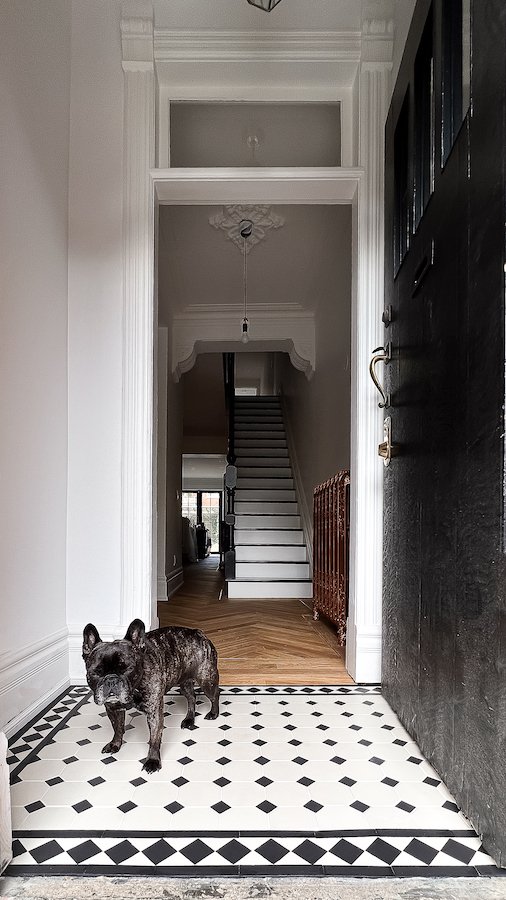
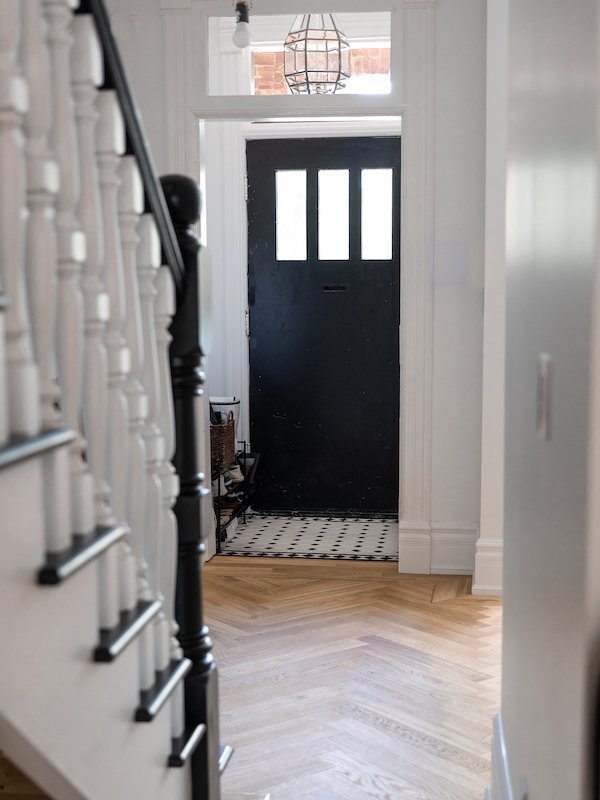
It felt so good to finally have my tiles from Winckelmans installed! Adam’s dad ended up helping me with the foyer install (making sure to add in some Schluter Ditra lining for extra waterproofing protection) while Duran from DuWolf tackled the powder room to ensure we could get both spaces done before we left. Although the sheeted tile format (which my Winckelmans Tiles came in) does make the installation process easier, it still takes a lot of thoughtful planning to make sure everything lines up properly and is measured and cut perfectly, so the install is no easy feat! In the end, both spaces turned out even better then I or Adam could have imagined and the black and white Victorian tiles with a matching boarder design turned out super sophisticated/elegant. I love how when you walk into the house the foyer plays off the black and white staircase in the background too which makes the whole entrance way feel cohesive and inviting.

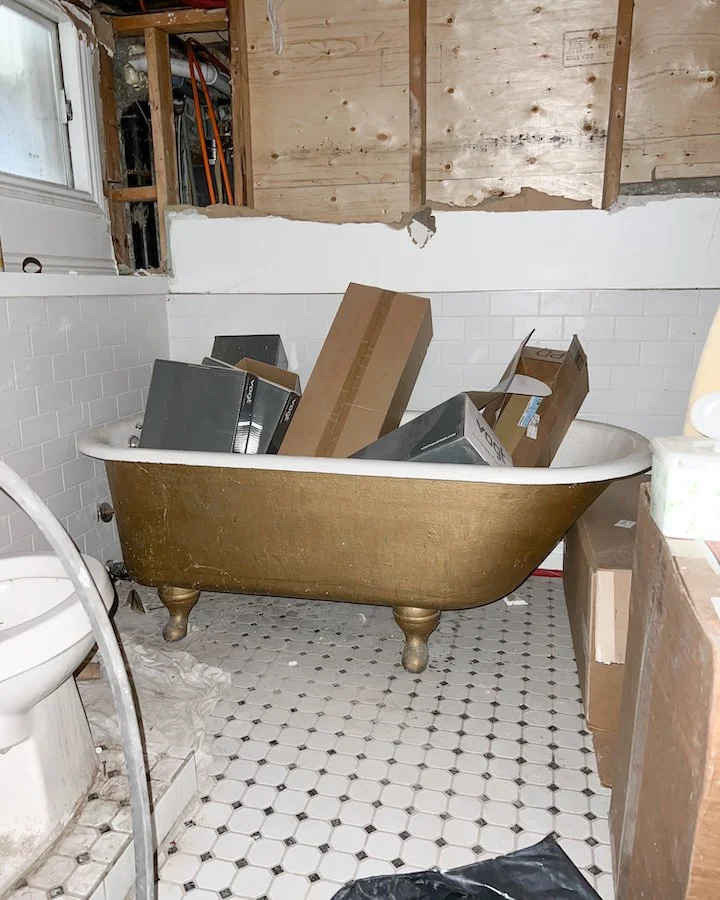
There is still a lot of work we have to do to the powder room following the tile install on one of the walls and floor but I can already tell it’s going to look great once it’s done and the custom Victorian stained glass window I’m having made is installed. Stay tuned for the final look in the next episode!

Toronto home renoation - arched wine cabinet with fridge - compact wine fridge - at home bar cabinet with coffee nook - victorian cast iron radiator and herringbone floors with brass inlay

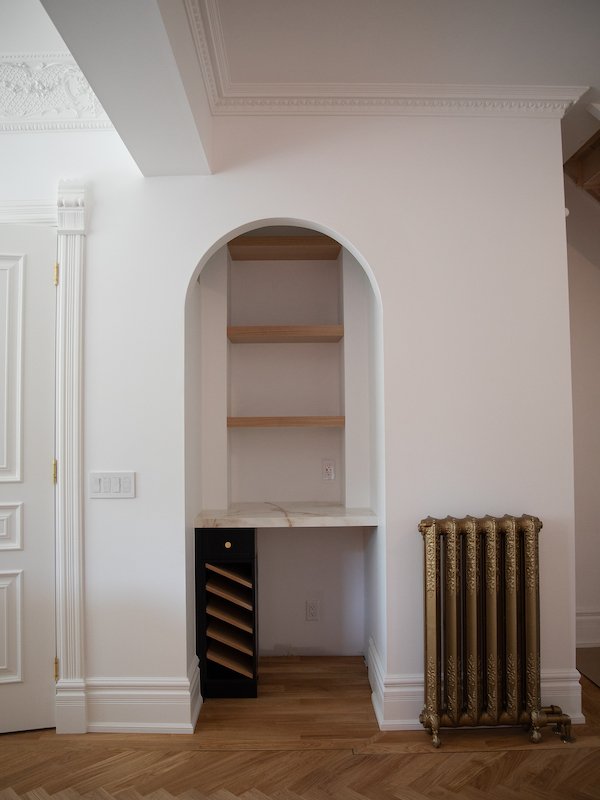
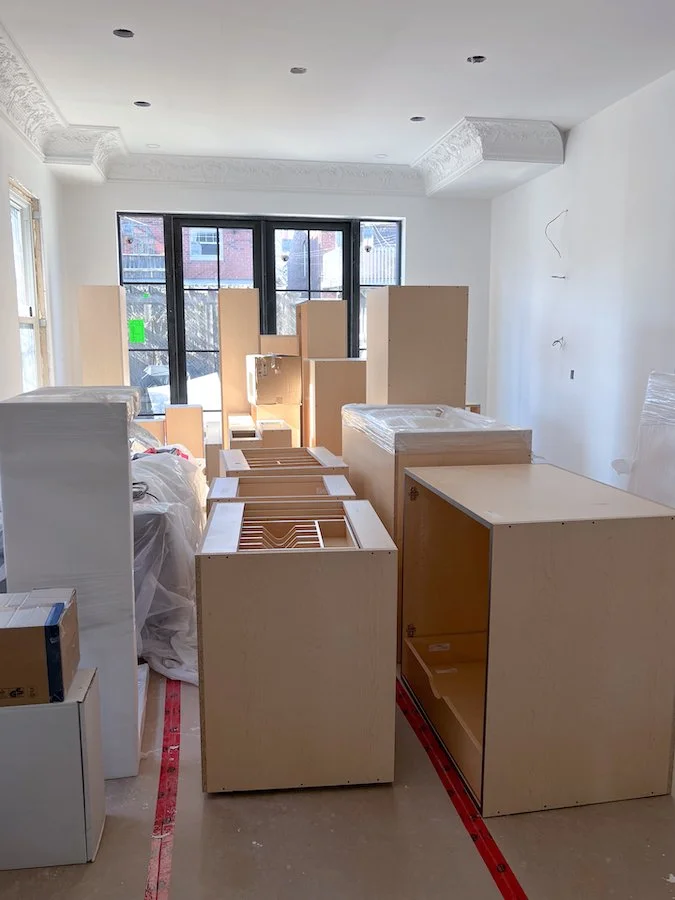
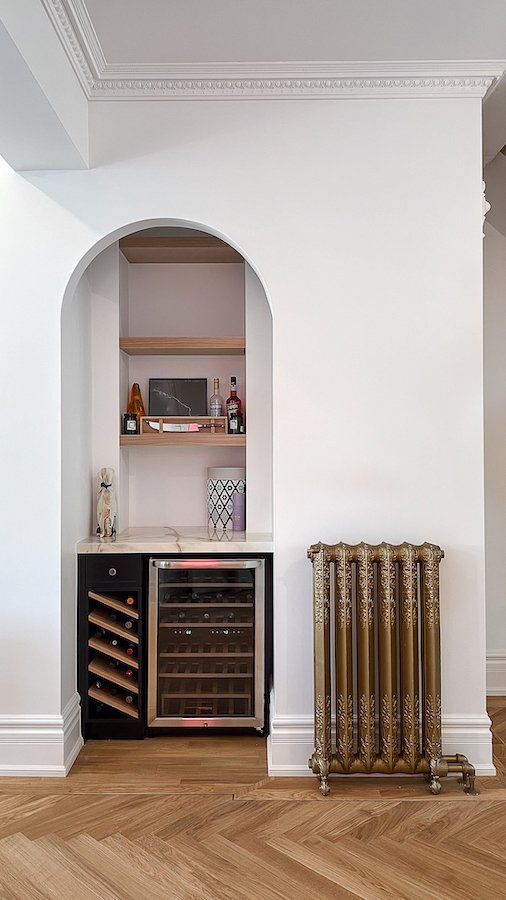
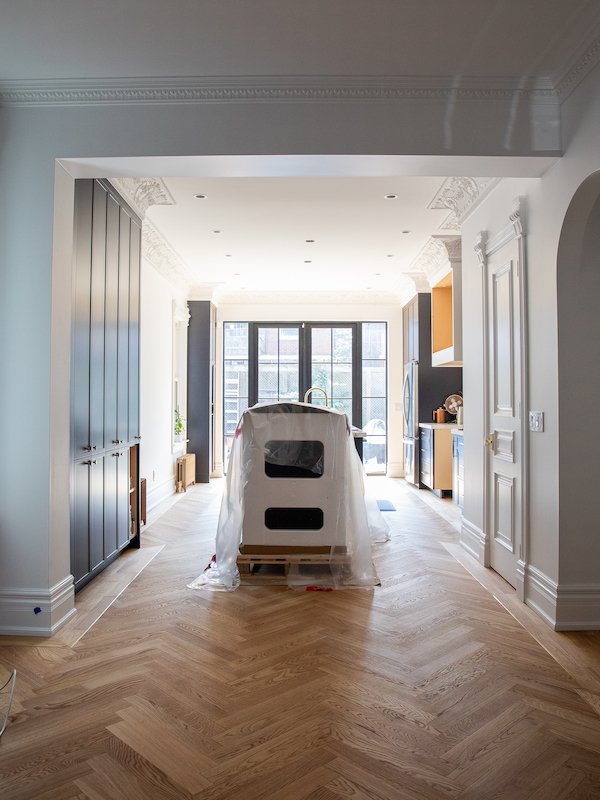
Our arched bar with wine storage is looking better than ever!

Installation of Our Wine Cabinet With Fridge for Our
Home Bar & Coffee Nook

Another job we were able to check off our to-do list before heading to Italy was the installation of our little arched bar/coffee nook!

Do you remember back in episode 6 when we started drywall and framed out an interior archway for a future little bar area with wine cabinet and wine fridge? Well the custom cabinetry we had ordered was finally ready for install! I went for a super simple design that played off the kitchen’s navy blue palette by having a small cubby with slanted shelves (perfect for storing wine bottles) made with a small drawer on top to hold bottle openers etc. We used the left over Calacatta Gold porcelain from the kitchen for a counter top and duplicated the natural oak shelves to add additional storage for liquor bottles and bar paraphernalia. All we had to do once the navy blue bar cabinet and shelves were installed was plug in our new dual zone wine fridge and Nespresso machine, and decorate! Adam and I saved a whole case of wine from our wedding that we are planning to stash away and open on future anniversaries so I’m really happy to have a nice space to store them. Not to mention a little area separate from the kitchen to mix cocktails for guests while hosting over the holiday season!

DID YOU KNOW the perfect wine fridge temperature ranges between 50 °F (11°C) and 65 °F (18°C) for red wine and 45 °F (7°C) and 50 °F (11°C) for white wine. Neither did I, I had to look it up. Also, needing to rotate your wine bottles every few months is a total myth. As long as they are stored on their side you’re fine! Learn something new every day! Haha!

Victorian homes - toronto home renoations - restoration of victorian windows - house restoration

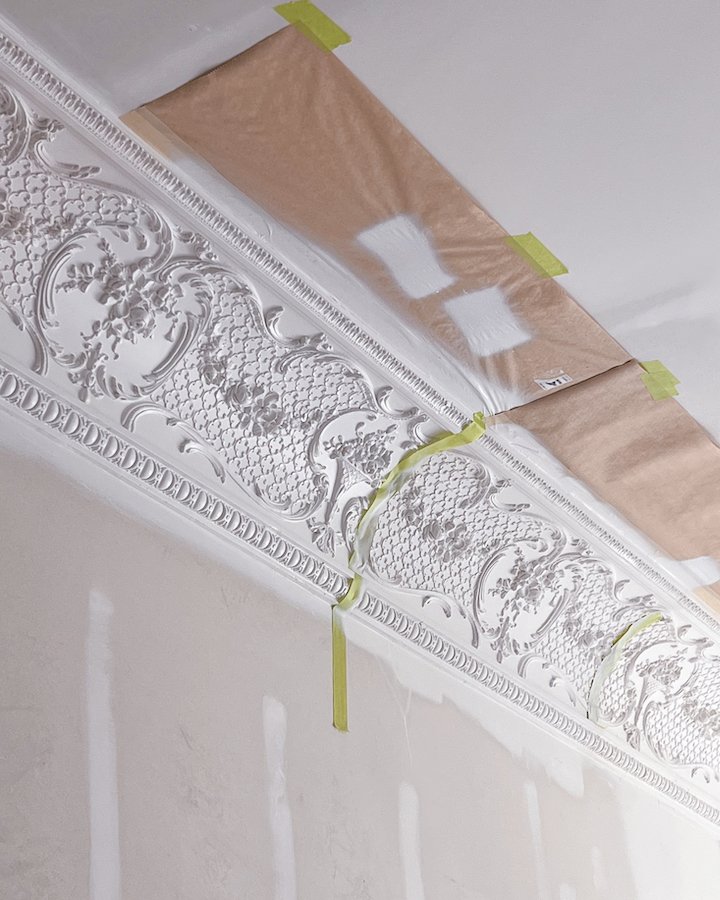
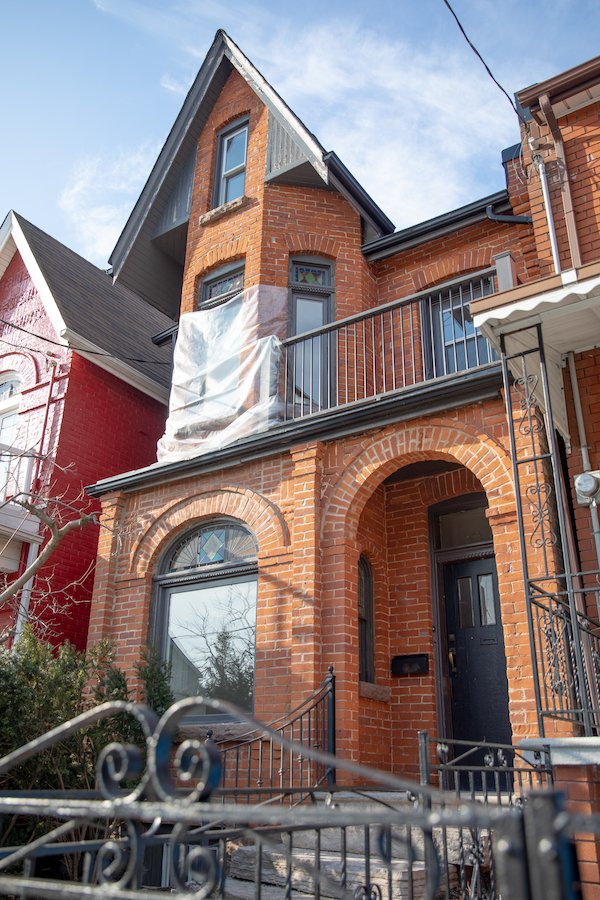
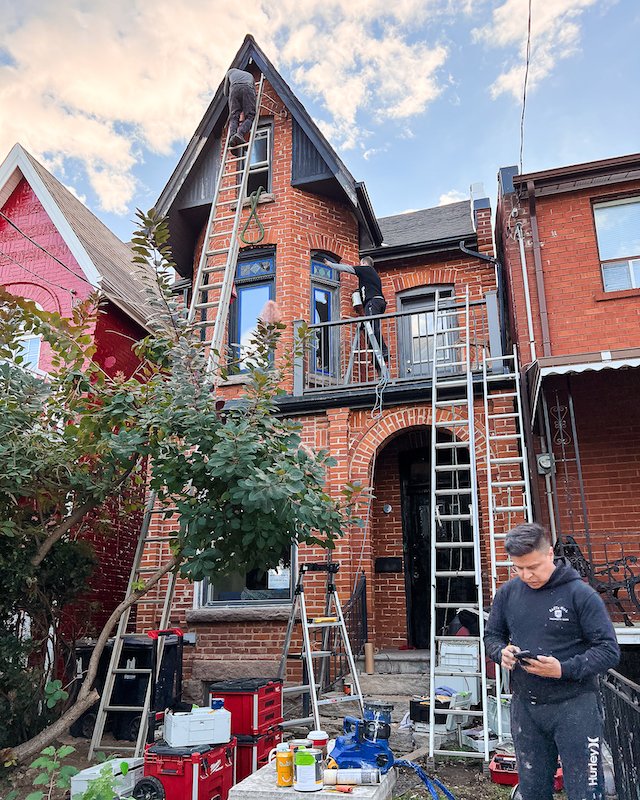
The plastic sheet draped over the front 2nd floor windows was becoming a huge eye sore!

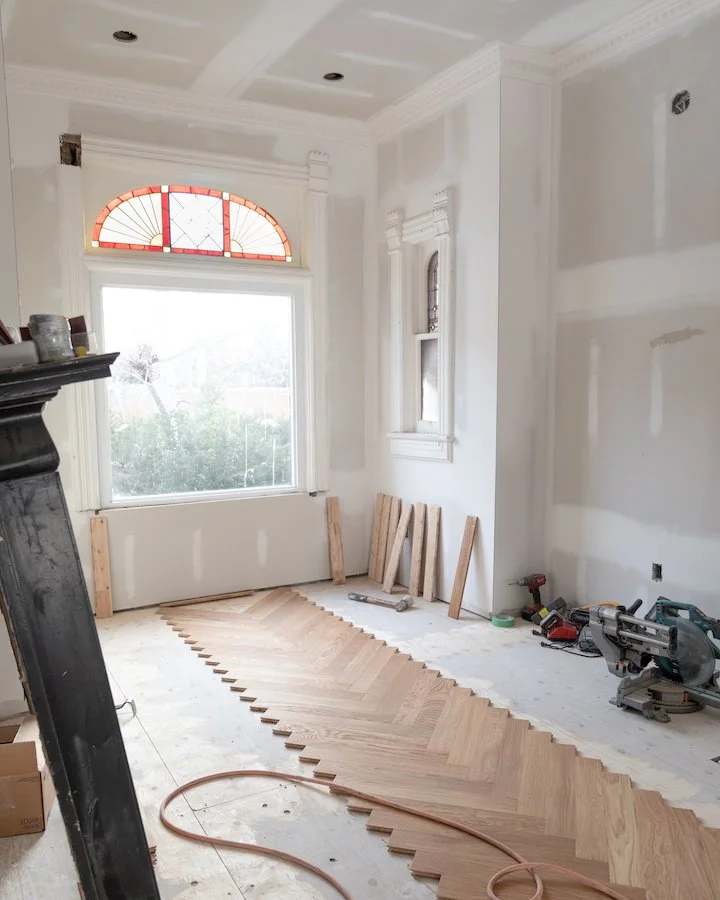
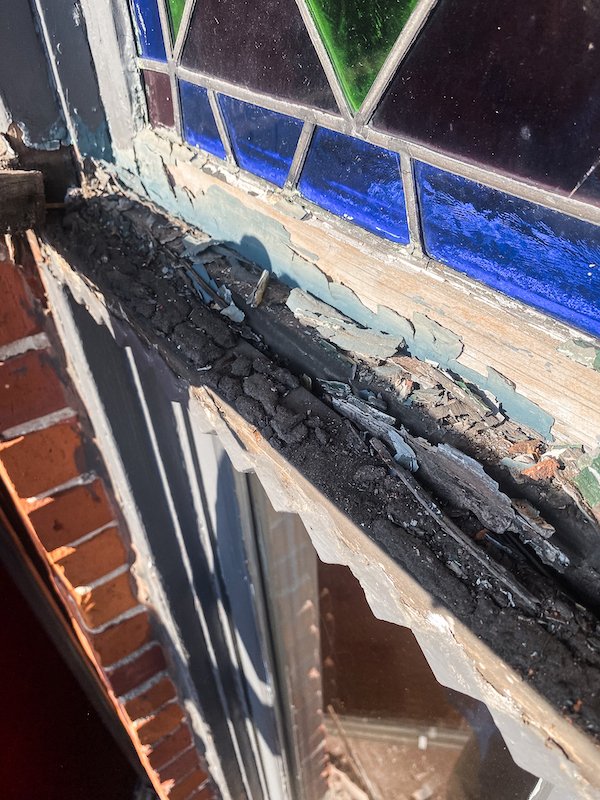
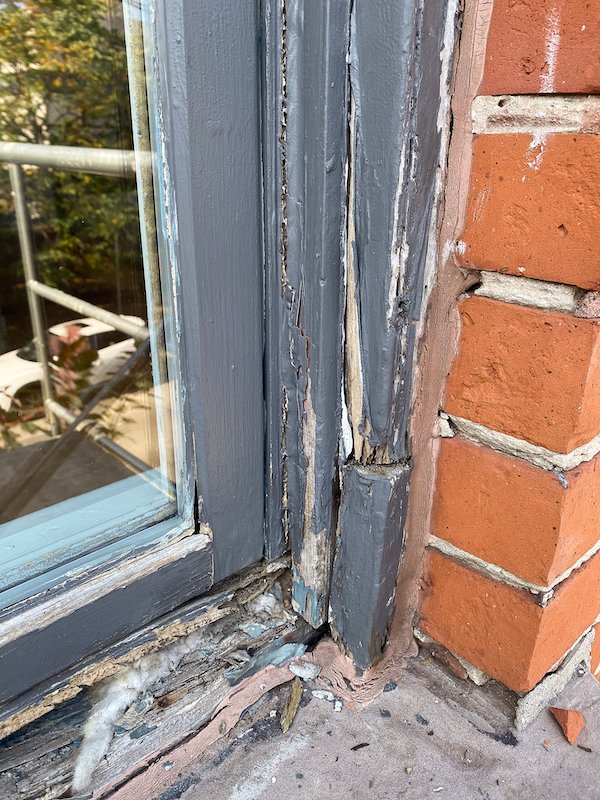
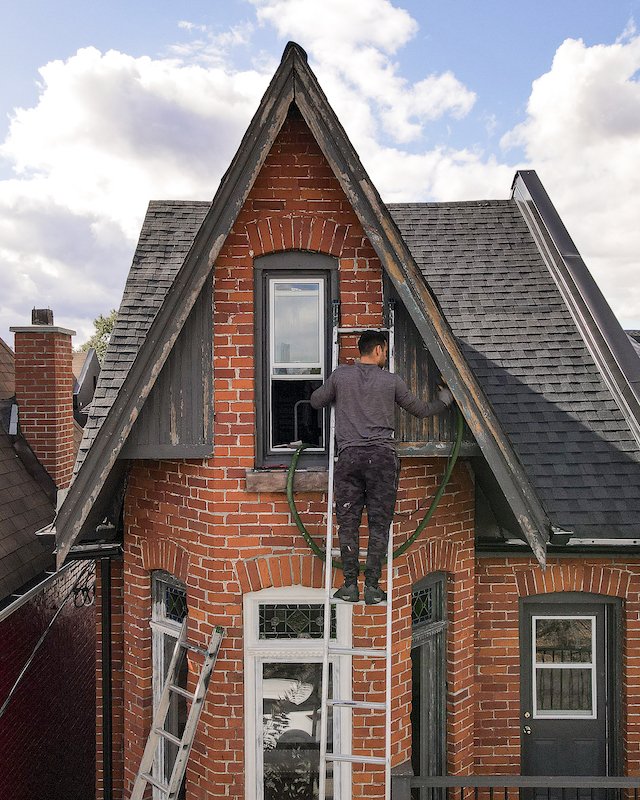
Restoration of Our Original Victorian Windows

If you’re new to my channel or blog you might have been wondering why there is a big plastic bag draped across the front second floor window of our house. Well, do I have a nightmare story for you!

The evening before Adam and I were set to start drywall there was a massive rainstorm that called our attention to the badly deteriorated and rotted state of our 2nd floor windows. The water from the rainstorm was just pouring into our main floor front room and with drywall starting the next morning, we had no choice but to temporary fix it by draping a large plastic sheet of vapour barrier over the 2nd floor window as a way to keep water off of it as much as possible. This temporary solution worked very well. Amazing actually! The leaking instantly stopped but living with a large plastic sheet on the front of our house was a huge eye sore I was getting sick of looking at. So when Adam and I got back from our wedding and honeymoon, I called our carpenter and asked him to come work his magic.

Restoration of our front windows took a couple days but our carpenter quickly identify the obvious culprit. He started with removing all the rotten wood before replacing it with new wood and sealing any remaining gaps around the edges with spray foam. He did a great job replicating the original Victorian trim work and mimicking the original style just as I asked, and even primed the window with some primer paint to seal it in preparation for painting and a fresh outline of caulking.

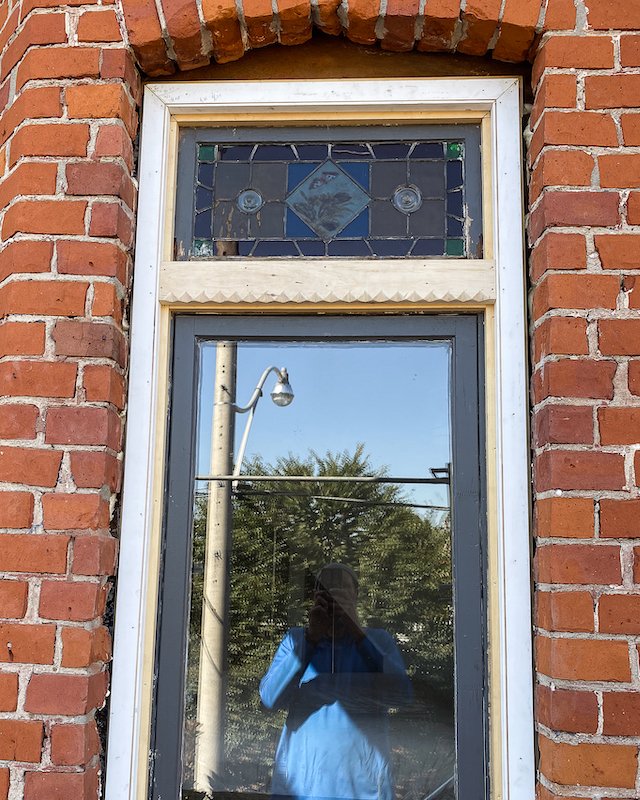
It felts so good to not only get that plastic sheet off the front of our house but checking this off our to-do list gave me the reassurance I needed to feel confident that this window will no longer be a problem moving into the winter months.


FOLLOW ME ON INSTAGRAM @ISTHATSOH


Toronto home renovations - victorian homes - exterior house painting and restoration - victorian house gable restoration - exterior window trim painting

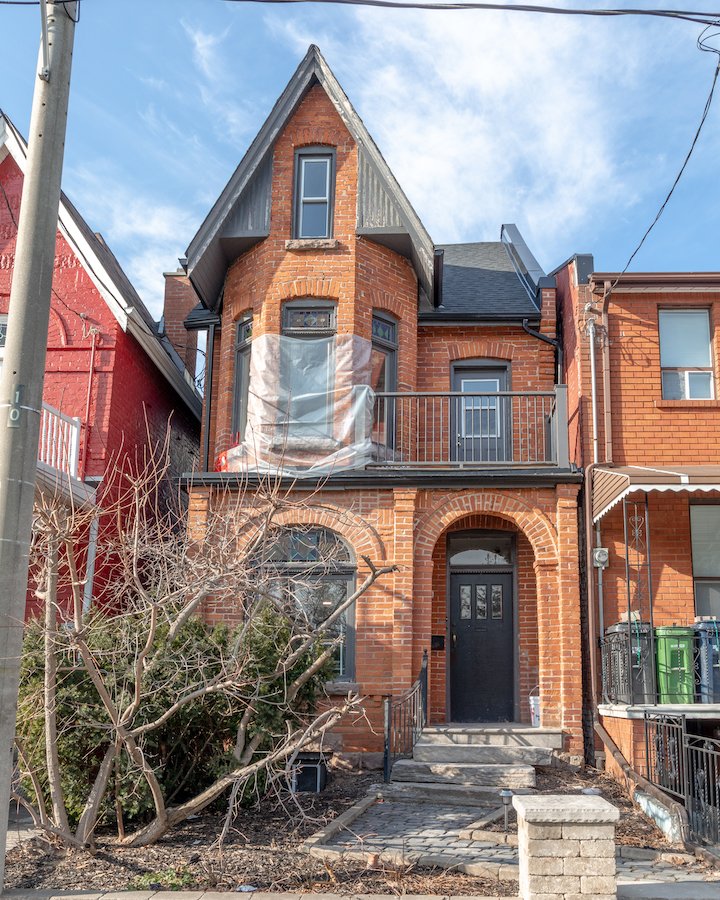
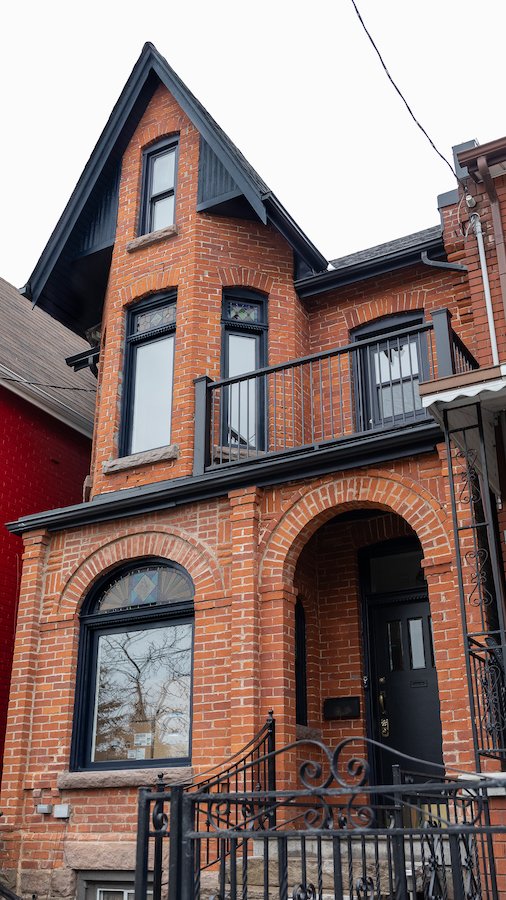
Giving the front of our house a little refresh!

Exterior Painting of Windows, Gable and Trim

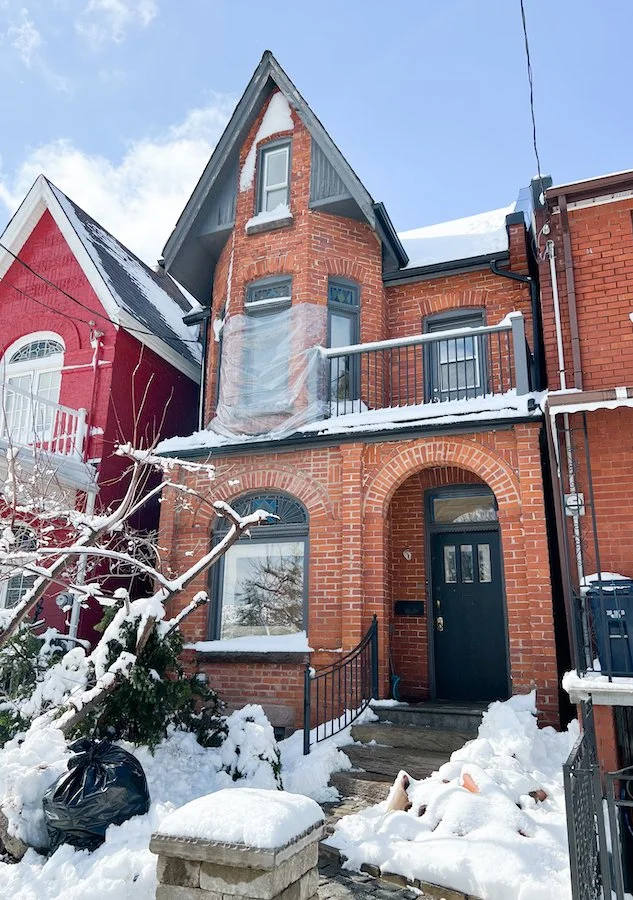
After our carpenter wrapped up his work, Ariel and his painting crew came in to sand down and paint the front windows, gable, balcony and trim before sealing the windows off with some fresh caulking. Originally the gable, windows and trim was this dull grey colour and our front door and balcony spindles were black but none of it did anything to bring out the beautiful orange hue of the brick. I wanted something complimentary, that helped the house stand out and appear vibrant and glorious in its old age, and what better choice for that than orange’s most complimentary colour, blue! It’s my favourite colour after all!

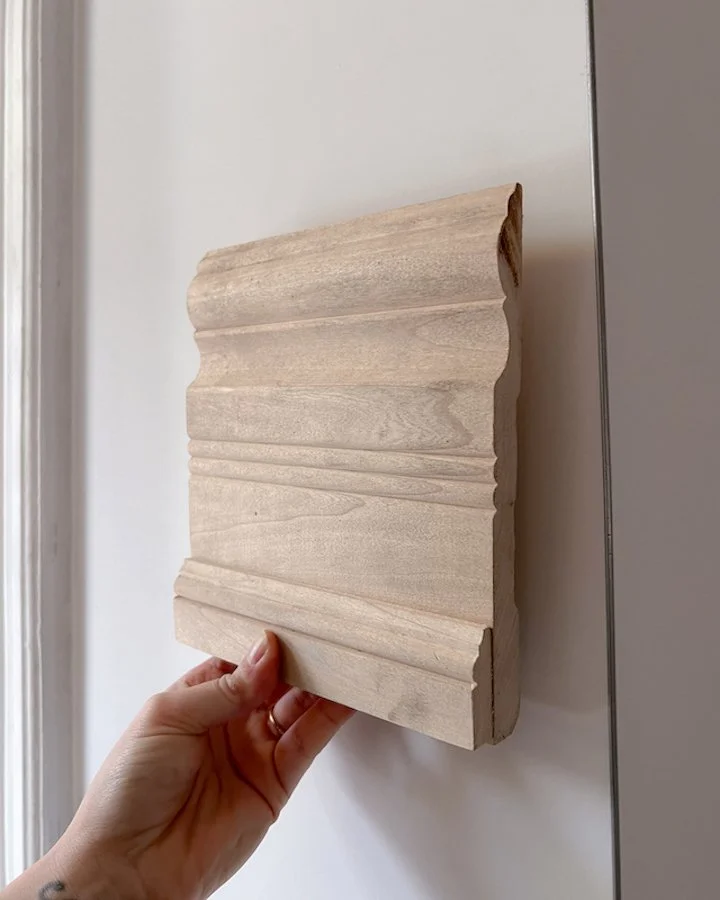
So off I went to the paint store, with one small kitchen cabinet door tucked under my arm to find the perfect matching colour! Imagine my shock then to find out there is no Benjamin Moore colour that matches! The gentleman at the store ended up mixing the paint colour by eye and after a few small tweaks, we landed on the perfect formula! Thank god for paint snobs!

Now that the windows are restored and everything received a fresh coat of paint, the house is looking really sharp! I love how the navy blue paint accentuates the rich orange hue of the brick and how it changes colours (it sometimes almost looks black) depending on what time of day it is. To help underscore the navy blue trim we kept the front door, cast iron railing, 2nd floor balcony and eves/drain spouts black as a way to emphasize the difference in colour despite the navy appearing black at a quick glance.

Toronto home renovations - victorian homes - custom victorian stained glass window for powder room

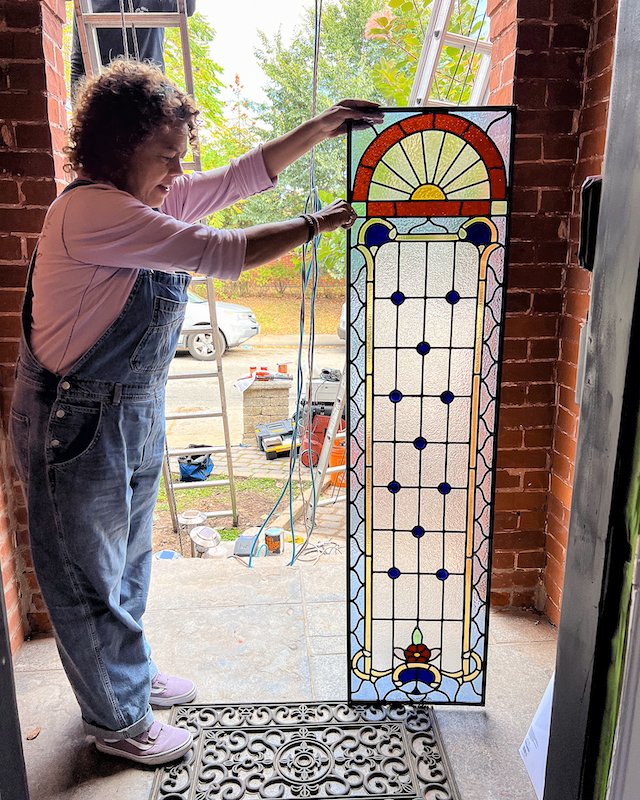
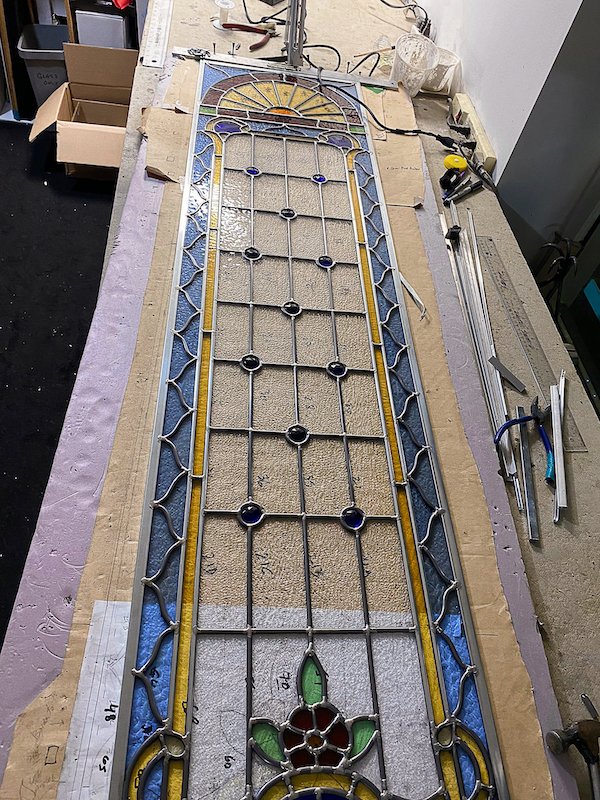
Louis stopped by to drop off the completed stained glass window I had her custom make for my powder room!

My Custom Victorian Stained Glass Window Was Delivered!

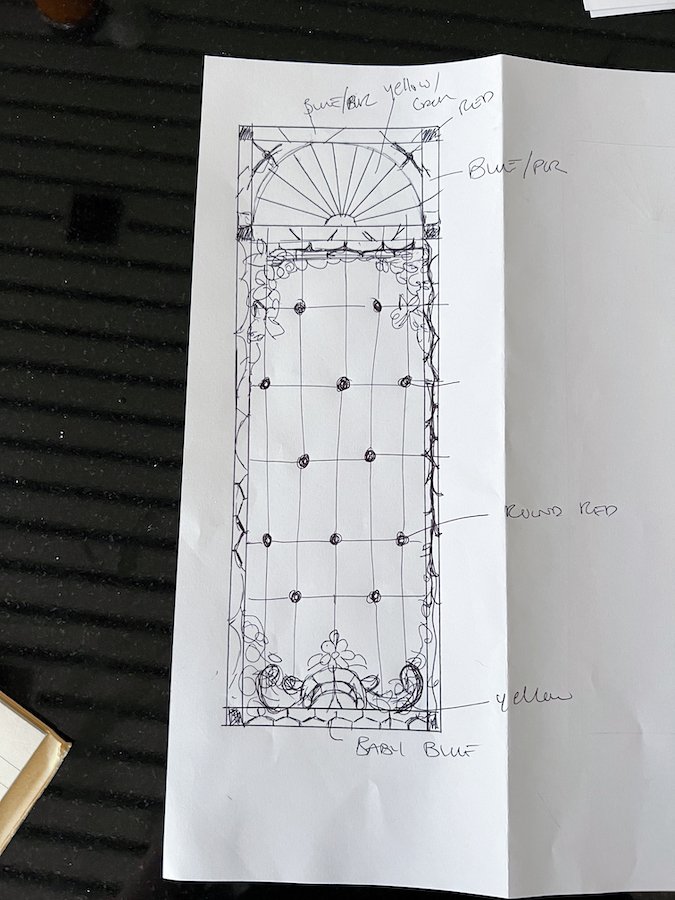
Prior to leaving for the wedding, Louis had invited me to her studio in Etobicoke to finalize the design of the custom stained glass window she was making for the powder room. It was so cool to visit her studio and learn more about the stained glass classes she offers. The pieces she was working on for me looked incredible and exactly like the mock up design I had drawn for her months earlier. During my visit she showed me some final jewel options and glass colours she had selected, and asked me to choose what I liked the best before she began the welding phase of the production.

A few weeks later, while Ariel was still painting the house, Louis stopped by to drop off the finished stained glass window! IT LOOKED SO GOOD and I was so happy to see it installed and in all its glory in the powder room!


ENJOYING THIS CONTENT? CHECK OUT SOME OF MY OTHER EPISODES AND BLOG POSTS!


Home renovations Toronto - victorian homes - la cornue ranges - kitchen renovations toronto - herringbone floors with brass inlay - navy blue kitchen cabinets

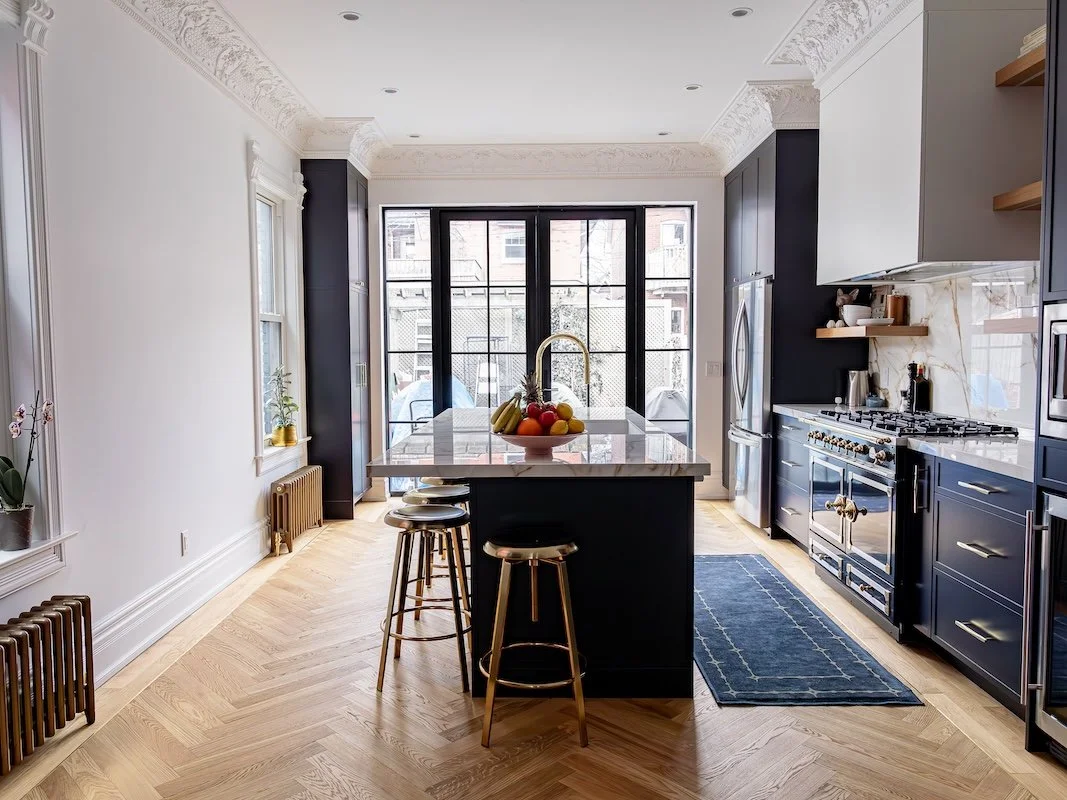
Our La Cornue Cornufé range was finally installed!

Installation of Our La Cornue Range

It finally happened! After months of waiting for our new vent to arrive, two weeks ago we were able to get not only get it installed but we got our new La Cornue range installed too!

Originally, Adam and I had planned to have our stove installed in May when we moved in but the inspector saw the hole for the vent exhaust and said it was too big and not to code. Pivoting as best we could, we ordered a new vent that required a smaller exhaust hole but the kicker was we had to wait 16 weeks for it to arrive. In the meantime our new La Cornue stove lived in its crate in our dining room while Adam and I cooked all our meals on the BBQ.

After months of waiting our new vent arrived and we had our kitchen cabinetry maker from Domani Design Group come in to retrofit our range hood cabinet (because of course the new vent had to be a different size than our old vent) before having a professional appliance installer come in to finish the rest of the install.

By the way, if anyone is doing a kitchen renovations and needs a vent, we still have our old, unopened, Elica vent available for purchase! Model number is EAR140S4 if you want to check out the specs!

Now that our La Cornue stove is installed, Adam and I have been cooking up a storm. We love the duel electric ovens and powerful gas range. We also later learned that they discontinued making the La Cornue Cornufé range in the navy blue colour so it’s not even available for purchase anymore which makes me love it even more. I’m so excited to continue to play around with it over the holidays and feel way more confident about hosting family and friends for dinner now that we are not limited to just the BBQ. It’s going to make things so much easier and more enjoyable not to mention it looks like a piece of jewellery!

Overall, I am ECSTATIC about all the progress we’ve made on the house since moving back in. I even bought some lights on Black Friday which I can’t wait to arrive so I can install them! Christmas is also around the corner and I’m looking forward to getting our first Christmas tree and starting to host our friends and family for drinks and dinner.

Toronto home renovations - underpinning the basement - before

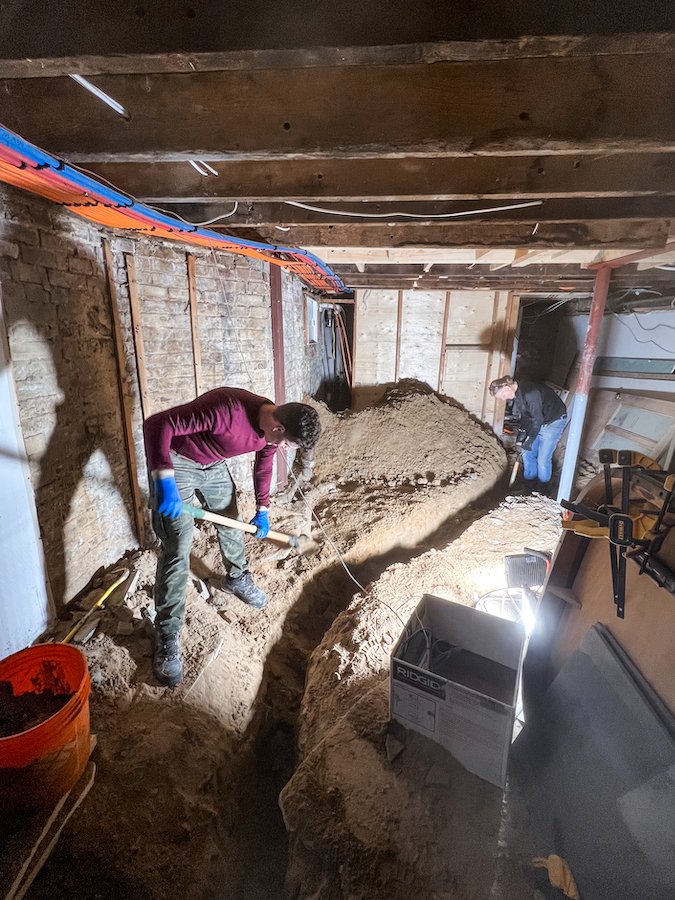
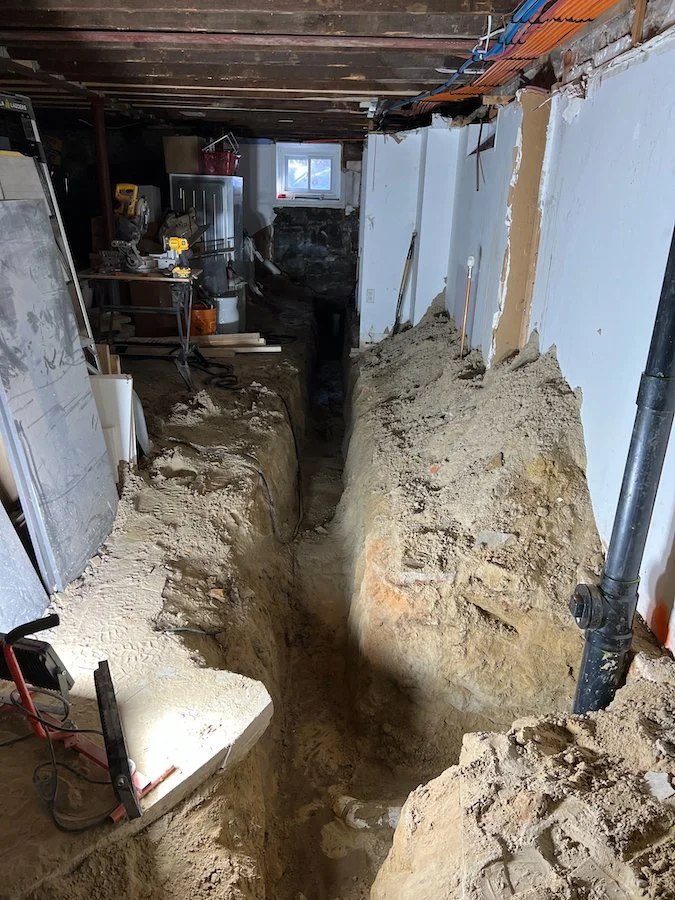
The current state of our basement - a sandbox!

2024 Plans: Tackling the Basement & Underpinning

In the new year Adam and I have plans to start tackling the basement which is currently a large sandbox. We want to do a big underpin in hopes of achieving an 8+ foot finished basement so it’s a bit more of a functional space and we can actually install our laundry machines (which is the last thing we need to install)! Until then they will continue taking up space in our living room. YAY! * eyeroll *

In preparation for the underpin (and before the ground froze) we had to cut away the bushes and smoke tree out front. Having to get rid of the smoke bush tree broke my heart, I loved that tree! Unfortunately it was so old, overgrown and wild that it produced less blooms each year and blocked all the light making it impossible to grow anything else. We have plans to re-landscape the front in the spring after the underpinning is done but for now we needed to prepare that front area for a demo bin.

Toronto home renovations - victorian homes - exterior window trim painting

The house after window restoration work and a fresh coat of black and navy blue paint!

Thank you so much for joining me today and for checking out my new Toronto home renovation series on Youtube. I am super excited to be modernizing a Victorian home while still keeping the charm of an old Victorian house. If you have any questions about my Victorian house renovations, what it’s like to live in Little Portugal, Toronto or recommendations for Toronto contractors, hit me up in the comments below!

Before I sign off, I’d also like to say a big thank you to Winckelmans Tiles and Deco Tile for partnering with me on this project. I’m so excited to be working with industry experts on our Toronto home renovations but want to reiterate that, like always, all opinions remain my own.

Until next time,

- Soheila

MORE BTS PHOTOS FROM THIS EPISODE


PIN THIS POST

Home renovations in Toronto - A Toronto Victorian Home - black and white victorian mosaic tiles from Winckelmans - powder room makeover

EPISODE 7: A DATE WITH DESTINY - RENOVATING MY VICTORIAN HOME

home renovations in Toronto - install herringbone flooring with brass inlay from chestnut flooring

Installation in progress! My white oak herringbone dreams are about to come true!

RENOVATING MY TORONTO VICTORIAN HOME - EPISODE 7!

It’s been yet another busy month at the house as we power through more of the finishes. Following the delivery of our refurbished cast iron radiators from Ironworks Radiator Inc and the installation of our classical mouldings from Parsiena Design, Adam and I felt ready to take on the next stage of our Toronto Victorian home renovation, the flooring.

If you have been following my home renovation series for awhile, you may remember me spilling the tea on all my juicy home renovation plans. For those who are new, it has been a dream of mine to have herringbone floors! When Adam and I purchased this property as our first home together, one of the things that I was thrilled about was how old the floors were - odd I know but here me out. Down the line, I knew we would eventually do some renovations to our Victorian home, and when that time came, redoing the subfloor and installing new flooring would be a top priority. In the meantime, I made sure to plant the seed of herringbone floors in Adam’s mind by sharing interior inspiration with him on the regular. Little did I know my dreams were going to come true sooner than I had imagined!

It wasn’t long after Adam and I moved in that we noticed a few things were not as they seemed. Many of our appliances were not working and needed to be fixed, and since they were old to begin with, we debated whether that was even worth doing. In the end, the debate around fixing the appliances escalated into buying them which again escalated into widening the staircase (because 'how would we fit the washer and dryer upstairs otherwise’). All this turned out to be just the thing we needed to get the ball rolling and start planning our Toronto home renovation.

Having big dreams of what I wanted the floors to look like presented a few challenges for me. Victorian homes in Toronto tend to be long and narrow, and I wanted the pattern to be prominent and repeat several times across the width of the house. In order to achieve this look I required a smaller, skinnier plank size. Finding this very specific thing was not easy. Most suppliers I found carried a ‘standard size’ of 4-5 inch wide herringbone planks while I was looking for something slightly smaller in the 3-3.5 inch range. At one point I got so desperate, I called a restaurant with ‘skinny’ herringbone floors that had just opened to find out where they got theirs! It took me a few weeks and visits to numerous showrooms, not to mention ordering samples online from supplier in the US, to find the perfect product - but I found it!

home renovations in Toronto - install herringbone flooring with brass inlay from chestnut flooring - fireplace and ceiling medallion with egg and dart crown mouldings

The living room in my Toronto Victorian home is beginning to shape up really nicely!

CHESTNUT FLOORING #PARTNER

It was a sunny, fall Saturday when Adam and I drove out to Vaughan to visit Chestnut Flooring’s showroom. A long time Instagram follower of mine who also happened to be a flooring installer suggested I check out their showroom after seeing my stories and learning about my herringbone aspirations. Having installed many different brands of herringbone flooring in the Toronto area himself, he remarked at the quality of their engineered herringbone floors - and he was right. Chestnut Flooring not only had the size and colour we wanted, but it turned out that when compared to the other samples I had collected, their engineered herringbone floor product had a superior top wood layer/thickness. This meant if we ever wanted to refinish the floors down the line or needed to fade out a big scratch (knock on wood that never happens), we had the ability to sand them down and do just that! Perfect, right!?

We ended up having such a great experience working with Chestnut Flooring’s co-owner and showroom manager, Sherry, the first time around that as we progressed into our renovations and realized we would have to pull the second floor (phase 2) into the initial phase of our renovation they were the only showroom we needed to visit to source additional flooring. Not only do they offer a wide selection of products from both well-known domestic and international brands, including hardwood, engineered, laminate, carpet, vinyl and tile, but Sherry was able to find a match for our second floor that we just loved! A red oak, straight plank, solid hardwood that adds both warmth and durability to the second floor.


FOLLOW ME ON INSTAGRAM @ISTHATSOH


Part of my big herringbone design dream was to incorporate a boarder with brass inlay. Luckily, a week before installation I was able to find a supplier in the Toronto area but since it was going to take a few days to arrive, we ended up starting the installation on the second floor.

The flooring installation on the second floor went quick and took maybe two days. The red oak hardwood floors from Chestnut Flooring look so warm and inviting. You can really see the natural beauty of the grain when the afternoon sun shines into the room. Adam and I ended up getting enough material for both of the back bedrooms and the 2nd floor hallway. We do have big plans to tile our new bathroom but that will have to wait for another episode!

Just as we wrapped up the second floor installation the brass inlay arrived. I was so excited that my dream was becoming real right before my eyes that I stayed and watched the process. My flooring installer did such a great job incorporating the border inlay and really took his time polishing the brass before installation. He even kindly made two examples for me of how the corners could be done so I could feel confident with my choice. After a week, my date with destiny was upon me! The white oak herringbone floors were fully installed and looking even better then I could have imagined.

CABINETRY HARDWARE AND STAINED GLASS WINDOWS

While the flooring was being installed I was also able to finalize my kitchen cabinetry hardware and begin working on a design for a stained glass window in our main floor powder room. The window in the powder room is skinny but tall and although we love the natural light it provides, it really doesn’t provide any privacy. After commissioning a stained glass artist last fall to replicate one of the small panels in the front window that I noticed was missing, I thought I would work on a larger design with her for this space as well. My plan is to incorporate the same colours you can see in the front window and some of the same motifs, while also keeping the majority of it in the centre a clear, textured glass. Can you picture it?


ENJOYING THIS CONTENT? CHECK OUT SOME OF MY OTHER EPISODES AND BLOG POSTS!


Toronto Home Renovations - Victorian Style Home - mosaic tiles at Deco Tile showroom

Deco Tiles Showroom located at 142 Tycos Drive in Toronto

VICTORIAN MOSAIC TILE COLLABORATION WITH DECO TILE & WINCKELMANS TILES! #PARTNER

So, I have been keeping a secret from you. A few weeks ago I received an email from Winckelmans Tiles, a French tile manufacturer with factories in Northern France. Having been in business for almost 130 years, they are best known for their mosaic tiles that have been used in numerous hotel, commercial spaces and homes globally.

My first encounter with Winckelmans took place two years ago while designing the finishes for my Toronto home renovation. Their catalogue featured so many beautiful mosaic patterns but what caught my eye was their collection of Victorian tiles. Not only do they have the classic ‘Octagons and Dot’ pattern I was already completely charmed by but they also offer numerous classical Victorian border patterns as well. I was smitten and had to let them know!

Sometimes amazing things happen when you take a chance and put yourself out there, and I’m happy to finally be able to share that I am going to be collaborating with Winckelmans Tiles through their local distributor in Toronto, Deco Tile. Located on Tycos Drive in Toronto, I visited Deco Tiles showroom to place my order for the powder room and front entrance. I went with a classic super white and black Victorian ‘Octagon and Dot’ pattern with a border to match, and for the powder room I decided to extend the pattern and border up one of the walls. I can just picture it now, looking at your reflection in the mirror and seeing the Winckelmans’ pattern on the wall behind you, framing your silhouette. A dream I can’t wait for!

Home Renovations Toronto - victorian homes - Main Drain Replacement

Adam and I kicked off Phase 3 ‘Basement Renovations’ by replacing the main drain and installing a back water valve!

ADAM AND I KICKED OFF PHASE 3 - THE BASEMENT!

Once flooring was complete Adam and I decided it was finally time to kick off Phase 3 of our renovation. If herringbone floors were my dream, Adam’s was having an amazing entertainment space in the basement. Given all the structural work we had to do at the beginning of our renovation, our once finished basement was no more and it was time for us to pull the trigger on replacing and lowering the main drain as well as installing a back water value outside. This required us to not only demo the basement bathroom but begin breaking the concrete floor and digging a 3 foot trench. Of course with all our stuff stored in the basement, this was a big challenge but we were able to successfully knock off those first few tasks before we begin working towards finishing the basement in the spring. Now that the main drain has been replaced and the back water valve installed we can hook up the water, begin removing all the stuff being stored in the basement, and begin the cleaning process!

REFURBISHING OUR CAST IRON TUB

When Adam and I first moved into the house I would never take baths upstairs. For some reason I never felt the supports under the bathtub on the 2nd floor were strong and I was paranoid that I would fall through the ceiling if I filled it with the weight of water in addition to me. Instead I created a little candlelight sanctuary in the basement where we had this beautiful classic claw foot cast iron tub. I loved taking baths in the basement especially since the cast iron tub would keep the water so warm for so long. I knew even before we started the renovation that the tub wasn’t going anywhere and I was determined to have it installed in our new master bathroom on the second floor. Now that we were beginning to kick off phase 3 of our renovation, the tub needed to be disconnected and moved upstairs. During its ‘great migration’ we were not really surprised to learn that only half of the tub was painted gold! The previous owners had neglected to paint the back side of the tub and it was black! I did have plans to have it repainted and refurbished but having two different paints on it didn’t make that job any easier. In addition to the cast iron tub, I also had the small bathroom radiator painted in the same silver so as to match.

toronto home renovations - cast iron tub refinishing and painting

The great migration of my cast iron clawfoot tub begins but not until we have a chance to refinish and paint it!

The week following the completion of our herringbone floors we were able to prime the main floor and paint the crown mouldings. Once that was complete the kitchen cabinetry we had custom ordered from Domani Design Group was delivered and work began on the 2nd floor master bathroom. More on all of this to come in the next episode along with installation updates on our new custom staircase, phase 3 progress and so much more.

Thank you so much for joining me today and for checking out my new Toronto home renovation series on Youtube. I am super excited to be modernizing a Victorian home while still keeping the charm of an old Victorian house. If you have any questions about my Victorian home renovations, what it’s like to live in Little Portugal, Toronto or recommendations for Toronto contractors, hit me up in the comments below!

Before I sign off, I’d also like to say a big thank you to Ironworks Radiator Inc., Parsiena Design, Chestnut Flooring, Domani Design Group, Winckelmans Tiles & Deco Tile for partnering with me on this project. I’m so excited to be working with both local and international industry experts on our Toronto home renovations but want to reiterate that, like always, all opinions remain my own.

Until next time,

- Soheila

MORE ‘BEHIND THE SCENES’ PHOTOS FROM THIS EPISODE


PIN THIS POST