3D GINGERBREAD CHRISTMAS TREE

* Please Note - Some links in this post may be affiliate links *

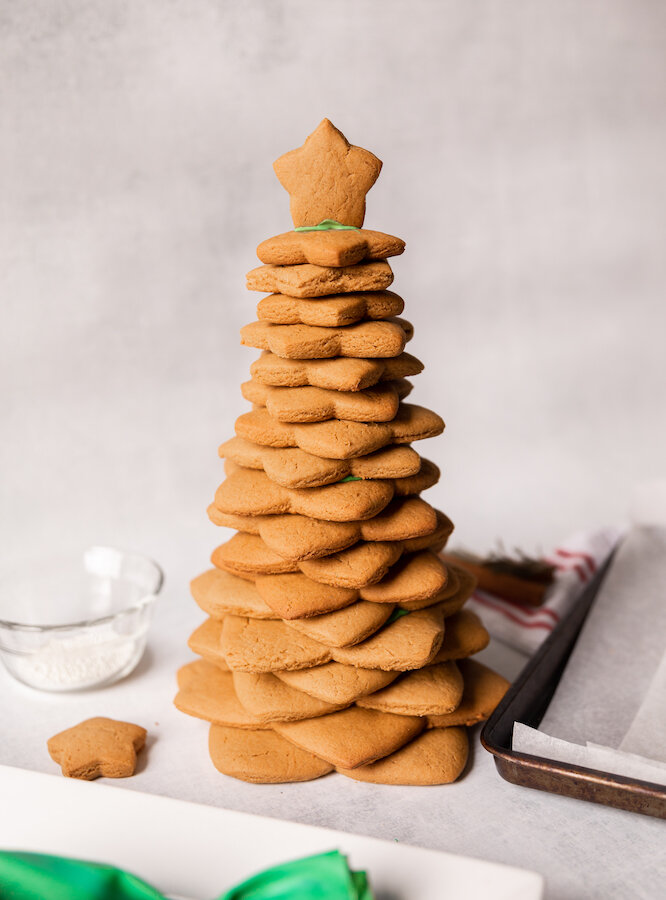
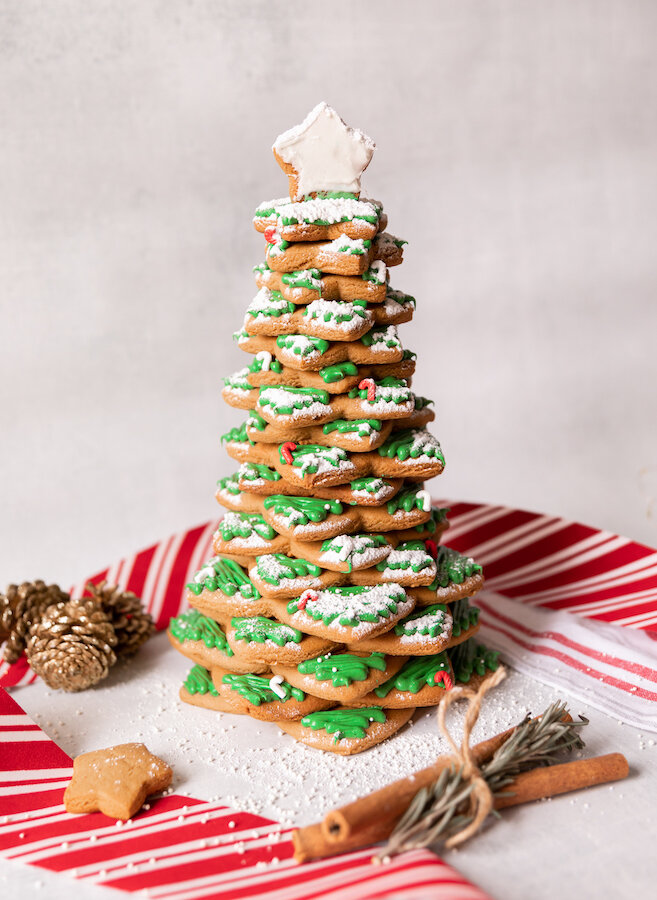
Level up your dessert table this year with this 3D Gingerbread Christmas Tree! It is not only so fun to make but it is also the perfect centerpiece at Christmas dinner. If you are looking for something to do that not only fill the house with the best smell (HELLO GINGERBREAD COOKIES!!) but is also a great activity the whole family can get involved in, this is it!

Happy Holidays my friends!


FOLLOW ME ON INSTAGRAM @ISTHATSOH!


INGREDIENTS:

Makes 1 Christmas Tree

- Gingerbread Cookie Recipe -
2/3 of a CUPS of Butter (unsalted) - softened
2 CUPS of Granulated Sugar
2 Large Egg - at room temperature
2/3 of a CUP of Fancy Molasses
5.5 CUPS of Flour (All Purpose)
3 TSP of Ginger
2 TSP of Cinnamon
1 TSP Baking Soda
1/2 TSP Ground Cloves
Large Pinch of Salt

- Decorations -
Cookie Icing - White, Green, Red are traditionally used
Sprinkles
Icing Sugar

- Tools -
10 PC Christmas Star Cookie Cutter - I found mine on Amazon and it arrived in 2 days! *Please note I did not use all 10 stars, I started from the smallest and worked my way larger. If you want to use all 10 stars (and have a massive tree) you will need to double your gingerbread cookie ingredients)
Wax Paper
Parchment Paper
Baking Tray
Icing Piping Bag and Decorative Tips


CHECK OUT THESE OTHER FESTIVE RECIPES

DIRECTIONS:

Blend softened butter and sugar together until fluffy. Add in your egg and fancy molasses.

In a separate bowl mix your flour, ginger, cinnamon, baking soda, ground cloves, and salt. Whisk until well mixed.

Slowly start to add your flour mixture into your butter mixture until a dough starts to form. You may want to finish it off with your hands.

Make two dough balls from the mixture and wrap them in plastic wrap before placing them in the fridge for an hour.

After an hour, remove the dough balls from the fridge and let them rest for 10 minutes before rolling them out to 1/4 inch thickness. I used my clean countertop to roll the dough out and placed wax paper on top of the dough for easy rolling.

Preheat oven to 350.

Cut out 2-3 cookies of each size (starting from smallest and working your way larger) of the Christmas Star and place them on a baking tray lined with parchment paper. Place each shape 1/2 - 1 inch apart because the cookies do spread out and puff up a little. I didn’t use all 10 of my stars (I think I stopped at 7) as I didn’t want my tree to be too big.

Bake for 11 minutes.

Remove from oven and allow to cool down before stacking them from the largest size to the smallest size. Use a little bit of icing when stacking to help hold them in place and level them out.

When you get to the final star cookie use icing to stick it to the top standing up to create a Christmas tree star!

Decorate as desired.

Allow to dry/harden in a safe place and store at room temperature.


I hope you enjoyed this recipe as much as I do. If you have any comments please leave them below and I'll be happy to answer them as soon as I can! Happy cooking!!!


PIN THIS POST

HOLIDAY DANISH WITH CREAM CHEESE DRIZZLE

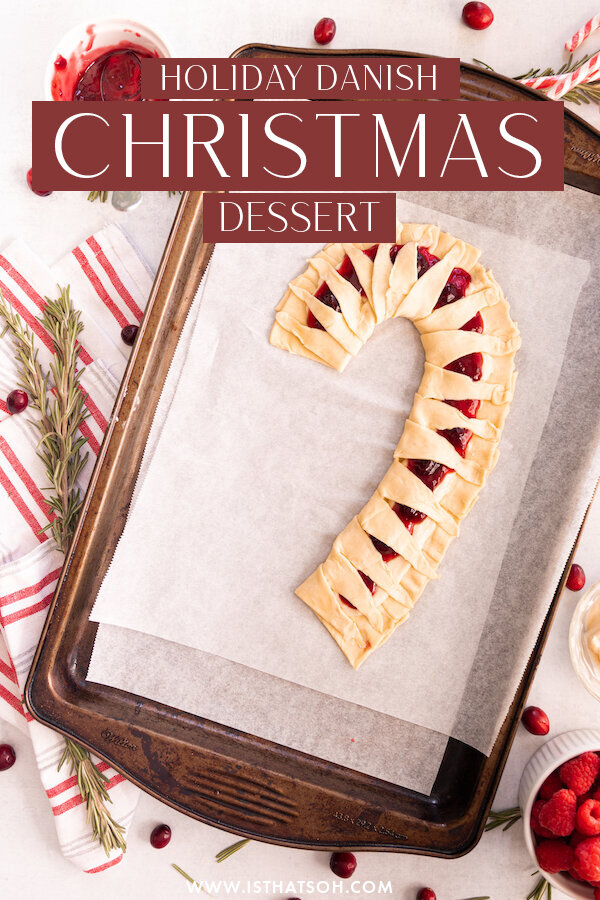
With the holidays just around the corner I thought I would get a head start on trying some festive recipes, and since sweets go hand in hand with festive celebrations I thought I’d kick things off with this candy cane shaped danish! It’s the perfect dessert to bring to a friends for dinner and totally enhance any dessert table! I used store bought puff pastry and the left over cream cheese filling to create a icing drizzle which cut down on the time needed to whip this dessert up significantly. Also, feel free to switch up the jam and put your own unique twist on it! Happy Holidays!


FOLLOW ME ON INSTAGRAM @ISTHATSOH!

INGREDIENTS:

Serves 4-5 People

1 Sheet of Puff Pastry - leave out 2 hours in advance so it has time to de-thaw or place overnight in the fridge
2-3 TBSP of Flour - to sprinkle
2 TBSP of Unsalted Butter - melted as a wash

- Filling -

4 Oz of Cream Cheese
1 TSP of Vanilla
1/4 CUP of Sugar
Jam of Choice - I went with Raspberry

- Cream Cheese Icing -
Remaining Cream Cheese Filling
1 TBSP of Milk

- Tools -
Ruler
Knife


CHECK OUT THESE OTHER FESTIVE RECIPES!


DIRECTIONS:

Preheat oven to 375 degrees

Roll out puff pastry leaving the parchment paper on the backside. Using a ruler, measure and cut the pastry dough in half. Starting with one half, create isosceles triangles by notching every two inches down the longest side and finding the halfway point on the opposite side.

Next, overlap the triangles one by one in the shape of a candy cane. Press overlapping sides together to bind them.

In a bowl combine your cream cheese, sugar, and vanilla. Beat with a hand mixer until well combined.

Spoonful cream cheese mixture onto the thickest part of the dough leaving a 1/2 inch border along the outer edge followed by your choice of jam.

Fold triangle points over and pinch along the 1/2 inch border to secure in place.

Brush dough with melted butter. You can also use to it seal the triangle points into place.

Bake for 16-20 minutes or until golden brown and allow to cool for 5 -10 minutes before adding icing.

Combine the remaining cream cheese mixture with 1 TBSP of milk and beat with a fork. Depending on how much cream cheese you used for filling you may need to add a little bit more milk to the mixture to make it more liquid. You will know you have the right consistency when you hold the fork above the mixture and have a pretty steady stream. Drizzle cream cheese icing over the danish and serve.

Alternatively, you can also sprinkle with powdered sugar.

Enjoy!


I hope you enjoyed this recipe as much as I do. If you have any comments please leave them below and I'll be happy to answer them as soon as I can! Happy cooking!!!


PIN THIS POST

MY GRANDMOTHERS EASY OLD FASHIONED APPLE CRISP RECIPE! THE PERFECT THANKSGIVING DESSERT!

Apple season is upon up which means I’m getting request left, right, and center from my family to make some of our household fall favorites including my grandmothers old fashioned apple crisp recipe! It’s the perfect and easiest dessert to make if you are having a small gathering and is always a crowd please, not to mention its super delicious! If you’re looking for a dessert that gives you all the fall feels and is sure to be a hit, this is it!

Enjoy!

INGREDIENTS:

Serves 10-12 People

Crumble Topping
1.5 Cups of Flour
2 Cups of Old Fashion Oats
1.5 Cups of Brown Sugar
1/2 TSP of Salt
1.5 TSP of Cinnamon
1 Cups of Cold Butter - grated

Apple Filling
12 Granny Smith Apples - Peeled and cut into pieces
1.5 TSP of Cinnamon
1/2 TSP of Salt
1/2 a Cup of Granulated Sugar
1 TSP of Vanilla

Butter - to coat your baking tray or casserole dish ( I used a 13x9 Inch casserole dish)

DIRECTIONS:

Preheat oven at 375 degrees.

Butter your baking tray or casserole dish with butter.

In a large bowl, mix your crumble topping ingredients together and using your hands, mix ingredients together until butter feels evenly spread throughout and the flaky dry flour texture is gone. About 5-6 minutes. When done, place in fridge to keep cold.

In another large bowl, add in your apple filling ingredients and mix using clean hands. Apple slices should be evenly coated in all ingredients.

When ready, dump apple filling into buttered casserole dish, cover with crumble and place in oven to bake for 45-50 minutes or until you start to see the top turn golden brown and the juice from the apple filling to bubble up the sides.

When ready, remove and allow to cool for 5 minutes before serving either alone or with a slice of vanilla ice cream.

Enjoy!


FOLLOW ME ON INSTAGRAM @ISTHATSOH


I hope you enjoyed this recipe as much as I do. If you have any comments please leave them below and I'll be happy to answer them as soon as I can! Happy cooking!!!


PIN THIS POST

DECADENTLY DELICIOUS MUSHROOM BRUSCHETTA WITH GOAT CHEESE AND TRUFFLE OIL

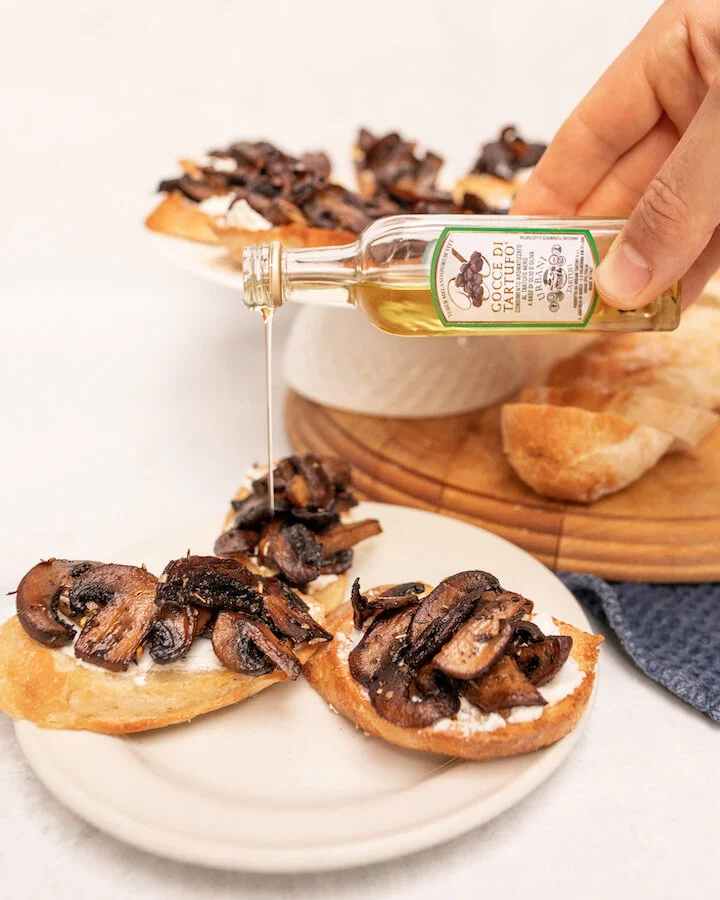
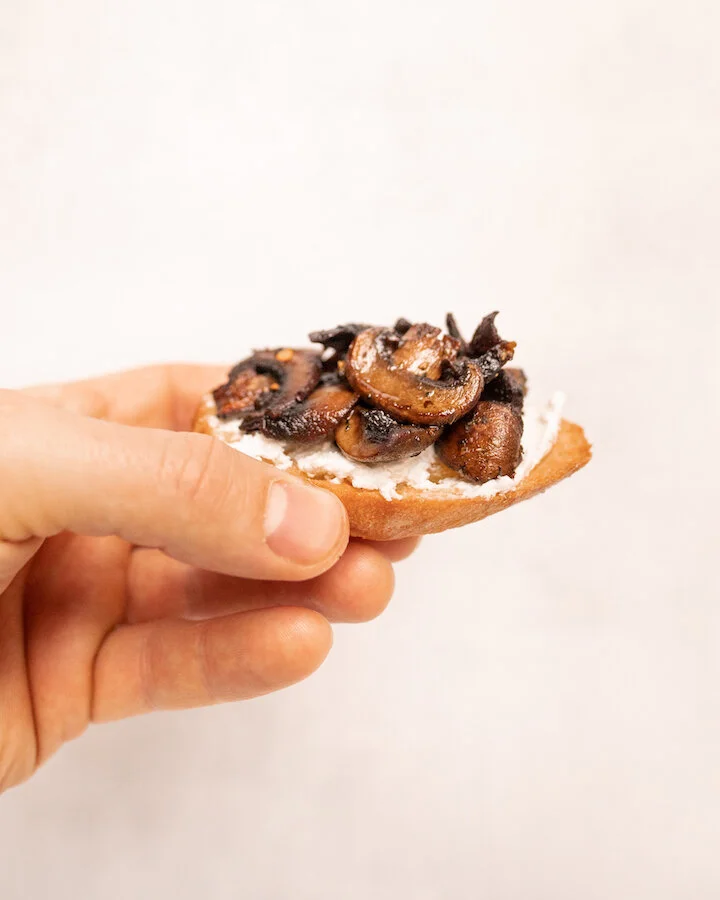
If you love truffle anything as much as I do, you are going to love this mushroom bruschetta with goat cheese recipe!! My boyfriend Adam originally created this easy mushroom bruschetta recipe with some leftover mushrooms we had and it was so decadently delicious, I had to steal it for the blog! I have always been a fan of tomato bruschetta and first learned how to make bruschetta when I was in Italy a few years back and it’s honestly one of my favourite appetizers. Although I do love a good classic bruschetta, I enjoyed trying different bruschetta toppings this time around. So here you guys go! An Adam original -Mushroom Bruschetta with Goat Cheese and Truffle Oil - bound to make your mouth water, just like it did mine! Enjoy!

INGREDIENTS:

Serves 4- 5 people or makes 15 -18 pieces

18 oz Cremini Mushrooms - Chopped
1/4 Cup of Butter - divided into two portions
Salt and Pepper to Taste
1/4 TSP of Dried Thyme
1/4 TSP of Dried Oregano
1/4 TSP of Chilli Flakes
French Baguette - cut into crostinis
2-3 TBSP of Olive Oil
1 Small Pack of Goat Cheese
Truffle Oil - as desired


FEELING ITALIAN FOOD TONIGHT? CHECK OUT THESE OTHER ITALIAN RECIPES?


DIRECTIONS:

Before we get started with making the bruschetta with mushrooms, preheat the oven to 375 so we can toast the bread.

Heat up a skillet on medium heat and once hot, add in one portion of the butter.

Once completed melted, add in mushrooms and turn up to high heat. You will notice after a few minutes a lot of water will start to release out of the mushroom. Continue to cook on high heat, making sure all mushrooms are coated in butter and allow the water to evaporate.

Once evaporated turn heat down to medium, salt, and pepper as desired, and add in your herbs and spices. Mix until well incorporated.

Next, add in your second portion of butter and coat mushrooms thoroughly. Allow to cook for another 10 or so minutes, stirring every few minutes to avoid burning.

While that cooks, place slices of bread on a baking tray and coat each piece with some olive oil before placing it in the oven for 5 minutes or until toasted. When ready remove, allow to cool for a few minutes before coating with goat cheese.

When mushrooms are ready, add them on top of the goat cheese covered crostini’s and garnish with truffle oil before serving.


FOLLOW ME ON INSTAGRAM @ISTHATSOH

Gallery Block
This is an example. To display your Instagram posts, double-click here to add an account or select an existing connected account. Learn more

I hope you enjoyed this easy recipe for mushroom bruschetta with goat cheese and truffle oil as much as I do. If you have any comments please leave them below and I'll be happy to answer them as soon as I can! Happy cooking!!!


PIN THIS POST

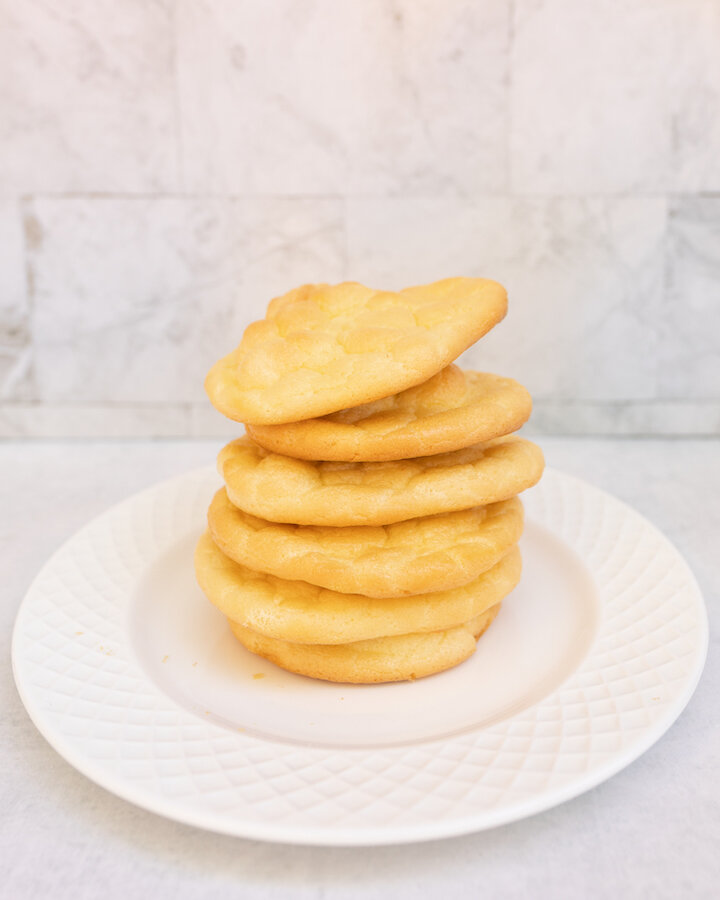
CLOUD BREAD *GLUTEN FREE & KETO FRIENDLY*

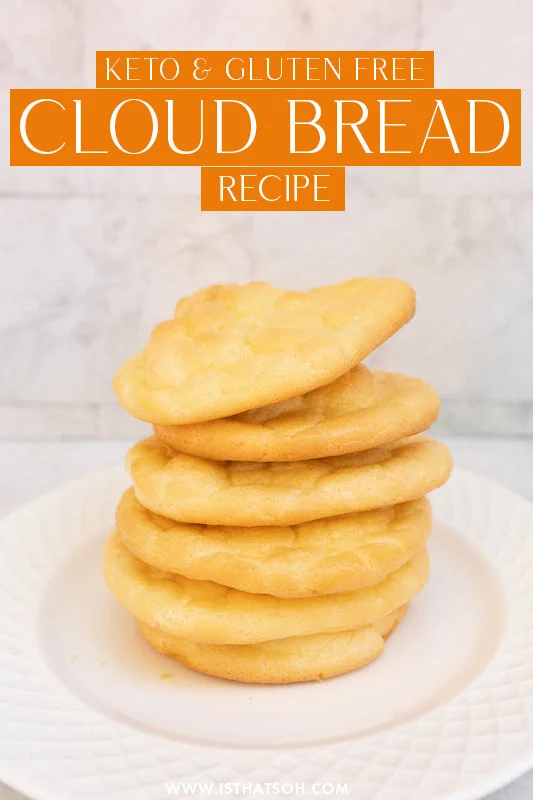
I know what you are thinking… Cloud bread? What is cloud bread? Well, it is a super fluffy, soft, delicious bread made from three ingredients! I first came across a cloud bread recipe while on TikTok and the fluffiness and name instantly caught my eye. Not only is it super easy and quick to make but keto-friendly, gluten-free, and so versatile - you can use it as a base for a pizza, or for your eggs at breakfast, etc. Best of all, it’s so delicious and I know you are going to love it just as much as I do! If you are wondering how to make cloud break and want an easy cloud bread recipe that is keto-friendly, check mine out below!

Enjoy!

CLOUD BREAD INGREDIENTS:

Makes 6-8 Pieces

3 Eggs - room temperature
3 TBSP of Cream Cheese - room temperature
1/4 TSP of Cream of Tartar


CHECK OUT THESE OTHER EASY KETO RECIPES


HOW TO MAKE CLOUD BREAD - DIRECTIONS:

Preheat oven to 300 and line a baking sheet with parchment paper.

In two medium-size bowl, separate the eggs, putting the yolk in one bowl and the whites in another.

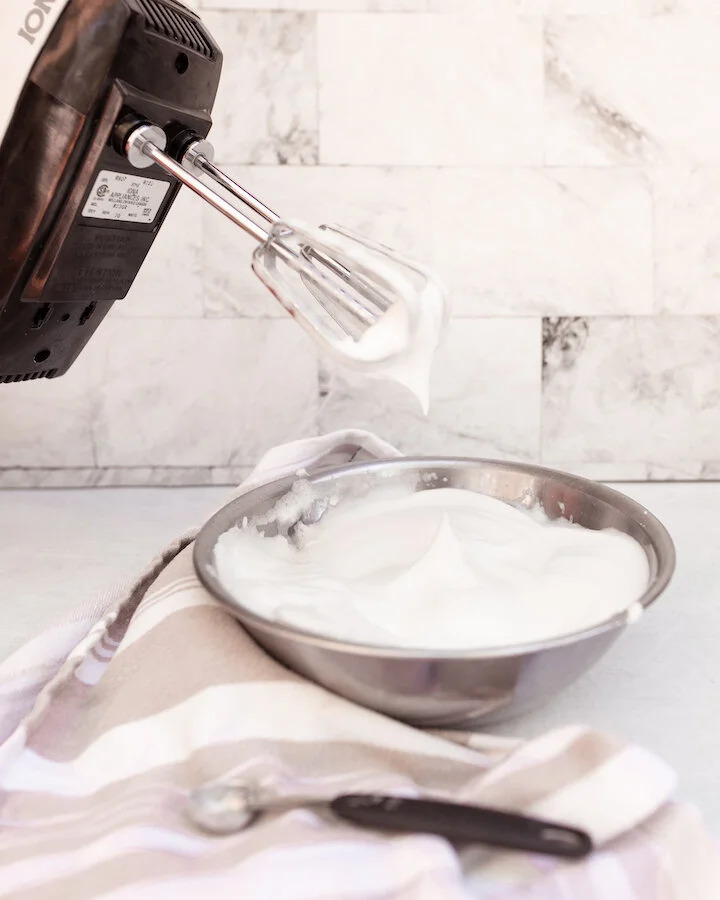
Using a hand mixer, beat the egg whites on a low-medium speed until bubbles start to form before adding in the cream of tartar. When ready, turn the speed up to high on the hand mixer and continuing to whip egg whites until stiff peaks start to form.

Next, in the bowl with the yolks, add in the cream cheese and beat until blended and smooth.

Next, fold the bowl with your egg whites into the bowl with the yolks and cream cheese. Try not to over mix because you will deflate your cloud bread.

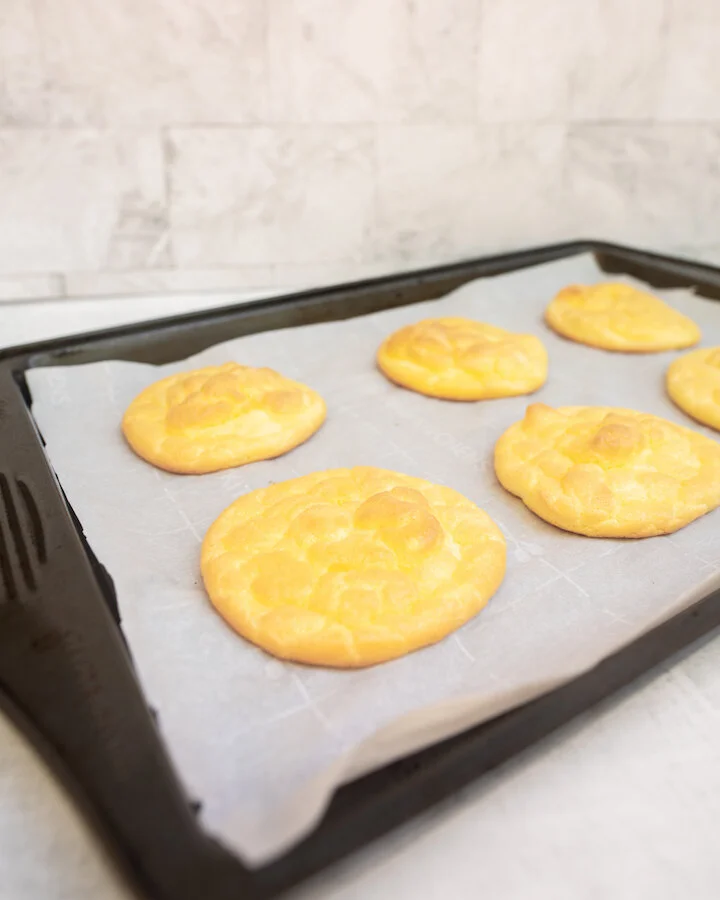
When ready, scoop a dollop of the batter using a large spoon onto your baking sheet and bake for 20-30 until medium golden brown.


FOLLOW ME ON INSTAGRAM @ISTHATSOH

Gallery Block
This is an example. To display your Instagram posts, double-click here to add an account or select an existing connected account. Learn more

I hope you enjoyed this TikTok cloud bread recipe as much as I do. If you have any comments please leave them below and I'll be happy to answer them as soon as I can! Happy cooking!!!


PIN THIS POST