CRISPY KOREAN BIBIMBAP CAULIFLOWER RICE BOWL WITH BBQ CHICKEN & SPRING VEGGIES

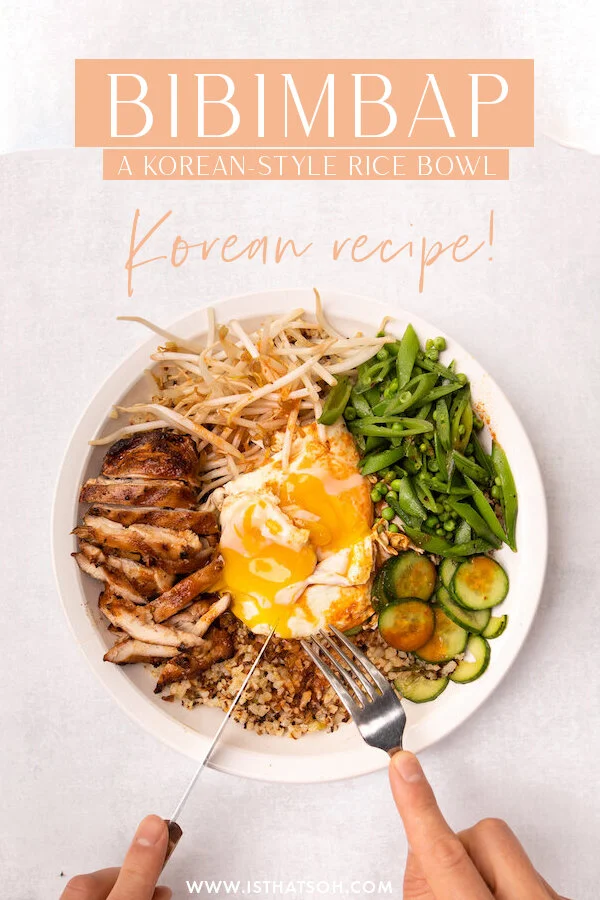
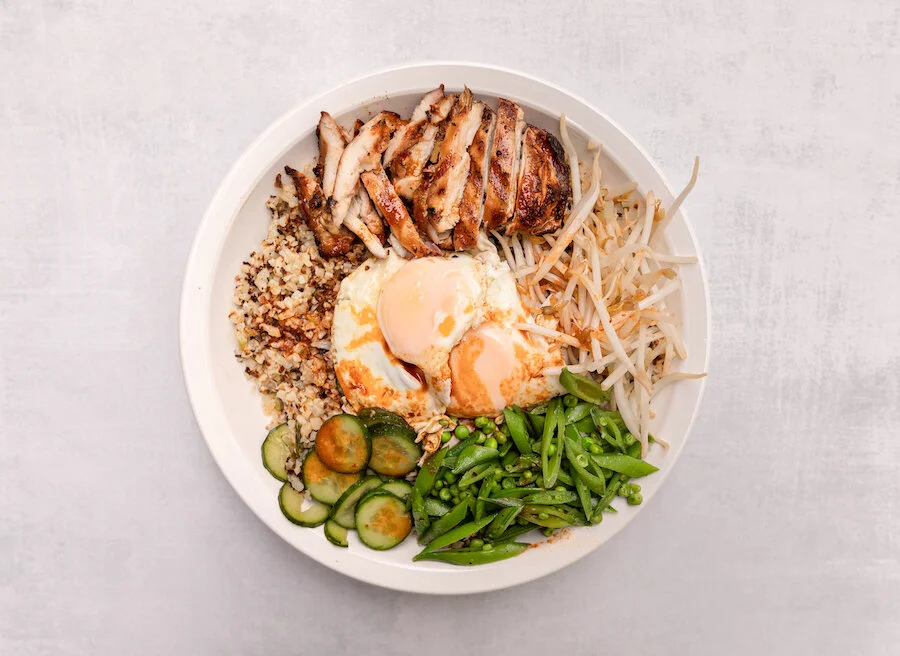
Traditionally cooked in a stone bowl, Bibimbap is a Korean rice dish that literally translates to ‘mixed rice with meat and assorted vegetables. Ever since I first discovered Korean rice bows I’ve been a huge fan and the hot Bibimbap sauce dressing really pulls the pickled veggies in perfectly with the crispy rice and fresh veggies. In the effort to make this recipe more low carb, I substituted the traditional use of sticky rice for cauliflower rice and although it didn’t crisp up quite the same way as normal sticky rice, it was still a beautiful substitute that maintained the integrity of the dish and still held the flavors together. To add a little extra protein Adam also cooked up these wonderful juicy chicken thighs on the BBQ which made for the perfect addition to this otherwise largely veggie based dish. If you are looking for something new, spicy, and wonderful to try, I highly recommend this Bibimbap recipe!

BIBIMBAP INGREDIENTS:

- Serves 4 People -

- BBQ Chicken Thighs and Marinade -
16 Chicken Thighs Boneless and Skinless (3-4 Per Person)
1 CUP of Low Sodium Soya Sauce
1 TBSP of Grated Ginger
4-6 Sprigs of Green Onion
4-6 cloves of Garlic - chopped or grated
Cracked Black Pepper
1-2 TSP of Cayenne Pepper - as per your spice level

- Crispy Cauliflower Rice Bowl -
Frozen Cauliflower Rice (you will want about 200grams per Person)
1.5 CUPS of Snow Peas - Chopped
6 Sprigs of Green Onion
3-4- slices of Ginger
3 Persian Cucumbers
1 TSP of Kosher Salt
3 TBSP of Rice Vinegar
4 TBSP of Vegetable Oil - split into 2 parts
2 TSP of Sesame Seed Oil
1 CUP of Frozen Peas
1 TBSP of Butter
4 Eggs
Bean Sprouts

- Korean Style Hot Bibimbap Sauce Recipe -
2 TBSP of Siracha
2.5 TBSP of Low Sodium Soya Sauce
2 TSP of Honey
4 TSP of Sesame Seed Oil
2 TSP of Rice Vinegar


CHECK OUT THESE OTHER ASIAN INSPIRED RECIPES


DIRECTIONS:

Throw the chicken along with all the marinade ingredients into a bowl and make sure the thighs are coated nicely. Allow chicken to marinate for min 30 minutes while chopping your veggies or overnight in the fridge.

Chop Persian cucumber in thin slices and place in a bowl. Add Kosher salt and massage into the cucumber. Dress with rice vinegar (make sure they are well coated and soaking in a little bath, and set aside allowing them to pickle while we move on to the other veggies.

Chop the snow peas on a diagonal in 1/4 inch pieces.

Chop the top (furthest from the stem) of the green onion on the diagonal until you have 1/4 CUP (set aside for garnish) and cut the remaining amount width-wise in thin slices as per normal.

In a large skillet, add in 3 TBSP of vegetable oil and 2 TSP of sesame oil and allow to heat up on medium. Once ready, add in your green onions (remember to save some for garnish) and ginger stirring constantly, and allow to fry for 3-4 minutes.

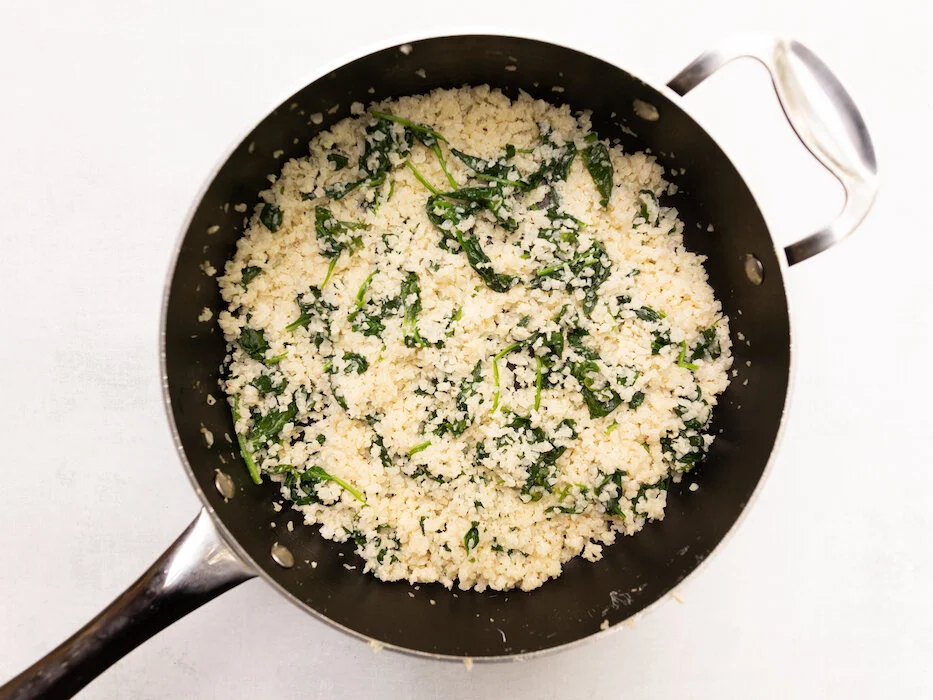
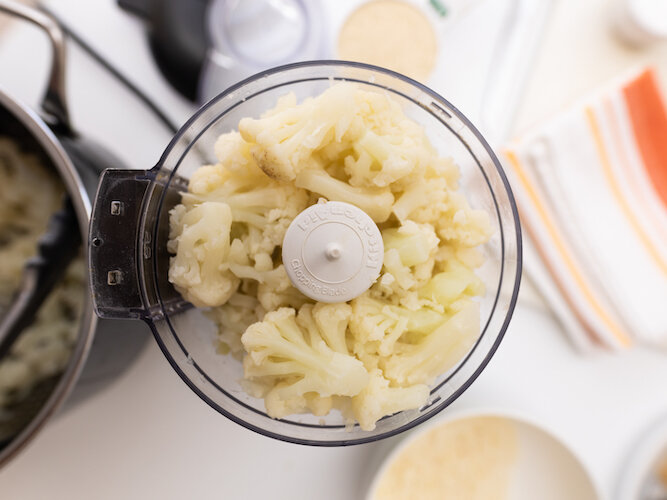
Once green onion and ginger are ready, add cauliflower rice into the skillet and mix until well incorporated before pressing the cauliflower down into the bottom of the skillet evenly and allowing it to cook on medium for the next 15 minutes.

During this time you can BBQ the chicken on medium-high heat, 10 minutes each side or until cooked through.

While the chicken and cauliflower are cooking make your Korean hot sauce by combining all the ingredients in a bowl and mixing thoroughly.

When cauliflower gets close to the 15-minute mark, give it a toss to allow crispy brown bits to mix and pat down again to form an even layer, allow to cook for an additional 5 -10 minutes until it is crispy. *Cauliflower rice will never get fully crispy because it holds a lot of water but it will get a little crispy

During these last few minutes fry up 4 eggs in a skillet using butter to coat the pan.

In a separate skillet, add 2 TBSP of vegetable oil and allow to heat up on medium heat. Add in the snow peas and frozen peas and allow them to fry ever so slightly before adding in 1/4 Cup of water, covering, and allowing to steam for 3-4 minutes.

When ready to plate, start with your cauliflower rice, add one friend egg to the middle, arrange bbq Chicken, bean sprouts, pickled Persian cucumber, and snow pea/pea mixture around the edge. Drizzle Korean hot sauce on top, garnish with extra green onion and serve!

Enjoy!


FOLLOW ME ON INSTAGRAM @ISTHATSOH


If you like this Korean bibimbap recipe or have any comments/questions about how to make bibimbap, feel free to leave them in the comment section below!


PIN THIS POST

ROASTED BRUSSELS SPROUTS WITH CRISPY FRIED SHALLOTS

Made this simple brussel sprout recipe with crispy fried shallots and it was amazing. Loved the saltiness of the shallots against the dense Brussel sprouts drizzled in lemon. Delicious, salty, and perfect as a low carb veggie side for any meat dish you are cooking, I would also recommend making a little bit of extra fried shallots so you can have them with your meat as well. Further, Cassava flour is a keto-friendly flour making this a perfect side for any low carb diets but if you don’t have access to that flour, normal white flour makes a great substitute.

Enjoy!

INGREDIENTS:

- Serves 2-3 people

1.5 LBS of Brussels Sprouts - washed, remove steam and top layers, and cut into halves
6 TBSP of Olive Oil - Split into 2 portions, one 2.5 TBSP and 3.5 TBSP
Sea Salt and Pepper
3-4 Shallots - sliced Into onion rounds
1/4 Cup of Cassava Flour
Sea Salt
Freshly Squeezed Lemon

DIRECTIONS:

Set oven to 400 degrees.

Toss brussels sprouts in 2.5 TBSP of olive oil until evenly coated and sprinkle with salt and pepper.

Place brussels sprouts on a baking tray lined with aluminum foil and allow to bake in the oven for 30 or so minutes until tender.

While brussels sprouts are in the oven chop up shallots and place in a bowl. Add 1/4 Cup of Cassava flour and 1/4 TSP of salt, mix until the shallots are evenly coated.

Heat up 3.5 TBSP of olive oil in a skillet on medium-high. Once ready, reduce heat to low - medium and sprinkle in your floured shallots. Toss them every 3-5 minutes to make sure they don’t burn. Once nicely golden and crispy, set aside.

When the brussels sprouts are getting close to finished you can broil them for the last two minutes if you want them extra crispy.

When ready, plate brussels sprouts, add crispy shallots on top and drizzle with fresh lemon juice.

Serve while hot and enjoy!

burssels sprouts-4 copy.jpg

If you like this recipe or have any comments/questions, feel free to leave them in the comment section below!


PIN THIS POST

CHICKEN PUTTANESCA - LOW CARB KETO FRIENDLY MEALS

Most often seen in its pasta form, puttanesca originated in Naples, Italy, and is said to be a sauce created by the ladies of pleasure. One story told is that the ladies would visit restaurants at the end of the night and they would ask for leftover ingredients. These ingredients would all go into one pot to create this salty, vibrant sauce. Today, the sauce is most often found made from tomatoes, black olives, capers, anchovies, onions, and garlic, and served commonly on pasta.

I, however, have been trying to stay low carb since starting Keto and decided to skip the pasta and use cauliflower rice instead. The results were fantastic and the saltiness of the sauce was perfect. Further, the chicken was tender and just fell off the bone.

If you are looking for a great, low carb meal this one is sure to be a hit!

Enjoy!

INGREDIENTS:

- Serves 2-3 people

3LBS of Chicken Thighs or Drumsticks
Salt
2 TBSP of Olive OIl
3 Cloves of Garlic - thinly sliced
4 Anchovy Fillets in Oil
1/2 TSP of Red Chilli Pepper Flakes
2 TBSP of Concentrated Tomato Paste
1 Cup of Olives - crushed and pitted
3/4 CUP of Dry White Wine - and a little extra for drinking
2 TBSP of Capers - drained
2 Bay Leaves
Lemon Peel - 3 x 2” stripes

- Optional Bases -

Pasta
Cauliflower Rice - low carb option

DIRECTIONS:

Clean and pat dry your chicken before seasoning with salt.

In a large skillet, heat 2 TBSP of olive oil and sear the chicken, turning it occasionally until the fat and skin is a golden brown color. Once done, transfer chicken to a baking dish.

As you near the end of searing all your chicken, preheat the oven to 350.

Once done searing the chicken you will have a lot of delicious chicken bits stuck to the bottom of your skillet along with a pool of fat, remove fat from skillet, reduce heat to medium and add in your anchovies and garlic. Once the garlic is soft (about 2-3 minutes) add in your red chili flakes and tomato paste, and mix until well incorporated.

Next add in your olives, wine, bay leaves, capers, and lemon peel to the skillet. Using your wooden spoon or spatula, scrape the bottom of the pan so as to lift up all the good bits stuck to the bottom. Allow this sauce to simmer for 4-5 minutes or until most of the liquid from the wine evaporates.

Next, add 1 cup of water to the baking dish with all the seared chicken (they should be snuggled together) and add in the sauce from the skillet. Place entire baking dish in oven uncovered and allow to bake in the sauce for another 20-30 minutes

Once ready, remove from oven and serve either alone or with pasta or on a bed of cauliflower rice.

Enjoy!

NOTE: The chicken should be plenty salty from the capers and anchovies but if it is not you can always taste the sauce when it comes out of the oven and add extra salt as desired.

brighterPUT-2 copy.jpg

If you like this recipe or have any comments/questions, feel free to leave them in the comment section below!


PIN THIS POST

SPICY SHRIMP WITH CREAMY CAULIFLOWER AND SPINACH RICE - KETO & LOW CARB FRIENDLY

Since being on the Keto diet I have been experimenting a lot with carb substitutes like cauliflower rice as a way of getting the texture of carbs without the calories, and one recipe I came across that made cauliflower rice sound so delicious was a creamed version of it. Of course, being in lockdown still, I didn’t have all the ingredients the original recipe required so I remixed it my way and topped it with some spicy shrimp for a little extra kick! Needless to say, it turned out fantastic and so far I have made it twice for my family - we just can’t get enough! The creamed cauliflower made for a perfect replacement for carbs without compromising on taste at all not to mention the entire meal takes only 10 minutes to whip up! If you are looking for a delicious, low carb meal for dinner tonight, you got to try this one!

Enjoy!

INGREDIENTS:

- Serves 2-3 people

2 TBSP of Olive Oil
1 Pack of Frozen Riced Cauliflower (500grams)
1 TSP of Garlic Powder - Split into two portions
1 TBSP of Salted Butter
1 Packet of Shrimp - mine had about 20 raw shrimp, peeled and deveined
1 TSP of Paprika
1/4 TSP of Chilli Flakes
Salt and Pepper
2 Handfuls of Fresh Spinach
3 TBSP of Light Cream Cheese

- Optional Toppings -

Chilli Flakes
Green Onions

DIRECTIONS:

In a large skillet, heat up olive oil on medium/high heat. Once hot add in your cauliflower rice and garlic powder. Mix thoroughly, add salt and pepper to taste, and let cook for 4-5 minutes or until cauliflower becomes softer.

In the meantime, in another medium skillet add in butter and allow to heat up on medium/high heat. When butter is hot, drain any excess juices from shrimp before throwing them into the pan along with garlic powder, paprika, and hot chili flakes. Salt and pepper to taste. Mix spices and shrimp until the shrimp are well coated. Allow it to cook for 2-3 minutes.

Returning to the cauliflower skillet as you let the shrimp cook, add spinach and allow to wilt down by stirring it into the cauliflower rice. Once wilted, add in cream cheese and mix thoroughly.

By this time the shrimp should be ready. Plate creamed cauliflower rice adding shrimp on top and you are ready to serve!

Enjoy!

brighter-2 copy.jpg

If you like this recipe or have any comments/questions, feel free to leave them in the comment section below!


PIN THIS POST

Spicy Shrimp 2.jpg
Spicy Shrimp.jpg

EASY KETO CAULIFLOWER GNOCCHI RECIPE

Since getting back on the Keto diet (click here to read about my Keto diet experience) I have been experimenting with new recipes to help me stay on track. One recipe that I developed using a combination of recipes I found online and experimenting with a few times, was Keto cauliflower gnocchi recipe that you can make using an air fryer or some oil in a pan if you don’t have an air fryer. Turned out that my entire family approved and actually preferred it over the regular Gnocchi I whipped up for the taste test. PLUS, it’s super easy to make! A double win! If you are looking for a healthy pasta alternative - you got to try this cauliflower gnocchi recipe!

Enjoy!


INGREDIENTS:

- Serves 4 people

1 Head of Cauliflower
1 CUP of Almond Flour
1/2 CUP of Arrowroot Flour
1 TSP of Garlic
1 TSP of Salt
1 CUP of Freshly Grated Parmesan Cheese
1 TBSP of Olive Oil if you are pan frying it


LOOKING FOR KETO RECIPES? CHECK THESE OUT TOO!


DIRECTIONS:

Cut the cauliflower florets off the stem in small chunks and steam until tender.

Once tender, remove the cauliflower from pot and place in a food processor. Pulse until the consistency of the cauliflower is like mash potatoes before piling it in the middle of a clean dishcloth and wringing out as much excess water as possible. Even when you think you’re done, you’re probably not so give it another wring!

Place the cauliflower in a bowl and add in the garlic, almond flour, arrowroot flour, salt, and parmesan cheese. Mix until thoroughly incorporated till it forms a soft dough. Cut dough into quarters.

On a lightly floured surface, roll each quarter of the dough out using your hands to form a long rope about 3/4 to 1 inch in diameter. Cut the dough into 1/2 inch pieces and picking up each one, smooth the edges into small oblong balls resembling gnocchi. Once done, place on a lightly floured baking sheet lined with parchment paper.

Now it is time to cook the cauliflower gnocchi. I recently used an air fryer and loved the results. If you have one you can cook them at 400 for 6 -7 minutes or fry in a tbsp of olive oil on the stove in a pan until golden brown.

When ready, serve with sauce of choice.


FOLLOW ME ON INSTAGRAM @ISTHATSOH


If you like this air fryer cauliflower gnocchi recipe or have any comments/questions, feel free to leave them in the comment section below!


PIN THIS POST