KOREAN KIMCHI PANCAKES (KIMCHIJEON) WITH DIPPING SAUCE - A YUMMY KOREAN STREET FOOD RECIPE

Korean kimchi pancakes (often referred to as kimchijeon in Korea) are a delicious street food dish often enjoyed as a snack or after a night out, that is so easy to make at home! To tell you the truth, it’s just like making traditional pancakes where you add everything together in a bowl and fry it up except Korean Kimchi Pancakes are way more savory than your traditional North American pancake thanks to the addition of green onions and some spicy kimchi! If you enjoy Korean food and want to learn how to make delicious kimchi pancakes at home, check out this foolproof recipe with dipping sauce below!

IS KIMCHI VEGAN?

It all depends on the brand you buy! Traditional kimchi does contain fish sauce but depending on the brand you buy you can also find it without, so make sure to check the ingredient list. Additionally, Kimchi is not difficult to make, so if you want to try making it at home you can just leave out any animal products to make it vegan.

In my opinion, the best kimchi brand is Myungga Mat Kimchi however, I did recently do a Whole 30 cleanse and found a plant-based kimchi brand called LIVE at Ambrosia that I very much enjoy. It doesn’t have any added fish sauce and uses apple for sweetness instead of sugar. *NOTE: This recipe is not whole 30!

WHAT ARE SOME KIMCHI BENEFITS?

Kimchi is so good for your gut! It aids with digestion and is packed full of great probiotics. It is also said to help with inflammation, aid with weight loss, strengthen your immune system and support heart health!

DOES KIMCHI GO BAD

Yes! I recently had to throw out the remnants of a jar of kimchi that was a month or so old. You could tell by the way it smelled that it had ‘over fermented’. It smelled like a bottle of wine that has been sitting out for a few days. If you open your jar and it smells kind of sour with a pungent alcohol smell - it’s most likely gone bad.

* Please Note - Some links in this post may be affiliate links *

INGREDIENTS FOR KIMCHI PANCAKES:

Makes 2-3 Pancakes

3-4 Green Onions (chopped diagonally) - set a little aside for garnish
1/2 a CUP of Kimchi (chopped) *Use a plant-based Kimchi if you want this recipe to be vegan!
1/2 a CUP of Korean Pancake Mix
2-3 TBSP of Kimchi Juice and/or Korean Chili Paste
About 1 Cup of Water (to be added a 1/4 CUP at a time)
1-2 TBSP of Vegetable Oil

- Garnish -
1 TBSP of Seasame Seeds (roasted)
Dried Seaweed (cut into 2-inch strips)

- Dipping Sauce -

2 TBSP of Soya Sauce
1 TBSP of Water
2 TSP of Rice Vinegar
1 TSP of Sugar
2 TSP of Sesame Oil
1 TSP of Sesame Seeds


CHECK OUT THESE OTHER ASIAN INSPIRED RECIPES


HOW TO MAKE KIMCHI PANCAKES:

In a small bowl, add all your dipping sauce ingredients, and using a fork mix it together before setting it aside.

In a bowl add in your green onions (making sure to put some to the side for a garnish later), Korean pancake mix, kimchi, and kimchi juice/ Korean chili paste in a bowl. Stir in a 1/4 cup of water at a time until a batter starts to form. You want it to be the same consistency as a regular pancake mix so keep adding water until you achieve this desired consistency.

Heat up 1-2 TBSP of vegetable oil in a pan and pour in your Kimchi pancake batter when hot. Allow the Kimchi pancake to cook on one side for 2-3 minutes before flipping - same as you would a regular pancake.

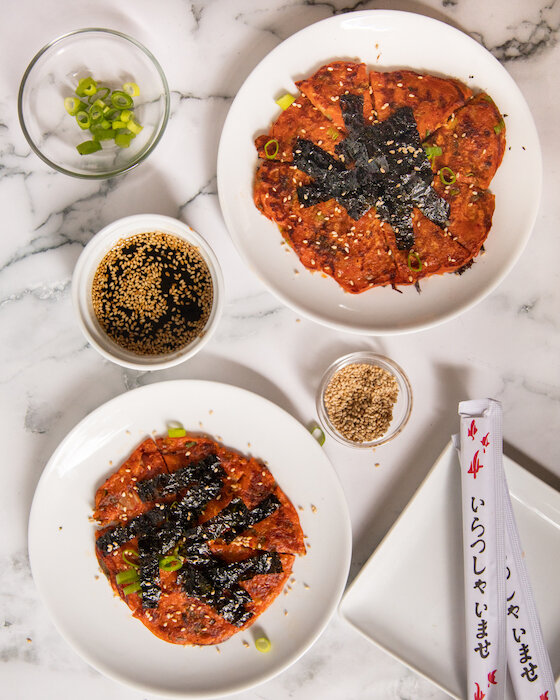
When ready, remove from heat, garnish with sesame seeds, more green onion, and dried seaweed strips.

Serve with dipping sauce.


FOLLOW ME ON INSTAGRAM @ISTHATSOH


I hope you enjoyed this easy vegan kimchi pancake recipe with dipping sauce as much as I do. If you have any comments about how to make kimchi pancakes, please leave them below and I'll be happy to answer them as soon as I can! Happy cooking!!!

PIN THIS POST

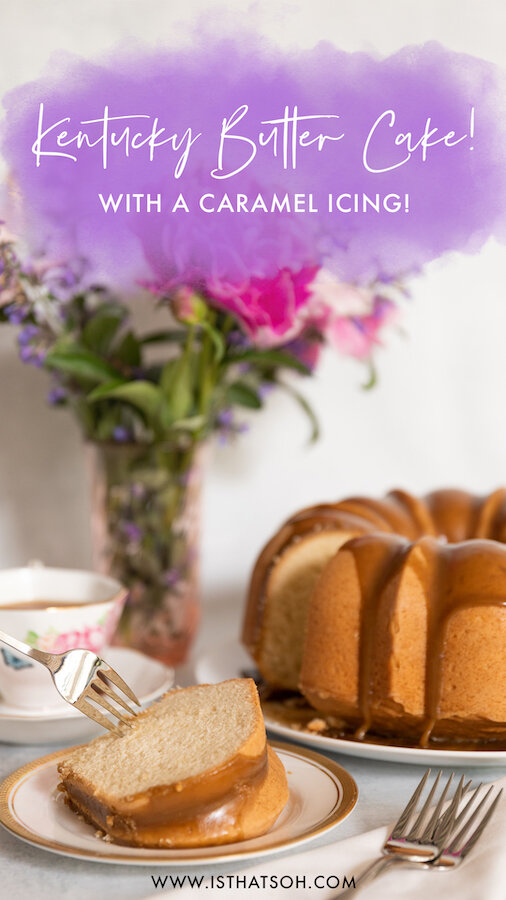
EASY KENTUCKY BUTTER CAKE RECIPE WITH CARAMEL ICING


I remember the first time my mom made me this Kentucky Butter Cake with Caramel Sauce. It was a warm summer day, we had just finished dinner, and she brought out this freshly baked and still warm, Kentucky Butter Cake with a Caramel Icing. Although outside, you could smell the cake’s sweetness and I instantly noticed how moist and spongy it was as soon as I dove into it with my fork. It didn’t take long for me to request every cake have this amazing caramal glaze on it and ask for the recipe for my blog!

Why is it called Kentucky Butter Cake?

Funny you should ask because from what I have read, no body is really sure. I came across a story about it being a Pillsbury bake-off winner and then another story that debunked that so the real story behind this cake is stil unknown. If i had to guess though, I’d bet the cake originated from Kentucky, and since it has lots of butter, it’s called a Kentucky Butter Cake! One thing I do know though is that this cake is usually found with a butter sauce or icing not a caramel glaze. In my opinion though, the caramel glaze can’t be beat!

Since my first introduction i’ve already baked it nemerous times and everyone I’ve introduced it instantly seems to fall in love with this Kentucky Butter Cakes recipe too. I’m sure after you try it, you will too what caramel frosting on just about everything you eat as well! The best part about this Kentucky Butter Cake and Caramel Icing Recipe is that it is SUPER easy to make so you don’t have to be an advance baker to yield good results or enjoy this recipe!

I’ve created a quick tutorial video for you below for this Kentucky Butter Cake with Caramel Sauce recipe, so make sure to check it out below!

Happy baking!

* Please Note - Some links in this post may be affiliate links *

INGREDIENTS:

Serves 10
- Kentucky Butter Cake -


3 cups of All-Purpose Flour
1 TSP of Salt (Kosher is preferred)
1 TSP of Baking Powder
1/2 a TSP of Baking Soda
1 Cup of Unsalted Butter (cubed and brought to room temperature)
2 Cups of Granulated White Sugar
4 Eggs
1 TBSP of Vanilla
1 Cup of Buttermilk

- Caramel Frosting -

1 Cup of Brown Sugar
2 TBSP of All-Purpose Flour
3 TBSP of Butter (softened)
1/4 Cup of Milk
1 TSP of Vanilla Extract

You will also need:

A 10” bundt pan
Hand Mixer
Saucepan


CHECK OUT THESE OTHER DESSERT RECIPES


KENTUCKY BUTTER CAKE DIRECTIONS:

Preheat oven to 325 degrees and butter your bundt pan before dusting it with flour - I used a 10” pan!

In a medium bowl, mix all your dry ingredients (flour, salt, baking powder, and baking soda) together with a whisk until well incorporated.

Next, in a separate, larger bowl add your butter, sugar, vanilla, eggs, and buttermilk, and mix together on low for 30 seconds using a hand mixer before slowly incorporating your dry ingredients in 2-3 portions.

When the dry ingredients are fully added to the wet ingredients, increase the hand mixer speed to high and continue to beat for 3 minutes until the batter texture becomes smooth. Make sure to scrape the sides of the bowl to get the excess flour that likes to get trapped there!

Pour batter into your buttered bundt pan and bake for 65-75 minutes or until a toothpick comes out clean.

When the Kentucky Butter Cake is ready, remove it from the oven and set it aside to cool. I like to allow the cake to cool for 10 minutes before inverting it onto a serving plate.

CARAMEL ICING RECIPE DIRECTIONS

After the cake has cooled you can get to work on the caramel glaze!

Combine brown sugar and all-purpose flour in a bowl - whisk together until well incorporated.

Using a saucepan, add in your brown sugar/flour mixture, butter and milk. Bring ingredients to a rolling boil on medium-high heat, stir continuously.

Once boiling, allow it to continue to boil for 1.5 minutes before removing from heat and setting it aside to cool for about 5 minutes.

When the caramel icing has cooled, use a wooden spoon to beat the mixture so that it thickens. Add in your vanilla as you continue to beat the mixture (about 1-2 minutes) until it becomes a similar consistency to honey.

Pour the caramel frosting over the cooled Kentucky Butter Cake using the back of the spoon to help spread it around evenly. Set aside to cool as the caramel glaze will harden after a few hours.

This cake can be stored at room temperature in a cake stand for 3 days or in an airtight container!


FOLLOW ME ON INSTAGRAM @ISTHATSOH


I hope you enjoyed this Kentucky Butter Cake recipe with Caramel Icing as much as I do. If you have any comments please leave them below and I'll be happy to answer them as soon as I can! Happy baking!!!

PIN THIS POST

THREE SKINNY COCKTAILS USING NUDE BEVERAGES VODKA SELTZER!

Happy Victoria Day long weekend to all my fellow Canadians!

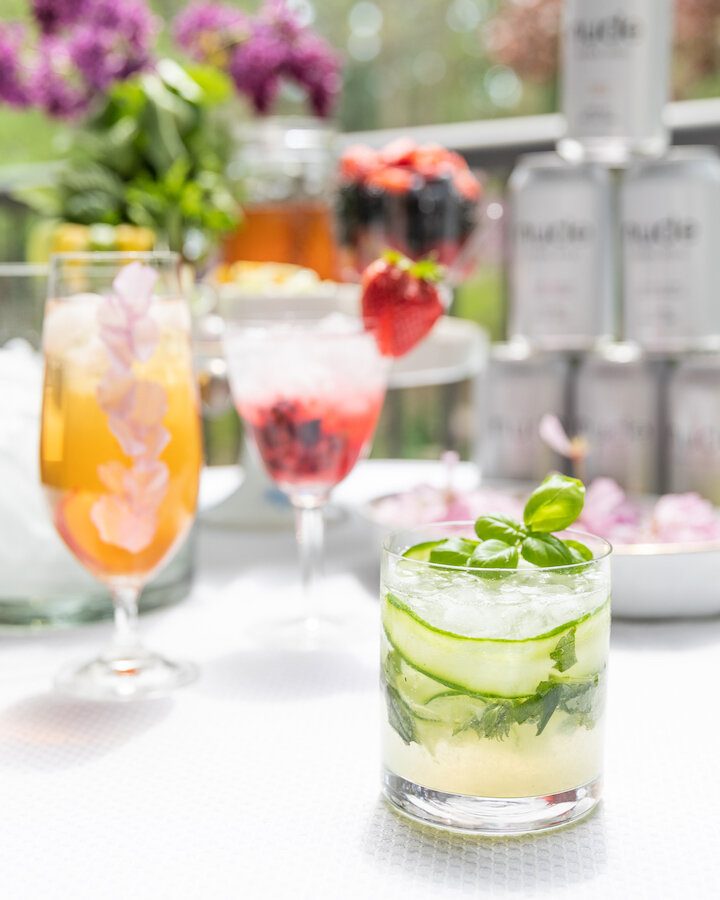
To help you kick off this weekends celebrations, I wanted to share three skinny cocktail recipes using Nude Beverages Vodka Seltzer.

If you are not familiar with Nude Beverages they are hard seltzer company from Britsh Columbia, Canada that uses clean alcohol bases along with all-natural flavors. All Nude Hard Seltzer beveraegs have 100 calories and 0 carbs per serving. In addition to Nude Vodka Soda, they also offer Nude Tequila Soda and Nude Gin Soda however only the Nude Vodka Soda (which comes in three flavours, Peach, Raspberry Lemon, Classic Lime, and Black Cheery) is currently available at the LCBO in Ontario.

I have been having a lot of fun experimenting with all the different flavours and making delicious vodka seltzer cocktails so that I can share it with you including a nude ice tea! Which vodka seltzer skinny cocktail would you make?

* Please Note - Although the video below was sponsored, this post was not! *

INGREDIENTS:

Skinny Cucumber Basil Gimlet
2-3 Mini Cucumbers - Shaved
A handful of fresh basil
Lime Juice (1/2 oz Per cocktail)
Nude Vodka Soda in the flavor ‘Classic Lime’

Mix Berry & Mint Caipiroska

A mix of muddled berries (blueberries, strawberries, blackberries and raspberries
A handful of fresh mint
Lime Juice (1/2 oz Per cocktail)
Nude Vodka Soda in the flavor ‘Raspberry Lemon’
Whole strawberry for garnish

Twisted Georgia Peach UnSweetened Ice Tea

Ice Tea (brew the night before for maximum flavour)
Nude Vodka Soda in the flavor ‘Peach’
Slices of Peach for garnish


CHECK OUT THESE OTHER COCKTAIL RECIPES


DIRECTIONS:

Skinny Cucumber Basil Gimlet Vodka Seltzer Skinny Cocktail

Add cucumber shaves, torn up fresh basil and 1/2 oz of Lime Juice to your glass and muddle together.

Next, decorate the Glass with more cucumber shavings

Add Ice (i used crushed ice which I made by putting ice in a plastic ziplock bag and hitting it with a meat mallet!)

Top it off with Nude Hard Seltzer using the Nude Vodka Soda in the flavor ‘Classic Lime’

Garnish with Basil

Mix Berry & Mint Caipiroska Vodka Seltzer Skinny Cocktail

Add one or two spooms of your berry smash to a glass (I literally just muddled a few different kinds of berries together), followed by 1/2 an Oz of lime juice and a few sprigs of fresh mint. Muddle together.

Add ice (I used crushed ice which I made by putting ice in a plastic ziplock bag and hitting it with a meat mallet!)

Top it off with Nude Hard Seltzer using the Nude Vodka Soda in the flavor ‘Raspberry Lemon’

Garnish with a strawberry

Twisted Georgia Peach UnSweetened Ice Tean Vodka Seltzer Skinny Cocktail

Add Ice Tea (I brewed mine the night before for maximum flavour)!

Add ice

Top it off with Nude Hard Seltzer using the Nude Vodka Soda in the flavor ‘Peach’

Garnish with a slice of peach!


FOLLOW ME ON INSTAGRAM @ISTHATSOH


I hope you enjoyed these three skinny cocktails using new beverages vodka seltzer as much as I do. If you have any comments about nude hard seltzer please leave them below and I'll be happy to answer them as soon as I can! Happy bartending!!!

PIN THIS POST

CLASSIC ITALIAN BRUSCHETTA RECIPE

italian brushcetta recipe_-3.jpg

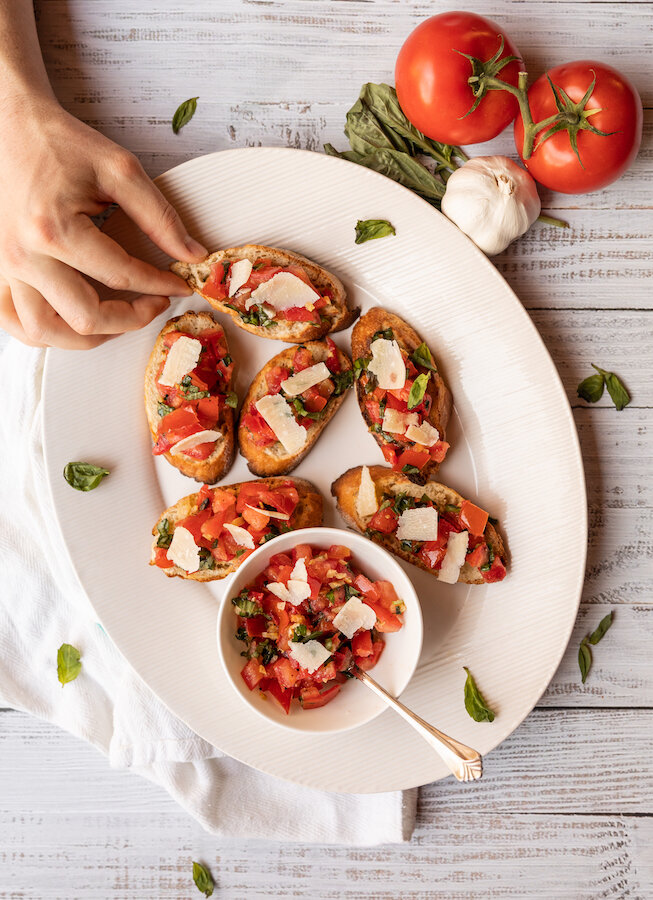
A classic Italian Bruschetta Recipe with Cheese

Italian cuisine has always been one of my favorites. When I was little my mom took my brother and I to Italy for the summer and we stayed in this villa outside the small medieval town of Montalcino, smack in the middle of Tuscan wine country. The villa was owned by a winemaker and farmer and was situated on the edge of his vast property. I remember running through the rows of grapevines, chasing sheep, and stomping buckets of grapes for fun. A child's dream playground and also the place I was first introduced to Italian cuisine (at least as far back as I can actually recall) and believe me it was love at first taste!

Bruschetta is a typical antipasto that comes before your meal and opens up your stomach for the usual large plant of pasta to follow. I am a huge fan of a classic tomato bruschetta and making it at home quite often. Not only is a classic bruschetta actually quite easy and straightforward to make but it also takes no time at all. If you are looking for an easy authentic Italian bruschetta recipe to make for your next meal, check out my bruschetta recipe below!

INGREDIENTS:

Serves 3-4 as an appetizer

1/4 Cup of Extra Virgin Olive Oil
2-3 Cloves of Garlic (if you like garlic put more... obviously) - minced
3 Tomatoes (I use vine tomatoes) - remove seeds and chop into pinkie nail size bits
1/3 Cup of Chopped Fresh Basil Leaves
Salt and Pepper to taste
French Baguette - Cut into pieces
Parmasan Cheese - optional garnish


CRAVING ITALIAN FOOD? CHECK OUT THESE OTHER DELICIOUS ITALIAN RECIPES!


HOW TO MAKE AN AUTHENTIC ITALIAN BRUSCHETTA!

In a small skillet, heat up extra virgin olive oil on medium - low heat. When ready, add in the garlic and allow to cook until aromatic and translucent (about 2-3 minutes). Remove from heat.

In a bowl, add your garlic and olive oil, chopped tomatoes, and basil. Sprinkle with salt and pepper to taste. Mix thoroughly and set aside.

italian brushcetta recipe_-4.jpg

An authentic Italian bruschetta with cheese

Cut the baguette into 1/2 inch slices and brush with olive oil on one side. Place them on a baking sheet, olive oil side up, and broil them in the oven until they start to brown (like toast). Once out of the oven dress the baguette with the bruschetta ingredients in the bowl.

Garnish with some more chopped fresh basil or parmesan cheese if you like and it is ready to serve!

italian brushcetta recipe_-2.jpg

An authentic Italian bruschetta with cheese

CHECK OUT THIS VIDEO ON HOW TO MAKE BRUSCHETTA


FOLLOW ME ON INSTAGRAM @ISTHATSOH


I hope you enjoyed this easy Italian bruschetta recipe. If you did please tell me about your experience in the comments below. If you want me to try something else I am always up for suggestions!!!!


PIN THIS POST

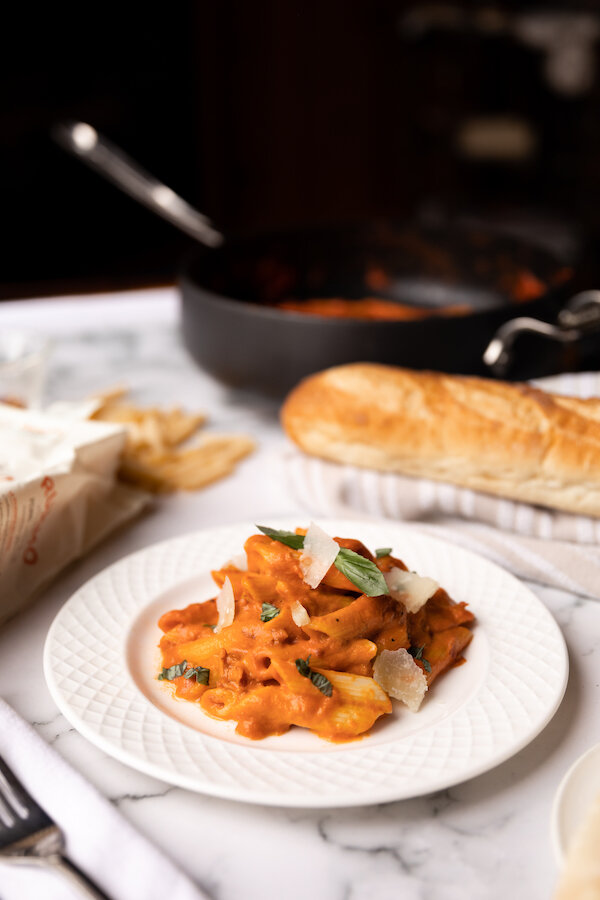
PENNE ALLA VODKA - AN AUTHENTIC VODKA SAUCE RECIPE

This authentic vodka sauce recipe is one of my all-time favorite pasta dishes and one of my most frequently asked for. People just love it, especially in the winter when the warmth and spiciness of this dish balance out the weather outside. Jam-packed full of carbs and comfort this dish definitely gives you the energy your body needs to stay warm all year round. All that aside though, it is a classic Italian vodka sauce recipe you can easily tweak to your desired spice level! First time cooking with vodka? Don’t worry, all alcohol in the vodka does evaporate during the cooking process while the vodka helps detach all the juicy pork flavor from the bottom of the skillet to ensure the most flavorful sauce you can possibly get! Enjoy!
INGREDIENTS:

SERVES 4-5
10 Min Prep, 50 min Cooking Time

1 Pack of Penne Pasta (Usually feeds 4-5)
1-1.5 650ml Bottles of Tomato Sauce (basic Pomodoro or tomato & basil)
1 TBSP of Butter (Salted
1 Cup of Vodka
200-300grams Of Pancetta or Black Forest Ham (chopped finely - almost minced)
1 TSP of Chili Flakes (optional)
1 Medium box of 35% Whipping cream
Parmesan Cheese (1 Cup Shaved and 1 Cup for garnish)
Salt and Pepper to Taste
Baguette (optional)


HERE ARE SOME OTHER PASTA RECIPES YOU MAY ALSO ENJOY!


DIRECTIONS:

Melt the butter down in a deep skillet on medium heat. Once the butter is melted and hot add in the chunks of pancetta or minced ham, tossing it in the butter and allowing it to cook until it becomes crispy.

Once the pancetta or ham is crispy add in your cup of vodka. It will create some more heat and steam but don't worry all the alcohol will burn out. This helps all the flavor from the ham that stuck to the bottom of the skillet to be transferred back into the flavors of the sauce later. Scrape the bottom of the skillet with a wooden spoon to help them along. Let this cook down until there is only a little bit of moisture left. Take your time.

Next, add in the tomato sauce (whether homemade or bought from the store you want the most basic Pomodoro kind). This will add in a lot of liquid to your sauce so make sure you boil this down as well so that a lot of the water evaporates and you are left with a nice thick sauce. About 20-30 minutes.

If you want your sauce to be a little bit spicy add in your chili peppers now and let them cook into your sauce. Sprinkle and stir. You can also add in some Salt and Pepper now to your taste.

Next, add in your cream. First, about a 1/2 cup stirring the whole time than a 1/4 cup until you get the perfect red/orange color. You can taste it as you go to see if you want more cream. To help thicken the sauce up shave about a cup of parmesan down and add it into the sauce, stir it in. Let the water cook out of this while you start cooking the penne pasta in a pot. Some people also like to use a hand blender and blend the sauce at this point so that the small bits of pancetta/ham become undetectable and the sauce is extra smooth in texture.

Boil water for the pasta adding about 1-1.5 TBSP of salt to the water once it boils. Add in pasta and let it cook till it is al dente.

Now you should be ready to serve the sauce with the pasta. You can either mix it together or spoon some sauce on top of a plate of pasta. Garnish with more parmesan cheese and a slice of baguette.


FOLLOW ME ON INSTAGRAM @ISTHATSOH


I hope you enjoy this authentic penne alla vodka sauce recipe as much as I do! Please let me know your thoughts and comments below I’d love to hear from you! Happy cooking :)


PIN THIS POST