KOREAN KIMCHI PANCAKES (KIMCHIJEON) WITH DIPPING SAUCE - A YUMMY KOREAN STREET FOOD RECIPE

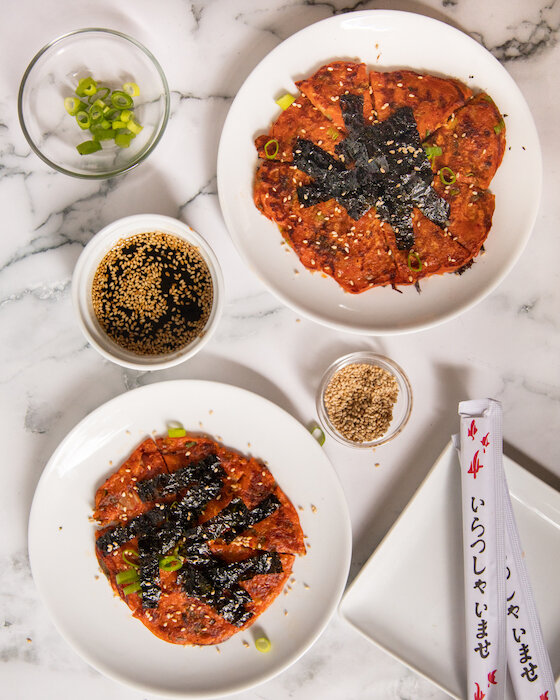
Korean kimchi pancakes (often referred to as kimchijeon in Korea) are a delicious street food dish often enjoyed as a snack or after a night out, that is so easy to make at home! To tell you the truth, it’s just like making traditional pancakes where you add everything together in a bowl and fry it up except Korean Kimchi Pancakes are way more savory than your traditional North American pancake thanks to the addition of green onions and some spicy kimchi! If you enjoy Korean food and want to learn how to make delicious kimchi pancakes at home, check out this foolproof recipe with dipping sauce below!

IS KIMCHI VEGAN?

It all depends on the brand you buy! Traditional kimchi does contain fish sauce but depending on the brand you buy you can also find it without, so make sure to check the ingredient list. Additionally, Kimchi is not difficult to make, so if you want to try making it at home you can just leave out any animal products to make it vegan.

In my opinion, the best kimchi brand is Myungga Mat Kimchi however, I did recently do a Whole 30 cleanse and found a plant-based kimchi brand called LIVE at Ambrosia that I very much enjoy. It doesn’t have any added fish sauce and uses apple for sweetness instead of sugar. *NOTE: This recipe is not whole 30!

WHAT ARE SOME KIMCHI BENEFITS?

Kimchi is so good for your gut! It aids with digestion and is packed full of great probiotics. It is also said to help with inflammation, aid with weight loss, strengthen your immune system and support heart health!

DOES KIMCHI GO BAD

Yes! I recently had to throw out the remnants of a jar of kimchi that was a month or so old. You could tell by the way it smelled that it had ‘over fermented’. It smelled like a bottle of wine that has been sitting out for a few days. If you open your jar and it smells kind of sour with a pungent alcohol smell - it’s most likely gone bad.

* Please Note - Some links in this post may be affiliate links *

INGREDIENTS FOR KIMCHI PANCAKES:

Makes 2-3 Pancakes

3-4 Green Onions (chopped diagonally) - set a little aside for garnish
1/2 a CUP of Kimchi (chopped) *Use a plant-based Kimchi if you want this recipe to be vegan!
1/2 a CUP of Korean Pancake Mix
2-3 TBSP of Kimchi Juice and/or Korean Chili Paste
About 1 Cup of Water (to be added a 1/4 CUP at a time)
1-2 TBSP of Vegetable Oil

- Garnish -
1 TBSP of Seasame Seeds (roasted)
Dried Seaweed (cut into 2-inch strips)

- Dipping Sauce -

2 TBSP of Soya Sauce
1 TBSP of Water
2 TSP of Rice Vinegar
1 TSP of Sugar
2 TSP of Sesame Oil
1 TSP of Sesame Seeds


CHECK OUT THESE OTHER ASIAN INSPIRED RECIPES


HOW TO MAKE KIMCHI PANCAKES:

In a small bowl, add all your dipping sauce ingredients, and using a fork mix it together before setting it aside.

In a bowl add in your green onions (making sure to put some to the side for a garnish later), Korean pancake mix, kimchi, and kimchi juice/ Korean chili paste in a bowl. Stir in a 1/4 cup of water at a time until a batter starts to form. You want it to be the same consistency as a regular pancake mix so keep adding water until you achieve this desired consistency.

Heat up 1-2 TBSP of vegetable oil in a pan and pour in your Kimchi pancake batter when hot. Allow the Kimchi pancake to cook on one side for 2-3 minutes before flipping - same as you would a regular pancake.

When ready, remove from heat, garnish with sesame seeds, more green onion, and dried seaweed strips.

Serve with dipping sauce.


FOLLOW ME ON INSTAGRAM @ISTHATSOH


I hope you enjoyed this easy vegan kimchi pancake recipe with dipping sauce as much as I do. If you have any comments about how to make kimchi pancakes, please leave them below and I'll be happy to answer them as soon as I can! Happy cooking!!!

PIN THIS POST

PENNE ALLA VODKA - AN AUTHENTIC VODKA SAUCE RECIPE

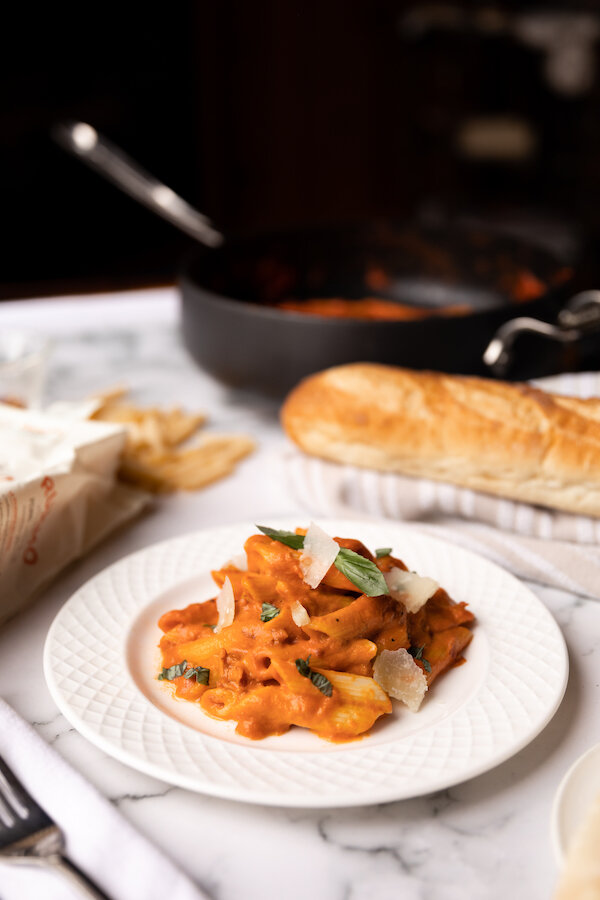
This authentic vodka sauce recipe is one of my all-time favorite pasta dishes and one of my most frequently asked for. People just love it, especially in the winter when the warmth and spiciness of this dish balance out the weather outside. Jam-packed full of carbs and comfort this dish definitely gives you the energy your body needs to stay warm all year round. All that aside though, it is a classic Italian vodka sauce recipe you can easily tweak to your desired spice level! First time cooking with vodka? Don’t worry, all alcohol in the vodka does evaporate during the cooking process while the vodka helps detach all the juicy pork flavor from the bottom of the skillet to ensure the most flavorful sauce you can possibly get! Enjoy!

INGREDIENTS:

SERVES 4-5
10 Min Prep, 50 min Cooking Time

1 Pack of Penne Pasta (Usually feeds 4-5)
1-1.5 650ml Bottles of Tomato Sauce (basic Pomodoro or tomato & basil)
1 TBSP of Butter (Salted
1 Cup of Vodka
200-300grams Of Pancetta or Black Forest Ham (chopped finely - almost minced)
1 TSP of Chili Flakes (optional)
1 Medium box of 35% Whipping cream
Parmesan Cheese (1 Cup Shaved and 1 Cup for garnish)
Salt and Pepper to Taste
Baguette (optional)


HERE ARE SOME OTHER PASTA RECIPES YOU MAY ALSO ENJOY!


DIRECTIONS:

Melt the butter down in a deep skillet on medium heat. Once the butter is melted and hot add in the chunks of pancetta or minced ham, tossing it in the butter and allowing it to cook until it becomes crispy.

Once the pancetta or ham is crispy add in your cup of vodka. It will create some more heat and steam but don't worry all the alcohol will burn out. This helps all the flavor from the ham that stuck to the bottom of the skillet to be transferred back into the flavors of the sauce later. Scrape the bottom of the skillet with a wooden spoon to help them along. Let this cook down until there is only a little bit of moisture left. Take your time.

Next, add in the tomato sauce (whether homemade or bought from the store you want the most basic Pomodoro kind). This will add in a lot of liquid to your sauce so make sure you boil this down as well so that a lot of the water evaporates and you are left with a nice thick sauce. About 20-30 minutes.

If you want your sauce to be a little bit spicy add in your chili peppers now and let them cook into your sauce. Sprinkle and stir. You can also add in some Salt and Pepper now to your taste.

Next, add in your cream. First, about a 1/2 cup stirring the whole time than a 1/4 cup until you get the perfect red/orange color. You can taste it as you go to see if you want more cream. To help thicken the sauce up shave about a cup of parmesan down and add it into the sauce, stir it in. Let the water cook out of this while you start cooking the penne pasta in a pot. Some people also like to use a hand blender and blend the sauce at this point so that the small bits of pancetta/ham become undetectable and the sauce is extra smooth in texture.

Boil water for the pasta adding about 1-1.5 TBSP of salt to the water once it boils. Add in pasta and let it cook till it is al dente.

Now you should be ready to serve the sauce with the pasta. You can either mix it together or spoon some sauce on top of a plate of pasta. Garnish with more parmesan cheese and a slice of baguette.


FOLLOW ME ON INSTAGRAM @ISTHATSOH


I hope you enjoy this authentic penne alla vodka sauce recipe as much as I do! Please let me know your thoughts and comments below I’d love to hear from you! Happy cooking :)


PIN THIS POST

SPAGHETTI AGLIO E OLIO - A SIMPLE ITALIAN CLASSIC

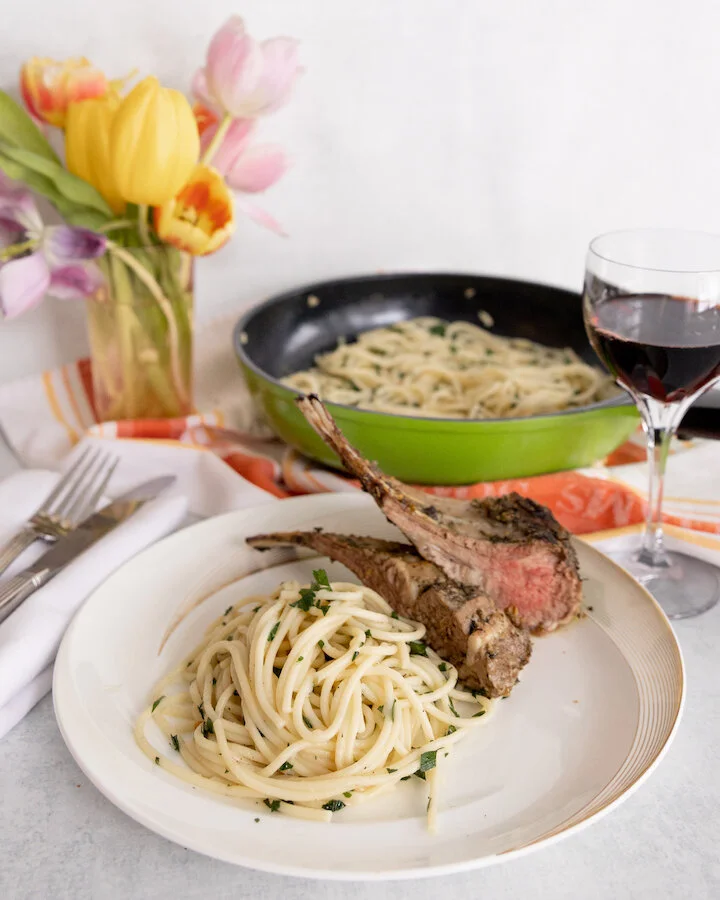
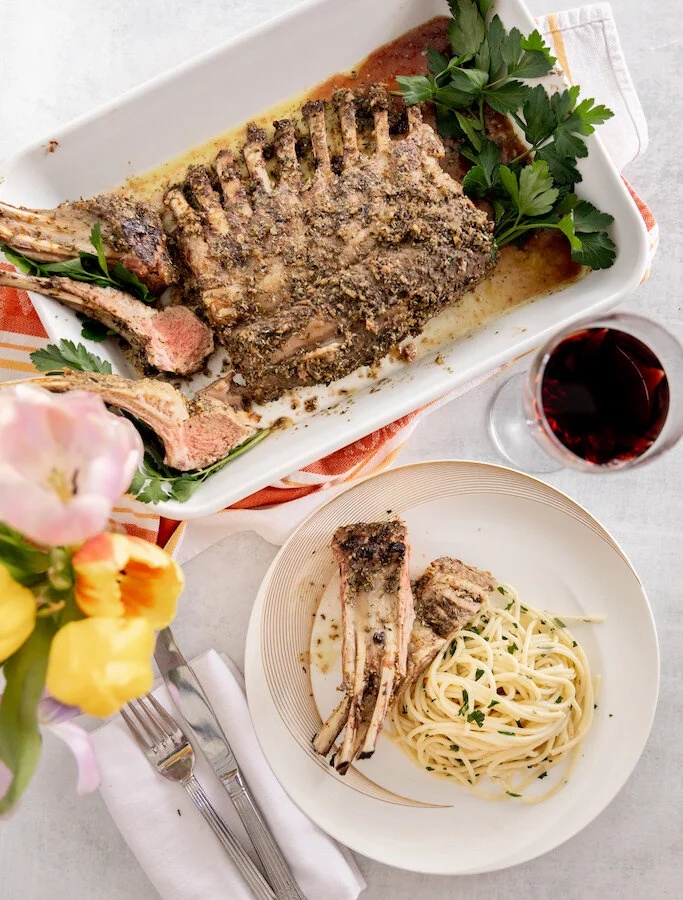
Leave it to the Italians to create an incredibly flavourful pasta dish using only a few inexpensive ingredients! This absolute classic is one of my all-time favs and takes less than 10 minutes to whip up. In my household, we like to serve it alongside meat dishes like my mom’s coveted rack of lamb recipe or occasionally by itself with a few added shrimp on top! If you are looking for a quick, student-friendly pasta dish to whip up or something to add to a protein as a side, you can’t go wrong with a simple yet flavorful dish like this one!

* Please Note - Some links in this post may be affiliate links *

INGREDIENTS:

Serves 4 People

2 TBSP of Olive Oil
4 Cloves of Garlic - Minced
1 Pack of Spaghetti - cooked al dente
Italian Parsley - Roughly Chopped
Parmesan Cheese - Grated
Salt and Pepper

You can also add chilli flakes to make it a little spicy or a few shrimp!


CHECK OUT THESE OTHER DELICIOUS ITALIAN RECIPES


DIRECTIONS:

Bring water to a boil on the stove, salt, and cook your pasta.

When pasta is almost ready, heat up your olive oil on medium heat in a large skillet. When hot, add in your garlic and cook for 2-3 minutes. If you like a little spice, feel free to add in some chili peppers too.

Once garlic is fragrant, add in your cooked pasta, sprinkle on some grated parmesan, and some roughly chopped parsley.

Salt and pepper to taste and serve with more parmesan on the side.

Enjoy!


FOLLOW ME ON INSTAGRAM @ISTHATSOH


I hope you enjoyed this recipe as much as I do. If you have any comments please leave them below and I'll be happy to answer them as soon as I can! Happy cooking!!!


PIN THIS POST

MY GRANDMOTHERS EASY OLD FASHIONED APPLE CRISP RECIPE! THE PERFECT THANKSGIVING DESSERT!

Apple season is upon up which means I’m getting request left, right, and center from my family to make some of our household fall favorites including my grandmothers old fashioned apple crisp recipe! It’s the perfect and easiest dessert to make if you are having a small gathering and is always a crowd please, not to mention its super delicious! If you’re looking for a dessert that gives you all the fall feels and is sure to be a hit, this is it!

Enjoy!

INGREDIENTS:

Serves 10-12 People

Crumble Topping
1.5 Cups of Flour
2 Cups of Old Fashion Oats
1.5 Cups of Brown Sugar
1/2 TSP of Salt
1.5 TSP of Cinnamon
1 Cups of Cold Butter - grated

Apple Filling
12 Granny Smith Apples - Peeled and cut into pieces
1.5 TSP of Cinnamon
1/2 TSP of Salt
1/2 a Cup of Granulated Sugar
1 TSP of Vanilla

Butter - to coat your baking tray or casserole dish ( I used a 13x9 Inch casserole dish)

DIRECTIONS:

Preheat oven at 375 degrees.

Butter your baking tray or casserole dish with butter.

In a large bowl, mix your crumble topping ingredients together and using your hands, mix ingredients together until butter feels evenly spread throughout and the flaky dry flour texture is gone. About 5-6 minutes. When done, place in fridge to keep cold.

In another large bowl, add in your apple filling ingredients and mix using clean hands. Apple slices should be evenly coated in all ingredients.

When ready, dump apple filling into buttered casserole dish, cover with crumble and place in oven to bake for 45-50 minutes or until you start to see the top turn golden brown and the juice from the apple filling to bubble up the sides.

When ready, remove and allow to cool for 5 minutes before serving either alone or with a slice of vanilla ice cream.

Enjoy!


FOLLOW ME ON INSTAGRAM @ISTHATSOH


I hope you enjoyed this recipe as much as I do. If you have any comments please leave them below and I'll be happy to answer them as soon as I can! Happy cooking!!!


PIN THIS POST

MY FAIL PROOF BANANA BREAD!

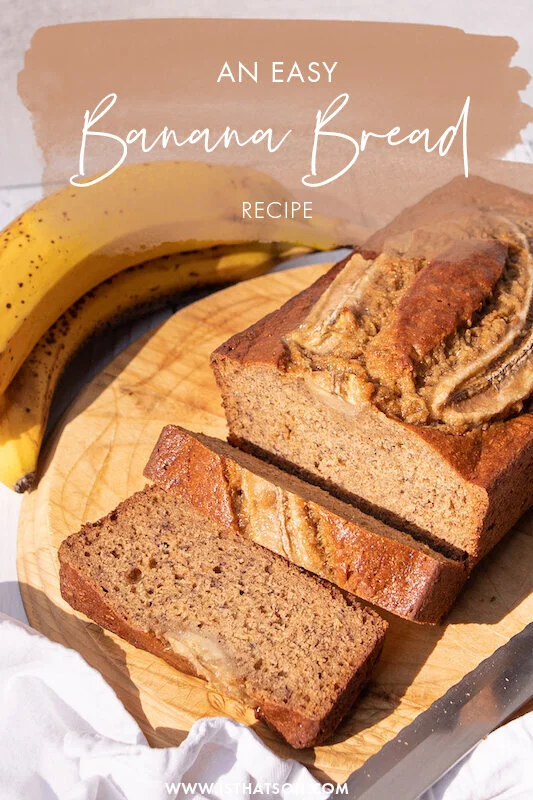
If you ever have overripe bananas, don’t throw them away! One of my favorite ways to use them is to make this glorious easy moist banana bread recipe. Even if I am on a diet that doesn't mean everyone else I know is and who wouldn't mind receiving a nice loaf of banana bread as a gift ;) Get creative... you can even add some walnuts or chocolate chips to this easy recipe if you want.

Enjoy!

INGREDIENTS:

1/3 Cup of Unsalted Butter (melted)
3/4 Cup of Brown Sugar
3 Bananas - (2 mashed and one for garnish)
1 TSP of Vanilla Extract
2 Egg (whisked)
2 Cups of All-Purpose Flour
1/4 TSP of Salt
1 TSP Baking Soda
1 TSP of Cinnamon


CHECK OUT THESE OTHER BREAD RECIPES!


DIRECTIONS:

Preheat over to 350 degrees.

Get a baking tray or loaf baking tray and butter all sides.

In a large bowl add in your butter and sugar. Blend with a hand blender until they come together.

Next, add in your banana and vanilla extract. Continue to blend.

Lastly, add in your egg and blend only until incorporated (don’t over blend).

In a second bowl add in your flour, salt, baking soda and cinnamon - whisk together until evenly mixed.

Slowly start to add in your dry ingredients to your wet ingredient bowl and mix on low with your hand blender. You may have to use a spatula to scrape the dry ingredient that build up on the side.

Once blended, scoop out your banana bread batter and place in your baking tray.

Garnish the banana bread batter with the 3rd banana before placing the tray in the oven to bake for about 1 hour (check at 50 minutes). Take a toothpick and stick it in the middle of the bread if when you pull it out nothing is on the toothpick it is ready.

Set aside to cool before cutting and serving.


FOLLOW ME ON INSTAGRAM @ISTHATSOH


I hope you enjoyed this classic banana bread recipe as much as I do. If you have any comments please leave them below and I'll be happy to answer them as soon as I can! Happy baking!!!


PIN THIS POST