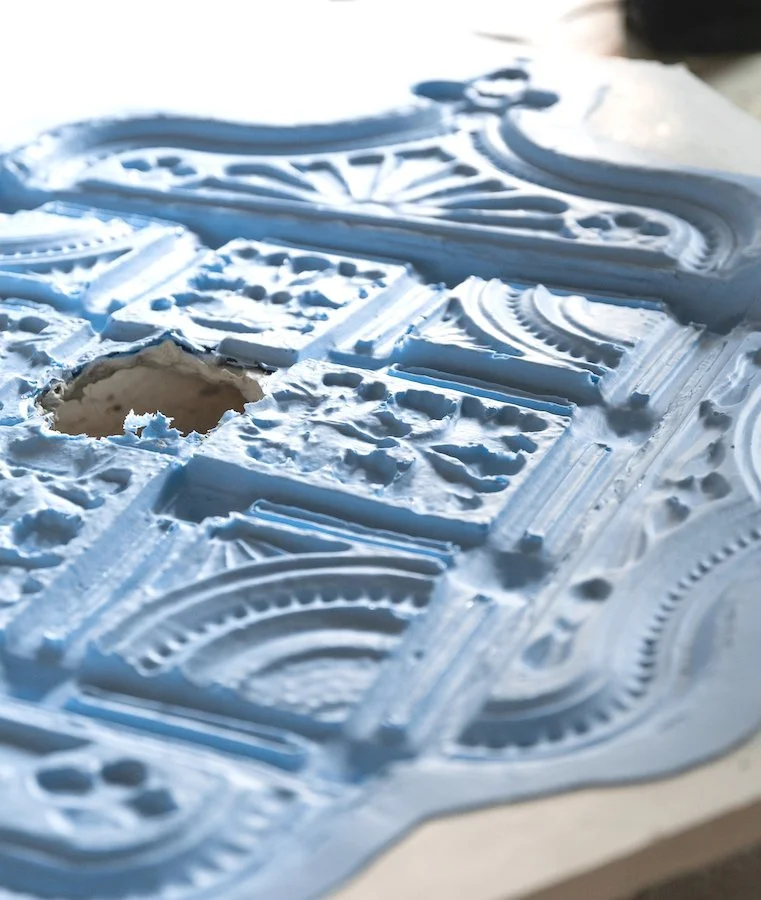
The silicone mold made by Parsiena Design of my Victorian ceiling medallion
RENOVATING MY TORONTO VICTORIAN HOME - EPISODE 5!
For me, 2022 was a year of firsts. First time doing a home renovation. First time gutting a house. First time demolishing a wall, removing flooring, widening a staircase, doing structural work of any kind, and yet here we are!
A year ago, all the work we have done would have been outside my scope of knowledge. It’s amazing what you can accomplish with a good team of people by your side and I feel so blessed to have worked with such great crews on this project. I am so proud of all that we have accomplished together and without them I would have never gotten this far. So before I kick off this episode, I just want to acknowledge everyone who has supported me and this home renovation series thus far. Without you, it would never have worked and we would never have gotten this far. Thank you for one of the best years of my life. ♡
If this is your first time tuning into my new home renovation series and want to start from the beginning, check out Episode 1: Sledgehammer Therapy and keep up with upcoming episodes by subscribing to my YouTube channel!
Since the last episode, lots has happened at the house! At the end of summer, Adam and I had our roof redone! With five layers of shingles, including the original cedar shingles, the front half of our roof was in rough shape.

Our roof was in serious rough shape before we had it redone!
ROOF REPAIRS & MAINTENANCE
It’s unclear when the previous owners did something to the roof but judging from the state of it, it would only be a matter of time before it would become an issue. The peak was deteriorating and you could see a depression where the old chimney stack used to be. Considering how much effort and money we had already put into this project, we weren’t willing to take the risk of going through another winter without making sure it was sealed tight.
The whole process of removing shingles, repairing any rotten areas, waterproofing, and laying down new shingles took two days. Adding back the eves and aluminum capping took an additional few days but for the most part it was fairly painless.
The worst thing about getting your roof redone is all the debris. I had to make sure it all landed in my front lawn and didn’t damage my neighbours property. At the end of the job I made sure the crew took extra time to clean their properties and they did do a pretty good job. It’s been really nice getting to know my neighbours over the past year and a half (can you believe it’s been that long since we bought our first home) and it’s nice to see that everyone really looks out for one another. One of my neighbours has a snowblower and always does the sidewalks for us. Another always gives us grapes from their garden. Having great neighbours is gift and I lucked out with a bunch of beauties.


One unfortunate outcome that did occur from my roof being redone, was that our smoke bush took a major hit. Despite having cut it back, all the debris that was coming off the roof was falling on the smoke bush causing it to lose entire branches. I had neglected it over the summer and by September it was out of control. I noticed it didn’t flower very well this summer and my mom’s friend who is a horticulturalist advised me to prune it back. I guess the roofers kind of did it for me but I love that smoke bush and really hope it makes an awesome come back next summer.
FOLLOW ME ON INSTAGRAM @ISTHATSOH


STRUCTURAL ENGINEER
Soon after the roof was finished we heard back from our residential structural engineer, K.H. Davis Engineering Consultants LTD who provided us with plans for the second floor.
When I first realized we would have to do structural work on the 2nd floor, my heart dropped. I was so worried about how long it would take and how much it would delay our plans. Turns out, when compared to the work we had already done it wasn’t going to be as complicated or extensive, which came as a huge relief. The new plans required us to install 4 new LVL beams (laminated veneer lumber) which we were confident we could do ourselves, and took us just over a week to complete.

Gearing up to install our fist LVL beam on the 2nd floor. Supports are up and the boys are already removing the top plate.
Most of the work was similar to what we had already done, except the first beam we installed actually had to be built in the air because it was so heavy! We would never have been able to lift it into place, and so we had to lift each piece it into position and connect them all once elevated. After that first massive LVL beam, things got easier. We built the beams on the floor and alleviated some of the lifts with a ‘ladder method’ I once saw our amazing residential structural contractor Raouf use in the basement with a steal beam.
Shout out to Raouf at Dynamic Design and Construction, we miss you and the crew!! We would have never gotten this far without you!!!


The last two beams were pretty simple to install and, much like we had done with the staircase header and floor joists, we connected all the joists that run perpendicular to the beam using joist hangers.
Once all the structural work was complete, Adam and I felt very accomplished. It’s crazy to think a year ago we had no structural or renovation experience whatsoever and here we are building our house from the inside out!
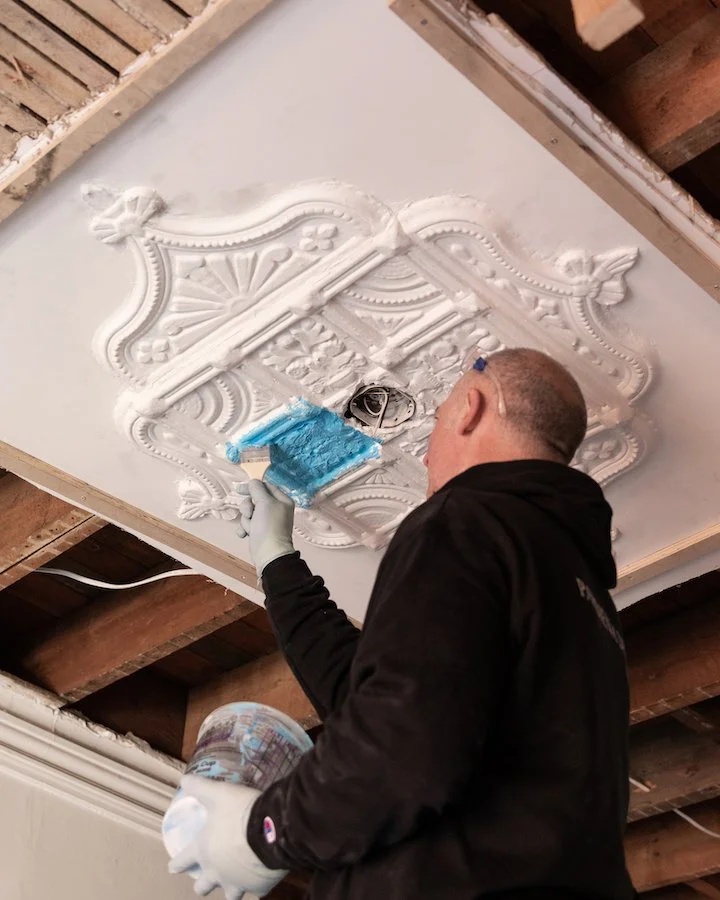
Parsiena Design in the process of making a silicone mold of my ceiling medallion!
MAKING A SILICONE MOLD OF MY CEILING MEDALLION
I know by now you must be thinking ‘Jeeze, this girl and her ceiling medallion’ (I know Adam is), but the original moldings and character of the house was a huge part of what made me fall in love with it in the first place. When Adam told me we would have to level the ceiling in the living room I protested, worried about damaging the almost 150 year old plaster ceiling medallion. I wouldn’t let them touch it without me first finding a solution to either remove it or have it replicated. Enter Parsiena Designs.
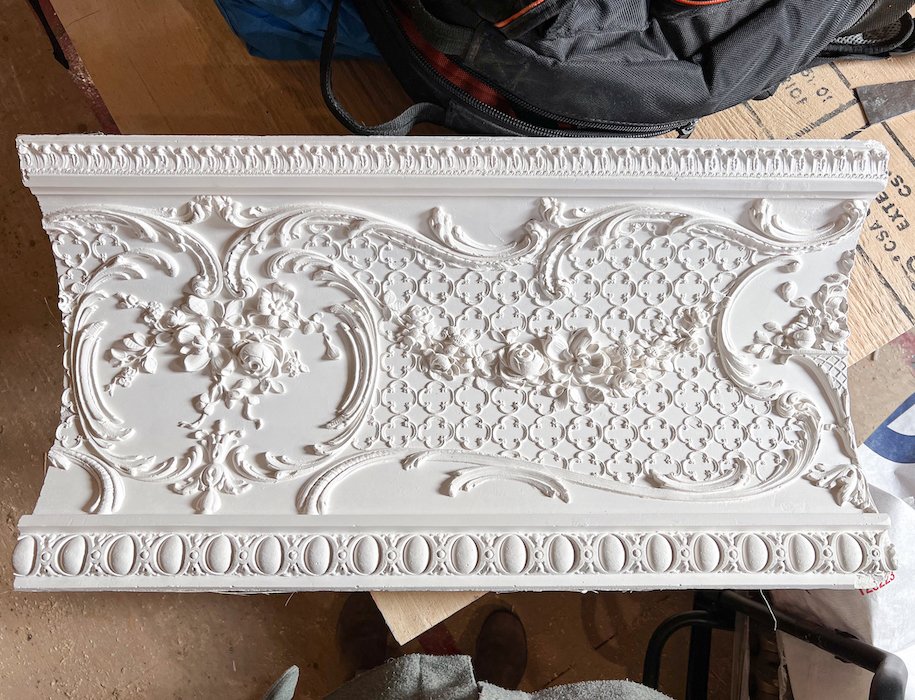
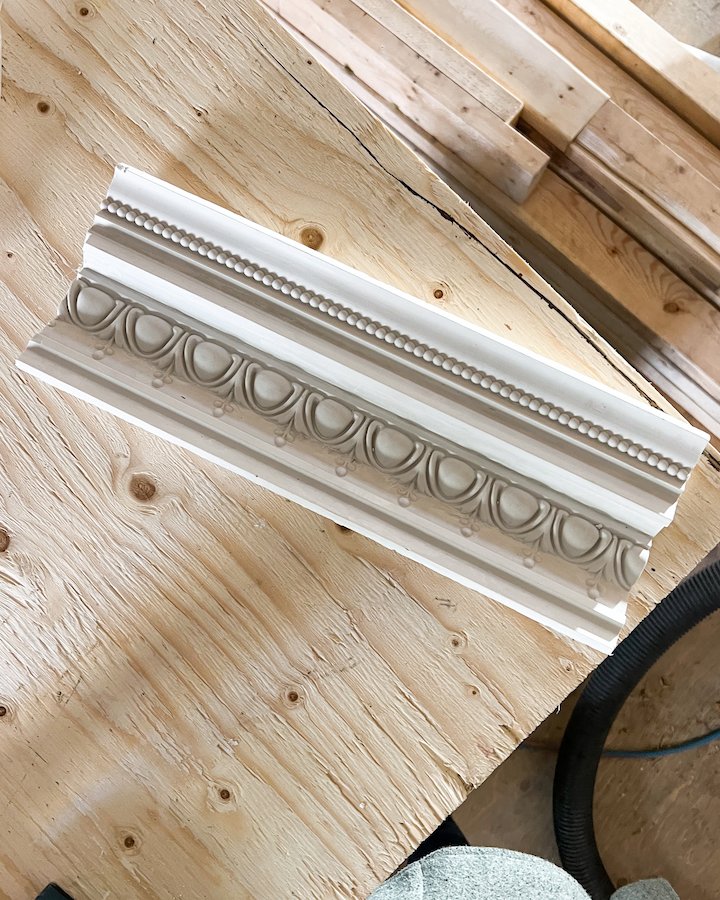
Parsiena Designs is one of Canada’s leading manufacturers of stone mantels and architectural elements. I first discovered Parsiena on Instagram and really wanted to work with them. They have a large catalogue full of beautiful medallions, friezes, trims, casing, panels and plaster crown mouldings, and I ended up picking one of their larger, more intricate crown molding designs for my kitchen! For the rest of the main floor, I chose another one of their more simple crown moulding designs, an egg and dart motif which echos the original plaster work found throughout the house.
I also learned that they can do plaster replication. I was so scared of what was going to happen to my ceiling medallion when we would inevitably have to take it down, and I thought a mold of it would be great ‘insurance’. In addition to the ceiling medallion, I also got the door crowns reproduced.
I am so excited to be partnering with Parsiena Designs on this project and can’t wait to see what the house looks like with my new crown mouldings! I think it’s going to really elevate the main floor and allow me to stay true to the original Victorian aesthetic while also providing the flexibility to modernize it.
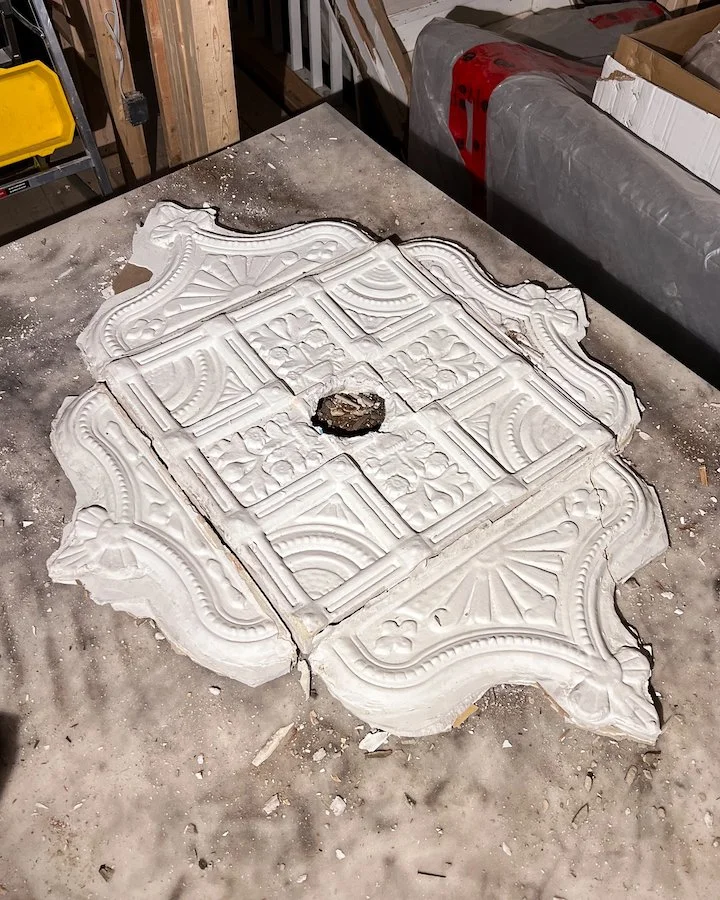
After the mold was made, we miraculously removed the ceiling medallion. I was so nervous the entire time despite having a mold, but was still determined to do whatever I could to save it (the original is always better after all). Two hours and a miracle later we managed to get it down safely using a drywall lift, a foam pad (used to absorb some of the vibrations), a crowbar, and lots of patience. We were all surprised to learn in the process that it was actually 5 separate pieces instead of just one large piece and although one of the side pieces broke, I knew it was easily reparable and was so thrilled with the outcome.

ENJOYING THIS CONTENT? CHECK OUT SOME OF MY OTHER EPISODES AND DIY’S!


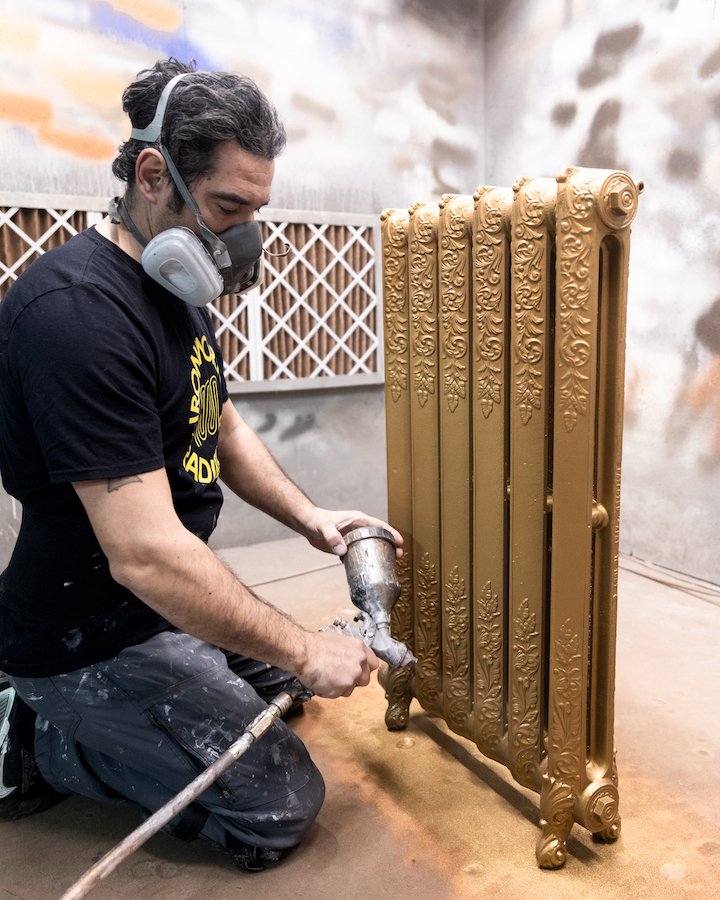
My newly refurbished, cast iron Victorian radiator being painted at Ironworks Radiator Inc.
PAINTING MY VICTORIAN CAST IRON RADIATORS
Remember this beauty? I first spotted her last summer while treasure hunting in the Ironworks stockyard.
Well in November I received a call from Jennifer at Ironworks Radiator Inc who told me that the ornate Victorian radiators I had purchased from her for refurbishment had been sandblasted and primed, and were ready for painting. It took me weeks to pick colours, but I finally landed on brass for the dining room and an antique bronze for the front foyer. I think both colours will go well with our incoming natural oak herringbone floors and french navy blue cabinetry as well as the brass hardware in the kitchen and the modern Castrad Radiators in bronze gold that arrived at the end of the summer.
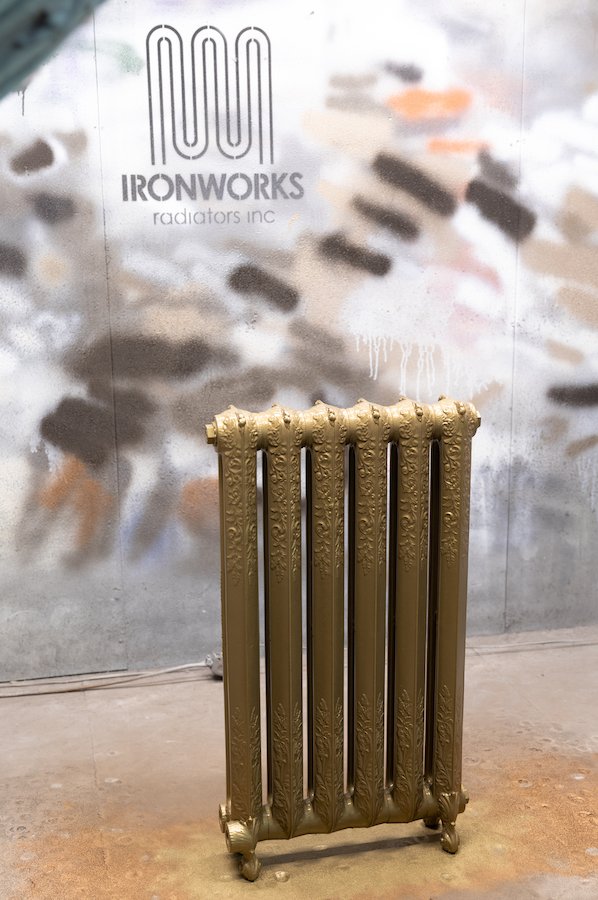
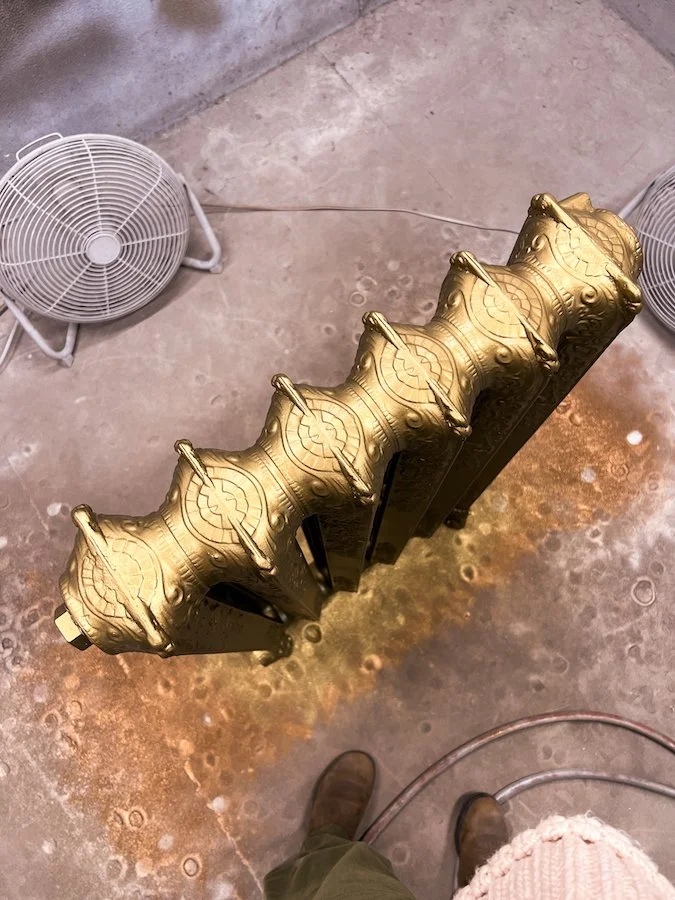
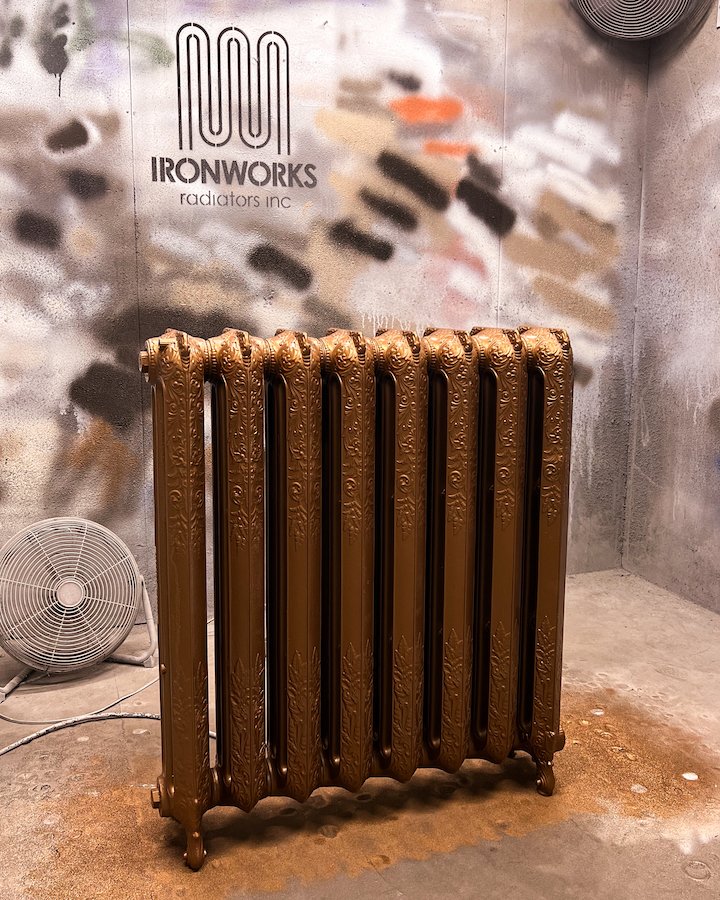
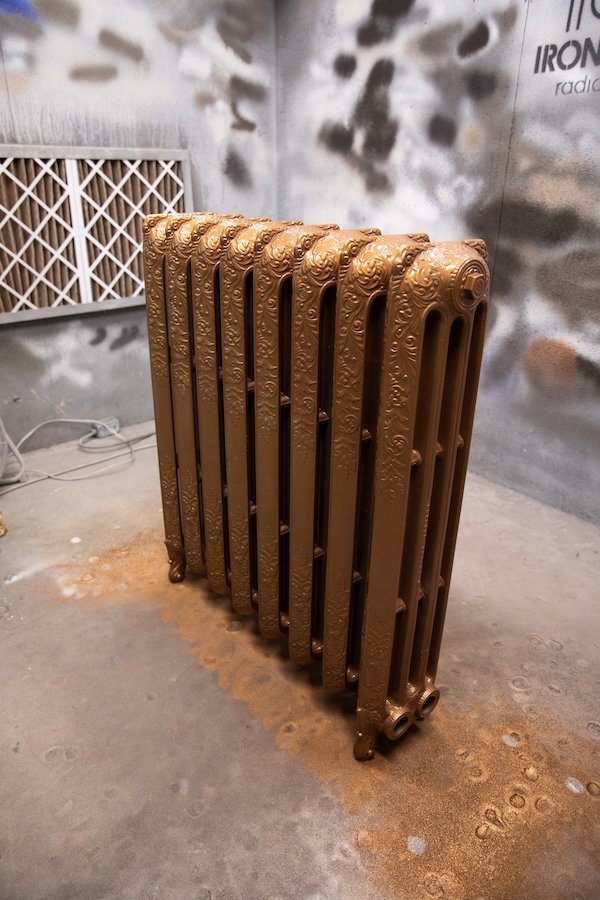

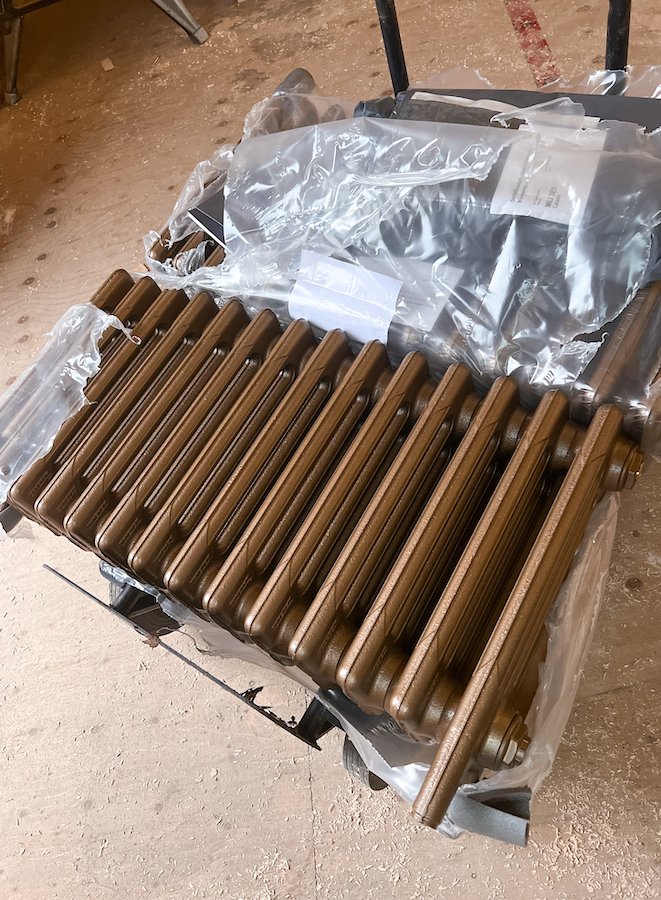
I really love the look of ornate cast iron Victorian radiators. To me they are like jewellery, but for your home. Not only are they eye-catching but depending on the colours you pick, they can totally add a pop of glamour to a room. I just loved how these turned out and I can’t wait to have them installed in my home! Which colour is your favourite? Feel free to leave your answer in the comments below!

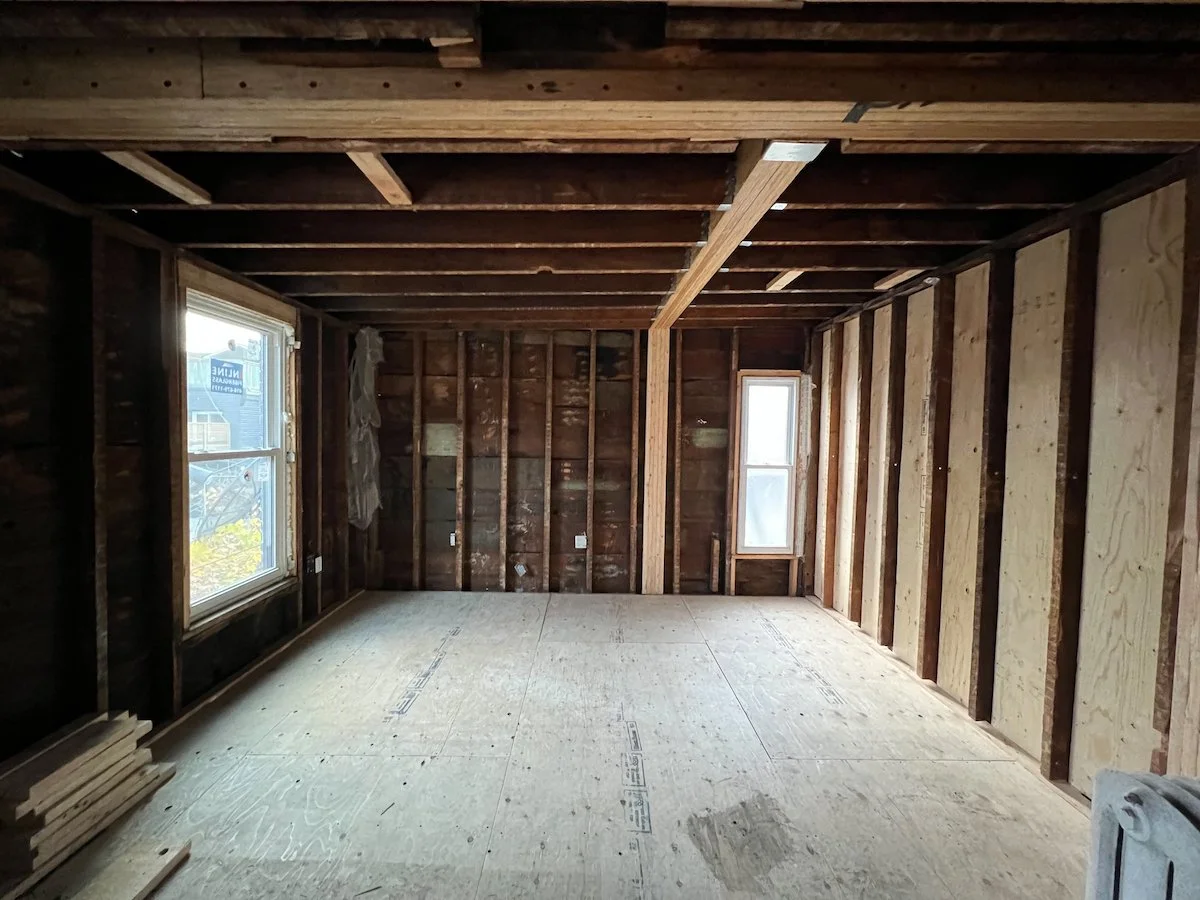
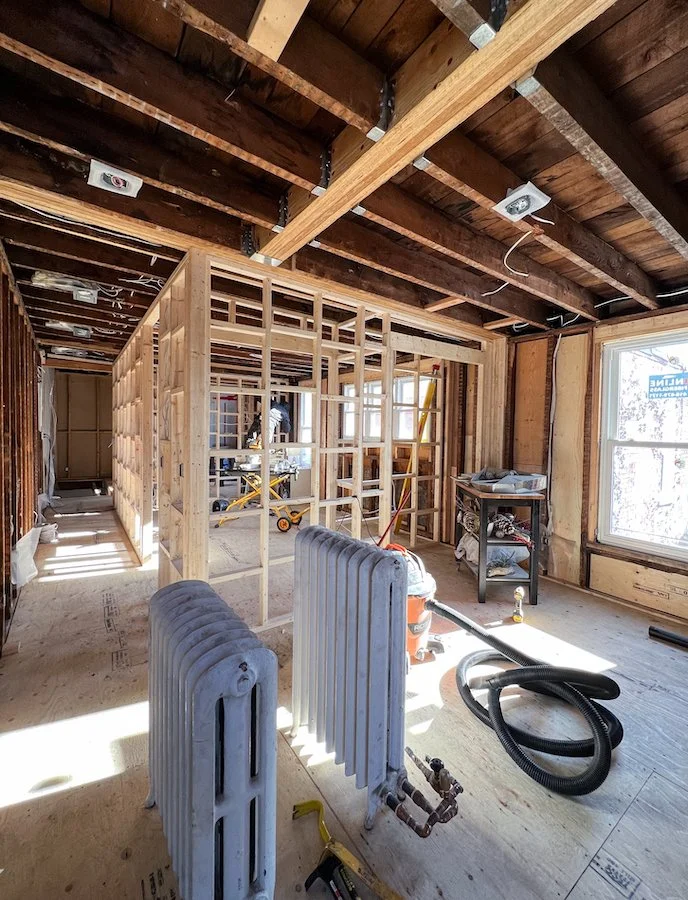
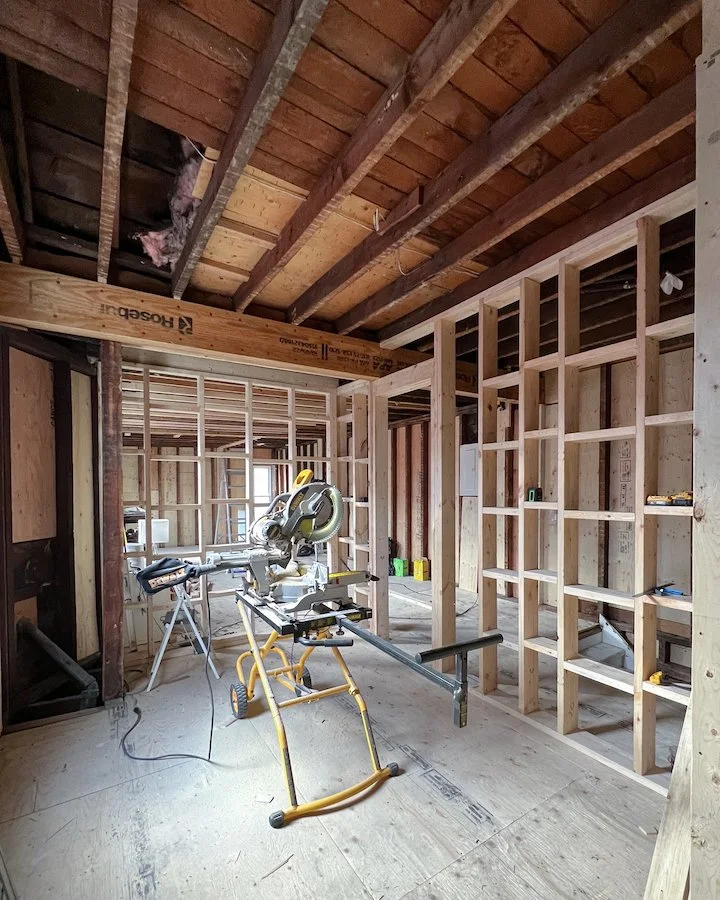
Framing the 2nd floor - pictured here 2nd and 3rd bedroom
FRAMING THE SECOND FLOOR
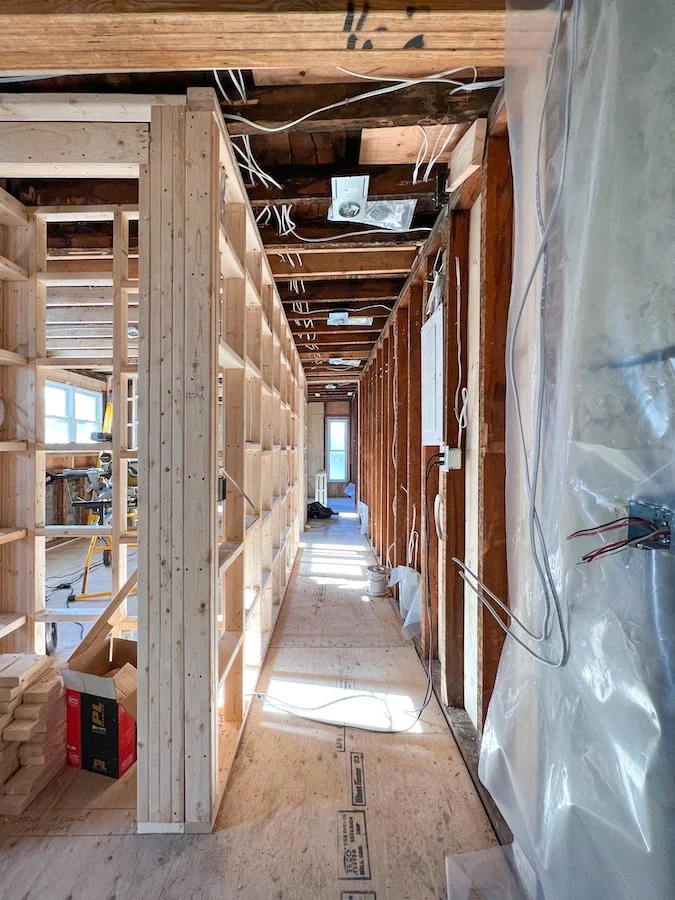
Once all the structural work was done on the second floor we could immediately start framing. Besides building the bulk heads on the main floor and one wall, Adam and I didn’t really have a lot of framing experience. Thankfully, Adam’s dad was able to lead the charge and show us how. Within a week we had the new second floor layout entirely framed out. Instead of having only one bedroom on the second floor we now had three and we were able to move the bathroom across the house so it could eventually act as a shared master ensuite.
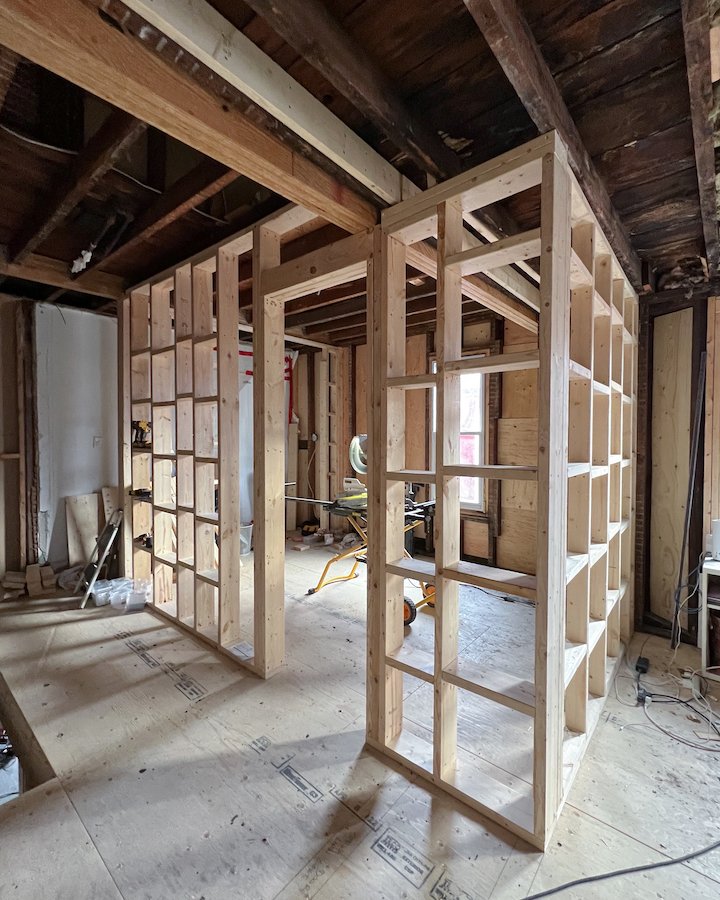
Overall, the framing was easy and uneventful except for the fact that the new layout I had originally planned for was a little tighter than expected in reality. After mapping out the space, Adam and I realized that the closet necessary to house the laundry machines would have eaten up to much space into bedroom 2 causing it to be significantly smaller than bedroom 3. Adam was also worried about future repairs and having to move them around in such a small space so we both agreed that the easiest and best solution was just to have a laundry area down stairs in the basement for now and keep the bedrooms fairly similar in size. The small space we had left over will now become a ‘hidden’ linen closet - a project I’m excited to work on when we we move onto finishing.
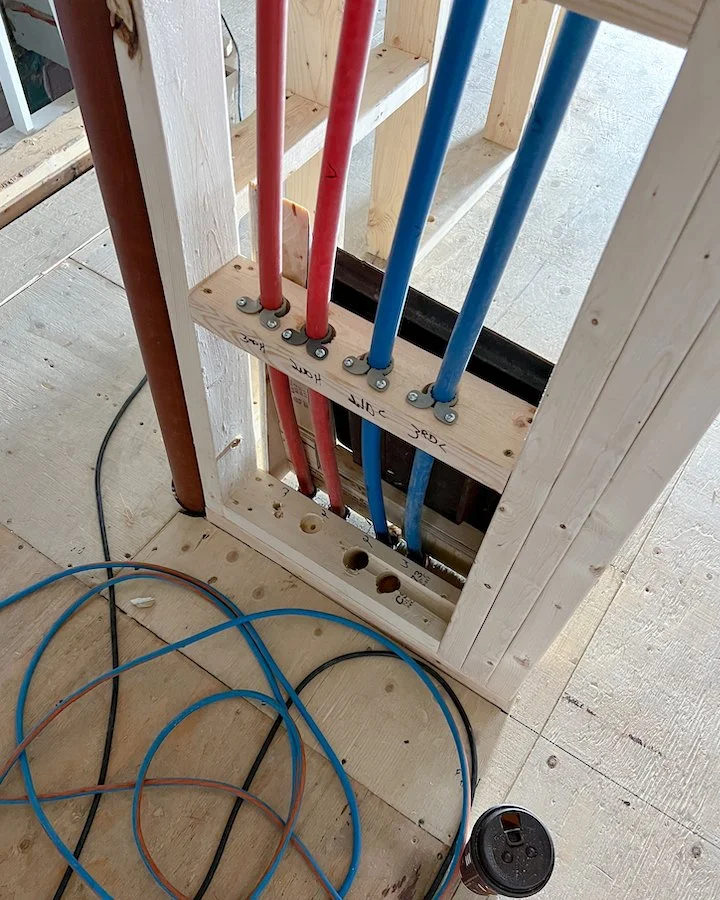
Once all the framing was done we could finally start having all the other trades come through to install plumbing, electrical and heating. The last two weeks in November were crazy! Not only were the other trades able to get all the ‘guts’ in the house done, but we passed inspection and had our new window and back Crittall door installed!


INSTILLATION OF OUR NEW WINDOWS & CRITTALL DOOR
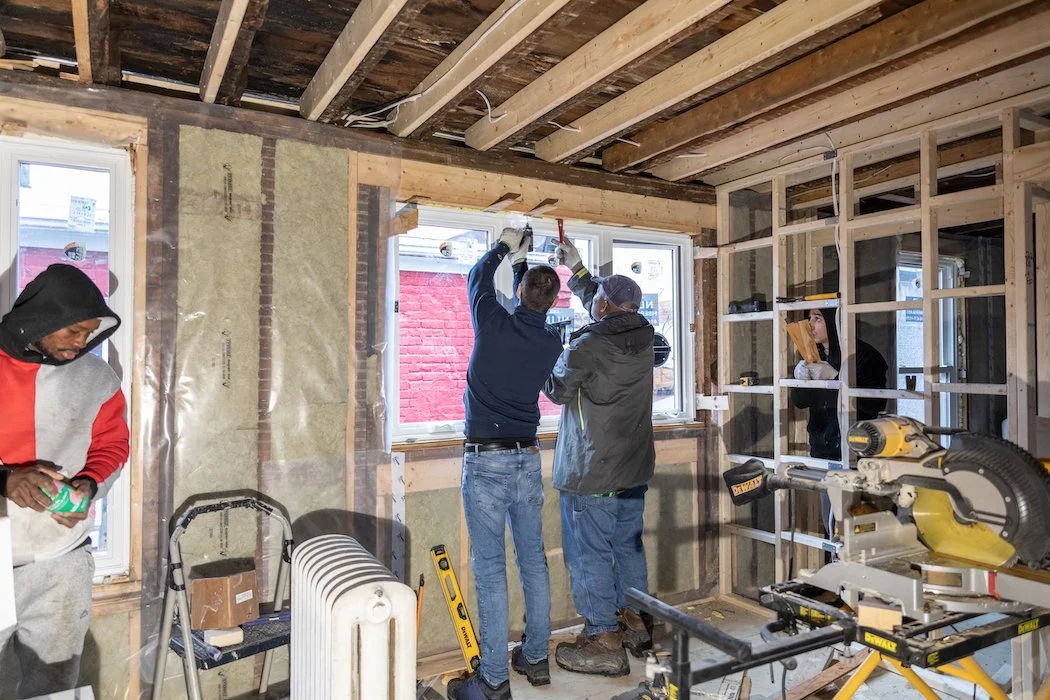
New windows have arrived (early too) and are being installed along with my new Crittall door .
The long awaited arrival of our back door finally happened! Adam and I originally placed our custom order for a new back door in the spring, expecting it to arrive mid summer. Here we were, well into fall, the weather is getting cold and I was super cheesed about how long it was taking. When our new Crittall door finally showed up I was still kind of sour, but what I didn’t know was that the manufacturer had sped up our window order which we had only placed a month prior (which wasn’t suppose to arrive until February) and the whole thing was getting installed in the same day. My whole mood did a 180°! All was forgiven and I was happy as a clam once again.
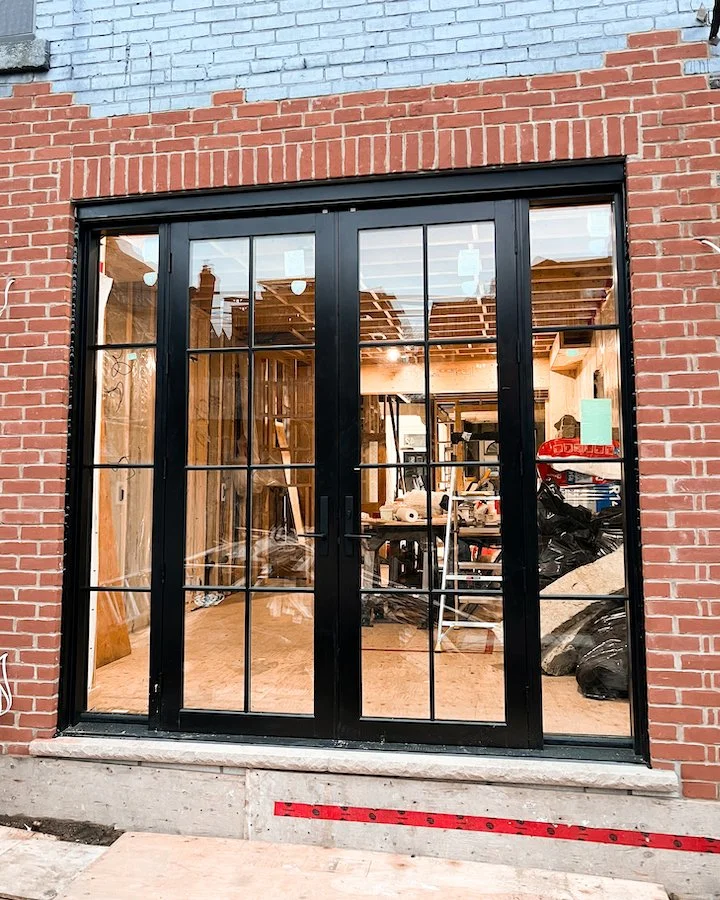

Plus our new Crittall door turned out amazing! Adam and I put a lot of effort into calculating the perfect glass size ratios for the opening and once it was installed, it was obvious all our hard work had paid off.
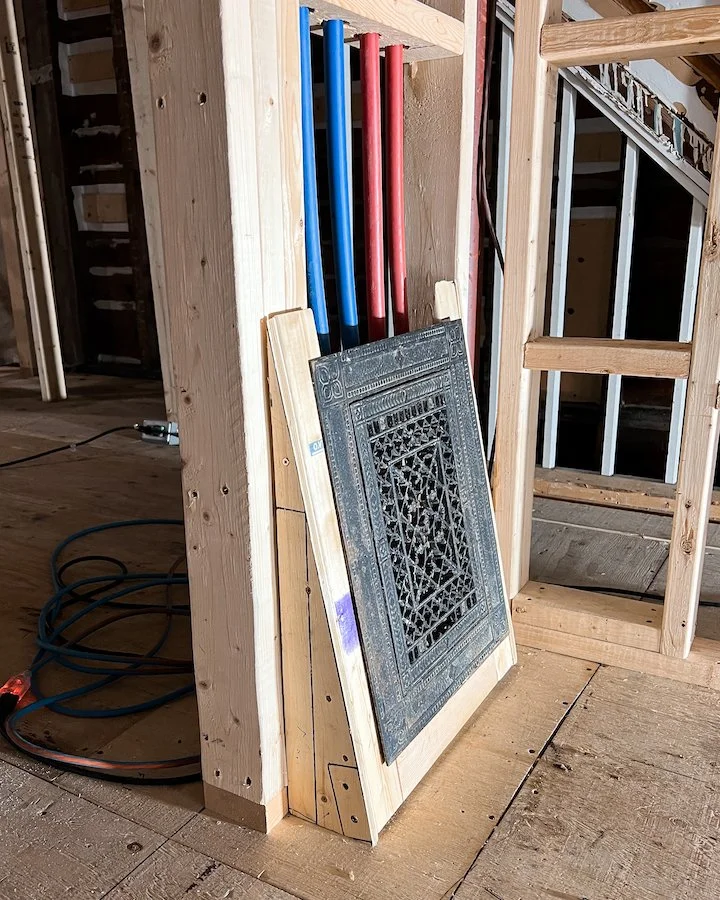
The ornate cast iron Victorian vent exchange I used to hide some water pipes with the help of some fancy carpentry work.
A LITTLE FANCY CARPENTRY
One small solo project I took on that I feel so proud about arose after our plumber Steve unknowingly hit a floor joist while running new water lines to the second floor. Having nowhere to go but around the joist and up, I had an opportunity to get creative with some fancy carpentry. Luckily, prior to the demo I made sure to save a few things that were part of the original house like this old vent exchange. I didn’t have any ideas as to what I would eventually use it for but clearly I’m a hoarder of old things and when this situation arose, I finally had the perfect reason to upcycle it. My background in design really came in handy for this little project and I was pretty proud of how it all turned out. All I had to do was build a box that could attach to the wall and be dry-walled in to look like it was meant to be there. The vent would fit inside it, blocking the lines while still making them accessible. Pretty cool, right?

Still smiling despite being incredibly itchy from all the Batt insulation work I’m doing
SPRAY FOAM INSULATION & MY DEAL WITH ADAM
In our relationship, Adam is definitely the spreadsheet guy. He’s the one who organizes our renovations expenses and makes sure we stay on budget. If I spring things on him like wanting new crown mouldings for the main floor, a compromise needs to be made. When planning for this home renovation we had set aside money for Batt insulation but was unaware that we would 1) have to use closed cell spray foam insulation on the 2nd floor ceiling because it is a flat roof (our inspector told us this) and 2) how costly replicating a ceiling medallion and putting in new crown mouldings would be.
So to help make room in the budget for these items, I told Adam I would do all the Batt insulation work myself. Boy did I have my work cut out for me. I had no idea how long it would take or how itchy Batt insulation makes my skin but I really wanted those crown mouldings so a deal was a deal. Although doing Batt insulation work is very easy, to do both floors took me more than a month because I could only do it in piece meal and only after the other trades were finished running electrical lines, PEX, and plumbing in those areas. By the end of it, I was so sick of dealing with insulation and being itchy all the time but I managed to get it all done and saved us a few thousand dollars.
When it comes to closed cell spray foam insulation you want to make sure you hire a trained professional with certified qualifications. Although a popular insulation method and one required by the Toronto Building Code for all non-vented roofs, if not done correctly you could experience toxic off-gassing. For this reason, we originally wanted to use Batt insulation everywhere but after our inspector informed us of the code, we had to compromise and do the 2nd floor ceiling. Thankfully, we were able to find a qualified company with great reviews to do it for us, but it did take some time and a lot of questioning. During our search though we did encounter a few shady companies, which is why I just wanted to take a moment to reiterate the importance of choosing a company wisely.


If you don’t want to wait for the next episode to catch a glimpse of what is happening behind the scenes you can always follow me on Instagram where I share up-to-date stories of my interior design and renovation progress!
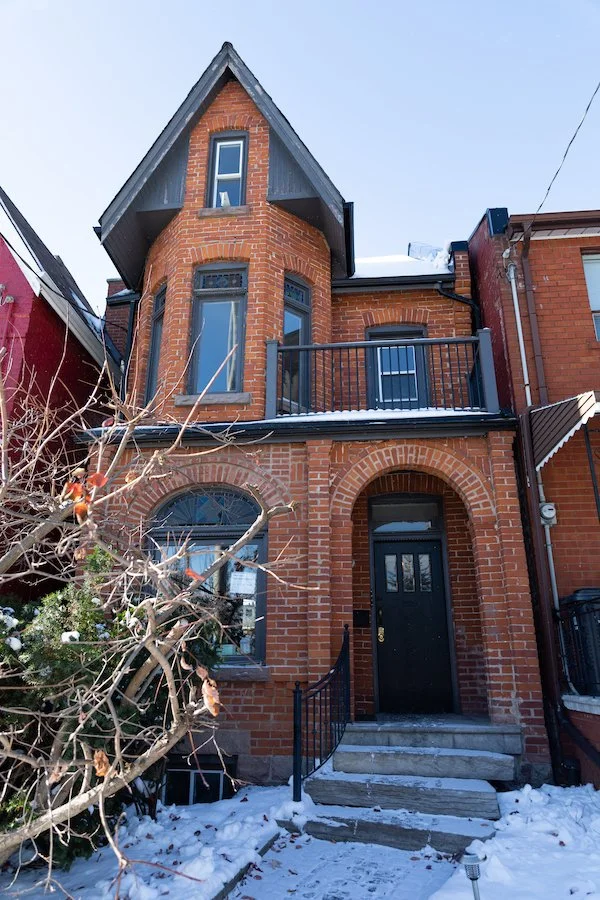
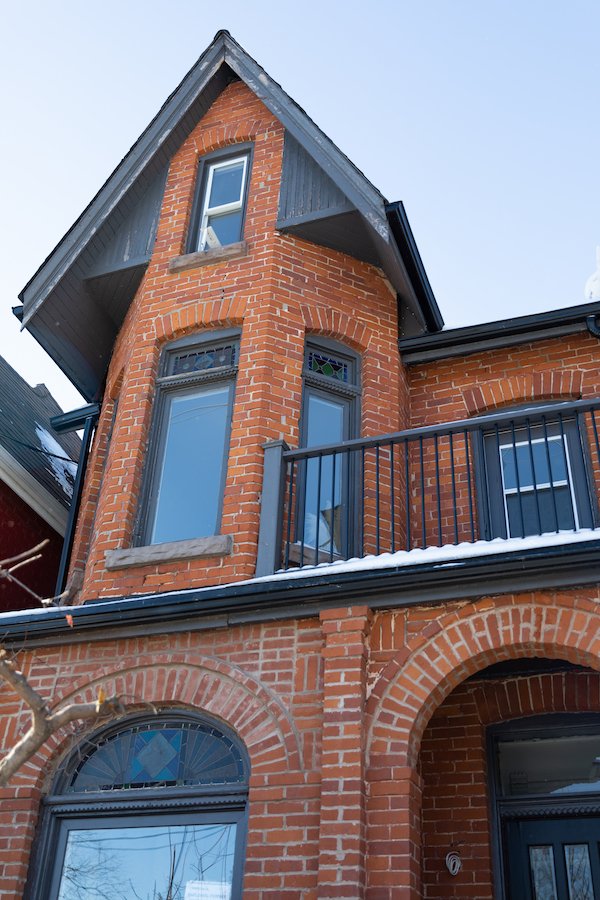
Winter has arrived! First snowfall of the year!
Thank you so much for joining me today and for checking out my new Toronto home renovation series on Youtube. I am super excited to be modernizing a Victorian home while still keeping the charm of an old Victorian house. If you have any questions about my Victorian house renovations, what it’s like to live in Little Portugal, Toronto or recommendations for Toronto contractors, hit me up in the comments below!
Before I sign off, I’d also like to say a big thank you to Parsiena Design and Ironworks Radiator Inc for partnering with me on this project. I’m so excited to be working with local industry experts on our Toronto home renovations but want to reiterate that, like always, all opinions remain my own.
Until next time,
- Soheila
MORE BTS PHOTOS FROM THIS EPISODE