THE YUMMIEST AHI TUNA ALOHA POKE!

Did you know that one of the last few trips Adam and I took before the pandemic was to The Big Island of Hawaii, Kona? It was an extended family trip that consisted of 13 of us staying at a house we rented for a few weeks over Christmas and it was a BLAST! It wasn’t my first trip to Hawaii but it is where I fell in love and really indulged in authentic Hawaiian Poké for the first time! It’s such a staple Hawaiian dish that you will find amazing Tuna Poké in grocery stores and small family owned stores all over the islands!

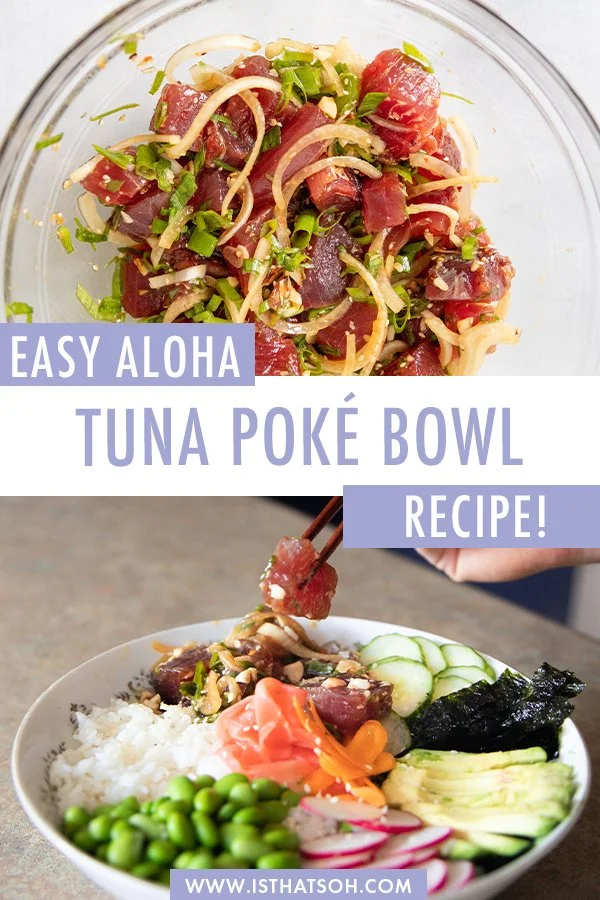
If you have never heard of Hawaiian Tuna Poké, it is a traditional Hawaiian raw fish salad that consists of raw tuna (although I have used salmon and it taste just as great) marinated in soy sauce, sesame oil, and onions. Ahi Poké may appear complicated or intimidating to recreate at home but let me assure you it is actually super easy to make Hawaiian Tuna Poké at home as long as you buy sushi grade fish. Unfortunately, not all fish will work for making a Hawaiian Poké recipe at home. Since the fish is not cooked it has to have been ‘flash frozen’ in order to kill any parasites that may exist inside the flesh. Because of this, it’s easier and safer to buy sushi grade fish when making not only this Tuna Poké recipe but any Hawaiian Poké.

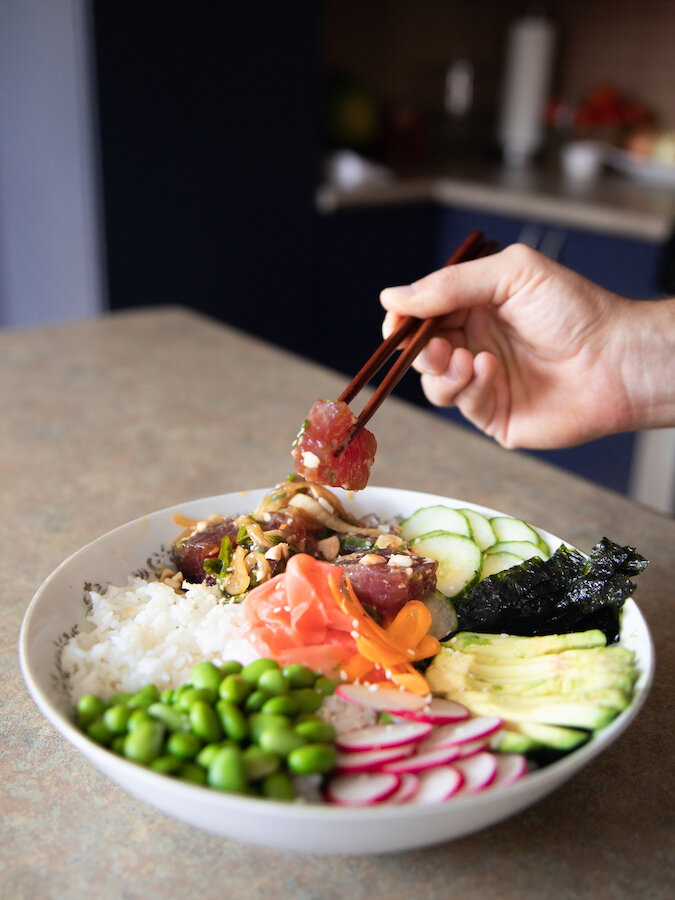
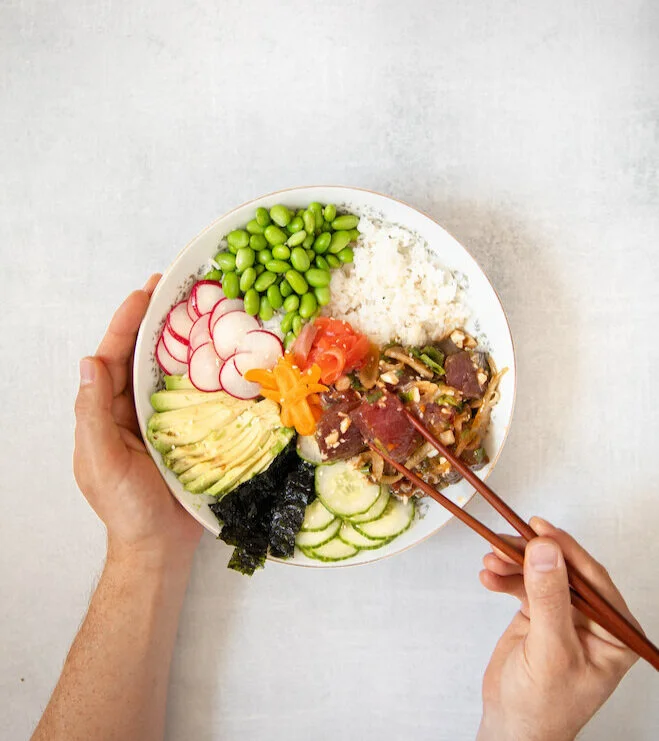
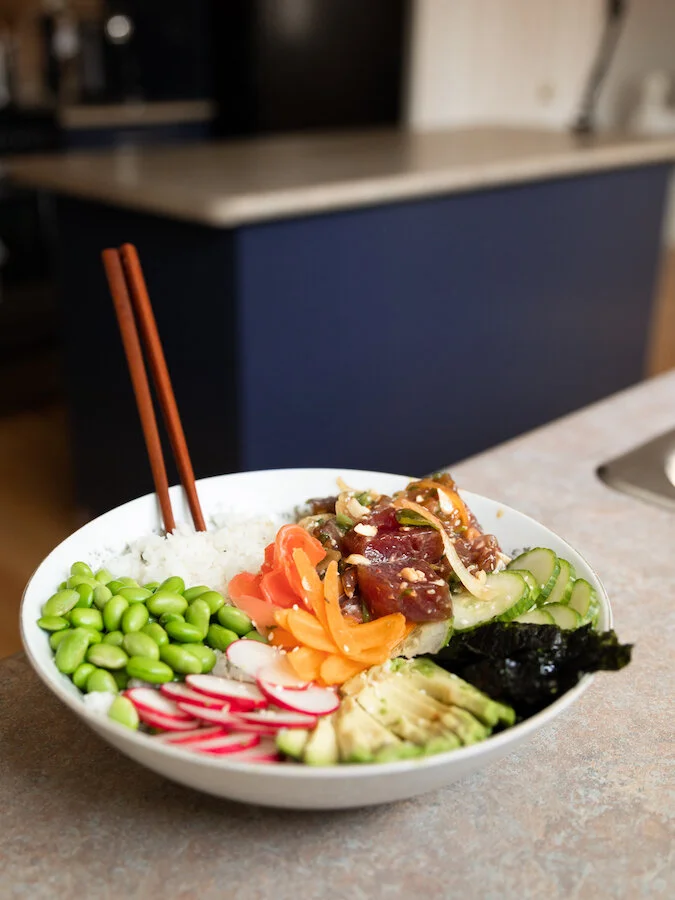
In terms of accompaniments, a few essentials include sticky rice, edamame, and sliced carrots but I love eating this Tuna Poké Recipe with avocado, cucumber, a few pieces of nori (dried seaweed), and radishes. Sometimes I’ll even include a little pickled ginger as a little extra salty profile addition to the dish! Alternatively, a simple addition of popular poké sauces can turn this recipe into a Spicy Tuna Poké Recipe like the addition of some spicy mayo (ingredients to which I have included below)! The best part, you can make it as spicy or as mild as you wish and use whatever mayo you have in the fridge (full-fat, light, paleo, etc).

Before you begin, it is vital to note that you must marinate your Ahi Tuna Poké for a minimum of 2 hours prior to eating in order to get the full flavor. The marinade really only takes 10-15 minutes to prepare and is super easy (just combined everything in a bowl). If you are thinking of making this for dinner you may want to start the marinating process first thing in the morning or over your lunch break to ensure it is ready for dinner! Although the best time to eat this Tuna Poké recipe is the same day you marinate it, it will keep in the fridge for up to two days.

* Please Note - Some links in this post may be affiliate links *

INGREDIENTS:

SERVES 4

- Tuna Poké Marinade -

2 Lbs of Sushi Grade Ahi Tuna
3 TBSP of Soy Sauce
2 TBSP of Sesame Oil
1 TSP of Fresh Ginger - grated
1.5 TSP of Hawaiian Salt
1/2 Cup of Onion - sliced thinly
1 TBSP of Sesame Seeds - toasted
2 TBSP of Macadamian Nuts - toasted and chopped
1 CUP of Green Onion (green parts only) - chopped
1/4 TSP of Chili Pepper

- Accompaniments -

2 CUPS of Steamed Sticky Rice - can be substituted for short grain brown rice for a healthier choice
Dried Seaweed - cut into 2 inch strips
1 CUP of Edamame - steamed and than chilled
Cucumber - thinly sliced
2-3 Radishes - thinly sliced
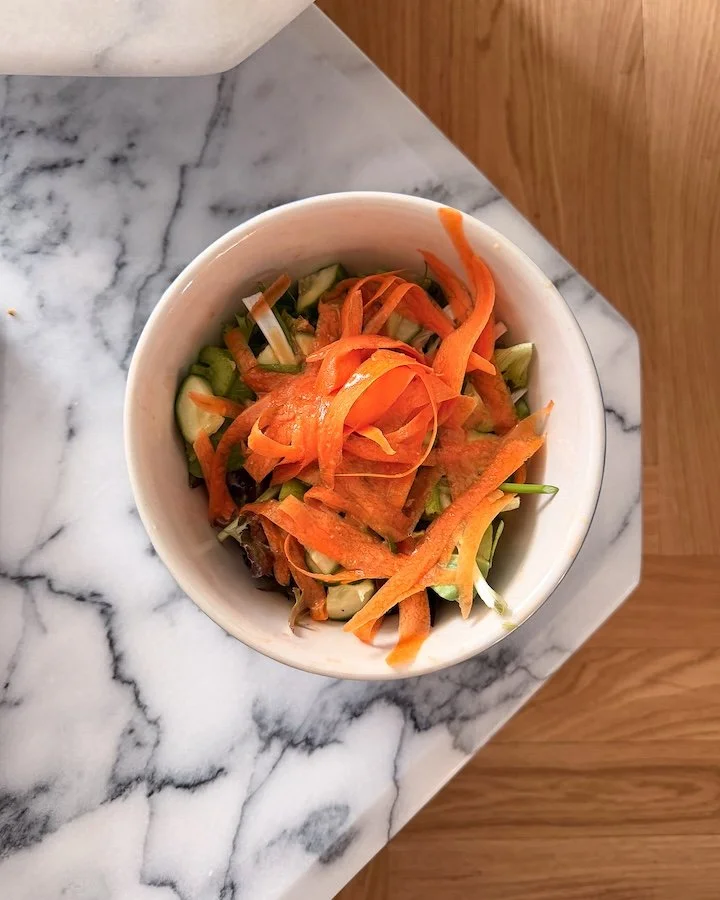
1 Carrot - shaved
Pickled Ginger

- Poké Sauce - Spicy Mayo can be added to this dish to turn it into a Spicy Ahi Poké recipe

4 TBSP of Mayonnaise
4 TSP of Sriracha - can be altered to your desired spice level


LOVE SEAFOOD? CHECK OUT THESE OTHER RECIPES!


HOW TO MAKE POKÉ:
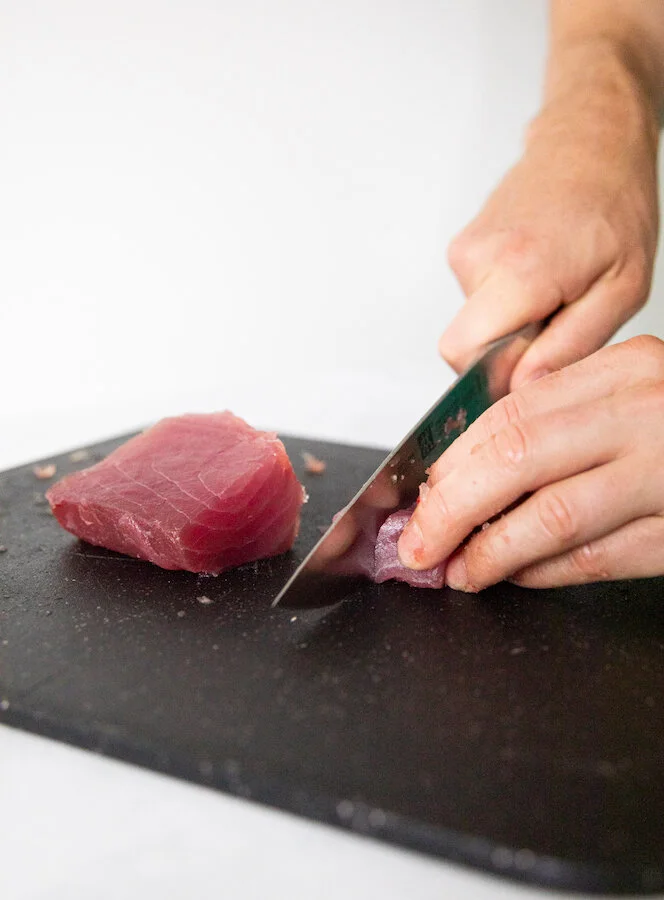
Using a sharp knife, skin your filet of tuna and cut away any tendon before cutting the remaining meat into 1 inch chunks.
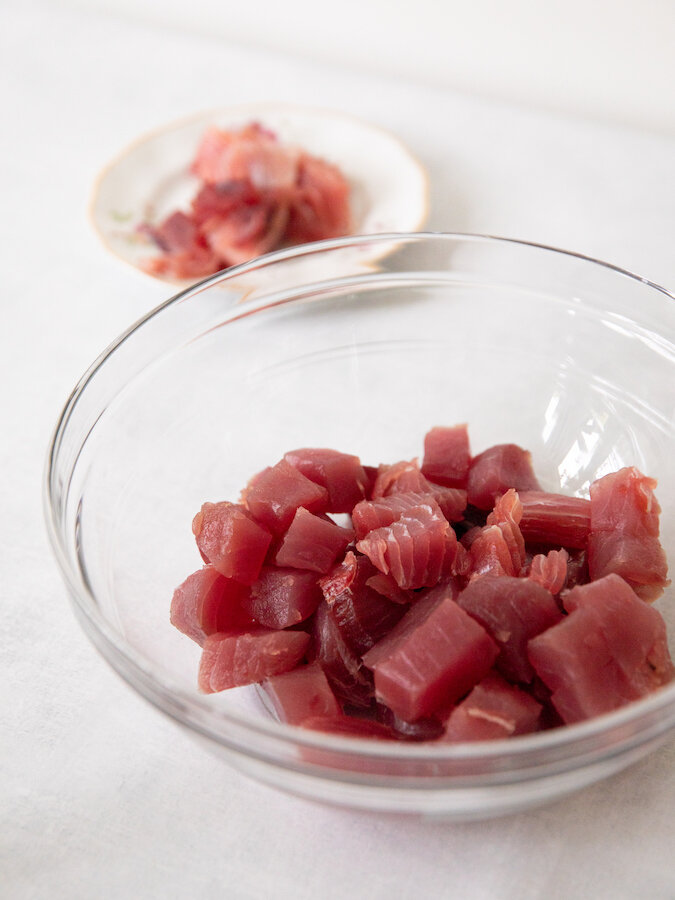
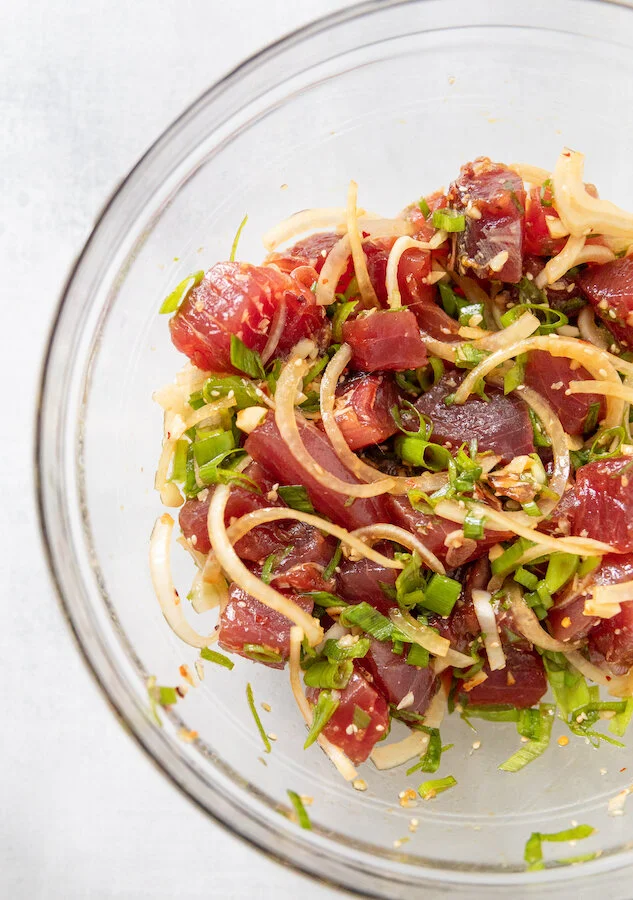
In a large bowl, mix your marinade ingredients together with the tuna very well before wrapping and placing in the fridge to marinate for 2 hours.

30 minutes prior to eating, prep your accompaniments and steam your sticky rice.

When ready, assemble your tuna poke bowl and garnish with a few additional sesame seeds.

FOLLOW ME ON INSTAGRAM @ISTHATSOH



I hope you enjoyed this Tuna Poké recipe with avocado recipe as much as I do. If you have any comments please leave them below and I'll be happy to answer them as soon as I can! Happy eating!!!


PIN THIS POST

KOREAN KIMCHI PANCAKES (KIMCHIJEON) WITH DIPPING SAUCE - A YUMMY KOREAN STREET FOOD RECIPE

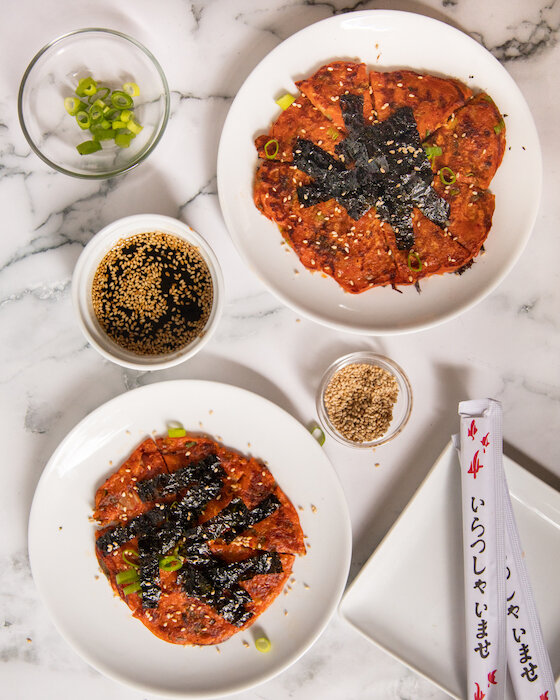
Korean kimchi pancakes (often referred to as kimchijeon in Korea) are a delicious street food dish often enjoyed as a snack or after a night out, that is so easy to make at home! To tell you the truth, it’s just like making traditional pancakes where you add everything together in a bowl and fry it up except Korean Kimchi Pancakes are way more savory than your traditional North American pancake thanks to the addition of green onions and some spicy kimchi! If you enjoy Korean food and want to learn how to make delicious kimchi pancakes at home, check out this foolproof recipe with dipping sauce below!

IS KIMCHI VEGAN?

It all depends on the brand you buy! Traditional kimchi does contain fish sauce but depending on the brand you buy you can also find it without, so make sure to check the ingredient list. Additionally, Kimchi is not difficult to make, so if you want to try making it at home you can just leave out any animal products to make it vegan.

In my opinion, the best kimchi brand is Myungga Mat Kimchi however, I did recently do a Whole 30 cleanse and found a plant-based kimchi brand called LIVE at Ambrosia that I very much enjoy. It doesn’t have any added fish sauce and uses apple for sweetness instead of sugar. *NOTE: This recipe is not whole 30!

WHAT ARE SOME KIMCHI BENEFITS?

Kimchi is so good for your gut! It aids with digestion and is packed full of great probiotics. It is also said to help with inflammation, aid with weight loss, strengthen your immune system and support heart health!

DOES KIMCHI GO BAD

Yes! I recently had to throw out the remnants of a jar of kimchi that was a month or so old. You could tell by the way it smelled that it had ‘over fermented’. It smelled like a bottle of wine that has been sitting out for a few days. If you open your jar and it smells kind of sour with a pungent alcohol smell - it’s most likely gone bad.

* Please Note - Some links in this post may be affiliate links *

INGREDIENTS FOR KIMCHI PANCAKES:

Makes 2-3 Pancakes

3-4 Green Onions (chopped diagonally) - set a little aside for garnish
1/2 a CUP of Kimchi (chopped) *Use a plant-based Kimchi if you want this recipe to be vegan!
1/2 a CUP of Korean Pancake Mix
2-3 TBSP of Kimchi Juice and/or Korean Chili Paste
About 1 Cup of Water (to be added a 1/4 CUP at a time)
1-2 TBSP of Vegetable Oil

- Garnish -
1 TBSP of Seasame Seeds (roasted)
Dried Seaweed (cut into 2-inch strips)

- Dipping Sauce -

2 TBSP of Soya Sauce
1 TBSP of Water
2 TSP of Rice Vinegar
1 TSP of Sugar
2 TSP of Sesame Oil
1 TSP of Sesame Seeds


CHECK OUT THESE OTHER ASIAN INSPIRED RECIPES


HOW TO MAKE KIMCHI PANCAKES:

In a small bowl, add all your dipping sauce ingredients, and using a fork mix it together before setting it aside.

In a bowl add in your green onions (making sure to put some to the side for a garnish later), Korean pancake mix, kimchi, and kimchi juice/ Korean chili paste in a bowl. Stir in a 1/4 cup of water at a time until a batter starts to form. You want it to be the same consistency as a regular pancake mix so keep adding water until you achieve this desired consistency.

Heat up 1-2 TBSP of vegetable oil in a pan and pour in your Kimchi pancake batter when hot. Allow the Kimchi pancake to cook on one side for 2-3 minutes before flipping - same as you would a regular pancake.

When ready, remove from heat, garnish with sesame seeds, more green onion, and dried seaweed strips.

Serve with dipping sauce.


FOLLOW ME ON INSTAGRAM @ISTHATSOH


I hope you enjoyed this easy vegan kimchi pancake recipe with dipping sauce as much as I do. If you have any comments about how to make kimchi pancakes, please leave them below and I'll be happy to answer them as soon as I can! Happy cooking!!!


PIN THIS POST

EASY KENTUCKY BUTTER CAKE RECIPE WITH CARAMEL ICING


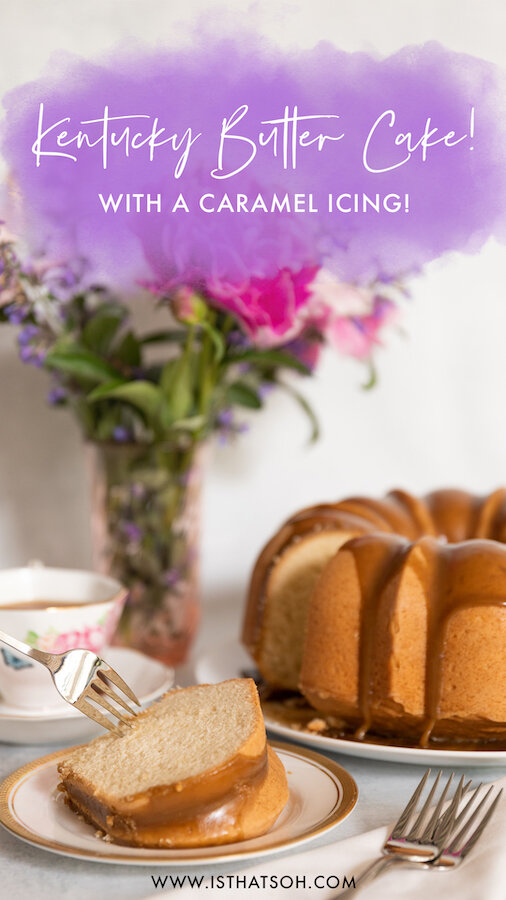
I remember the first time my mom made me this Kentucky Butter Cake with Caramel Sauce. It was a warm summer day, we had just finished dinner, and she brought out this freshly baked and still warm, Kentucky Butter Cake with a Caramel Icing. Although outside, you could smell the cake’s sweetness and I instantly noticed how moist and spongy it was as soon as I dove into it with my fork. It didn’t take long for me to request every cake have this amazing caramal glaze on it and ask for the recipe for my blog!

Why is it called Kentucky Butter Cake?

Funny you should ask because from what I have read, no body is really sure. I came across a story about it being a Pillsbury bake-off winner and then another story that debunked that so the real story behind this cake is stil unknown. If i had to guess though, I’d bet the cake originated from Kentucky, and since it has lots of butter, it’s called a Kentucky Butter Cake! One thing I do know though is that this cake is usually found with a butter sauce or icing not a caramel glaze. In my opinion though, the caramel glaze can’t be beat!

Since my first introduction i’ve already baked it nemerous times and everyone I’ve introduced it instantly seems to fall in love with this Kentucky Butter Cakes recipe too. I’m sure after you try it, you will too what caramel frosting on just about everything you eat as well! The best part about this Kentucky Butter Cake and Caramel Icing Recipe is that it is SUPER easy to make so you don’t have to be an advance baker to yield good results or enjoy this recipe!

I’ve created a quick tutorial video for you below for this Kentucky Butter Cake with Caramel Sauce recipe, so make sure to check it out below!

Happy baking!

* Please Note - Some links in this post may be affiliate links *

INGREDIENTS:

Serves 10
- Kentucky Butter Cake -


3 cups of All-Purpose Flour
1 TSP of Salt (Kosher is preferred)
1 TSP of Baking Powder
1/2 a TSP of Baking Soda
1 Cup of Unsalted Butter (cubed and brought to room temperature)
2 Cups of Granulated White Sugar
4 Eggs
1 TBSP of Vanilla
1 Cup of Buttermilk

- Caramel Frosting -

1 Cup of Brown Sugar
2 TBSP of All-Purpose Flour
3 TBSP of Butter (softened)
1/4 Cup of Milk
1 TSP of Vanilla Extract

You will also need:

A 10” bundt pan
Hand Mixer
Saucepan


CHECK OUT THESE OTHER DESSERT RECIPES


KENTUCKY BUTTER CAKE DIRECTIONS:

Preheat oven to 325 degrees and butter your bundt pan before dusting it with flour - I used a 10” pan!

In a medium bowl, mix all your dry ingredients (flour, salt, baking powder, and baking soda) together with a whisk until well incorporated.

Next, in a separate, larger bowl add your butter, sugar, vanilla, eggs, and buttermilk, and mix together on low for 30 seconds using a hand mixer before slowly incorporating your dry ingredients in 2-3 portions.

When the dry ingredients are fully added to the wet ingredients, increase the hand mixer speed to high and continue to beat for 3 minutes until the batter texture becomes smooth. Make sure to scrape the sides of the bowl to get the excess flour that likes to get trapped there!

Pour batter into your buttered bundt pan and bake for 65-75 minutes or until a toothpick comes out clean.

When the Kentucky Butter Cake is ready, remove it from the oven and set it aside to cool. I like to allow the cake to cool for 10 minutes before inverting it onto a serving plate.

CARAMEL ICING RECIPE DIRECTIONS

After the cake has cooled you can get to work on the caramel glaze!

Combine brown sugar and all-purpose flour in a bowl - whisk together until well incorporated.

Using a saucepan, add in your brown sugar/flour mixture, butter and milk. Bring ingredients to a rolling boil on medium-high heat, stir continuously.

Once boiling, allow it to continue to boil for 1.5 minutes before removing from heat and setting it aside to cool for about 5 minutes.

When the caramel icing has cooled, use a wooden spoon to beat the mixture so that it thickens. Add in your vanilla as you continue to beat the mixture (about 1-2 minutes) until it becomes a similar consistency to honey.

Pour the caramel frosting over the cooled Kentucky Butter Cake using the back of the spoon to help spread it around evenly. Set aside to cool as the caramel glaze will harden after a few hours.

This cake can be stored at room temperature in a cake stand for 3 days or in an airtight container!


FOLLOW ME ON INSTAGRAM @ISTHATSOH


I hope you enjoyed this Kentucky Butter Cake recipe with Caramel Icing as much as I do. If you have any comments please leave them below and I'll be happy to answer them as soon as I can! Happy baking!!!


PIN THIS POST

AND THE WINNER OF THE 'IS THAT SOH 2ND ANNUAL ROSÉ TASTING' IS....

Photo Credit: Valeriya Kobzar

Photo Credit: Valeriya Kobzar

You know spring is here when the days get longer, nights get hotter, and that all to familiar desire to drink rosé outside returns. You may remember last year, in preparation for National Rosé Day and with the onset of COVID, I conduct an at-home Rosé wine tasting with my family in the hopes of finding the best rosé wines of the season. Little did I know then that my family would enjoy participating in my rosé market research study so much, they would ask me to turn it into an annual event! So here we are, one year later with a new top 5 list of our favorite rosé wines that we recommend you try this spring and summer!

Things were done a little differently this year! Firstly, instead of tasting only 6 wines, we did 8 and we split the tasting over 2 evenings (4 wines per evening). I also decided to try a different selection of rosé wines this year which I randomly selected from the LCBO’s ‘Summer Rosé’ and ‘Vintages’ section. The respondents for this year’s annual rosé tasting also included more members of Adam’s family vs mine, however we maintained the same minimum of 6 respondents per day/tasting. Further, this year I covered the labels of the bottles and numbered them so as to not give away their origin, price, etc., and switched up the tasting order for each person as a way of removing further bias. Everyone was given 1-2 oz of each wine and asked to give a score from 1-10 along with tasting notes for each wine.

As for the tasting itself, it was done at the cottage this year, outside, before dinner under the glow of the afternoon sun. Our cottage neighbors joined in (socially distanced of course) on the 2nd night adding to the fun and excitement of the overall event. Everyone was in good spirits and excited to be socializing outdoors after a long winter and the dinner that followed on the first night was a delicious filet of salmon cooked in an Asian-inspired soy glaze - a perfect pairing and excuse to polish off any remaining bottles if you ask me!

Below are the results of this year's ‘Is That Soh 2nd Annual Rosé Tasting’! Cheers!


CHECK OUT THESE COCKTAIL & DRINK RECIPES


THE BEST ROSÉ WINES IN RANKING ORDER


1st Place - Whitecliff Winemaker’s Selection Rosé

From Hawk’s Bay, New Zealand
$14.95 CAD at the LCBO

Whitecliff’s Winemakers Selection Rosé rose to the top as this year’s ‘favorite rosé’ with all but two giving it a super high score! It is a medium-bodied, dry rosé wine often described as fruity with berry undertones, smooth, refreshing, and easy to drink. This wine was by far my personal favorite as well and it came as no surprise to learn that it was from one of the best wine regions in the world, New Zealand!

Located in Hawk’s Bay, New Zealand, Whitecliff Wines was named after the majestic white river cliffs that bordered the original site of the family estate vineyards. Designed for everyday enjoyment, Whitecliff has created fruit-forward wines of purity and exceptional value for over 20 years, making them a favorite with wine lovers everywhere.

Perfect for an outdoor picnic, the Whitecliff Winemaker’s Selection Rosé features a pale salmon colour, vibrant aromas of strawberries, fresh cream, candy floss, and orange rind. In my opinion, it would pair well with seafood, a cheese charcuterie platter, or a summer salad. At the very reasonable price of $14.95, you can’t go wrong but to give this crowd pleaser a try!


2nd Place - L'Orangeraie Rose Pays

From the Pays d'Oc wine region in the South Of France
$11.90 CAD at the LCBO

Maison Lorgeril’s L’Orangeraie Rosé also performed really well with over half of the group giving it a high score! Many people described this rosé wine as dry, smooth, and refreshing with hints of citrus.

I was first introduced to L’Orangeraie last year by a friend and it quickly became one of my go-to’s. Not only is it delicious but at $12.00 a bottle, it is also super budget-friendly! I often would pick up a few bottles at a time and just keep them on hand to enjoy during afternoons at the cottage or during seafood dinners.

Salmon pink in colour L’Orangeraie is a blend of Shiraz/Syrah, Grenache, and Cinsault varietals, and features soft floral, raspberry, strawberry, and citrus aromas with a mineral note. It is a medium body French wine with dry; berry and citrus flavours. I also found it to have moderate acidity and a clean finish.

Maison Lorgeril was founded in 1620 in the South of France and is still to this day a family enterprise. Owner, Nicolas de Lorgeril is a tenth generation winemaker, who along with his wife Miren de Saint Chamas, utilizes the best terroirs in the Languedoc and Roussillon areas to grow varietals that yield French wines with gentle and smooth aromas.


3rd Place - La Fage Miraflors Rose

From Roussillon, France
$17.95 CAD at the LCBO

Another favorite from this year’s Rosé tasting was Domaine Lafage’s La Fage Miraflors Rose! Described as medium-bodied, dry, refreshing, and slightly acidic this rosé was well received by the majority but only received a top score from two respondents.

La Fage Miraflores is made from a blend of Mourvedre, Grenache Gris, and Grenache grapes, many of which are from old vines - some over 80 years old! Pale pink in colour this French wine features notes of strawberry and white peach that lend to its overall clean, crisp, and refreshing flavour.

For over two centuries the Lafage family have been winegrowers in the heart of Roussillon, the southernmost point of France. Today, the Domaine vineyards extend over 350 hectares across the whole of Roussillon, to the Pyrenean foothills of Aspres.


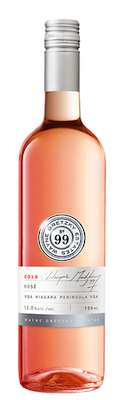
4th Place - Wayne Gretzky Rosé VQA

From Niagara-On-The-Lake, Ontario Canada
$16.95 CAD at the LCBO

Coming in 4th place this year was the locally produce Wayne Gretzky Rosé from Niagara-On-The-Lake, Ontario. Described as medium-bodied, semi dry, and fruity, this wine is a blend of 80% Pinot Noir, 17% Pinot Grigio, and 3% Gamay Noir, harvested from long-standing growers within the Niagara Peninsula.

Wayne Gretzky Estate Winery and Distillery expanded into a state-of-the-art facility in the heart of Niagara-On -the-Lake wine country in 2017 and today produces delicious, approachable wines, a line of spirits that include whiskies, muscat, and cream liqueur, as well as craft beer!

This delicate rosé has a strong salmon colour with aromas of peach, citrus, and strawberry that move to flavours of red berries, plum, and cherry the more you drink. It also has a slightly off-dry finish.


5th Place - Château de Berne Romance Rosé

From Provence, France
$17.00 CAD at the LCBO

To finish off our top 5 list we have the Chateau De Berne Romance Rosé which, although polarizing did well with most. Described as light, dry, and slightly acidic with hints of grapefruit this French rose wine is medium bodied and made mostly from locally sourced Grenache, Cinsault, Syrah, and Merlot grapes.

Chateau de Berne crafts their Romance Rosé in the heart of Provence, the perfect climate for bearing wines with aromas and flavours of orchard fruit, red berries, and ripe peaches. Sheltered by acres of pine forests and lavender fields, Chateau de Berne grapes bask in over 3000 hours of sunshine a year and enjoy cooler Provence at nights - features of an ecosystem known for producing grapes that ripe slowly to produce perfect Provencal rosés bursting with flavour.

The Romance Rosé features silky texture and a dry finish. This dry rose wine would pair perfectly with spicy and/or acidic dishes like ceviche!


FOLLOW ME ON INSTAGRAM @ISTHATSOH


I hope you enjoyed reading this blog post about the 2nd Annual ‘Is That Soh Rosé Tasting’ as much as my family and I did creating it. If you have any comments about rosé wine, french wine, or how to perform a wine tasting at home, please leave them below and I'll be happy to answer them as soon as I can! Cheers!


PIN THIS POST

ESPRESSO MARTINI'S - AN EASY COCKTAIL RECIPE FOR COFFEE LOVERS

Espresso Martini’s - An Easy Cocktail Recipe for Coffee Lovers

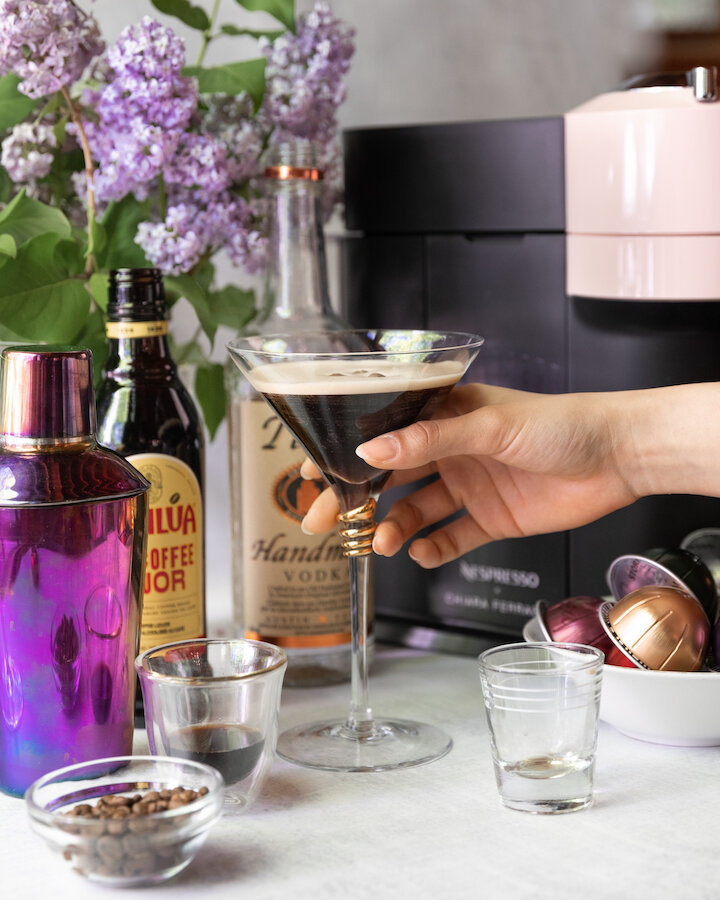
Last weekend my little at-home-bar got a BIG upgrade with the addition of a new Nespresso Vertuo Next Espresso Machine! I was so excited about my new addition that I couldn’t wait to shake up some coffee cocktails and since (N)espresso Martini are one of my all time faves, I thought I’d share a little tutorial with you!

Legend has it that the espresso martini originated in London, England when a young future supermodel walked into a famous Soho Brasserie in 1983 and asked bartender Dick Bradsell to make her something that would ‘wake her up and then fuck her up’. He mixed her a drink using vodka, coffee liqueur and a shot of espresso, and that is how the espresso martini came to be!

Today, espresso martini’s are very popular especially as a digestive after a big meal and although originally made with coffee liqueur, I have also seen menus showcasing espresso martini's with Baileys and even Tia Maria espresso martini’s! I prefer my espresso martini’s with Kahlua but no matter your preference, the steps are always the same so I thought I’d share this simple cocktail recipe with you along with a quick tutorial video I made below!

Enjoy!

* Please Note - Some links in this post may be affiliate links *

ESPRESSO MARTINI INGREDIENTS:

Makes 1 cocktail


3/4 oz of Espresso (I used my Nespresso Vertuo Next machine)
3/4 oz of Kahlua Coffee Liquor (you can also use Baileys or Tia Maria if you don’t have Kahlua or want to try something different)
1.5 oz of Vodka
Ice
A few whole coffee beans for garnish

You will also need a cocktail shaker and espresso martini glasses!


CHECK OUT THESE OTHER DRINK AND COCKTAIL RECIPES


HOW TO MAKE ESPRESSO MARTINI’S:


Making espresso martini’s is super easy!

First, add ice to a cocktail shaker followed by your espresso coffee, vodka, and liquor (Kahlua, Baileys or Tia Maria)

Place lid on cocktail shaker and shake well! The cocktail shaker should turn cold and the more you shake the thicker the foam will be for the cocktail!

Pour cocktail into a martini glass making sure to strain out the ice.

Garnish with a few whole coffee beans.


FOLLOW ME ON INSTAGRAM @ISTHATSOH


I hope you enjoyed this espresso martini recipe as much as I do. If you have any comments please leave them below and I'll be happy to answer them as soon as I can! Happy bartending!!!


PIN THIS POST