SUMMER OF PROSCIUTTO - 2 APPETIZERS THAT REQUIRE ZERO COOKING

*Disclosure: I have participated in a paid partnership with Mastro/San Daniele.
Opinions in this post are my own.

Summer has always been my favourite season in Canada and this year I am determined to make the most of it! For me, that means less time in the house and more time outdoors, enjoying the cottage, hanging out at the beach and of course, watching the sunset. Whenever I’m looking for a quick and easy meal to whip up to take along with me, I always prefer the non-cook option (actually, my boyfriend Adam and I like to joke about how I’m an even better ‘assembler’ than I am a cook)! This means that I’m always on the lookout for delicious food items that are not only versatile but also bursting with flavours that enhance any dish I throw together. One such item is San Daniele Prosciutto! Made according to old world tradition and cured for 12 months, this pre-packaged prosciutto helps turn a simple salad, crostini or charcuterie board into an amazing appetizer or even meal, not to mention it travels well and can easily be assembled on the go! So next time you’re at the grocery store, make sure to grab a pack of San Daniele prosciutto from the bulk deli counter at your grocery store and enjoy its bursts of classic flavour, unique fragrance, and naturally rosy colour with your next meal.

This week I used my pack of San Daniele prosciutto to whip up these brie and prosciutto crostini to enjoy on the beach while watching the sunset, along with this Joso’s inspired summer salad (my favourite restaurant in Toronto) that is light yet very filling!

INGREDIENTS:

- Serves 4 People -

- Crostini -

1 Pack of Paris Toast
1 Round of Brie Cheese
1 Jar of Jam (I recommend an apricot or raspberry)
1 Pack of San Daniele Prosciutto

- Large Salad -

1 Large White Potato - Boiled and Chopped
2 Cups of Fresh Arugula
2 Cups of Romain - Chopped
1 Vine Tomato - Chopped
1/2 Can of Chickpeas - Rinsed and Drained
2 Green Onions - sliced lengthwise
1/2 Cup of Feta Cheese
1 Persian Cucumber - Chopped
1 Pack of San Daniele Prosciutto
Salt and Pepper

- Salad Dressing -

1 Part Red Wine Vinegar
4 Part Canola Oil or Vegetable Oil
Salt and Pepper (lots of salt!)

DIRECTIONS:

- Crostini’s -

Top a few Paris toast with brie cheese.

Next, add a dollop of jam on top.

Garnish with San Daniele Prosciutto and serve.

Enjoy!

- Large Salad -

Bring a pot of water to a boil and place you pealed potato inside. Cook for 20 minutes or until it is soft. You can check if it has become soft by sticking a fork in it. If you can easily slide a fork inside it then it is ready. When ready, drain the hot water out of the pot and blanch the potato with cold water for 2 minutes to prevent it from cooking further.

Place Arugula, Romain, chopped tomato, chickpeas, chopped green onion, chopped cucumber, crumbled feta, and cooled, chopped boiled potato in a large bowl. Top with San Daniele Prosciutto, some fresh cracked pepper, and a pinch of salt.

Dress with salad dressing, toss and serve.

Enjoy!


If you like this recipe or have any comments/questions, feel free to leave them in the comment section below!


PIN THIS POST

BOOZY MANGO ORANGE RUM POPS!

Made these boozy rum popsicles the other day while up at the cottage and I’m so glad I did because lately, we have been experiencing a big heatwave! The combination of mango, orange, and coconut go great together, and there no need to add more sugar because they are definitely sweet enough. If you are looking for a tasty vegan treat to have on those sweltering hot summer days, I highly recommend making this recipe!

INGREDIENTS:

- Makes 8 Popsicles -

- Popsical Filling -
1 Large Ripe Mangos - remove skin and pit
3/4 CUP Coconut Water
1/4 CUP of Orange Juice
2 Oz of Rum

- Molds -

NorPro Frozen Ice Pop Maker - I ordered this one off Amazon and highly recommend it!

DIRECTIONS:

In a blender add in your fresh mango and coconut water. Belnd until liquified.

Next, add in your orange juice and rum, pulse for 2 sec to mix.

Pour mixture into popsical moulds and palce in freezer for a minimum of 12 hours before you serve!

Enjoy!


If you like this recipe or have any comments/questions, feel free to leave them in the comment section below!


PIN THIS POST

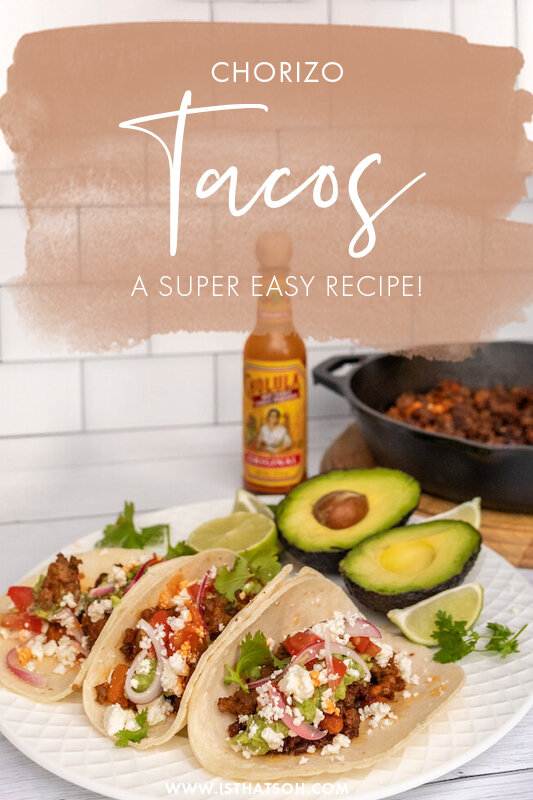
CHORIZO TACOS WITH POTATO!!! A SUPER EASY AND DELICIOUS RECIPE!

Is there a better way to celebrate the end of the work week than with margaritas and tacos? I think not! For the last 4 weeks in a row, Adam’s family and I have been partying it up every Friday with this chorizo potato taco recipe. First introduced to us by my sister, this recipe has become a Weiers family favorite and I am not mad about it. If you are looking for an easy Carne taco recipe to whip up for your next taco Tuesday or get together, baby you found it! It’s so easy, juicy, and packed full of flavor your friends will be begging you for the recipe.

Enjoy!

INGREDIENTS:

- Serves 4 People -

- Chorizo Filling -

8 Pork Sausage (If you can’t find chorizo sausage you can use mild or Italian with the Chorizo spices)
1 Spanish Onion - diced
1 medium Sweet Potato - peeled and diced

- Chorizo Spice Mix -

1 TBSP of Ancho Chilli Powder
1 TBSP of Paprika
1/2 TSP of Kosher Salt
1/2 TSP of Garlic Powder
I/2 TSP of Onion Powder
1/2 TSP of Cumin
1/2 TSP of Ground Black Pepper
1/4 TSP of Oregano
1/4 TSP of Thyme
1/4 TSP of Coriander
1/4 TSP of Ground Clove
Pinch of Cinnamon
1 Bay Leaf

- Optional Ingredients and Garnishes -

Tortillas
Hot Sauce
Guacamole
Tomatoes - diced
Jalapeno
Cilantro
Cojita
Red Onion - pickled

DIRECTIONS:

In a large bowl, remove raw pork sausage from casing. If the sausage is not already spiced with chorizo, make and add in the chorizo spice mix. Mix thoroughly and set aside to marinate for 30 minutes.

When ready, in a large skillet add in a handful of sausage, allow to cook on medium heat until the fat starts to render out before adding in your onions. Cook onions until translucent, around 2-3- minutes before adding in the remaining sausage, breaking it apart as it cooks for 5-7 minutes.

When further fat is released from the sausage, add in sweet potato and allow to cook further for 30 or so minutes until the potato is tender and meat is fully cooked. Stir every few minutes to avoid burning and to ensure both the meat and potatoes are being cooked evenly.

Remove from heat and build your taco using tortillas and optional garnishes.

Enjoy!


If you like this recipe or have any comments/questions, feel free to leave them in the comment section below!


PIN THIS POST

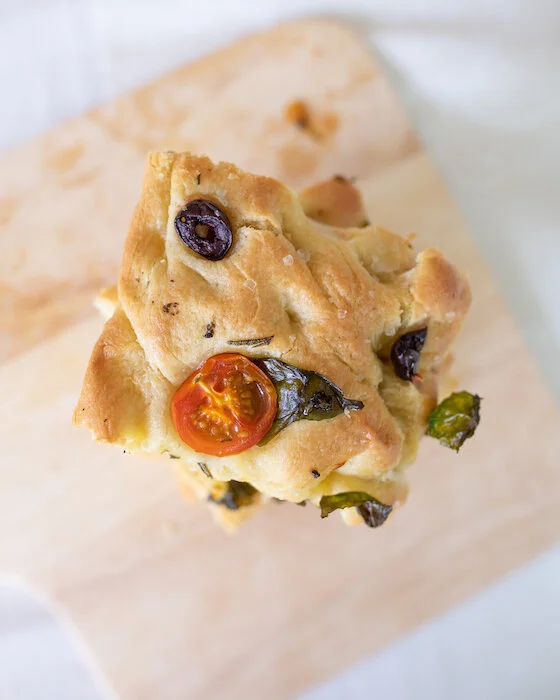
TRADITIONAL ITALIAN HOMEMADE FOCACCIA (SO EASY)

Is there anything better than the smell of fresh bread?

Especially when it’s covered in all your favorite focaccia toppings?

My Achilles heel, sun dried tomato focaccia is one of those traditional Italian appetizers that I can never turn down. As soon as I spot it (usually across the room), you know I’m right there, having a slice - okay 2, maybe 3….

While in self-isolation I had time to perfect this amazing homemade focaccia dough recipe I learned while in Italy and I must say, it stands the test of time! The dough always turns out perfect - fluffy and doughy with a crisp bottom and golden crust. Oh, and did I mention it’s also a vegan focaccia!

I can’t wait for you to enjoy it too!

FOCACCIA BREAD INGREDIENTS:

Serving: 8-10 Servings

-Focaccia Dough-
1 3/4 Warm water
1 Package of Yeast
1 TBSP of Sugar
5 CUPS of All-Purpose Flour
1 TBSP of Kosher Salt
1 CUP of Olive Oil - Spilt in two halves

-Optional Focaccia Toppings-
Coarse Sea Salt
Cherry Tomatoes
Kalamata Olives
Basil
Capers
Rosemary
Garlic


HERE ARE SOME OTHER BREAD RECIPES YOU MAY LIKE!


FOCACCIA RECIPE DIRECTIONS:

The first thing you need to do is activate the yeast so you will need to combine the warm water, yeast and sugar in a bowl. Stir and let it sit for 10-15 minutes until it starts bubbling and becomes very aromatic.

When ready, in a mixer using the hook attachment, combine the flour, salt, half a cup of the olive oil, and the yeast mixture on the lowest speed. After it is well mixed, increase the speed to three (low/medium) until it becomes smooth.

Once smooth, remove the dough from the mixer and place on a floured surface. Kneed the dough by hand until the dough stops being sticky. If you need to sprinkle more flour to help it along, do so.

When ready, form a ball with the dough. Using the mixing bowl you used before, coat the sides of the bowl with some oil and place the dough once again inside. Coat the dough with a little bit of oil as well before covering it with a cloth or plastic wrap, and place somewhere warm for about an hour until it doubled in size.

Take your cooking sheet or jelly roll pan (pan with lip) and cover with parchment paper (including the sides). Put a heavy coat of olive oil on the parchment paper before putting the dough on top. Focaccia is a heavily oiled bread so be generous with the olive oil.

making a FOCACCIA RECIPE

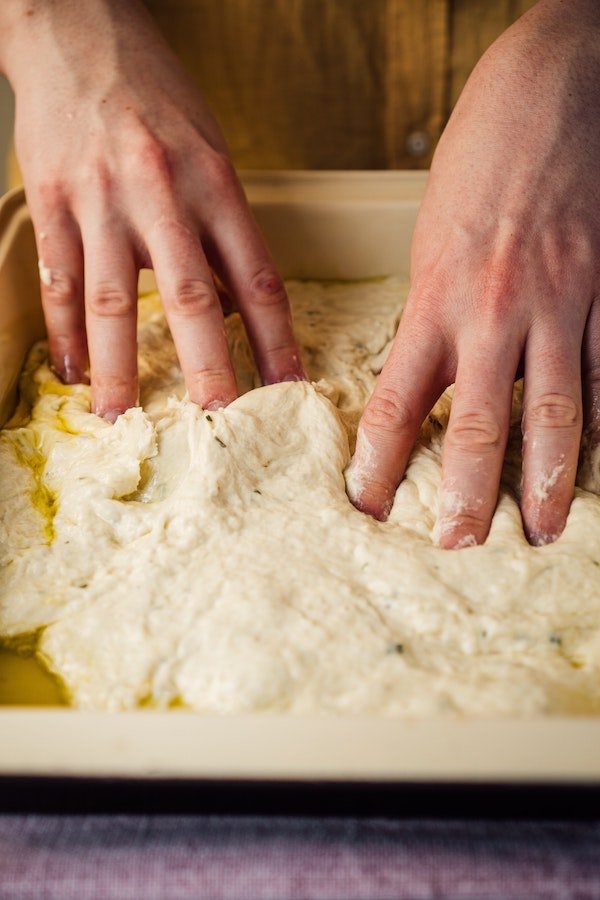
Place the dough on the pan and stretch out with your fingers, flipping the dough over to allow the olive oil on the tray to coat both sides. Use your fingers to stretch the dough the full length of the pan and create finger holes so as to give it an uneven texture. Place the stretched dough in a warm place until it once again doubles in size (approximately one hour).

When dough is close to ready, preheat oven to 450.


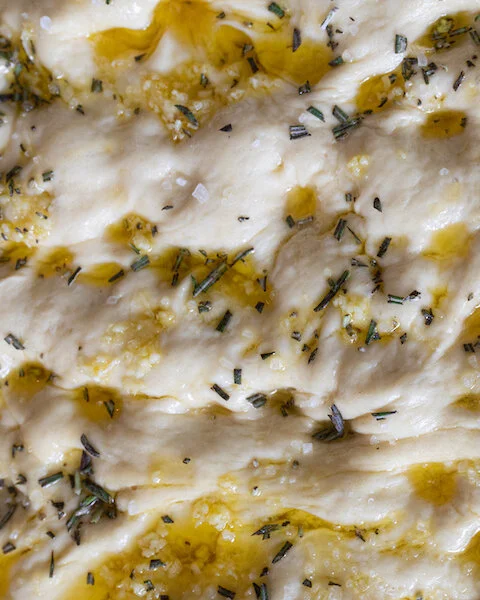
If you want to add toppings to your focaccia you can do so at this point. If you want it plain you should still liberally sprinkle it with coarse sea salt.

When ready, bake until the top is golden brown, about 25-30 minutes. Remove from the oven and allow to cool before serving to your guest.

focaccia bread recipe

Buon Appetito!


FOLLOW ME ON INSTAGRAM @ISTHATSOH


If you like this vegan focaccia dough recipe or have any comments/questions, feel free to leave them in the comment section below!


PIN THIS POST FOCACCIA BREAD RECIPE

ITALIAN Focaccia recipe.jpg

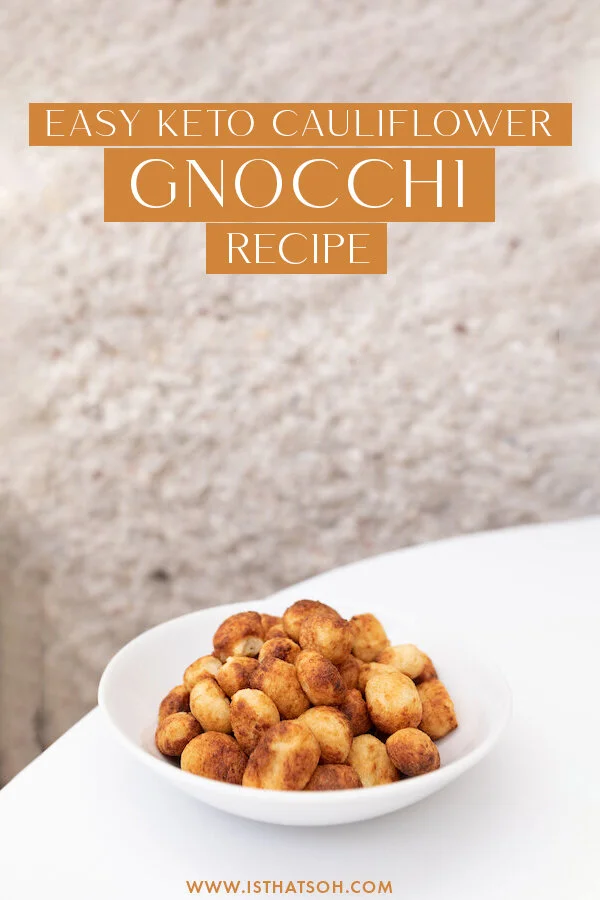
EASY KETO CAULIFLOWER GNOCCHI RECIPE

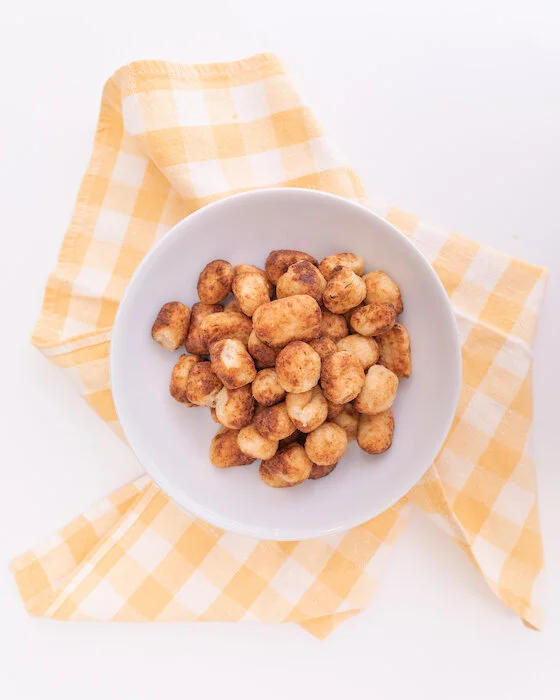
Since getting back on the Keto diet (click here to read about my Keto diet experience) I have been experimenting with new recipes to help me stay on track. One recipe that I developed using a combination of recipes I found online and experimenting with a few times, was Keto cauliflower gnocchi recipe that you can make using an air fryer or some oil in a pan if you don’t have an air fryer. Turned out that my entire family approved and actually preferred it over the regular Gnocchi I whipped up for the taste test. PLUS, it’s super easy to make! A double win! If you are looking for a healthy pasta alternative - you got to try this cauliflower gnocchi recipe!

Enjoy!


INGREDIENTS:

- Serves 4 people

1 Head of Cauliflower
1 CUP of Almond Flour
1/2 CUP of Arrowroot Flour
1 TSP of Garlic
1 TSP of Salt
1 CUP of Freshly Grated Parmesan Cheese
1 TBSP of Olive Oil if you are pan frying it


LOOKING FOR KETO RECIPES? CHECK THESE OUT TOO!


DIRECTIONS:

Cut the cauliflower florets off the stem in small chunks and steam until tender.

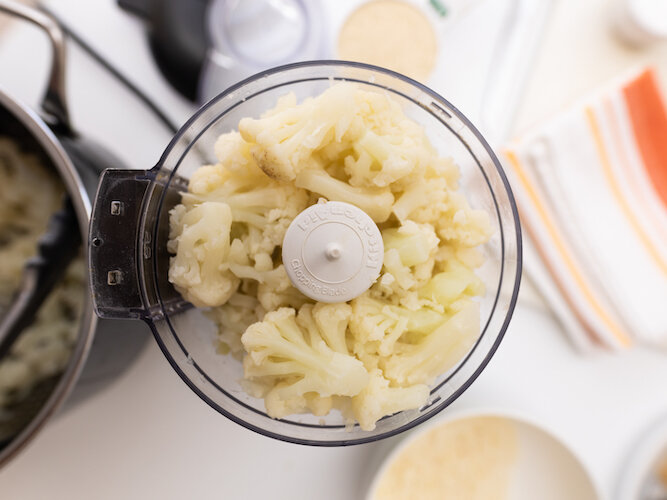
Once tender, remove the cauliflower from pot and place in a food processor. Pulse until the consistency of the cauliflower is like mash potatoes before piling it in the middle of a clean dishcloth and wringing out as much excess water as possible. Even when you think you’re done, you’re probably not so give it another wring!

Place the cauliflower in a bowl and add in the garlic, almond flour, arrowroot flour, salt, and parmesan cheese. Mix until thoroughly incorporated till it forms a soft dough. Cut dough into quarters.

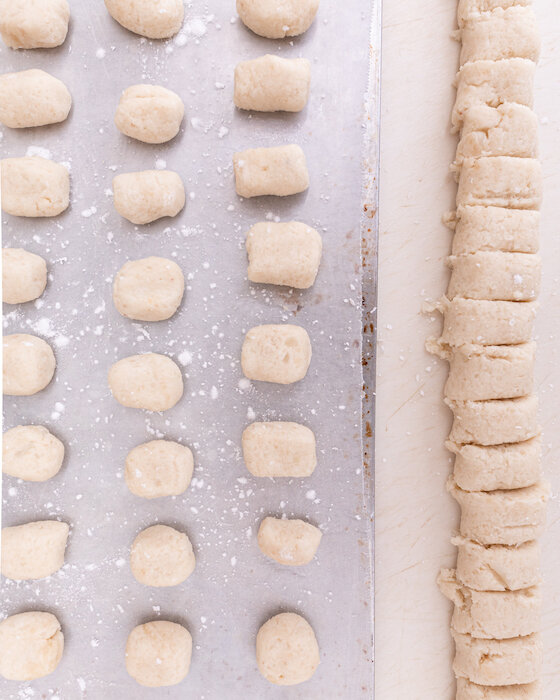
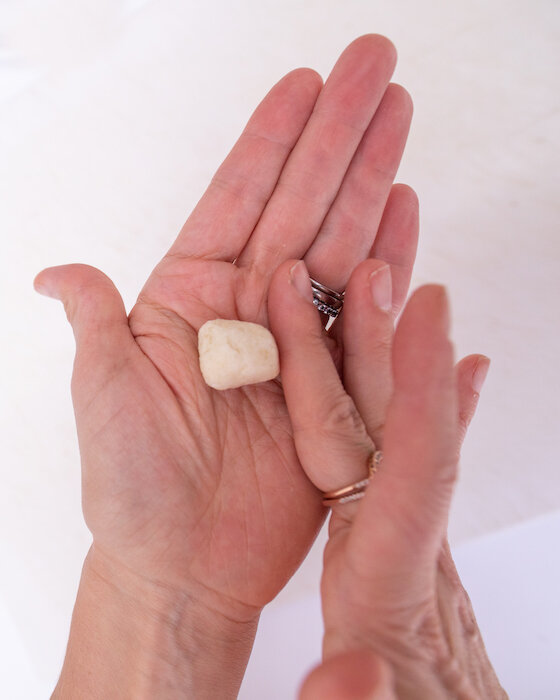
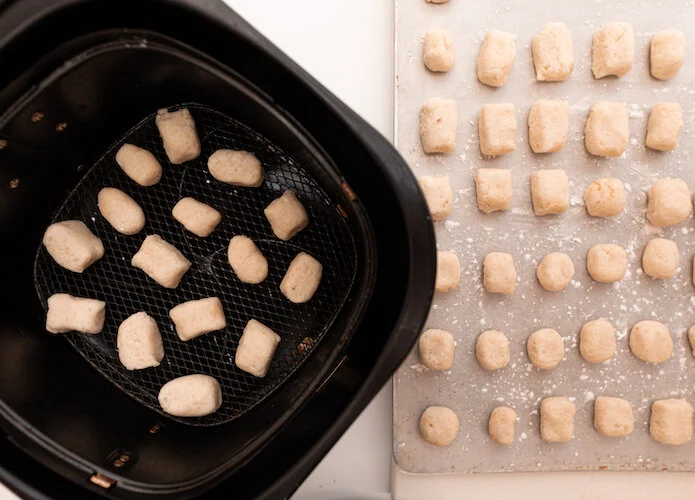
On a lightly floured surface, roll each quarter of the dough out using your hands to form a long rope about 3/4 to 1 inch in diameter. Cut the dough into 1/2 inch pieces and picking up each one, smooth the edges into small oblong balls resembling gnocchi. Once done, place on a lightly floured baking sheet lined with parchment paper.

Now it is time to cook the cauliflower gnocchi. I recently used an air fryer and loved the results. If you have one you can cook them at 400 for 6 -7 minutes or fry in a tbsp of olive oil on the stove in a pan until golden brown.

When ready, serve with sauce of choice.


FOLLOW ME ON INSTAGRAM @ISTHATSOH


If you like this air fryer cauliflower gnocchi recipe or have any comments/questions, feel free to leave them in the comment section below!


PIN THIS POST