DULCE DE LECHE CHEESECAKE WITH SHORTBREAD CRUST

When it comes to cheesecake I’ve got the biggest weak spot! This year, for my birthday I requested my boyfriend’s mom make her famous cheesecake recipe with a dulce de leche topping and shortbread crust and boy was I in heaven. Ever since we went to Argentina together on a family trip I have been obsessed with dulce de leche and to have it on my birthday cake just made all the amazing memories come flooding back. If you are not into dulce de leche, no worries. The cheesecake in this recipe has vanilla in it so it also makes for a great, more subtle vanilla cheesecake recipe.

ENJOY!

INGREDIENTS:

-Shortbread Crust -

1/2 CUP if Butter (softened)
1/4 CUP of Sugar
1 CUP of All-Purpose Flour

- Cheesecake Filling -

1 CUP of Whipping Cream 35% - divided into 2 portions
3 x 8oz Packs of Cream Cheese (softened)
3/4 CUP of Sugar
2 TBSP of Cornstarch
4 Eggs
4 TBSP of Vanilla

- Topping -
Apx 300ml of Dulce De Leche

DIRECTIONS:

In a large bowl, beat butter and sugar until fluffy before slowly incorporate the flour until crumbly.

Press dough into a 9-inch springform pan before refrigerating for 10 minutes.

Preheat oven to 400 degrees and when ready, bake shortbread crust for 15 minutes until golden.

In another bowl, whip one portion of cream until stiff peaks start to form. Set aside.

In another large bowl, beat cream cheese until it starts to become fluffy before adding in sugar and cornstarch. Continue to beat until the filling has a smooth texture.

Next, beat in eggs one at a time until blended before beating in the remaining whipping cream and vanilla.

Lastly, fold in whipped cream and pour over the baked crust before returning the cake back to the oven and reducing the temperature to 300 degrees. Allow cheesecake to bake for 70 minutes or until the center is almost set.

When ready, allow the cheesecake to sit in the springform pan while it cools on a cooling rack. You can run a knife along the edge of the pan to help you remove it. After removing the springform pan refrigerate for at least 6 hours or overnight if possible before serving.


I hope you enjoyed this recipe as much as I do. If you have any comments please leave them below and I'll be happy to answer them as soon as I can! Bon Appetite!!!


PIN THIS POST

SUNRYPE SLIM BOOZY POPSICLE RECIPES #SPONSORED

It may only be spring, but my heart is already yearning for summer. I love longer days, warmer nights, and being able to gather with friends. Summer entertaining is one of my favourite things to do on weekends, and I always look for any excuse to host a get together. It’s also a great way to just relax and take 10 for yourself and to actually enjoy the moment, instead of being wrapped up in the hustle and bustle of everyday life.

One thing I typically do in the summer is keep some fun popsicles in my freezer. Not only because they make a great after work treat and are a great party ‘wow’ factor, but because they help me take 10 for myself and cool down on those hot and sweaty summer nights when there isn’t a breeze for miles. I can still picture myself last summer, happy as a clam licking my popsicle as it dripped down my hand like I was twelve - so perfectly refreshing. Who is to say popsicles have to be just for kids anyways? As a matter of fact, MY popsicles are just for Adults.

To add a little extra fun to my popsicles, I booze them up in a multitude of ways. There are obviously so many variations you can make, but I always like to make sure that the ingredients I use taste great and aren’t filled with sugar and artificial elements. That is why I love to use SunRype Slim beverages as the perfect popsicle base, as they don’t have any artificial colouring, flavours or contain any aspartame, plus they only contain 10 calories per serving (250ml), how great is that!.

Using SunRype Slim makes it easy for me to adjust the amount of sweetness I want so my popsicles fit my palette (and calorie intake) and still maintain natural flavours and ingredients. The best part - they are so easy to make to your liking and easy to find. You can try this recipe out using a variety of different flavors including SunRype Slim Blueberry Burst, Cranberry Twist, Lemon Drop Lemonade, Long Island Iced Tea and Tropical Mango– all found in the non-refrigerated juice aisle of your grocery store.

Not into popsicles? SunRype Slim 10 low calorie beverages are also perfect without alcohol as a refreshing glass over ice on a warm summer day!

Tips before we get started
*   Soaking your popsicle sticks before making your popsicles will help with any buoyancy issues and prevent them from popping out of the molds completely.
*   Soaking your fruit in alcohol before hand adds for an extra punch!
*   SunRype Slim contains only 10 calories per serving (250ml). To keep calories per popsicle even lower, you can always leave out the simple syrup and replace with more SunRype Slim!

What are you waiting for? Take 10whether you have just 10 seconds or 10 minutes - for yourself and relax with a delicious SunRype Slim popsicle now!


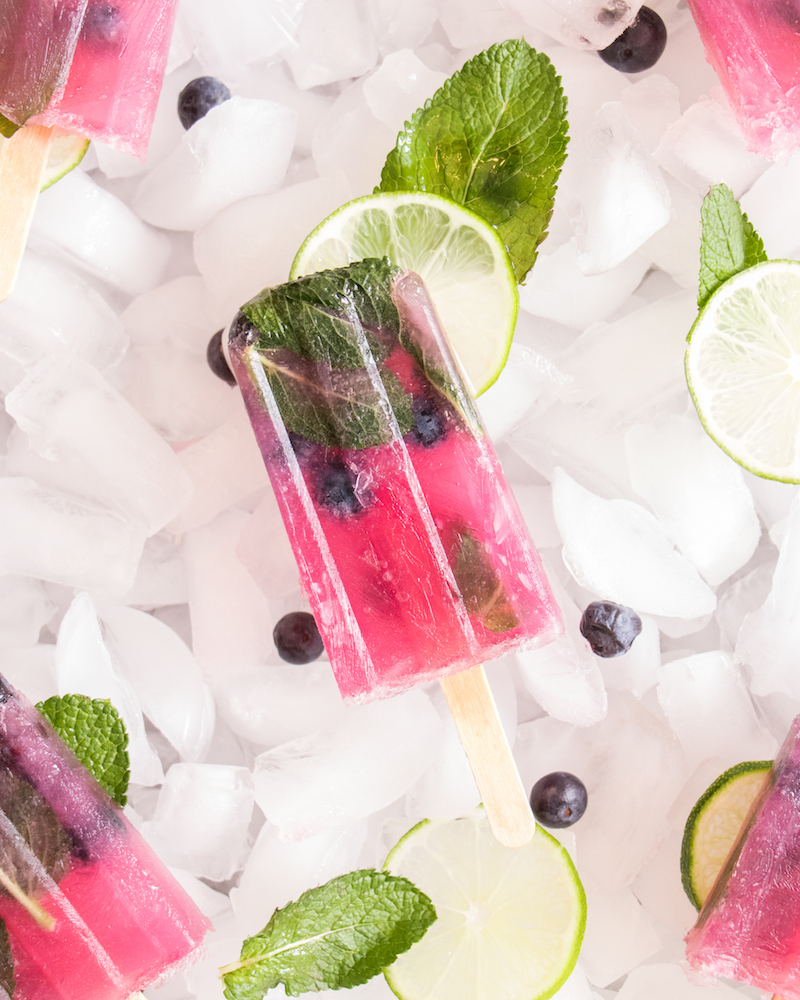
Blueberry Mojito Pops!

INGREDIENTS:

1/2 Cup of Sugar
1/2 Cup of Water
Mint
1 Bottle of SunRype Slim Blueberry Burst
3/4 Cup of Freshly Squeezed Lime Juice
1/2 oz Shot of Rum Per Popsicle
Blueberries

DIRECTIONS:

-    Make a simple syrup using equal parts sugar and water. Bring water to a boil and add in your sugar. You can also add in some mint to give your simple syrup extra flavour! Once sugar has completely dissolved, strain the mint from your simple syrup and let cool to room temperature. 

-    Fill 1/4 of each popsicle mold with SunRype Slim Blueberry Burst, then fill 1/4 of each popsicle mold with equal amounts of Lime Juice and Simple Syrup. Next add 1/2 Oz of Rum and some blueberries (maybe like 10 per mold). You can also add in some fresh mint leaves to each if you want. If there is still room in your molds, top it off with more SunRype Slim Blueberry Burst.

-    Add in your popsicle sticks and place popsicle molds in the freezer overnight for best results!

Spiked Peace Raspberry Ice Tea!

INGREDIENTS:

2 Peaches - sliced thin
1 Pint of Raspberries
1/2 Cup of Tequila
1/2 Cup of Vodka
1/2 Cup of White Rum
1/2 Cup of Sugar
1/2 Cup of Water
1 Bottle of SunRype Slim Long Island Ice Tea

DIRECTIONS:

-    Mix tequila, vodka, and white rum together in a bowl and add in your thin slices of peaches. Allow peaches and raspberries to soak up the alcohol overnight in the fridge.

-    Make a simple syrup using equal parts sugar and water. Bring water to a boil and add in your sugar. Once sugar has completely dissolved, let cool to room temperature. 

-    Place a couple of your alcohol soaked peaches and raspberries in each of the molds. Fill 1/2 of each mold with SunRype Slim Long Island Ice Tea. Fill the remainder with equal parts simple syrup and left over alcohol mix.

-    Add in your popsicle sticks and place popsicle molds in the freezer overnight for best results!


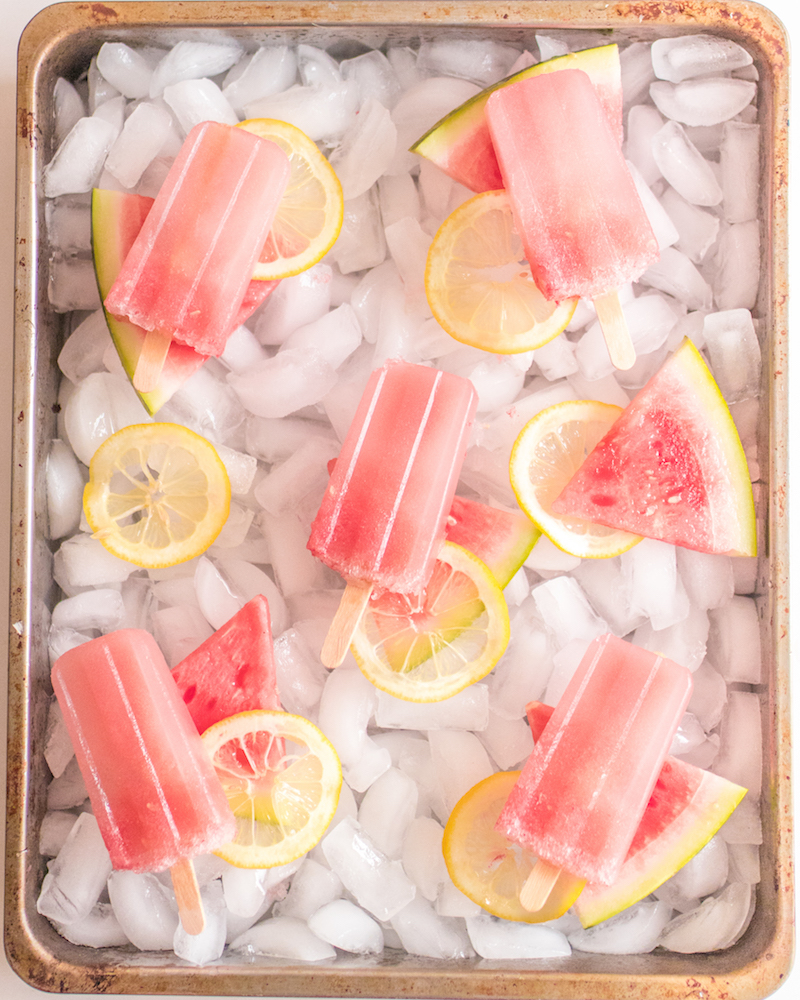
Watermelon Lemonade Prosecco Pops

INGREDIENTS:

1/2 a Seedless Watermelon (Cubed)
1 Bottle of SunRype Slim Lemon Drop Lemonade
1 Bottle of Prosecco
1 Lemon - to make thin lemon slices with

DIRECTIONS

-    Placed cubed watermelon in blender and liquefy.

-    Add 2-4 thin slices of lemon to each mold.

-    Fill 1/3 of each mold with watermelon juice, 1/3 with SunRype Lemon Drop Lemonade and 1/3 with Prosecco (pour Prosecco slowly as to not have the bubbles overflow).

-    Add in your popsicle sticks and place popsicle molds in the freezer overnight for best results!

Discover More With SunRype Slim10!

Disclaimer: This post has been generously sponsored by Sun-Rype, the opinions and language are my own and in no way do they reflect Sun-Rype


 PIN THIS POST

A GOOD CUP OF COFFEE - MY INSPIRATION FOR A TIRAMISU RECIPE #SPONSORED

Having recently witnessed my first Japanese tea ceremony I learned that the beauty behind the  ceremony is not only drinking tea and sharing the tea with others, but the consciousness of every action, movement in preparation, presentation, and enjoyment. The ceremony in fact is much more about reflection, meditation, and living in the moment than just drinking tea.

Although I am not much of a tea drinker I too am a creature of routine and morning meditation. Much like the Japanese tea ceremony, I have a series of actions, movements, and preparations I do to get ready for my day. One such action that must always occur is my morning coffee. When all is still dark and silent I sneak downstairs quietly to my kitchen, turn my stove on until I hear the familiar clicks of my gas stove and wait for the kettle to boil. During this time of patiently waiting for the water to boil I meditate and reflect on how I am feeling, how I slept, and let both my body and mind consciously connect while taking deep breaths and listening to the background sounds of slowly bubbling water.

With the whistles of my kettle I am brought back to the moment and like a dance I have performed hundreds of thousands of times previously, a series of moments I can practically do with my eyes closed, I gather all the instruments and ingredients I need to make my first cup of coffee. With each deliberate movement I am now focused and have only one goal - to achieve the perfect cup of coffee.

With the help of my Melitta ‘Pour Over Coffee Brewing Cone’, I am in control of how much coffee I want to make and how strong I want to make it. Usually for my morning coffee I use 4 tablespoons of coffee and make two cups - one I like to drink when it’s fresh and hot and the second I let cool for an ice coffee later. No matter what your coffee preference, weather you like your coffee flavoured, bold, dark roast, organic or even on the go - you can make coffee your way every morning with Melitta Pour Over Coffee.  

Once ready and when the rich aroma of my perfect cup of coffee hits my nose I like to move to the couch, cuddle up to my little Frenchie who is often still snoozing and take a moment to enjoy what I have created. With each sip my mind turns on and I am able to reflect and focus on what I want to accomplish in my day ahead. Believe it or not sometimes great inspiration is born in these still moments of reflection. Today as I was sipping my morning coffee I reflected on a cooking class I did on my recent trip to Italy. Inspired by both the memory and my morning cup of coffee I decided to turn that second cup of coffee into a delicious Tiramisu dessert I learned. And with that memory and inspiration I here leave you with a recipe for creating your own delicious Tiramisu and encourage you to find the joy and inspiration hiding in your own perfect cup of coffee. Enjoy.

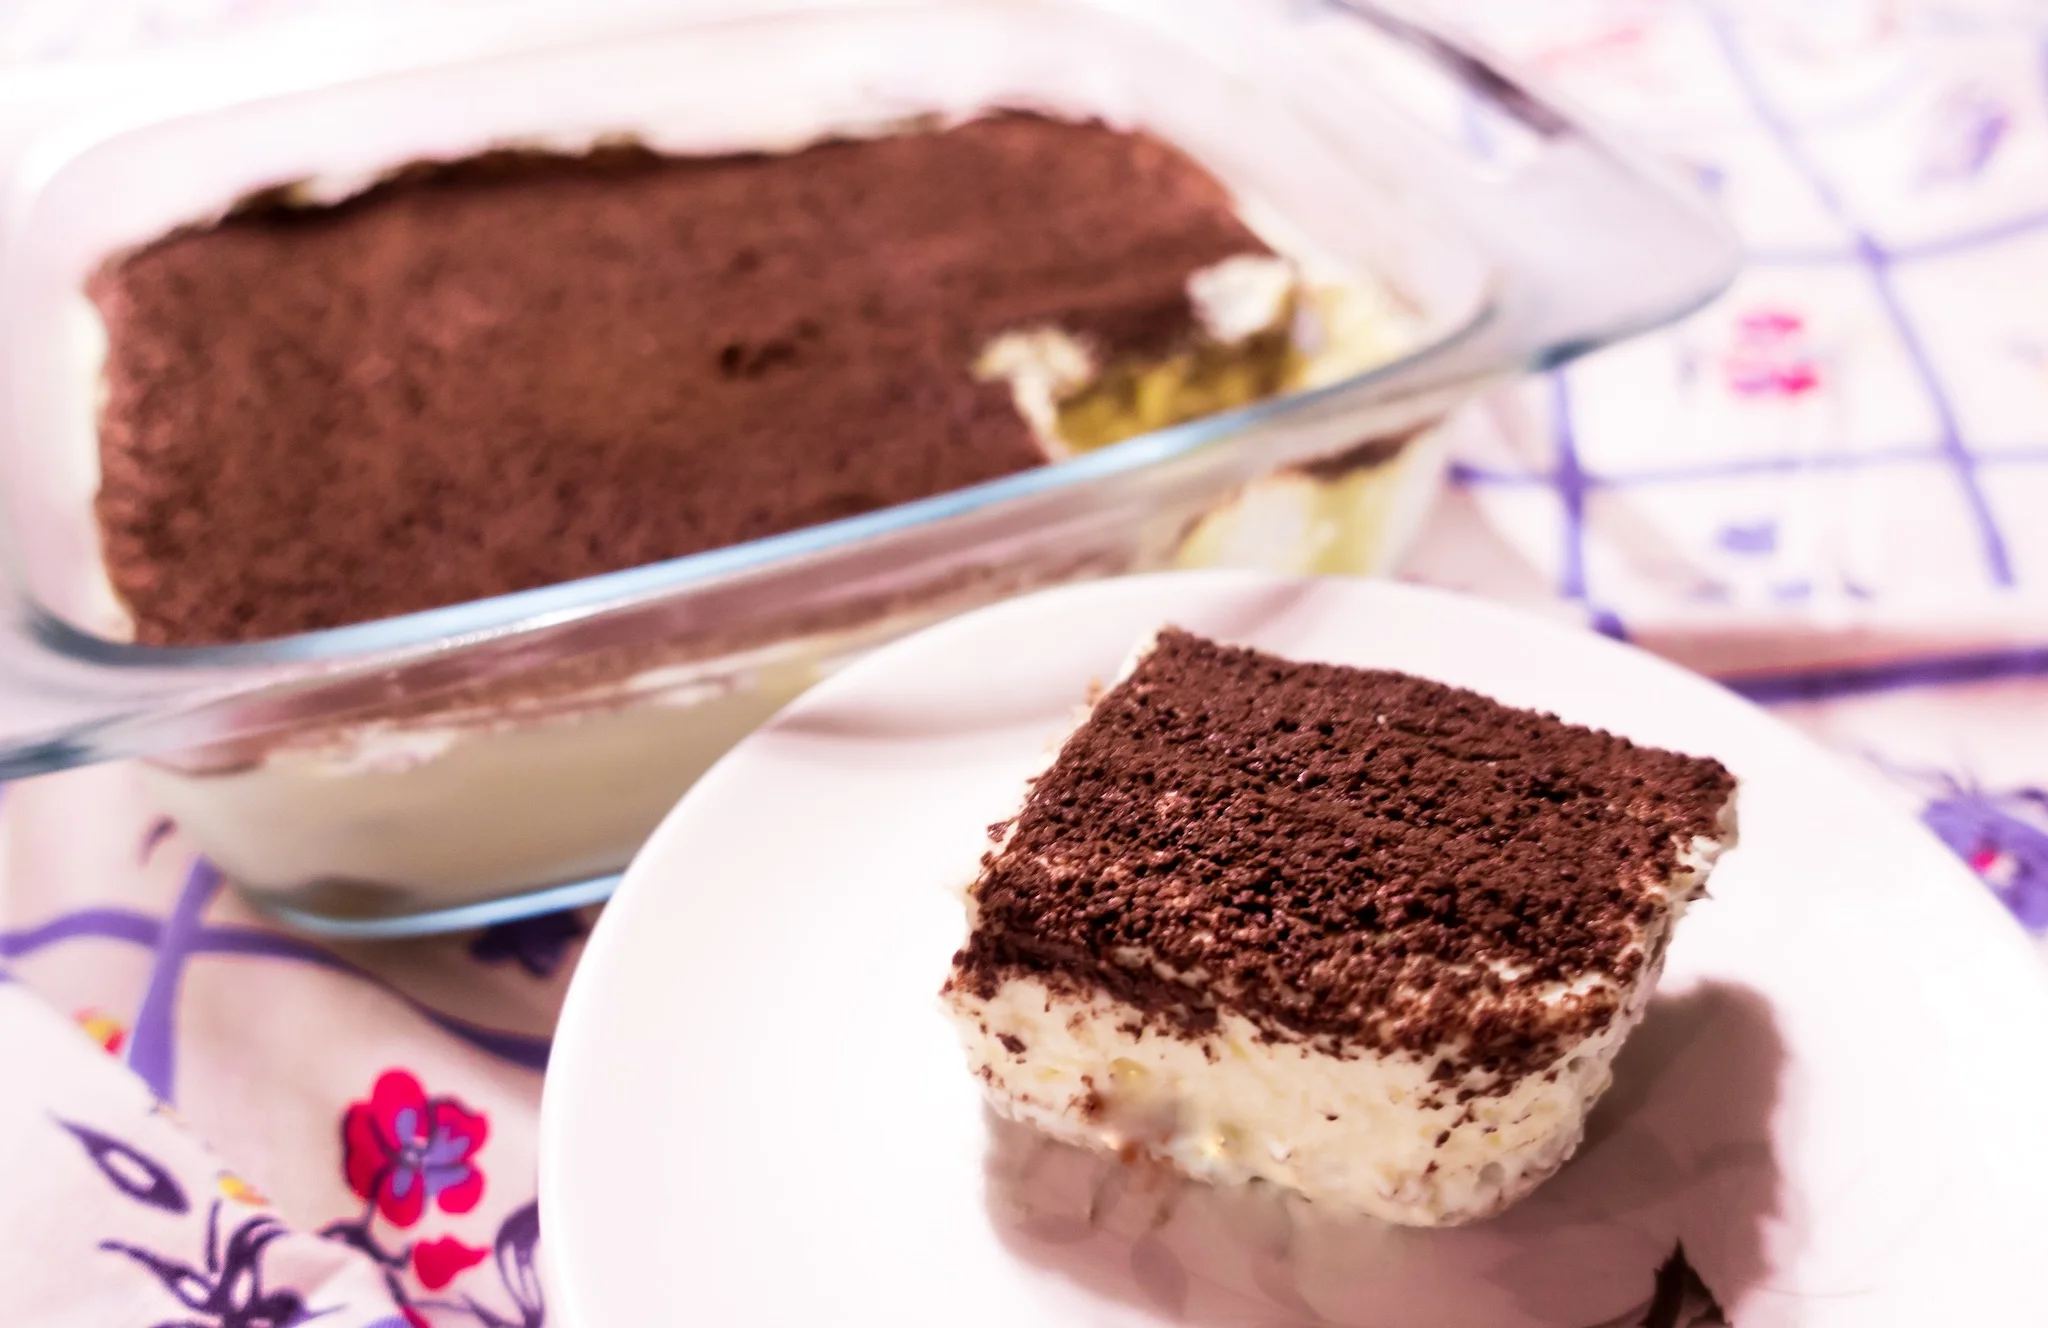
Tiramisu Recipe

Good for 4 people

INGREDIENTS:

4 Egg Yolks
4 TBSP of granulated sugar
400g or 1 3/4 Cups of Mascarpone cheese
1 Box of Ladyfingers Biscuits
Coco Powder
1 Cup of Melitta Pour Over Coffee - room temperature
*Optional - Add some almond extract or rum (just a few drops) to the cream to add another layer of aroma

DIRECTIONS:

Making the Cream

Mix the egg yolks with the sugar using a whisk until a soft cream starts to form.

Add the Mascapone cheese in bit by bit being careful not to dissolve the texture.

Once a nice cream base is formed if you want, you can now add in a couple drops of your almond extract or rum for additional aroma.

Making the Tiramisu

Fill the bottom of an individual sized mason jar, teacup or if you only want to make one large one for a group, cake pan with a layer of cream.

Next dip the lady finger (you may need to break it in half depending on what you are using to hold your tiramisu) into the coffee quickly so it gets submerged but doesn’t crumble from holding to much liquid. Place a lady finger layer on top of cream layer.

Repeat alternating these two processes of cream and ladyfinger until individual mason jar, teacup or cake pan is full. Add final layer of cream to the top if you did not end with cream and sprinkle sifted coco powder over top. Store in fridge until ready to serve.


If you like this recipe or have any comments/questions, feel free to leave them in the comment section below!


Although this post has been generously sponsored by Melitta Canada, the opinions and language are my own, and do not reflect Melitta Canada.


Find out more about Melitta at Melitta.ca