

Here I go! Trying something I’ve never done before!
* Please Note - Some links in this blog post are affiliate links *
Gold Foil Ceiling DIY
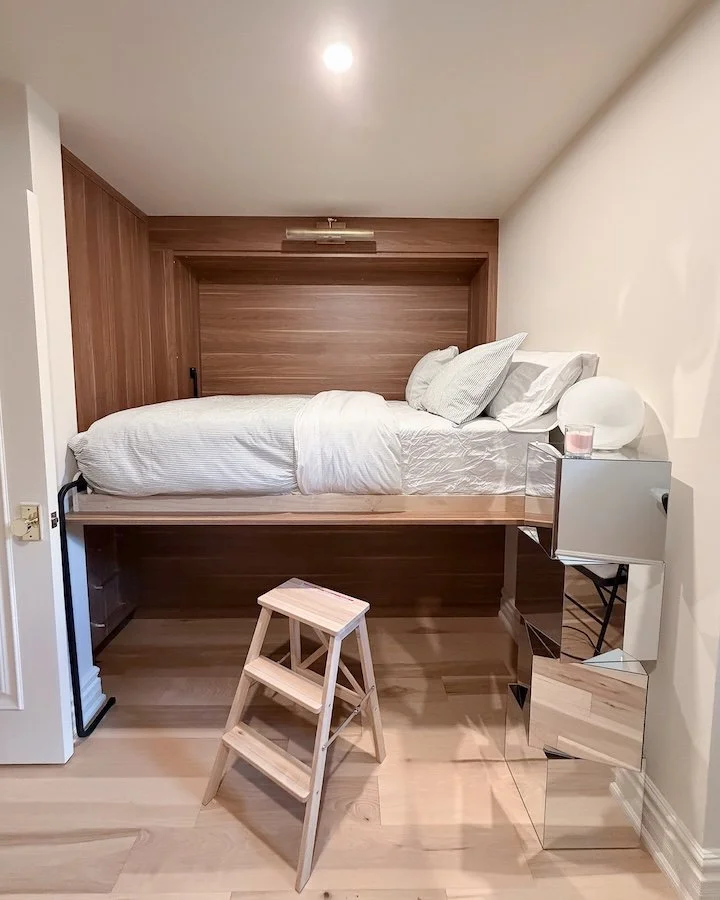
Prior to starting our basement underpin my husband and I knew we needed a space to gather, relax, watch TV and play with our son. I had already been gathering inspiration for months and was drawn to the idea of designing a space that felt more like a theatre room versus a secondary living room. Given that I live in a 125+ years old Toronto Romanesque Victorian, gold foiling the ceiling just felt appropriate. I knew if I could pull off applying the gold foil, the combination of the cove ceiling and the recessed LED light channel would take the room’s ambience to a whole new level. Still, I had never gold foiled anything before. Intimidated by the idea, I did a lot of research before starting and can thankfully report that there was no need to be. Applying gold foil to the ceiling was super fun, almost meditative and honestly it’s kind of a forgiving DIY material. There is no need to worry about not having lots of experience with this one, just be ready to get covered in glitter after.
Gold Foil Experiment
If you aren’t following me on Instagram you would have totally missed the series of stories I posted this past April of my gold foil experiment. Essentially I had sourced some imitation gold foil from China and had received several gold variation samples to try. Since we were in the process of finishing our basement, I grabbed a left over piece of drywall and over the next two days fixed it up and got it paint ready.


During my research I had noticed a base coat was used in several references. Still I had questions…. If you properly cover the area in foil, is it really necessary? Is a base coat just red paint? What makes it special? So during my sample test I experimented and applied a red base coat to only half of the test piece and although in the end I concluded that there really was no difference from the side that did have a base coat vs the side that didn’t, I did use a base coat on my basement ceiling.
Ultimately my husband reminded me that I was doing this for the first time and this was not the project to skip steps on. LOL! So I did it. Just to be clear though, I do not think a base coat is any different from a water based red paint or is special in any way. Maybe if you are using real gold foil it would be different but for the imitation stuff, I did not notice any difference following my gold foil experiment.
In the end I choose ‘light gold’ for the basement. I knew the LED cove lighting would warm it up so I tried to keep that in mind when visualizing what it would look with the green cabinetry and cream walls. If you are going to attempt to do a room vs an object, I recommend you take the lighting and colour of the room into account because it will have an effect on the foil.

After finishing the ceiling I painted one wall green and noticed it sent an unexpected cast onto the ceiling so I pivoted!
Where To Get Gold Foil Materials
Other than the imitation gold foil which I sourced online from China, all the other materials you need for this DIY you can find at your local sculpture art store and hardware store. You can also find some of them on my Amazon Storefront.
FOLLOW ME ON INSTAGRAM @ISTHATSOH


Gold Foiling The Ceiling Steps & Tips
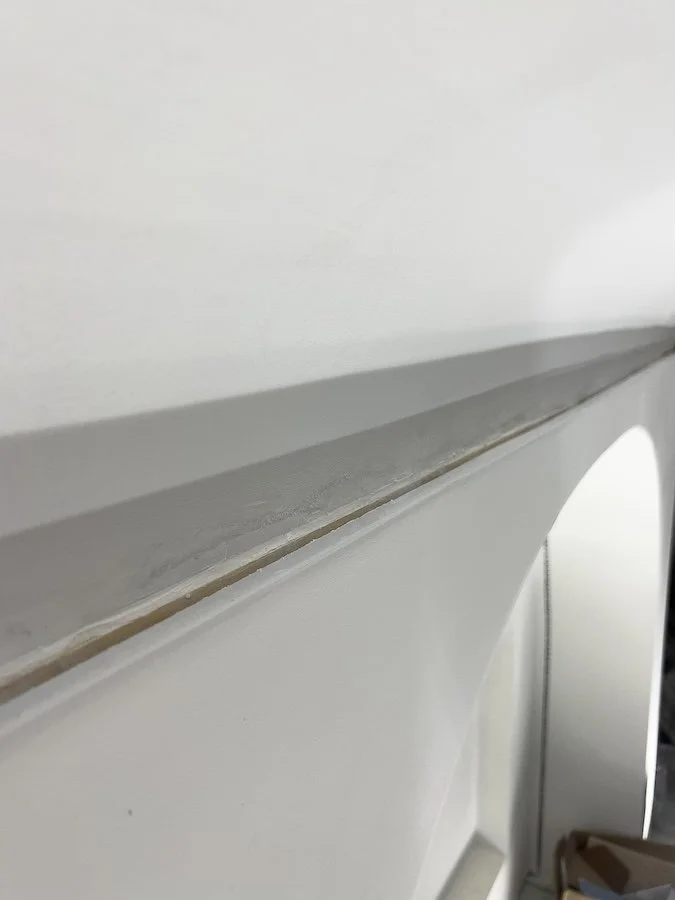
Fixed up the drywall edges before starting the foiling process.
Step 1 - Prep your workspace
I know ‘you’re only going to be as good as your base’ so the first thing I did was prep my workspace. The drywall edges along the ceiling cove were rough and had lots of gaping so I used Polyfilla all along the edges, applying it generously with a spatula before wiping all excess away. Once the Polyfilla dried I gave it a quick sand, vacuumed the area and applied a coat of primer.
Tools & Materials Used:
TIP: Cover your floors! I spilled glue a few times during this DIY and was very thankful I had put a protective layer down to protect my new floors.

Applied a red base coat to the entire ceiling
Step 2 - Apply your red base coat
Once my primer was dry I could begin applying my base coat. To do this I used a microfibre roller and rolled it on the entire area.
Tools & Materials Used:
Gold Foil Base Coat *check can to see if you need to shake it before opening*
Microfiber Roller
Paint Tray
Stir Stick
TIP: Although rolling the base coat on was really easy, I do remember the roller soaked up a lot of product and the biggest size I could find of the base coast was a 32 Oz Quart. I had ordered two cans and just had enough to cover my ceiling. If you are going to do a red base coat my advice is to get more of this product than you need because it doesn’t go as far as you would think. The next two product, the adhesive and sealer, actually do go further but this base coat doesn’t…
Still so suspect about the base coat. LOL

The Metal Leaf Adhesive starts milky and turns clear after an hour
Step 3 - Apply Metal Leaf Adhesive
When the base coat dried completely I could move onto the adhesive. You need to apply the adhesive generously without leaving puddles and wait an hour for it to get tacky. When you first apply the adhesive it will have a milky appearance but as it sets and becomes tacky it will go clear. That is how you know it’s ready for foil.
Tools & Materials Used:
Gold Foil Adhesive *check can to see if you need to shake it before opening*
Paint Brush (my preferred) or Roller
A clean take out food container (I used this to hold and store my glue so I didn’t have to contaminate the can
TIP: Since I could only work on this project during my son’s nap time and in the evenings, I decided to work in three foot by three foot sections. This project did take me a few weeks to complete so instead of covering the entire ceiling in adhesive I would repeat steps three and four each time to ensure my glue was always ‘fresh’ vs covered in dust or debris from being exposed for multiple weeks. If you are working on a smaller area or have more time available to complete your project, you can totally do it in one go otherwise I would suggest doing it in sections like me.
ENJOYING THIS CONTENT? CHECK OUT SOME OF MY OTHER EPISODES AND BLOG POSTS!


Step 4 - Apply Gold Foil
Once the glue becomes tacky you can start applying the foil. I began in a corner and worked my way across one wall. Anywhere you applied glue, foil will stick to. Getting the hang of applying the foil does take a little bit of practice but after you do one pass it gets a lot easier . Even if you do a terrible job with the first pass, know you can always go over it. That’s what I did after I finishing the whole ceiling. I had perfected the application by the end and went back to that first strip of wall, applied glue, waited an hour, and did the whole section over. You can’t even tell there are two layers of material so don’t worry about getting it perfect.
When applying the foil, the easiest way to do it is to try and overlap the sheets so you know you’re covering everything but since I don’t live in a perfect world where I get the placement right every time, if you do have gaps, you can just take some scrap foil and place it is that area. Foil will stick to anything that has glue on it and any excess will get brushed away so you wont notice the small gaps you covered up with scrap foil in the end.


Every once and awhile I would throw up a laser level just to reset my lines but honestly I didn’t fuss to much about getting them perfectly straight all the time and I don’t think it shows or is even noticeable in the end.
Once I applied foil to the entire section I was working on I would use a wide, flat head brush to push out all the air bubbles before going back in with a small fluffy head brush and gently brush all the excess foil away. This is the super messy bit of the project so be prepared for everything to be covered in glitter.
Tools & Materials Used:
Gold Foil Sheets
Wide, Flat head brush
Small fluffy head brush
TIP: I noticed in the first pass that the foil was very delicate and would get stuck to any small amount of adhesive that was left behind on my hands. To help minimize this I would rub a drop or two of olive oil on my hands after completing step 3 (applying the adhesive). This I found significantly helped make the foil application processes go smoother.

Step 5 - Apply Gold Leaf Sealer
Once I completed the whole ceiling it was time to add our final coat, a sealer. For this I used a foam roller which, not so much that you would notice but did leave some streaks if I look closely. If I could do this part again, I would maybe try a microfiber roller over a foam roller for his application, or maybe do two coats as I only did one, but yea, didn’t love the foam roller for this step.
Tools & Materials Used:
Metal Leaf Sealer *check can to see if you need to shake it before opening*
Microfiber Roller
Paint Tray


Alright friends, thank for joining me for another episode of Soh At Home! I hope you enjoyed this Gold Foil Ceiling DIY tutorial and gave it a thumbs up. If you have any questions about my gold foil ceiling or cove ceiling design feel free to leave them in the comments below. I did start a new Instagram for my new Soh At Home series so if you would like to show your support, feel free to give it a follow!
Until next time,
- Soheila


