SPAGHETTI AGLIO E OLIO - A SIMPLE ITALIAN CLASSIC

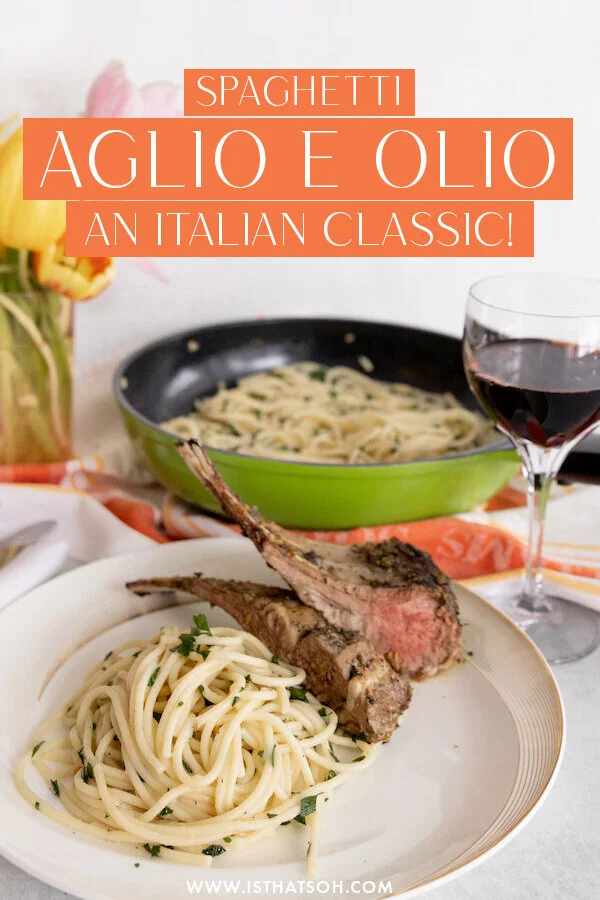
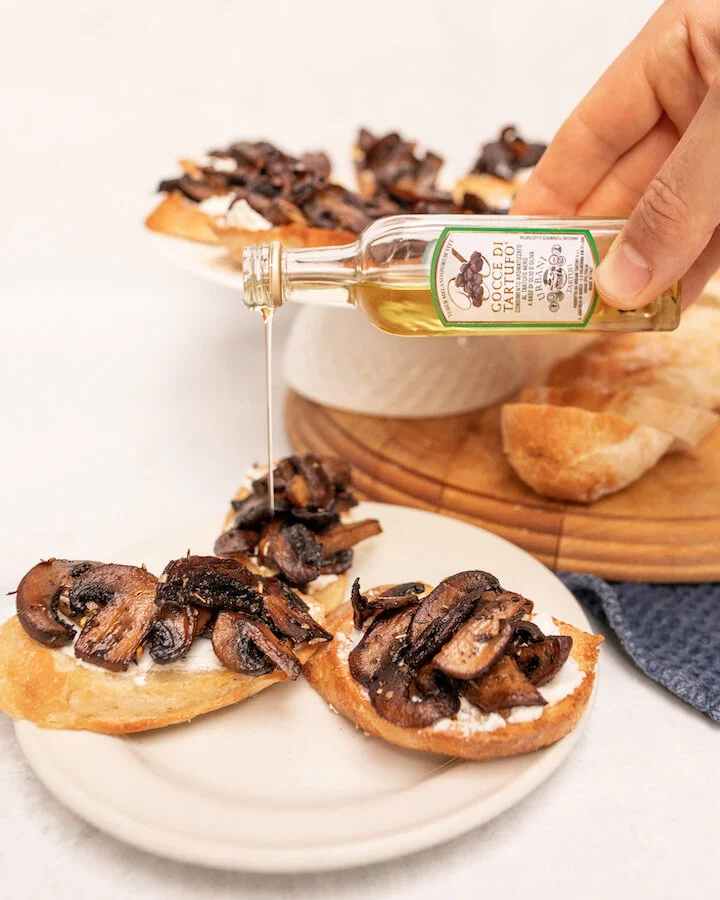
Leave it to the Italians to create an incredibly flavourful pasta dish using only a few inexpensive ingredients! This absolute classic is one of my all-time favs and takes less than 10 minutes to whip up. In my household, we like to serve it alongside meat dishes like my mom’s coveted rack of lamb recipe or occasionally by itself with a few added shrimp on top! If you are looking for a quick, student-friendly pasta dish to whip up or something to add to a protein as a side, you can’t go wrong with a simple yet flavorful dish like this one!

* Please Note - Some links in this post may be affiliate links *
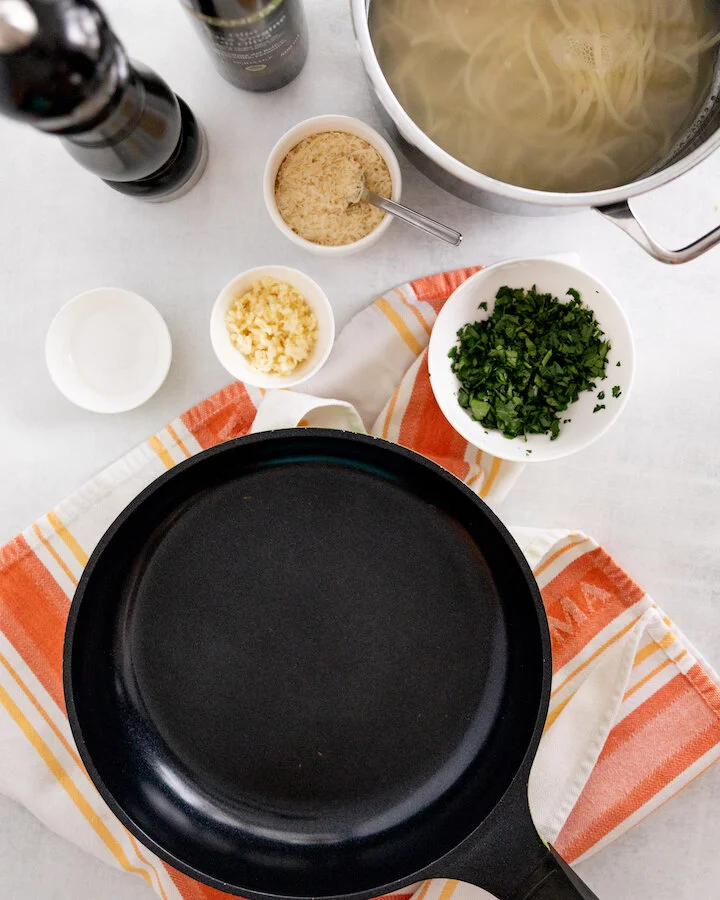
INGREDIENTS:

Serves 4 People

2 TBSP of Olive Oil
4 Cloves of Garlic - Minced
1 Pack of Spaghetti - cooked al dente
Italian Parsley - Roughly Chopped
Parmesan Cheese - Grated
Salt and Pepper

You can also add chilli flakes to make it a little spicy or a few shrimp!


CHECK OUT THESE OTHER DELICIOUS ITALIAN RECIPES


DIRECTIONS:

Bring water to a boil on the stove, salt, and cook your pasta.

When pasta is almost ready, heat up your olive oil on medium heat in a large skillet. When hot, add in your garlic and cook for 2-3 minutes. If you like a little spice, feel free to add in some chili peppers too.

Once garlic is fragrant, add in your cooked pasta, sprinkle on some grated parmesan, and some roughly chopped parsley.

Salt and pepper to taste and serve with more parmesan on the side.

Enjoy!


FOLLOW ME ON INSTAGRAM @ISTHATSOH


I hope you enjoyed this recipe as much as I do. If you have any comments please leave them below and I'll be happy to answer them as soon as I can! Happy cooking!!!


PIN THIS POST

MOROCCAN BROCCOLI SALAD - GLUTEN FREE, KETO & VEGAN

Packed full of antioxidants, this delicious Moroccan raw broccoli salad is both beautiful to look at and packed full of nutrients. If you, like me, are looking for ways to eat healthier without compromising on taste, this gluten free, vegan, keto broccoli salad is perfect. Since it can be prepared a day in advance and keeps well in the fridge, it also is great for meal planning or a grab-and-go snack. Not to mention it takes only a few minutes to make!

Enjoy!

INGREDIENTS:

Serves 4

- Dressing -
6 TBSP of Grape Seed Oil
1 TSP of Ras-El-Hanout Spice
1 Garlic Clove (pressed or chopped finely)
2 TBSP of Fresh Lemon Juice
2 TBSP of Balsamic Vinegar
1 TBSP of Honey (can be substituted with Agave if you are vegan)
Salt and Pepper to taste

- Salad -
6 CUPS of Broccoli Florets
1 Shallot (chopped Finely)
1 Jalapeno (chopped finely)
1/3 CUP of Dates (pits removed and chopped finely) - reduce the amount or leave out if you want more of a keto broccoli salad)
1/4 Cup of Roasted Pistachios (chopped finely)
Salt and Pepper to taste

- Optional Garnish-
1/4 CUP of Pomegranate Seeds
5-6 Slices of Pickled Beets (use sugar-free pickled beets if you want more of a keto broccoli salad)


LOOKING FOR SOME HEALTHY RECIPES? CHECK THESE OUT TOO!


DIRECTIONS:

Remove sauce pan from heat and add in lemon juice, balsamic vinegar, and honey (or agave). Salt and pepper to taste and set aside to cool.

Next, add your broccoli, shallots, dates, jalapenos and pistachios to a large salad bowl. Dress with your ras-el-hanout dressing, toss and garnish with pomegranates and slices of picked beats. Salt and pepper once again to taste.

Cover and chill if prepared in advance otherwise enjoy!


FOLLOW ME ON INSTAGRAM @ISTHATSOH


I hope you enjoyed this gluten free, vegan, keto broccoli salad recipe as much as I do. If you have any comments please leave them below and I'll be happy to answer them as soon as I can! Happy cooking!!!


PIN THIS POST

MEDITERRANEAN VEGAN BEAN SALAD!

As someone who is always looking for ways to make ‘honouring my body’ easier, following a balanced diet such as the traditional Mediterranean diet makes doing so not only satisfying but undeniably more delicious! If you are looking for ways to add more protein to your diet without always gorging on meat, mix bean salad make a great substitute. Packed full of protein and carbs, this Mediterranean vegan bean salad will give you a boost of energy to help sustain you throughout the day. It has more nutritional value than a regular leafy green salad and keeps well for 3-4 days in the fridge, making it perfect for meal planning. It’s also very inexpensive to make and can be whipped up in less then 10 minutes! Regardless of your motivation, I know you’ll not only love the flavour, but feel good about eating it too!

Enjoy!

INGREDIENTS:

Serves 4-5

1 Shallot (finely chopped)
3TBSP of White Wine Vinegar
1/2 Cup of Parsley (roughly chopped)
1/4 Cup of Chives (roughly chopped)
1/4 Cup of Mint (roughly Chopped
Olive Oil
2 x 15 oz Mix Bean Medley
Salt and Pepper


LOOKING FOR VEGAN RECIPES? CHECK THESE OUT!


DIRECTIONS:

Add white wine vinegar to shallots and set aside for 5 minutes.

Next get a large bowl and add in your chopped parsley, chives and mint. Coat in olive oil. Add bean medley. Salt (generously) and pepper to taste.

Lastly add in your white wine vinegar shallots, toss and serve!


FOLLOW ME ON INSTAGRAM @ISTHATSOH


I hope you enjoy this vegan bean salad recipe as much as I do. If you have any comments please leave them below and I'll be happy to answer them as soon as I can! Happy cooking!!!


PIN THIS POST

ROASTED POTATO TOWERS WITH THYME AND GOAT CHEESE!

When planning for a dinner party it’s important to make sure that whatever you are serving matches or has a progression. This recipe for roasted potato towers, although not complicated in terms of flavor profile, make a really appetizing side dish and pairs well with meats, pasta, and even some seafood dishes like scallops!

INGREDIENTS:

Makes 6 Servings

4-5 Yukon Potatoes - thinly sliced (about 1/8 inch thick)
7 TBSP Butter - melted
1 TBSP of Fresh Thyme - removed from stems
Coarse Salt and Cracked Pepper (to taste)
Goat Cheese

- Cooking Items-
Muffin Tin
Baking Tray
Aluminum Paper


CHECK OUT THESE OTHER DELICIOUS SIDE DISHES!


DIRECTIONS:

Preheat the over to 350 degrees.

Place the cut up potato slices into a large the bowl. Add the butter, thyme, salt, and pepper and mix together so the potatoes are well coated.

Take a muffin tray and butter the tray. In a circular motion start to stack the potatoes into tower form. TIP: Use the smaller pieces at the bottom of the muffin tray and the larger slices at the top.

Cover the tray with aluminum foil and bake in the oven for 30 minutes.

After 30 minutes take the cupcake tray out of the oven and turn the heat up to 450.

Next, we are going to flip the potato towers, aluminum foil and all, over onto a baking tray and remove the muffin tray. When you have successfully completed this step and fixed your towers so they stand up straight again (don’t worry it happens to all of us) place the tray back into the oven for an additional 15 minutes until they cook and become more crispy.

When they are nice and crispy take them out of the oven and add a dollop of goat cheese to the top (or if you want them to be really pretty pipe goat cheese onto them with an icing piper!), followed by a small piece of thyme for garnish.

Serve while hot!

Enjoy!


I hope you enjoyed this recipe as much as I do. If you have any comments please leave them below and I'll be happy to answer them as soon as I can! Happy cooking!!!


FOLLOW ME ON INSTAGRAM @ISTHATSOH


PIN THIS POST

Potato Towers.jpg

DECADENTLY DELICIOUS MUSHROOM BRUSCHETTA WITH GOAT CHEESE AND TRUFFLE OIL

If you love truffle anything as much as I do, you are going to love this mushroom bruschetta with goat cheese recipe!! My boyfriend Adam originally created this easy mushroom bruschetta recipe with some leftover mushrooms we had and it was so decadently delicious, I had to steal it for the blog! I have always been a fan of tomato bruschetta and first learned how to make bruschetta when I was in Italy a few years back and it’s honestly one of my favourite appetizers. Although I do love a good classic bruschetta, I enjoyed trying different bruschetta toppings this time around. So here you guys go! An Adam original -Mushroom Bruschetta with Goat Cheese and Truffle Oil - bound to make your mouth water, just like it did mine! Enjoy!

INGREDIENTS:

Serves 4- 5 people or makes 15 -18 pieces

18 oz Cremini Mushrooms - Chopped
1/4 Cup of Butter - divided into two portions
Salt and Pepper to Taste
1/4 TSP of Dried Thyme
1/4 TSP of Dried Oregano
1/4 TSP of Chilli Flakes
French Baguette - cut into crostinis
2-3 TBSP of Olive Oil
1 Small Pack of Goat Cheese
Truffle Oil - as desired


FEELING ITALIAN FOOD TONIGHT? CHECK OUT THESE OTHER ITALIAN RECIPES?


DIRECTIONS:

Before we get started with making the bruschetta with mushrooms, preheat the oven to 375 so we can toast the bread.

Heat up a skillet on medium heat and once hot, add in one portion of the butter.

Once completed melted, add in mushrooms and turn up to high heat. You will notice after a few minutes a lot of water will start to release out of the mushroom. Continue to cook on high heat, making sure all mushrooms are coated in butter and allow the water to evaporate.

Once evaporated turn heat down to medium, salt, and pepper as desired, and add in your herbs and spices. Mix until well incorporated.

Next, add in your second portion of butter and coat mushrooms thoroughly. Allow to cook for another 10 or so minutes, stirring every few minutes to avoid burning.

While that cooks, place slices of bread on a baking tray and coat each piece with some olive oil before placing it in the oven for 5 minutes or until toasted. When ready remove, allow to cool for a few minutes before coating with goat cheese.

When mushrooms are ready, add them on top of the goat cheese covered crostini’s and garnish with truffle oil before serving.


FOLLOW ME ON INSTAGRAM @ISTHATSOH

Gallery Block
This is an example. To display your Instagram posts, double-click here to add an account or select an existing connected account. Learn more

I hope you enjoyed this easy recipe for mushroom bruschetta with goat cheese and truffle oil as much as I do. If you have any comments please leave them below and I'll be happy to answer them as soon as I can! Happy cooking!!!


PIN THIS POST