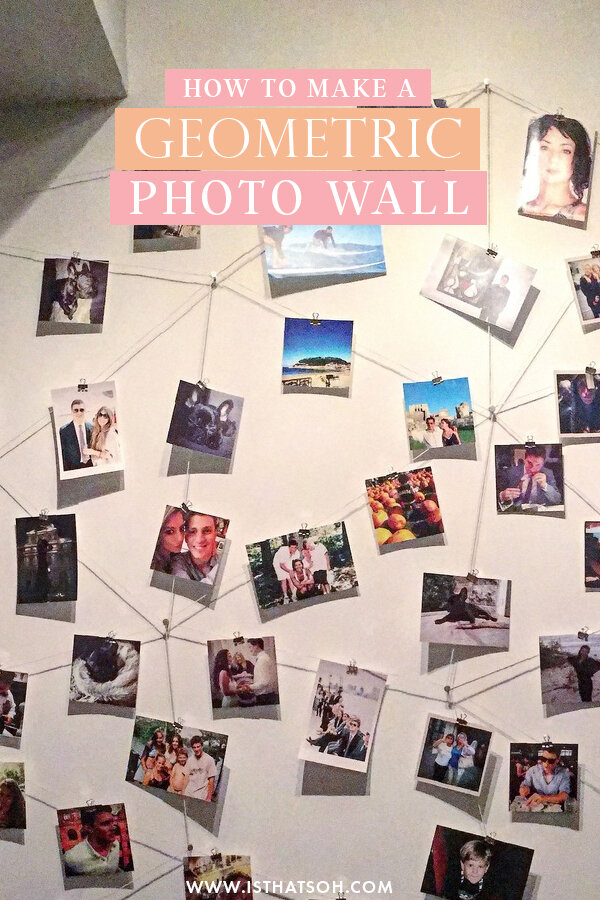
So having just moved into a new apartment, I am desperate to make it feel like home. I know from my friends who are interior decor experts that "feature walls" are trending and can really bring life to any room. This geometric photo wall is like hitting two birds with one stone. I get my feature wall and also personalize my new home sweet home. It took me about an hour to actually make the wall but there is a bit of preparing that needs to be done like printing out your photos. If you are a student or are just looking for an inexpensive way to jazz up a room this is it!
MATERIALS:
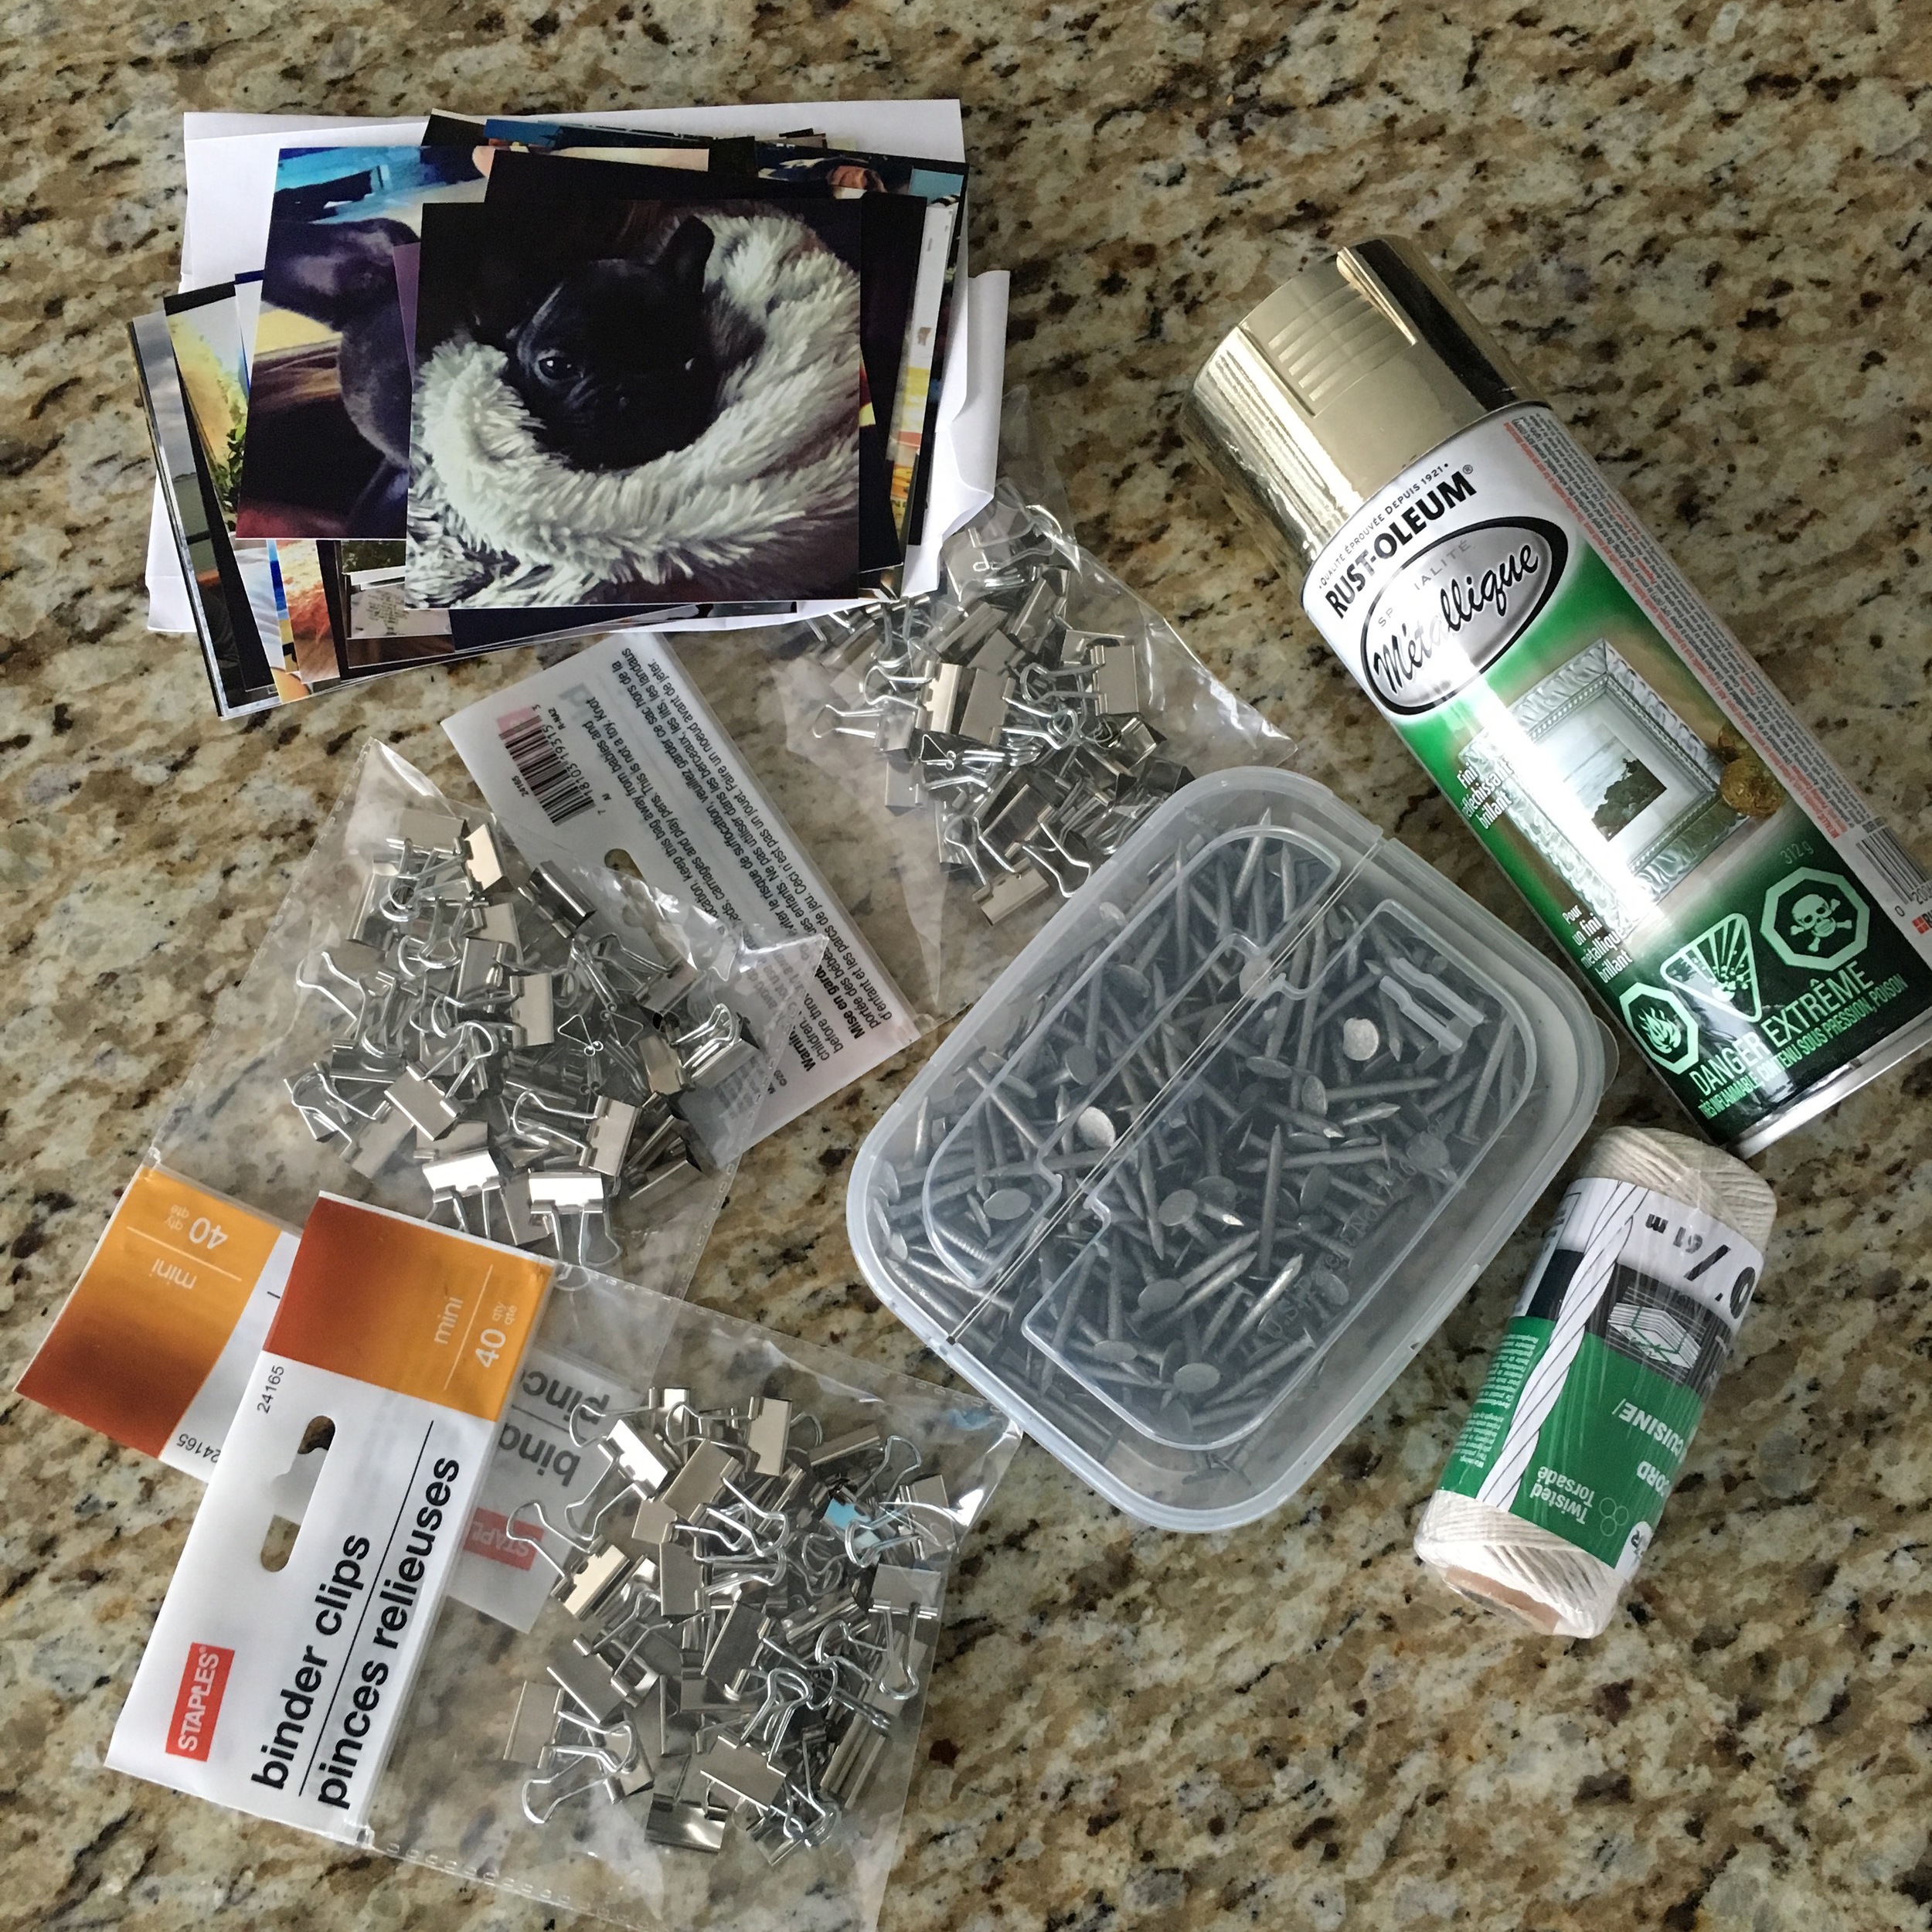
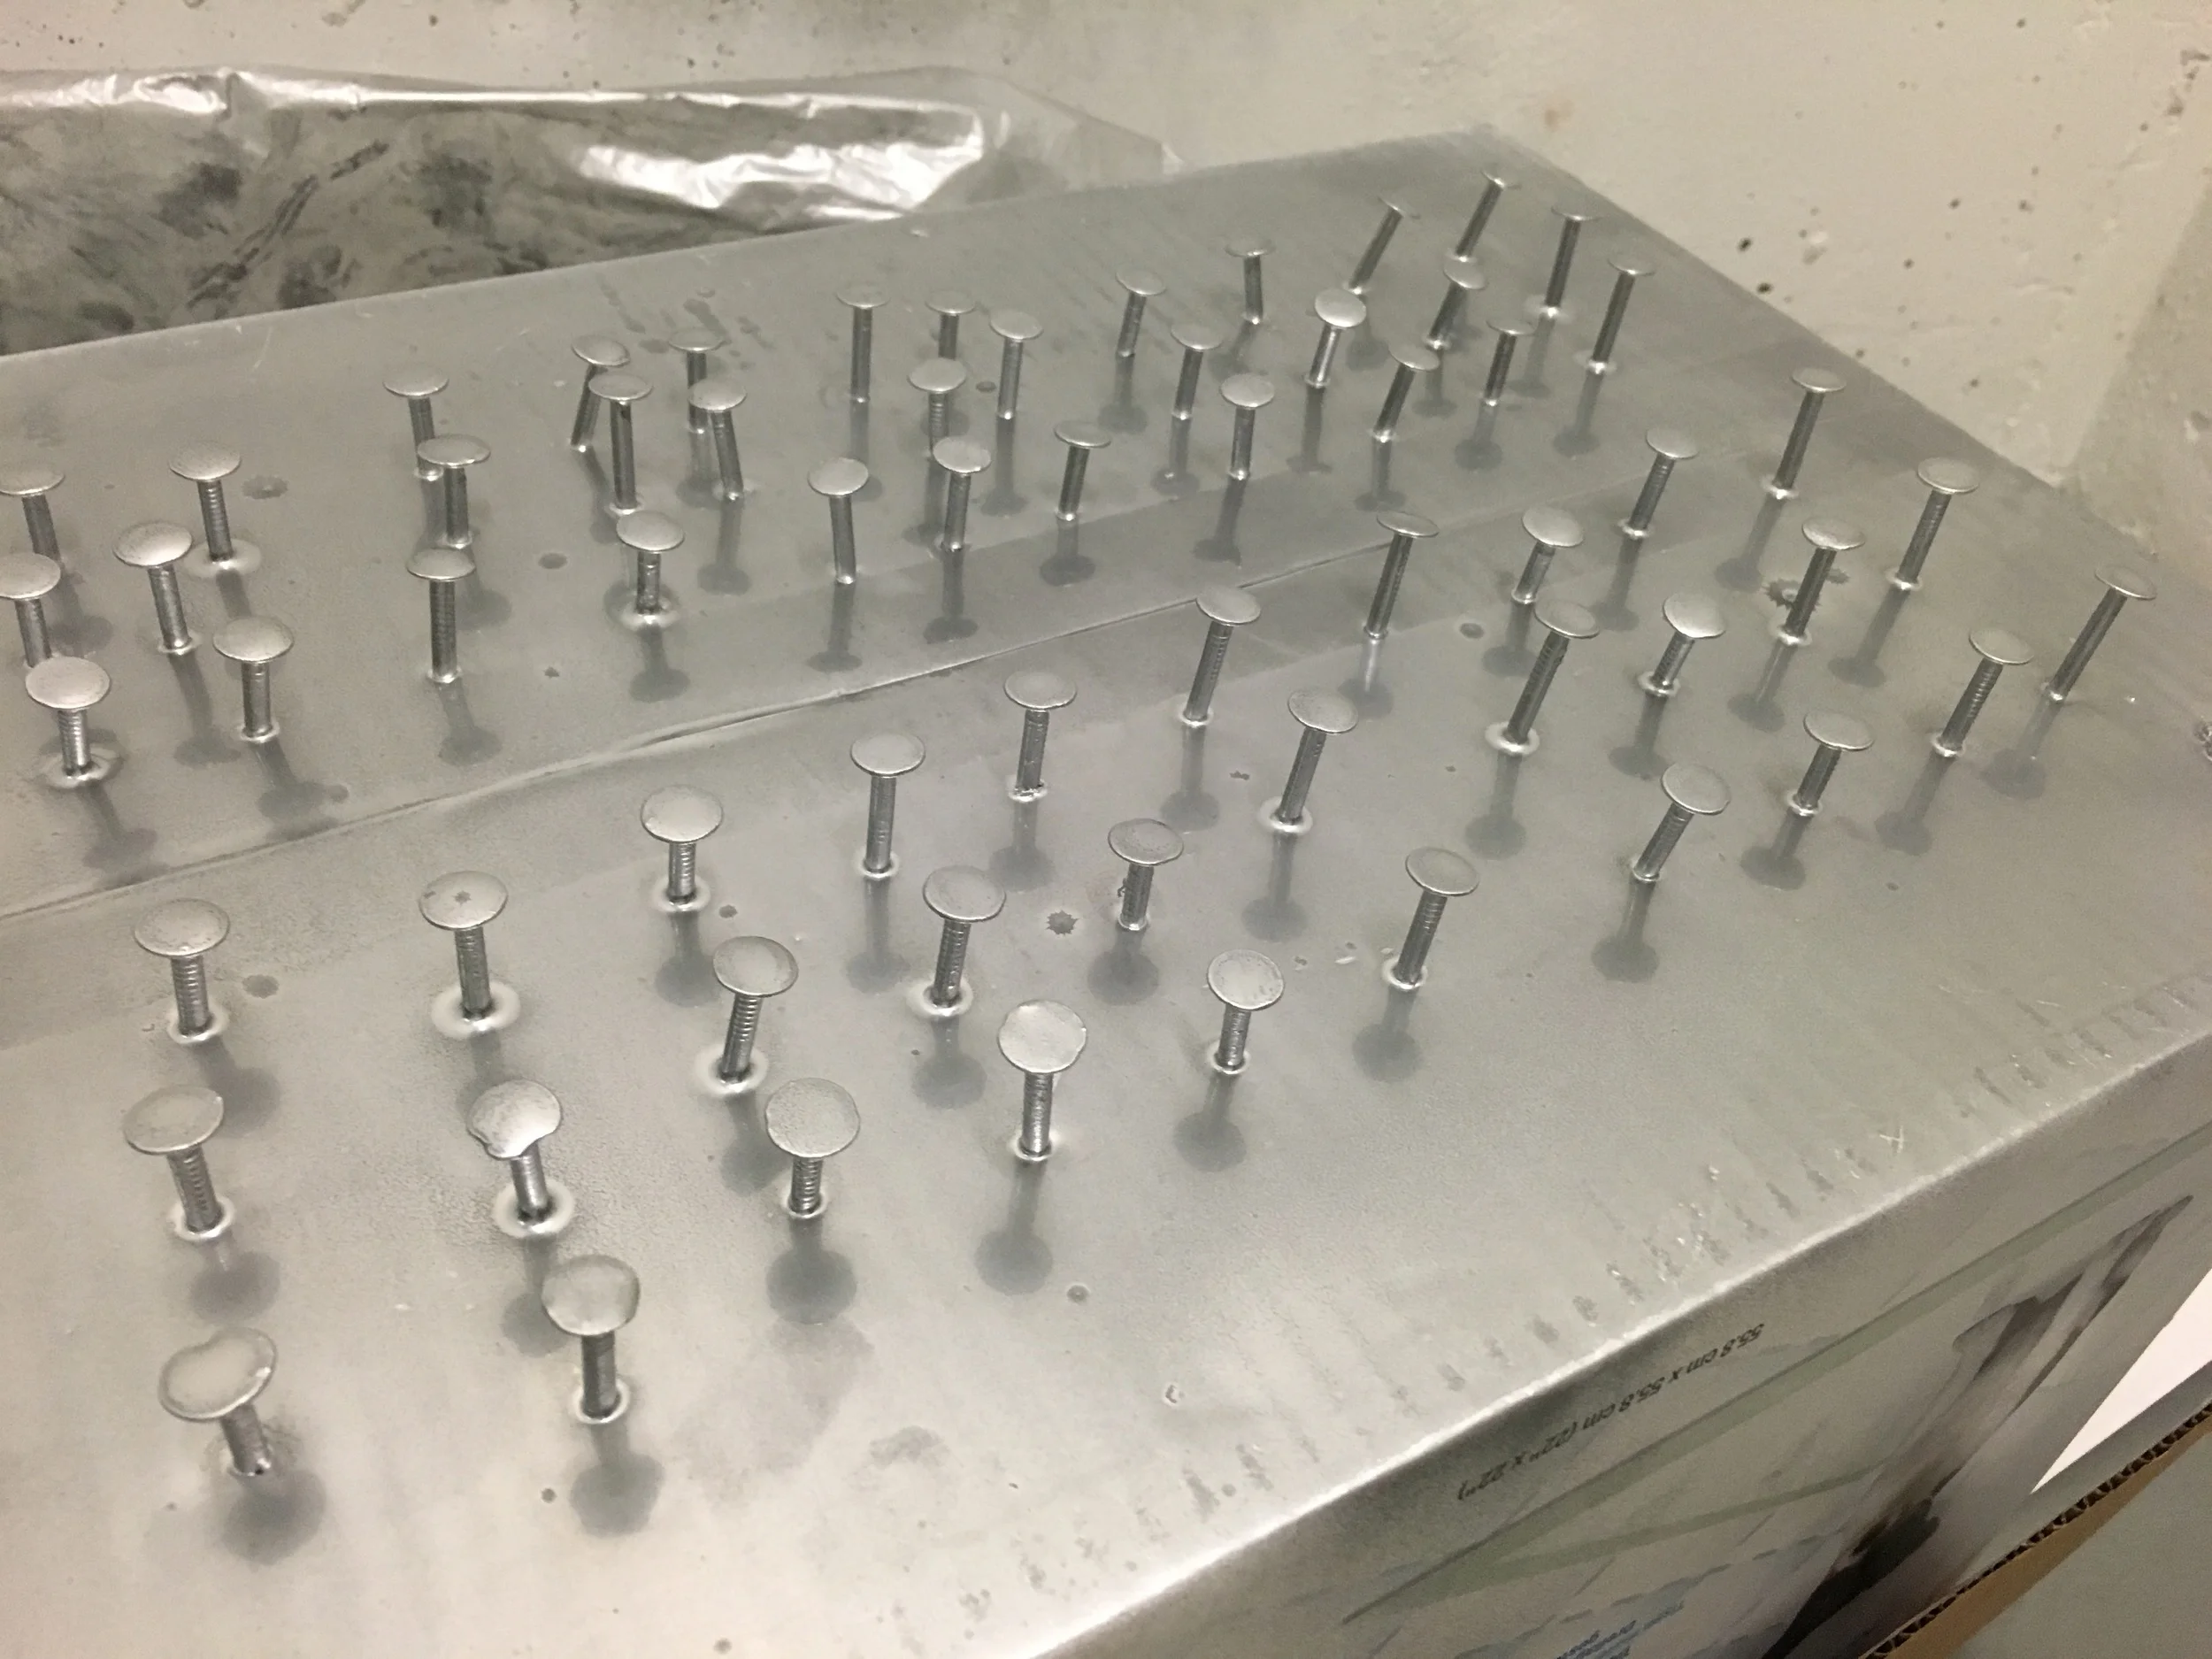
Nails - I used Roofing nails because the heads are wide and the string wont slip off.
Spray Paint- So you can spray paint the nails if you want them to be a different colour
Binder Clips
String
Printed Photos
Shoe Box or any box
TOOLS:
Hammer
Drop Sheet - if you are spray painting
PREP:
Take the nails and place them into the box so they are half standing out. Place the drop sheet below the box and spray the box and nails with the spray paint. Leave them to dry for a couple hours.
Print of your photos.
DIRECTIONS:
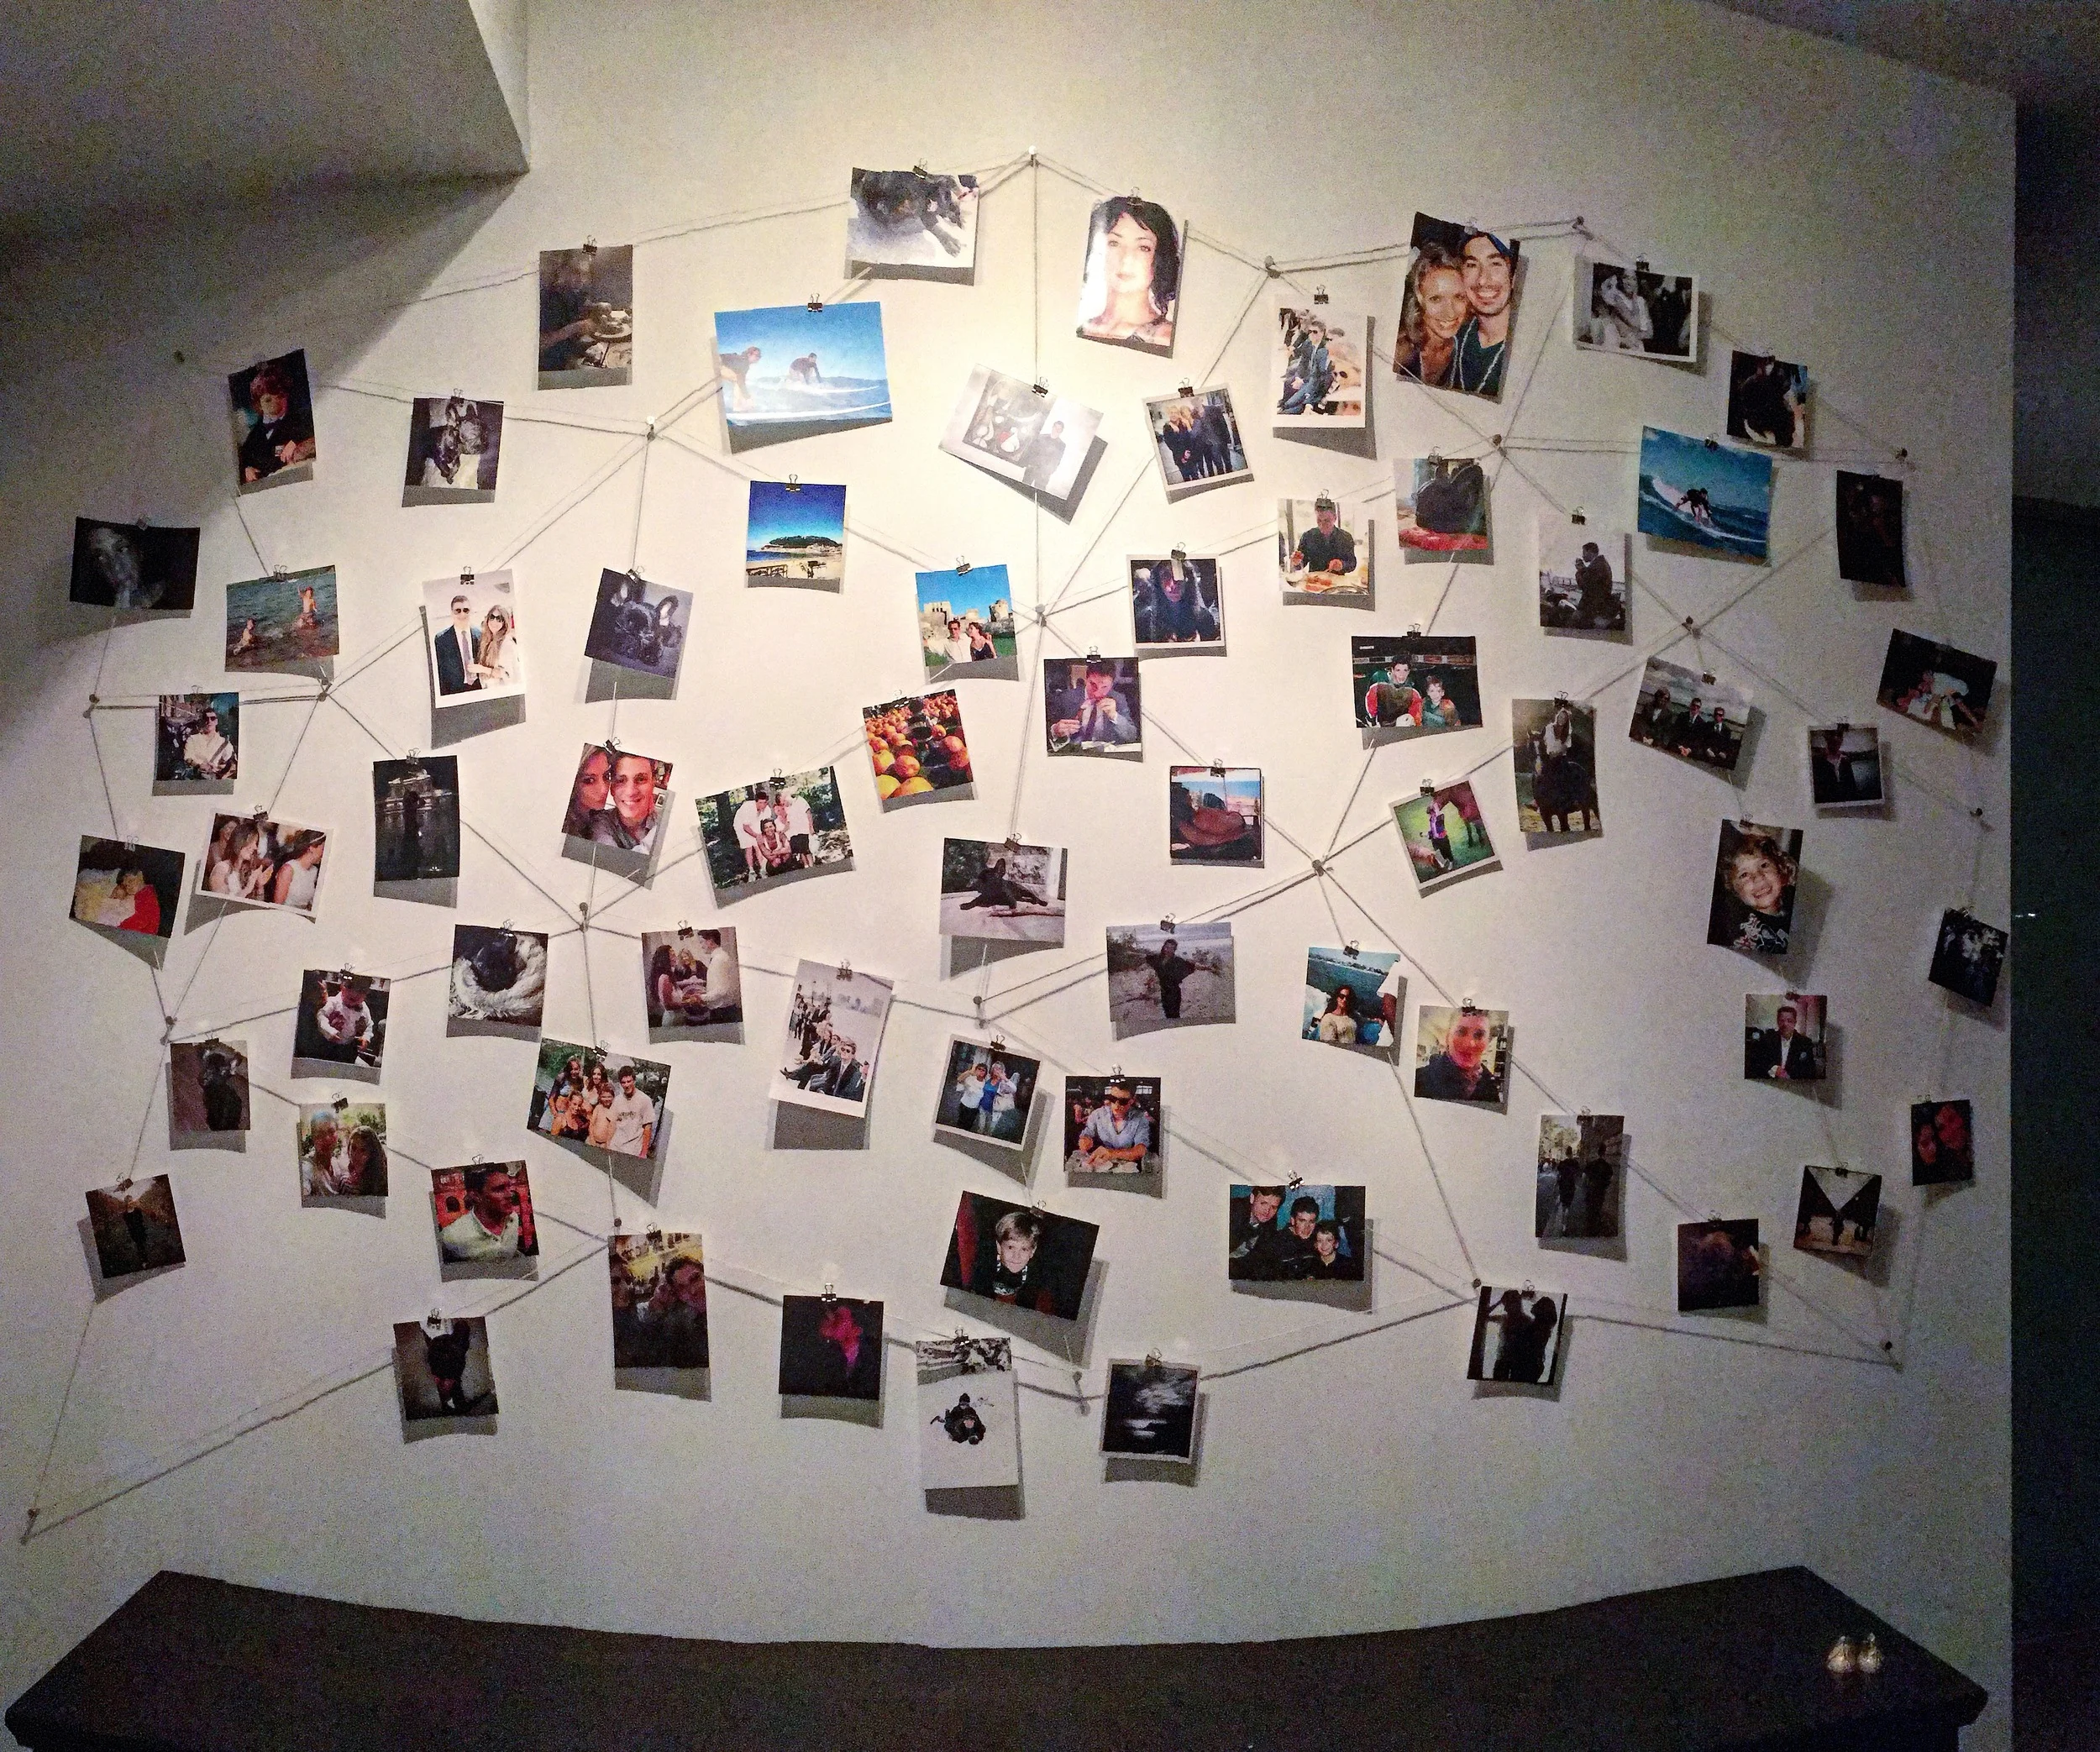
Use the dry spray painted nails and start nailing them into the wall, placing them so they make the outer geometric shape you want.
Take the string and tie it around one nail and then wrap it once around the next nail and move on continuing to wrap around the nails until the whole wall is outlined the way you want.
Next start adding nails on the inside forming triangular shapes.
Take the string and close off all the triangles by wrapping it around the inner nails you just added until you are satisfied with the geometric shapes. When you are done crating your triangular shapes just tie off the string with a knot.
Next take the binder clips and photos and start placing them along the strings so they hang secured to the string.
What do you think? Would you try this approach??? If you have any questions or comments just leave them below and Ill get back to you.
PIN THE POST